
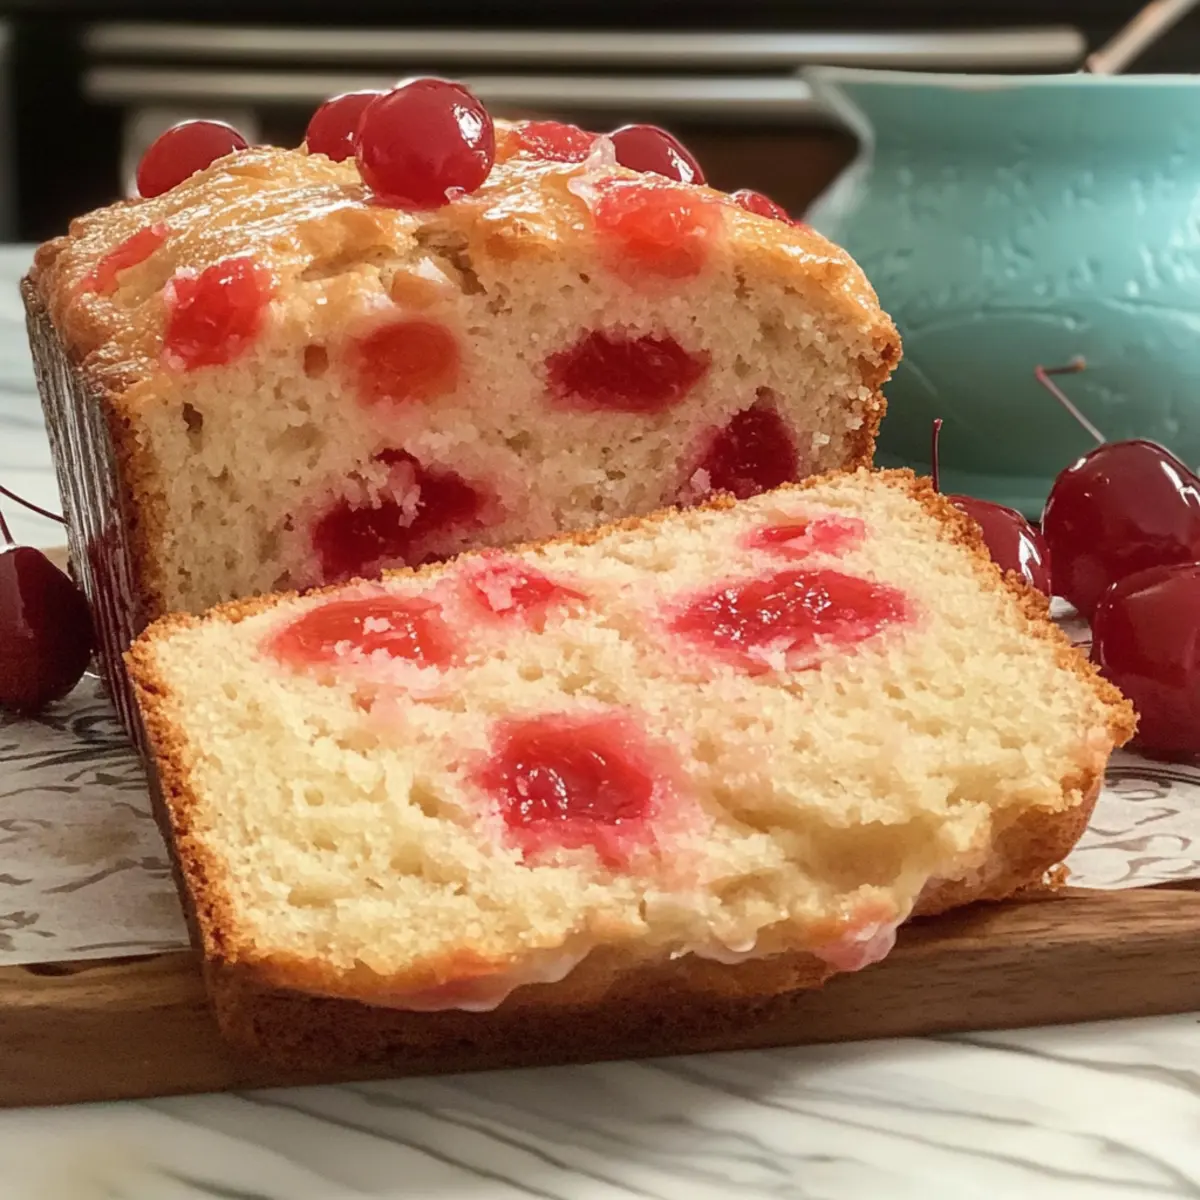
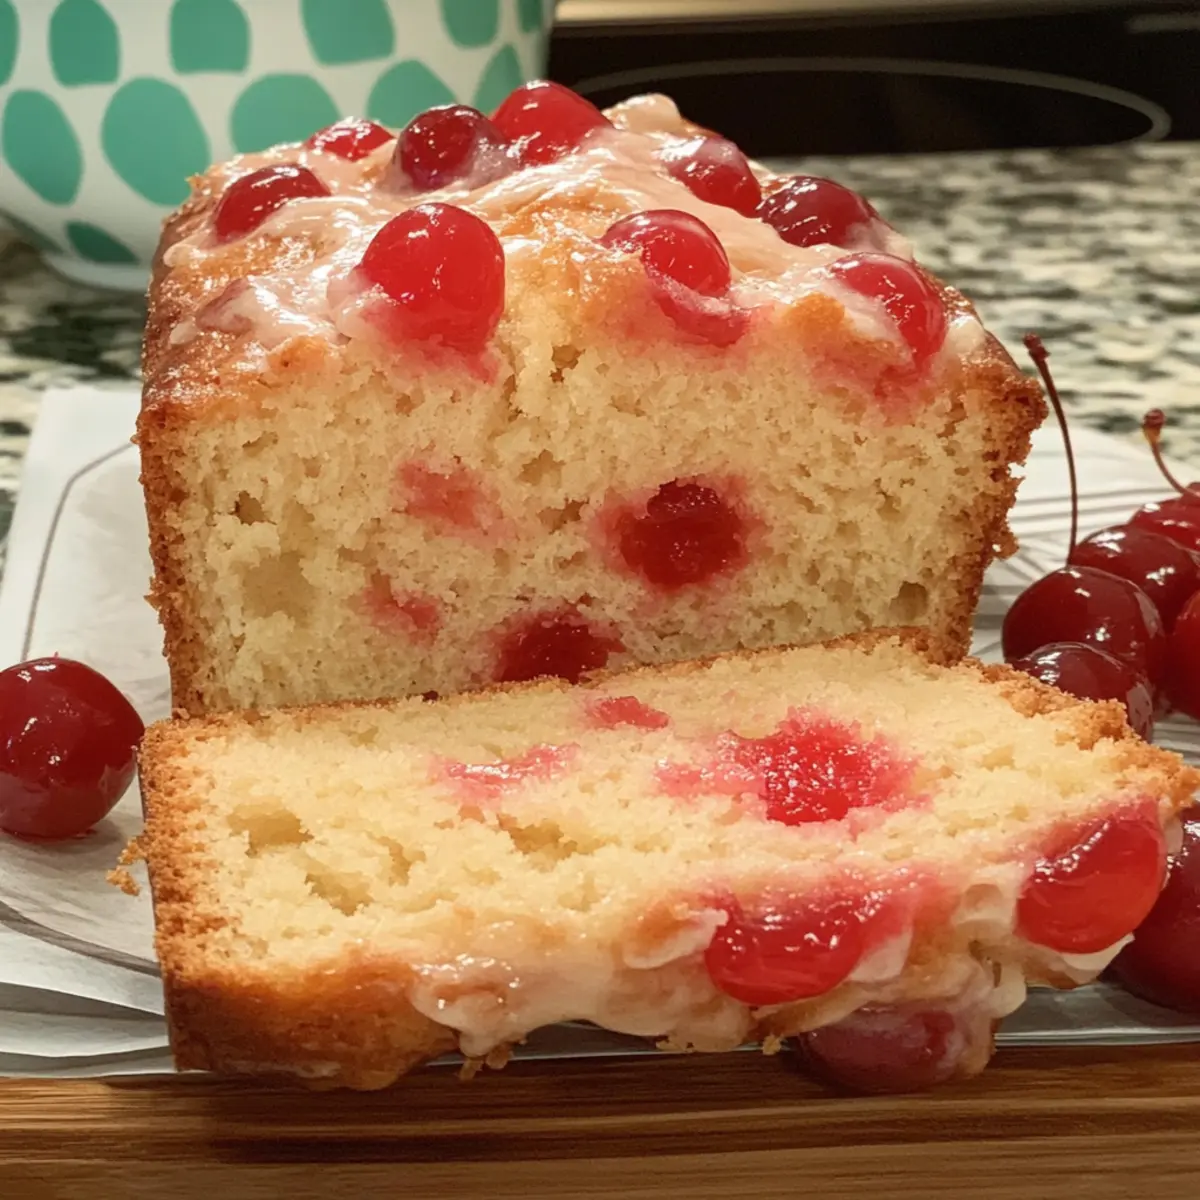
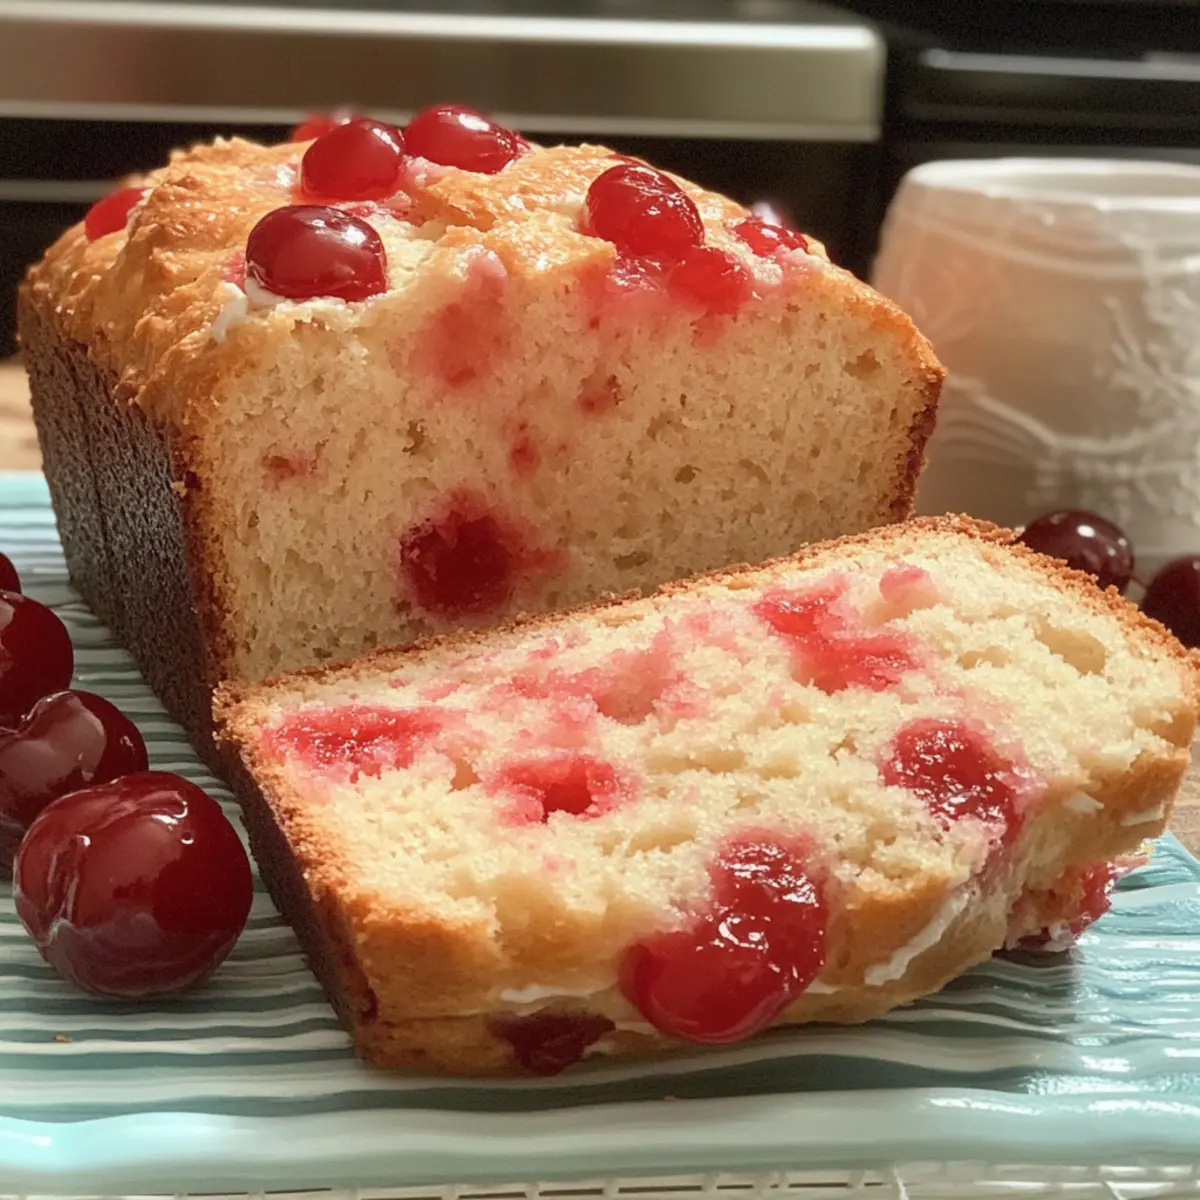
As I settled down with my morning coffee, the sweet aroma of baking bread filled the air, immediately transporting me back to sunny afternoons spent in my grandmother’s kitchen. That nostalgic warmth inspired me to share my Classic Cherry Bread Recipe—a delightful blend of sweet cherries and a moist, fluffy texture that’s perfect for breakfast, a snack, or a comforting dessert. Not only is this bread easy to whip up, but it also leaves your house smelling divine, making it a true crowd-pleaser. Plus, with its vibrant bursts of cherry flavor, each slice is like a little piece of joy. Have you ever tasted something that made you feel instantly at home? Let’s bring that feeling into your kitchen!

Why is this Classic Cherry Bread Recipe special?
Nostalgic Flavors: Relive those cherished memories of warm summer days with every slice.
Simple Preparation: Enjoy the ease of a straightforward recipe that even novice bakers can master.
Versatile Treat: Savor it warm for breakfast, as a delightful snack, or dress it up as a dessert.
Customizable Options: Mix in chocolate chips or nuts for an extra twist—endless possibilities await!
Plus, if you’re seeking a perfect pairing, consider serving this with a side of Garlic Butter Potatoes or some flavorful Zucchini Flatbread Herbs. You won’t regret it!
Classic Cherry Bread Ingredients
For the Batter
- All-purpose flour – Provides structure and texture; you can substitute with gluten-free flour for a gluten-free version.
- Granulated sugar – Adds sweetness and moisture; for a richer flavor, consider using brown sugar.
- Baking powder – Acts as a leavening agent; ensure it’s fresh for maximum rise.
- Salt – Enhances the overall flavor.
- Egg – Binds the ingredients together and adds moisture; be sure to use one egg as specified.
- Milk – Contributes moisture and affects the texture; feel free to use dairy or non-dairy variations as preferred.
- Maraschino cherries – Delivers a distinct flavor and vibrant color; for a more natural taste, substitute with fresh or frozen cherries.
- Cherry juice – Elevates the cherry flavor and adds additional moisture to the batter.
This Classic Cherry Bread Recipe is simple yet satisfying!
Step‑by‑Step Instructions for Classic Cherry Bread Recipe
Step 1: Preheat the Oven
Begin by preheating your oven to 350°F (175°C). This ensures that the heat is evenly distributed for optimal baking. While the oven heats up, gather your mixing bowls and a greased loaf pan, which will be used to bake your Classic Cherry Bread.
Step 2: Mix Dry Ingredients
In a large bowl, whisk together the all-purpose flour, baking powder, and salt until they are well blended. This step is crucial as it helps evenly distribute the leavening agent and salt, promoting a uniform rise and flavor in your Classic Cherry Bread. Set the dry mixture aside for now.
Step 3: Combine Wet Ingredients
In another mixing bowl, combine the granulated sugar, egg, milk, and cherry juice. Whisk these ingredients together until the mixture is smooth and well incorporated, which should take about a minute. This blend of wet ingredients introduces sweetness and moisture to your Classic Cherry Bread.
Step 4: Fold in Cherries
Gently fold in the maraschino cherries into your wet mixture. Aim for an even distribution of the cherries so that every slice of your Classic Cherry Bread is bursting with sweet cherry flavor. Use a spatula or wooden spoon, and be careful not to overmix, which helps preserve the delicate texture.
Step 5: Combine Mixtures
Gradually add the dry mixture to the wet ingredients, stirring gently until just combined. It’s important to stop mixing once the flour is incorporated to avoid a dense bread. The batter should be slightly lumpy—this is a good sign for your Classic Cherry Bread!
Step 6: Pour & Bake
Pour the thick batter into your greased loaf pan, smoothing the top for an even bake. Place the pan in the preheated oven and bake for 45-50 minutes. Check for doneness by inserting a toothpick into the center; it should come out clean, indicating your Classic Cherry Bread is ready to be enjoyed.
Step 7: Cool
Once baked, remove the loaf pan from the oven and allow it to cool in the pan for about 10 minutes. This will help set the bread and makes it easier to transfer. After cooling, carefully turn the loaf onto a wire rack to cool completely, allowing the delightful aroma to fill your kitchen further.
Make Ahead Options
These Classic Cherry Bread preparations are perfect for busy home cooks looking to save time! You can prepare the batter up to 24 hours in advance. Simply mix the dry ingredients and store them in an airtight container, then combine the wet ingredients separately and refrigerate them overnight. When you’re ready to bake, just mix the two parts, fold in the cherries, and pour the batter into the loaf pan. This method keeps the bread just as delicious while minimizing effort on the day you want to serve it. Additionally, you can bake the Classic Cherry Bread and store it in an airtight container at room temperature for up to 3 days. Just reheat individual slices in the microwave or oven for a warm, comforting treat anytime!
Classic Cherry Bread Recipe Variations
Feel free to get creative with this recipe and customize it to suit your tastes!
- Chocolate Chip Twist: Add 1 cup of chocolate chips for a sweet and decadent change that pairs perfectly with cherries.
- Nutty Delight: Incorporate ½ cup of chopped walnuts or pecans for a crunchy texture that contrasts beautifully with the soft bread.
- Fresh Fruit Swap: Replace maraschino cherries with 1 cup of fresh or frozen cherries for a more authentic flavor, enhancing the natural sweetness.
- Glazed Finish: Drizzle a simple glaze made from powdered sugar and cherry juice on top once the bread cools for an extra level of sweetness and shine.
- Spice It Up: Add 1 teaspoon of cinnamon or nutmeg to the dry ingredients for a warm, comforting spice flavor throughout the bread.
- Zucchini Addition: Mix in 1 cup of finely grated zucchini for added moisture and nutrition—don’t worry, it won’t affect the flavor!
- Savory Option: For a twist, reduce sugar to ½ cup and add some crumbled feta or goat cheese to the batter for a savory version that can be enjoyed any time.
- Berry Medley: Combine ½ cup of chopped strawberries or blueberries with the cherries for a mixed berry flavor that sings with freshness.
These variations allow you to explore new flavor profiles and textures, making your Classic Cherry Bread even more delightful. Just imagine enjoying a slice of this with a side of Pesto Chicken Flatbread alongside that morning coffee! Enjoy baking!
Tips for the Best Classic Cherry Bread
-
Room Temperature Ingredients: Ensure all ingredients are at room temperature for optimal mixing and a better rise in your Classic Cherry Bread.
-
Avoid Overmixing: Be gentle while combining your mixtures; overmixing will result in a denser bread instead of the desired fluffy texture.
-
Use Fresh Cherries: If possible, swap maraschino cherries for fresh or frozen ones. This adjustment delivers a more natural taste and enhances the flavor profile.
-
Check Doneness: Insert a toothpick into the center of the bread; it should come out clean. This simple step ensures your Classic Cherry Bread is perfectly baked.
-
Storage Tips: Keep leftover bread in an airtight container at room temperature for up to 3 days. It can also be refrigerated or frozen for longer storage.
What to Serve with Classic Cherry Bread Recipe
As you savor each slice of this delightful cherry creation, consider pairing it with complementary flavors and textures to elevate your meal experience.
- Creamy Mashed Potatoes: Comforting and rich, these potatoes offer a savory contrast to the sweetness of the bread.
- Zesty Green Salad: A fresh salad with tangy vinaigrette adds crispness and brings balance to your sweet bread.
- Vanilla Ice Cream: Served alongside warm slices, the ice cream melts slightly, enhancing the cherry flavors for an indulgent dessert.
- Homemade Whipped Cream: Light and airy, whipped cream adds a luxurious touch and pairs beautifully with the sweet cherry notes.
Think about enjoying this cherry bread with a light tea to elevate those nostalgic feels even further. Each pairing will create a symphony of flavors that celebrate the warmth of home-cooked moments.
Storage Tips for Classic Cherry Bread
- Room Temperature: Store your Classic Cherry Bread in an airtight container at room temperature for up to 3 days to retain its moist texture.
- Refrigerator: If you prefer, you can refrigerate the bread for up to a week. Wrap it tightly to prevent drying out.
- Freezer: For longer storage, slice the bread and freeze it in an airtight container for up to 3 months. This makes for easy serving whenever you’re craving a slice!
- Reheating: To enjoy it warm, simply toast slices in a toaster or warm them in the oven for a few minutes at 350°F (175°C).
Classic Cherry Bread Recipe FAQs
What type of cherries should I use for the Classic Cherry Bread?
For the best flavor, I recommend using fresh or frozen cherries instead of maraschino cherries. They provide a more natural taste and a pop of freshness in every bite. If using fresh, make sure they’re ripe, plump, and vibrant in color—it will greatly enhance your Classic Cherry Bread experience!
How should I store my Classic Cherry Bread?
Store your Classic Cherry Bread in an airtight container at room temperature for up to 3 days to maintain its delightful moist texture. If you’d like to keep it longer, refrigerate it for up to a week—just be sure to wrap it tightly so it doesn’t dry out.
Can I freeze Classic Cherry Bread? How?
Absolutely! To freeze your Classic Cherry Bread, slice it beforehand for quick and easy serving. Wrap each slice individually in plastic wrap, then place them in an airtight container or freezer bag. It can be frozen for up to 3 months. When you’re ready to enjoy it, simply thaw at room temperature or toast the slices directly from the freezer!
What should I do if my Classic Cherry Bread turns out dense?
If your bread is denser than expected, it may be due to overmixing the batter. Always mix just until the dry ingredients are combined; a slightly lumpy batter is okay! Additionally, ensure your baking powder is fresh, as using old leavening agents can affect the rise of your bread.
Is this recipe suitable for those with allergies?
This Classic Cherry Bread contains common allergens, including eggs and dairy. For a dairy-free version, you can substitute the milk with a non-dairy alternative like almond or oat milk. If you have a gluten sensitivity, consider using a gluten-free flour mix. Always ensure to check labels when choosing your ingredients for any specific allergies.
Classic Cherry Bread Recipe for Sweet Nostalgic Moments
Ingredients
Equipment
Method
- Preheat your oven to 350°F (175°C) and gather your mixing bowls and greased loaf pan.
- In a large bowl, whisk together the all-purpose flour, baking powder, and salt until well blended.
- In another mixing bowl, combine the granulated sugar, egg, milk, and cherry juice. Whisk together until smooth.
- Gently fold in the maraschino cherries into your wet mixture for even distribution.
- Gradually add the dry mixture to the wet ingredients, stirring gently until just combined. Do not overmix.
- Pour the batter into your greased loaf pan and smooth the top. Bake for 45-50 minutes or until a toothpick comes out clean.
- Allow the bread to cool in the pan for about 10 minutes before transferring it to a wire rack.
Leave a Reply