
The first bite of homemade no-cook refrigerator pickles is like a crisp, refreshing splash on a hot summer day. With their perfect blend of sweet and tangy flavors, these delightful pickles transform a simple cucumber into a zesty crunch that brightens up any meal or snack. What I love most is how effortlessly they come together—require no cooking and involve just a few steps! Plus, they are an excellent solution for those craving a quick, healthy alternative to store-bought snacks. Allow these crunchy delights to marinate in your fridge, and in just a couple of days, you’ll have a jar full of goodness that’s ready to pair with sandwiches, burgers, or enjoy straight from the jar. Curious about how you can make your own tangy batch? Let’s dive in!
Why are No Cook Refrigerator Pickles amazing?
Effortless Preparation: No cooking is required, making these pickles super easy and accessible for everyone, from busy parents to novice chefs.
Crisp, Fresh Flavor: Each bite delivers a delightful crunch, thanks to quality cucumbers, making them a refreshing option for snacking or adding to meals.
Versatile Brine: This recipe’s unique brine can also be used for other vegetables—try it with green beans for a tasty twist!
Perfect for Meal Prep: Make a big batch and enjoy them throughout the week as a delicious side or snack.
Crowd-Pleasing Snack: These no-cook refrigerator pickles are a hit at gatherings, and they effortlessly outshine store-bought varieties in taste and freshness.
Ready to enjoy a homemade twist on a classic? Check out my Cookies Cream Peanut recipe for a sweet treat to complement your tangy pickles!
No Cook Refrigerator Pickle Ingredients
• Get ready to craft delicious homemade no-cook refrigerator pickles with these simple ingredients!
For the Pickles
• Medium-Sliced Cucumbers (8 cups) – Choose firm cucumbers for that satisfying crunch and freshness.
• Sliced Onion (1 medium yellow or red) – Adds a pop of color and flavor; red onions lend a milder taste.
For the Brine
• White Vinegar (2 cups) – Essential for acidity, enhancing both flavor and preservation of your no-cook refrigerator pickles.
• Sugar (4 cups) – Balances the sharpness of the vinegar but can be adjusted for your preferred sweetness level.
• Salt (¼ cup) – Enhances overall flavor while keeping the cucumbers crisp and fresh.
• Celery Seed (2 tablespoons) – Infuses a unique flavor that sets your homemade pickles apart from store-bought options.
• Minced Garlic (to taste) – Optional, but it can deepen the brine’s flavor; feel free to use fresh garlic for an extra kick!
With these ingredients in hand, you’ll be well on your way to creating a jar of delightful no-cook refrigerator pickles that everyone will love!
Step‑by‑Step Instructions for No Cook Refrigerator Pickles
Step 1: Slice the Vegetables
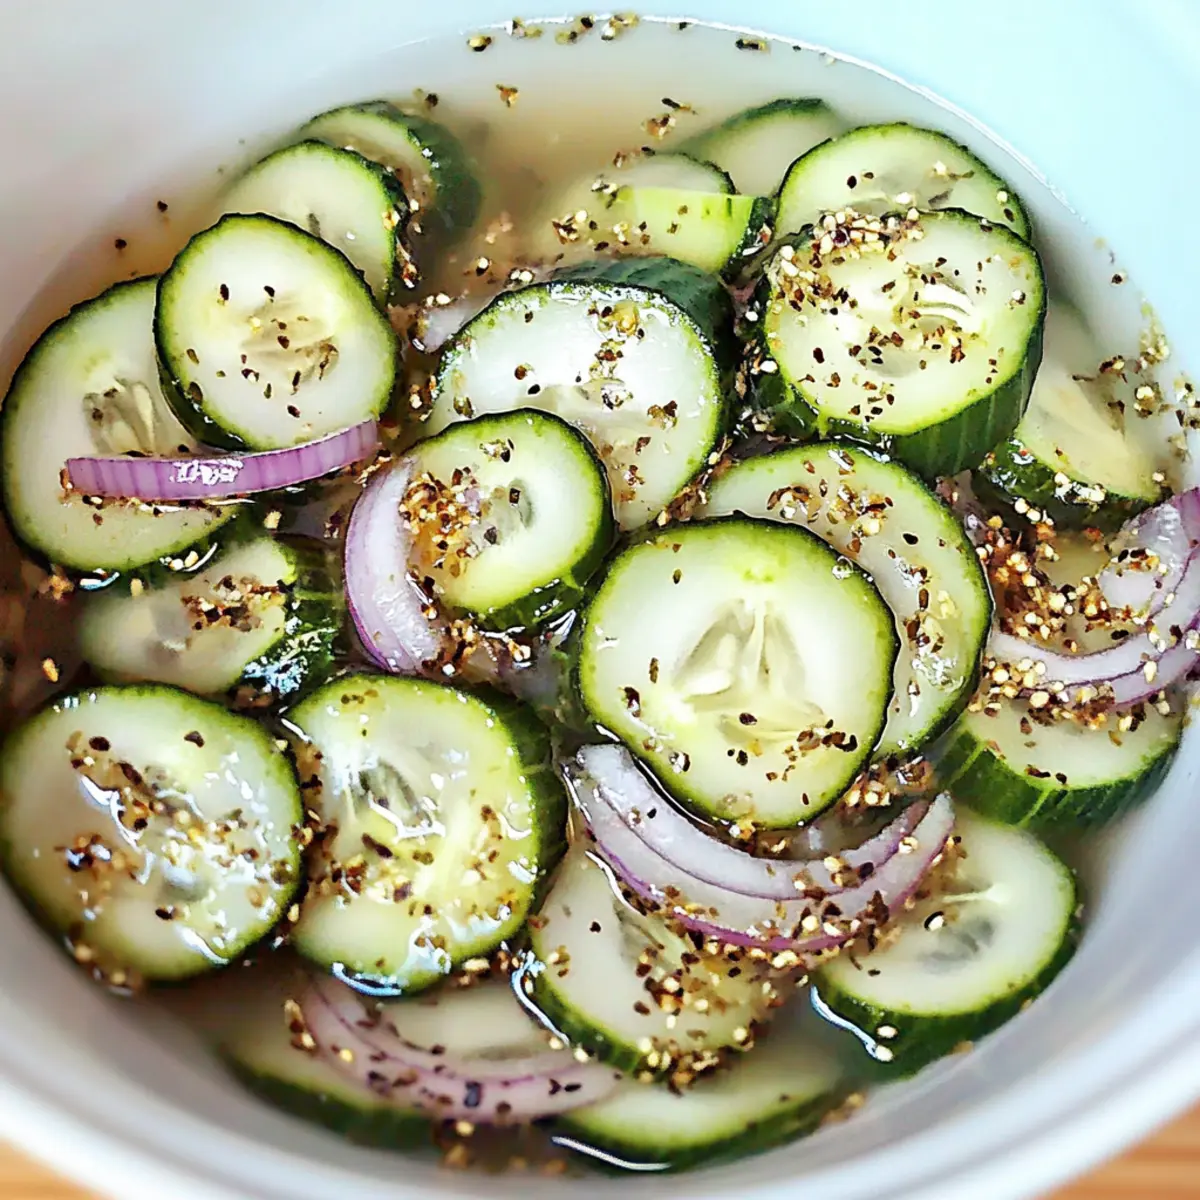
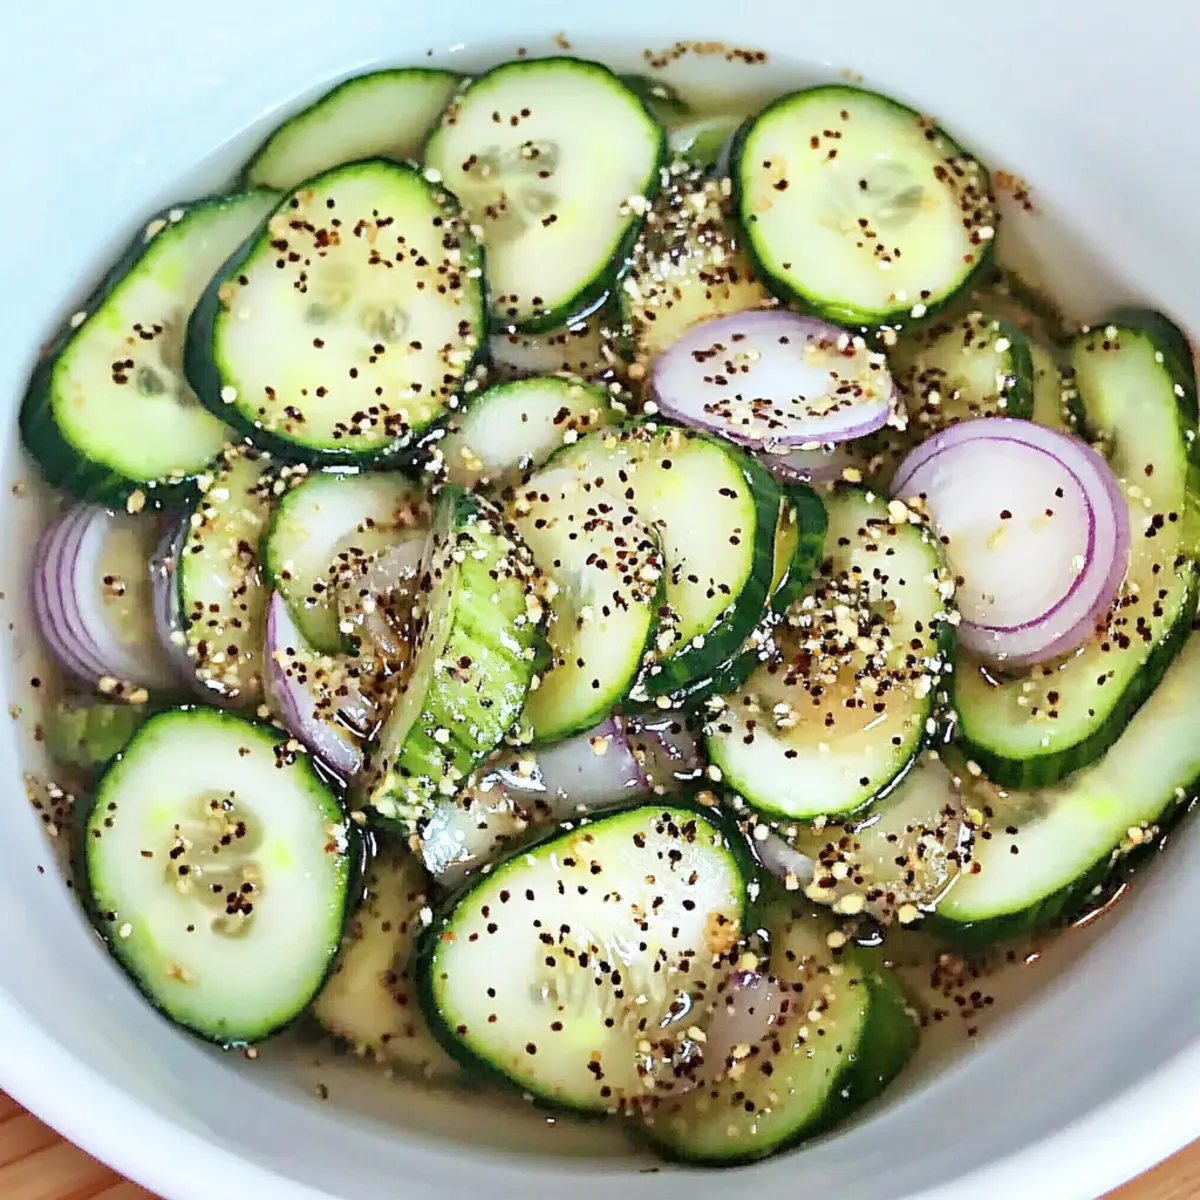
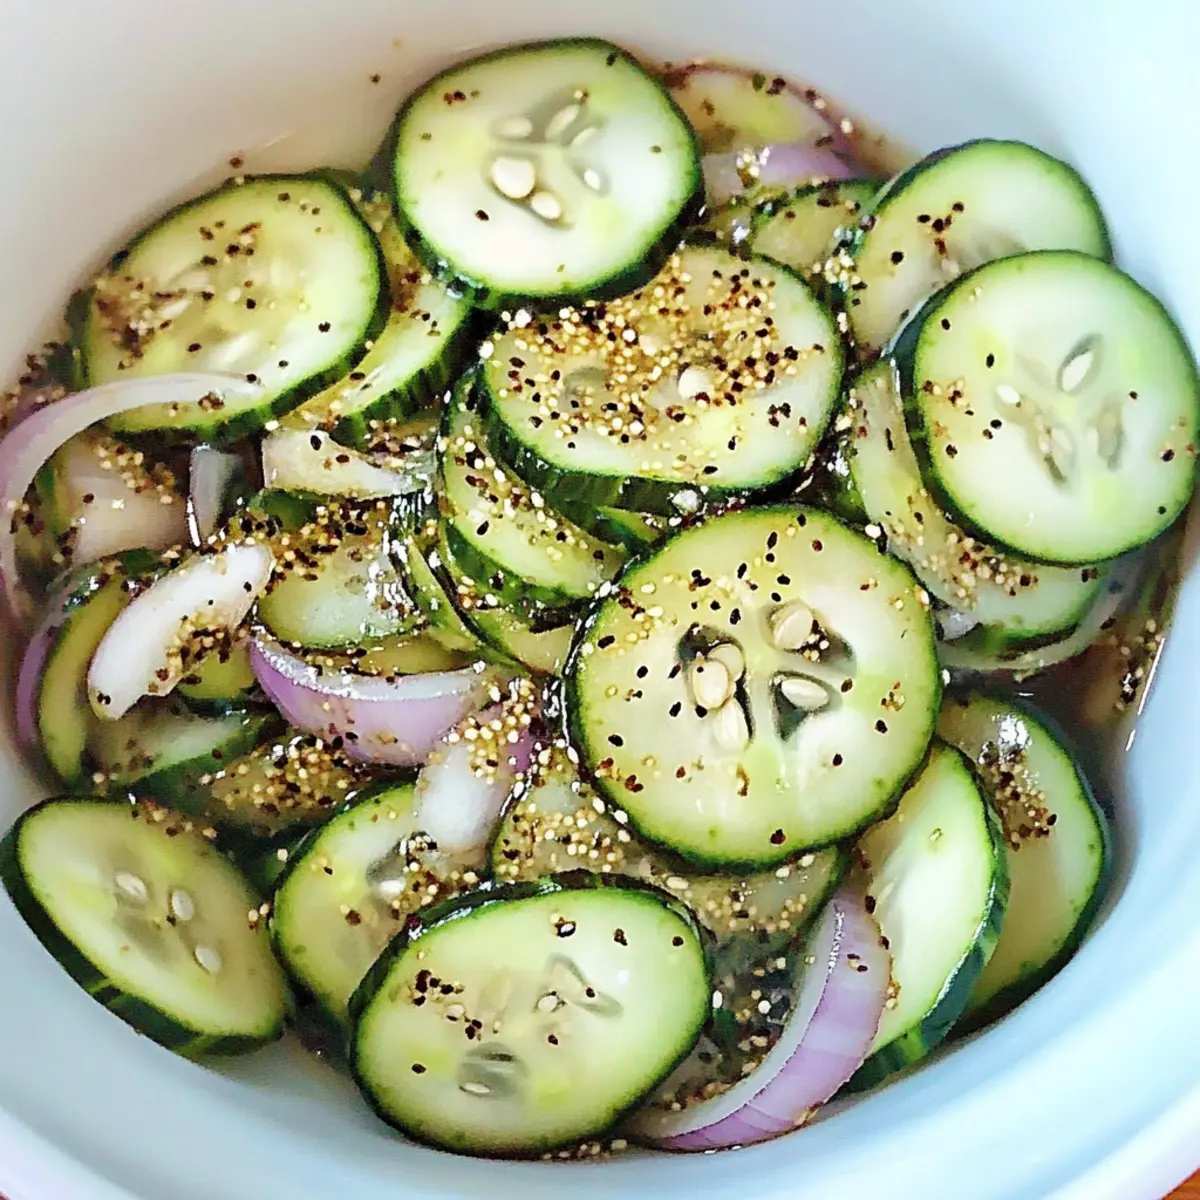
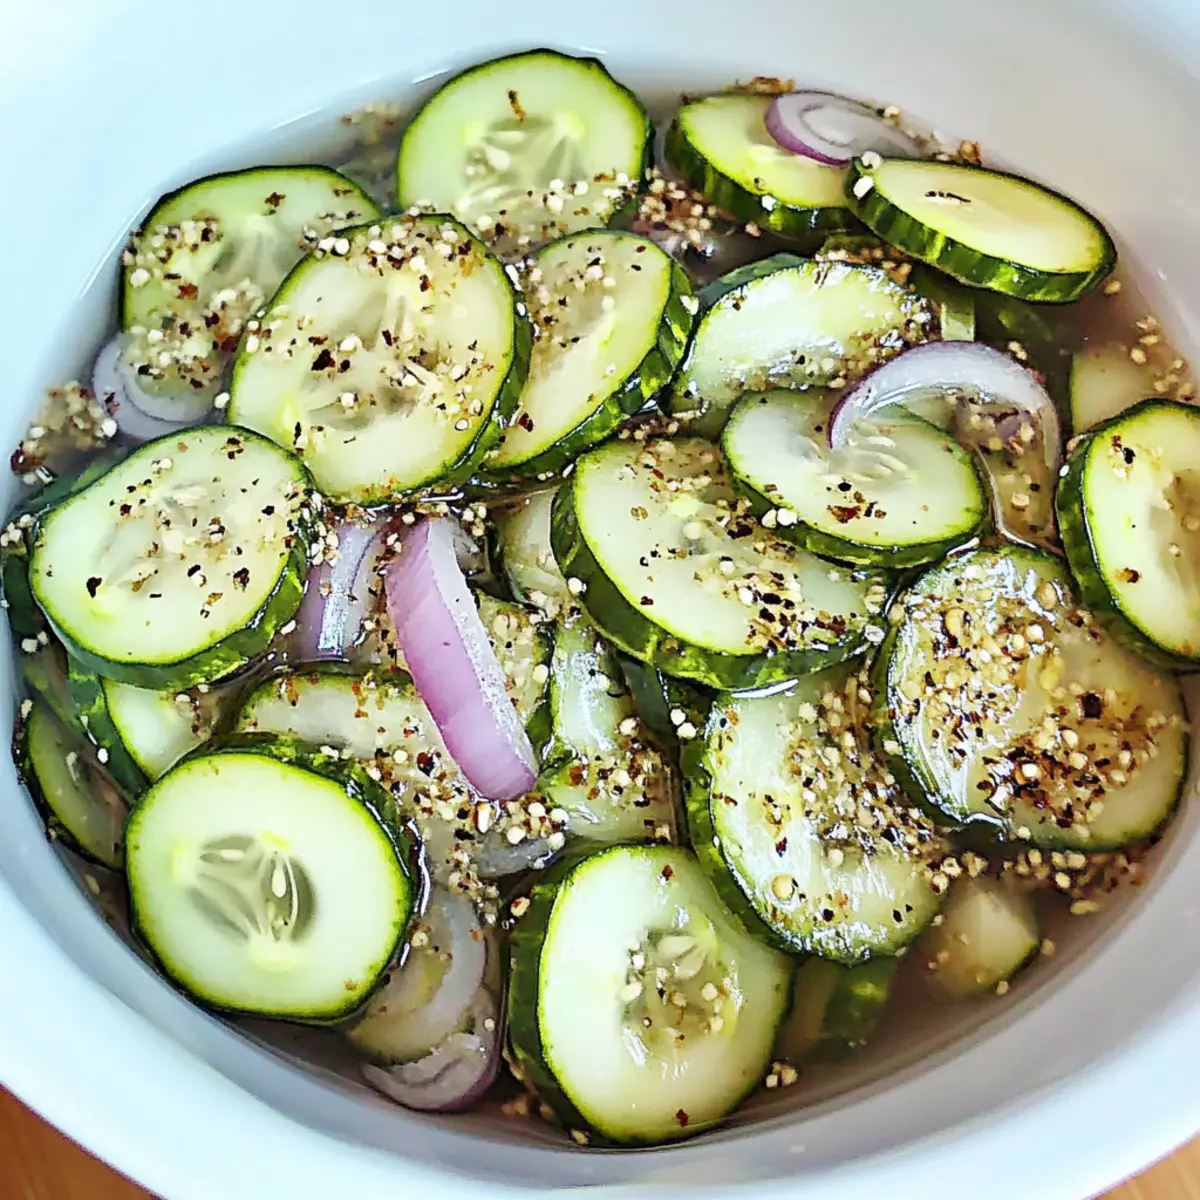
Begin by slicing the cucumbers into medium, even slices, ensuring they are about ¼ inch thick for a satisfying crunch. Next, slice the onion into thin half-rings for even distribution throughout your pickles. Use fresh, firm cucumbers to guarantee the best texture in your final product, and arrange the slices as you go to keep your workspace tidy.
Step 2: Combine in a Jar
Transfer the sliced cucumbers and onions into a half-gallon jar or a leak-proof container. Pack the vegetables tightly but without crushing them to allow for a good brine ratio. This step is crucial for achieving the perfect pickles, as the jar will help the flavors meld together beautifully. Set the jar aside while you prepare the brine.
Step 3: Mix the Brine Ingredients
In a mixing bowl, combine white vinegar, sugar, salt, celery seed, and minced garlic if using. Stir these ingredients together until the sugar and salt are fully dissolved, creating a vibrant brine. The mixture should be hearty and fragrant, signaling that it’s ready for the next step. Set this mixture aside for a moment—don’t worry; the magic is just beginning!
Step 4: Heat the Brine
Pour the brine mixture into a saucepan and heat it over medium heat until it’s almost boiling, stirring occasionally to dissolve the remaining sugar completely. This usually takes about 3–5 minutes; you want it heated but not boiling over. The steam and aroma should fill your kitchen! Once ready, remove it from the heat and allow it to cool slightly.
Step 5: Cool the Brine
Let the heated brine cool to room temperature for about 15-20 minutes. Patience is key here, as adding the brine while still hot could cook the cucumbers slightly, compromising their crispiness. As it cools, you can enjoy the rich scents wafting through your kitchen, building up anticipation for your no-cook refrigerator pickles.
Step 6: Pour Over Vegetables
Once the brine is cooled, carefully pour it over the cucumber and onion slices in the jar, ensuring they are fully submerged. This is crucial for flavor absorption and preservation. You should see the vibrant brine bubbling slightly as it envelops the veggies, promising a delicious crunch. If needed, add more sliced cucumbers to fill the jar, ensuring everything is covered.
Step 7: Seal and Refrigerate
Tightly seal the jar with its lid to lock in all those delightful flavors. Place the jar in the refrigerator and let the pickles marinate for at least 24 hours. For the best results, allow them to sit for 2-3 days, letting the sweet and tangy flavors of your no-cook refrigerator pickles blossom fully. Observe as the colors deepen and flavors fuse in your fridge.
Step 8: Enjoy Your Pickles
After the waiting period, your homemade no-cook refrigerator pickles are ready to be enjoyed! They’ll be crisp, zesty, and full of flavor, making for a delightful snack or a perfect side dish to accompany your meals. Whether enjoyed straight from the jar or alongside your favorite sandwich, these pickles promise a refreshing bite every time.
Make Ahead Options
These No Cook Refrigerator Pickles are perfect for busy home cooks looking to save time! You can prepare the cucumbers and onions up to 24 hours in advance by slicing them and storing them in a jar. The brine can also be made ahead: simply mix the vinegar, sugar, salt, celery seed, and minced garlic (if using), then heat it as instructed before letting it cool. Once cooled, pour it over the prepped vegetables and seal the jar. For optimal flavor, let the pickles marinate in the refrigerator for 2-3 days before serving, ensuring they stay crispy and flavorful. Enjoy these homemade delights anytime with minimal last-minute effort!
Expert Tips for No Cook Refrigerator Pickles
-
Pick the Right Cucumbers: Choose firm, unwaxed cucumbers for the best crunch. Avoid those that are soft or blemished to prevent mushy pickles.
-
Monitor the Brine Temperature: Ensure the brine cools to room temperature before pouring. Hot brine can wilt cucumbers, affecting the final texture of your no-cook refrigerator pickles.
-
Submersion is Key: Make sure all cucumber and onion slices are fully submerged in the brine. This prevents spoilage and ensures even flavor distribution.
-
Replenish as Needed: If your cucumbers shrink during marination, add more slices to maintain volume in the jar. This keeps your pickles fresh and crunchy.
-
Flavor Variations: Don’t be afraid to get creative! Try adding different herbs or spices to the brine for unique flavor twists in your no-cook refrigerator pickles.
Storage Tips for No Cook Refrigerator Pickles
Fridge: Keep your pickles sealed in the refrigerator for up to 2-3 weeks for optimal crunch and flavor. Use an airtight container to maintain their freshness.
Freezer: It’s not recommended to freeze no-cook refrigerator pickles, as the cucumbers may become mushy after thawing, losing their delightful crunch.
Reheating: These pickles are perfect served cold straight from the jar. There’s no need for reheating; just enjoy the crisp, tangy flavors as is!
Serving Suggestion: Elevate your meals by pairing these no-cook refrigerator pickles with sandwiches, salads, or as a refreshing snack on their own.
No Cook Refrigerator Pickles Variations
Feel free to get creative with your no-cook refrigerator pickles and tailor them to your taste!
-
Vegetable Twist: Experiment with different vegetables like green beans or carrots; blanching may enhance their texture.
-
Herbal Infusion: Add fresh dill or thyme for a fragrant herbal kick that elevates the pickling experience.
-
Spicy Kick: Toss in red pepper flakes or sliced jalapeños for a delightful heat that complements the tanginess.
-
Garlic Lovers: Increase the minced garlic amount for a more intense flavor, providing that zesty punch with every bite.
-
Low-Sugar Option: Reduce the sugar in the brine, making your pickles more tangy—a lovely choice for those watching their sweetness intake.
-
Fruit Fusion: Toss in slices of radish or fruits like pears for an unexpected sweet and savory surprise in your pickling jar.
-
Citrus Zest: Splash in some lemon juice or orange zest for a bright, citrusy note that adds a refreshing layer of flavor.
-
Reusable Brine: Keep your leftover brine handy for future pickles or try pickling cauliflower; the possibilities are endless!
No matter how you choose to customize, these no-cook refrigerator pickles will shine! If you’re in the mood for more delightful recipes, consider pairing them with my scrumptious Ferrero Rocher Cookies for a sweet treat!
What to Serve with Homemade No-Cook Refrigerator Pickles
Add a refreshing crunch to your meals with delightful sides that balance and elevate your homemade pickles.
- Creamy Potato Salad: Its richness contrasts beautifully with the tangy pickles, making for a satisfying side dish at summer gatherings.
- Pulled Pork Sandwiches: Serve crispy pickles alongside tender, smoky pulled pork to bring a refreshing zip that cuts through the richness of the meat.
The combination of flavors creates a harmony between sweet, tangy pickles and savory, hearty sandwiches.
-
Simple Coleslaw: The crunch of cabbage and carrots in coleslaw complements the crispiness of the pickles, adding textural variety to your plate.
-
Fresh Tomato Salad: A light, vibrant salad with ripe tomatoes and basil pairs well by enhancing the pickles’ tangy notes, creating a garden-fresh experience.
-
Grilled Cheese Sandwiches: The gooey, cheesy goodness of this classic pairs perfectly with the zesty crunch of your pickles, making every bite pop with flavor.
-
Sparkling Lemonade: Refreshing and light, this fizzy drink brings out the sweetness in your pickles while keeping the meal lively and fun.
-
Chocolate Chip Cookies: Balance the tanginess of the pickles with a sweet dessert, where the warm cookies offer a comforting end to your meal.
These pairings ensure that your homemade no-cook refrigerator pickles shine, making each dining experience memorable and delicious!
No Cook Refrigerator Pickles Recipe FAQs
How do I pick the best cucumbers for pickling?
Absolutely! When selecting cucumbers for your no-cook refrigerator pickles, look for firm, unwaxed cucumbers free from blemishes or soft spots. Ideal varieties include pickling cucumbers or Kirby cucumbers, which are smaller and have a thinner skin, allowing for crisp and crunchy pickles.
How should I store my no-cook refrigerator pickles?
I recommend storing your pickles in an airtight container in the refrigerator to keep them fresh and crunchy. They can be enjoyed for up to 2-3 weeks when properly sealed. Just be sure to check for any signs of spoilage, such as an off smell or a cloudy brine.
Can I freeze no-cook refrigerator pickles?
It’s not advisable to freeze no-cook refrigerator pickles, as the freezing process can make the cucumbers mushy. Instead, enjoy them fresh! If you have extra brine, consider reusing it for another batch of pickles or experimenting with other vegetables, like green beans.
What should I do if my pickles are not crunchy?
Very good question! If your cucumbers end up soft, it could be due to selecting overripe cucumbers or not using enough salt in your brine. To enhance crunchiness, always ensure the cucumbers are fresh and firm. Additionally, try adding a bit of tannin—such as a few grape leaves—into your jar, as this helps keep pickles crisp.
Are there any dietary considerations with no-cook refrigerator pickles?
Of course! This recipe is generally safe for most diets, but if you’re catering to those with allergies, keep in mind that some may have sensitivities to garlic or specific spices. As for pets, vinegar isn’t toxic to them, but these pickles should be kept out of reach, as the high salt content is unhealthy for animals.
Can I adjust the sweetness level of the brine?
Very, yes! If you prefer a less sweet pickle, you can certainly scale back the sugar in the brine. Start with half the recommended amount and taste-test as you mix the brine together to find your perfect balance of sweet and tangy flavors. Enjoy customizing your no-cook refrigerator pickles to your liking!
Crisp and Tangy No Cook Refrigerator Pickles You’ll Love
Ingredients
Equipment
Method
- Slice the cucumbers into medium, even slices, about ¼ inch thick. Slice the onion into thin half-rings.
- Transfer the sliced cucumbers and onions into a half-gallon jar or leak-proof container.
- In a mixing bowl, combine white vinegar, sugar, salt, celery seed, and minced garlic if using. Stir until fully dissolved.
- Pour the brine mixture into a saucepan and heat over medium heat until almost boiling, stirring occasionally.
- Let the heated brine cool to room temperature for about 15-20 minutes.
- Carefully pour the cooled brine over the cucumber and onion slices in the jar, ensuring they are fully submerged.
- Seal the jar with its lid and refrigerate for at least 24 hours; for best results, let them marinate for 2-3 days.
- After the waiting period, your homemade no-cook refrigerator pickles are ready to be enjoyed!
Leave a Reply