
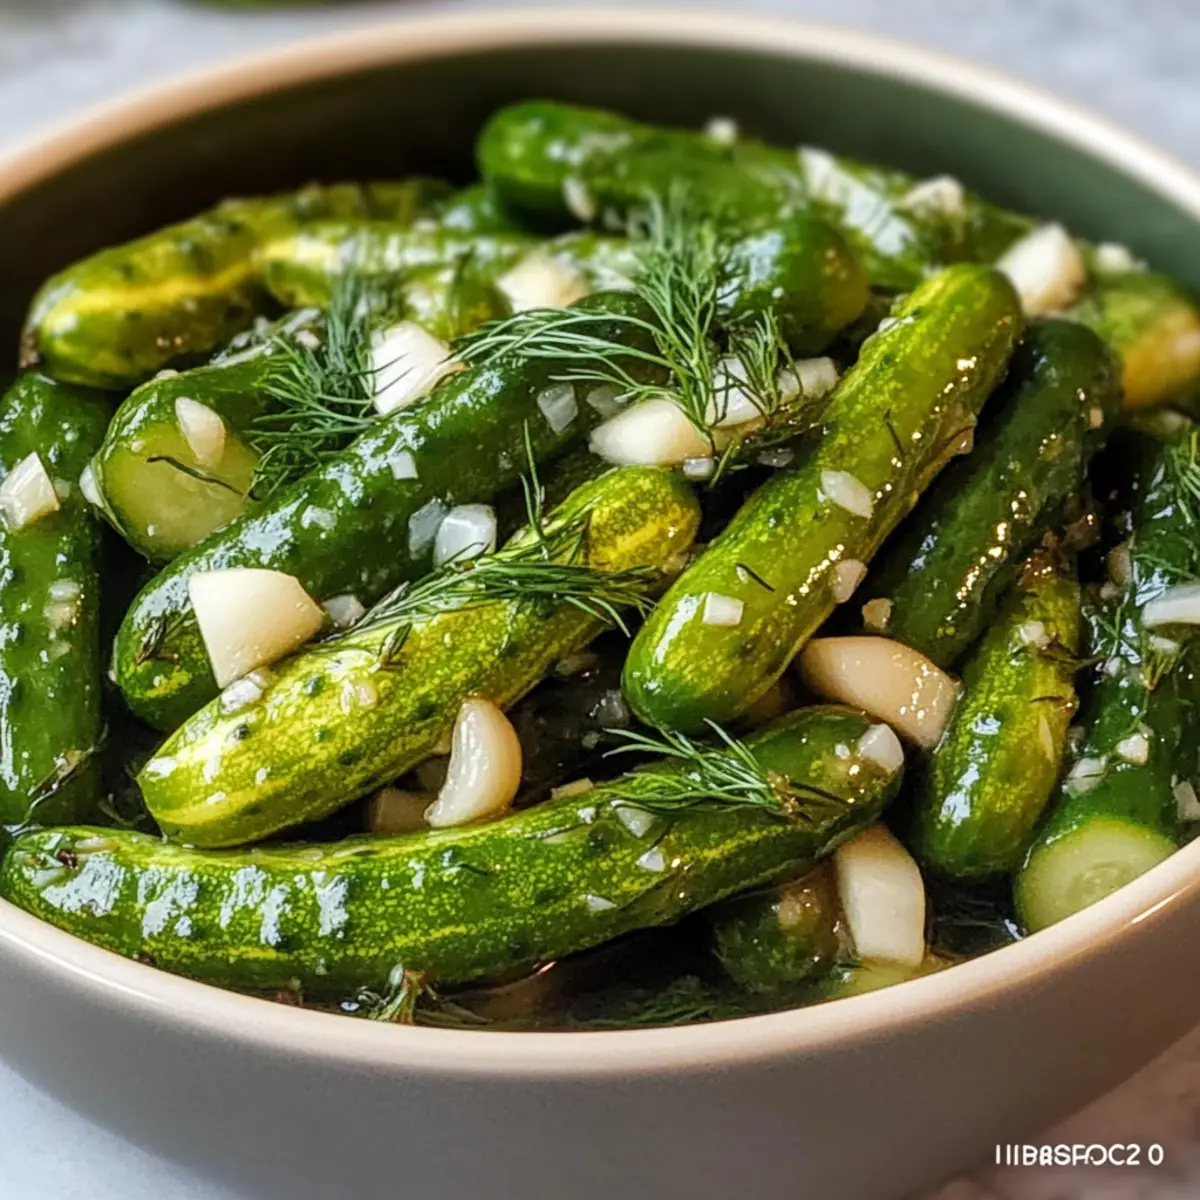
As I stood in my kitchen, surrounded by the vibrant scents of fresh dill and garlic, I couldn’t help but feel a wave of nostalgia wash over me. There’s something magical about crafting Homemade Garlic Dill Pickles that transports you straight to summer picnics and family barbecues. This quick pickling method gives you crispy pickles ready in just 30 minutes of prep and a day of chilling, making them an effortless addition to any meal. With a delightful crunch and a perfect balance of tang and flavor, these refrigerator pickles are not only an irresistibly zesty complement to burgers and charcuterie boards, but they’re also a fantastic way to enjoy seasonal produce at its peak. Are you ready to dive into the world of pickling and elevate your snack game? Let’s get started!

Why Make Homemade Garlic Dill Pickles?
Crispy Perfection: These pickles deliver an irresistibly crunchy bite that you simply can’t get from store-bought options.
Quick & Easy: With just 30 minutes of prep time and a short chilling period, you’ll have delicious pickles ready without the hassle.
Flavorful Twist: Fresh dill and garlic create a vibrant taste that elevates any sandwich or snack. Pair them with your favorite burgers or try incorporating them on a charcuterie board for an extra zing!
Versatile Variations: Customize your batch by adding fresh jalapeños for some heat or adjusting the sugar to suit your taste preferences.
Satisfying Snack: Enjoy these pickles straight from the jar or serve them as a crunchy side to your meals. They’re not just great for family gatherings, but also an entertaining conversation starter!
Dive into more adventures in flavors with recipes like Garlic Butter Steak and elevate your culinary repertoire.
Homemade Garlic Dill Pickle Ingredients
To embark on your pickling adventure, here’s everything you’ll need to create these delightful Homemade Garlic Dill Pickles.
For the Pickles
- Kirby or Persian cucumbers – Provide crisp texture; avoid slicing cucumbers as they are too watery for pickling.
- Garlic (6 cloves, smashed) – Adds pungent flavor; fresh garlic yields the best aroma and taste.
- Fresh dill (1 cup, roughly chopped) – Offers fragrant herbal notes; dried dill can work, but fresh is recommended for a vibrant flavor.
- White onion (1 medium, thinly sliced) – Contributes sweetness and crunch; consider red onion for a sharper kick.
For the Brine
- White distilled vinegar (2 cups) – Provides a sharp, tart flavor for brining; mixing with more apple cider vinegar can enhance sweetness.
- Apple cider vinegar (1 cup) – Adds a fruity depth to the mix.
- Filtered water (3 cups) – Ensures clarity in brine; avoid tap water to prevent cloudiness.
- Pickling salt (1/2 cup) – Essential for brining without cloudiness; regular salt may cause the brine to turn cloudy.
- Cane sugar (2 tbsp) – Balances the acidity; optional for keto or vegan diets and can be substituted with stevia.
For the Spices
- Mustard seeds (1 tbsp) – Introduces mild spice that enhances flavor.
- Black peppercorns (1 tbsp) – Adds warmth and depth to the brine.
- Coriander seeds (1 tsp) – Complements the flavors with complexity.
- Red pepper flakes (1 tsp) – Presents a touch of heat; for spicier pickles, consider adding fresh hot peppers.
Gather these ingredients and get ready to create crispy, zesty Homemade Garlic Dill Pickles that will brighten your meals and snacks!
Step‑by‑Step Instructions for Homemade Garlic Dill Pickles
Step 1: Prepare the Cucumbers
Begin by thoroughly washing 4–6 Kirby or Persian cucumbers to remove any dirt. Slice off about 1/16th inch from the blossom end to prevent excessive softness during pickling. This small step ensures that your Homemade Garlic Dill Pickles retain a satisfying crunch. Once prepared, set the cucumbers aside while you gather the remaining ingredients.
Step 2: Layer the Ingredients
In five pint jars, evenly distribute the smashed garlic, chopped fresh dill, and thin slices of white onion. As you pack the jars, tightly insert the cucumbers, ensuring to leave about 1/2 inch of headspace at the top. This helps maintain the crispness of your pickles and allows room for the brine. The layered flavors will infuse beautifully as they marinate.
Step 3: Make the Brine
In a medium-sized pot, combine 2 cups of white distilled vinegar, 1 cup of apple cider vinegar, 3 cups of filtered water, 1/2 cup of pickling salt, and 2 tablespoons of cane sugar. Bring this mixture to a boil over medium heat, stirring until the salt and sugar are completely dissolved. Once bubbling, the tangy aroma will entice you as you prepare to fill the jars.
Step 4: Fill the Jars
Carefully pour the hot brine over the packed cucumbers in each jar, ensuring they are fully submerged. Leave a little space at the top to allow for expansion. After filling, secure the lids tightly on each jar. This crucial step ensures that the flavors meld while keeping your Homemade Garlic Dill Pickles fresh and preserved.
Step 5: Cool and Refrigerate
Allow the jars to cool at room temperature for about 1 hour. Once cooled, transfer them to the refrigerator. Let your crispy pickles chill for at least 24 hours before indulging in their vibrant flavors. Patience is key, as this resting period allows the cucumbers to absorb the delicious brine, resulting in perfectly seasoned Homemade Garlic Dill Pickles!
How to Store and Freeze Homemade Garlic Dill Pickles
Fridge: Store your Homemade Garlic Dill Pickles in the refrigerator for up to 4-6 weeks. Ensure jars are sealed tightly to maintain crispness and flavor.
Freezer: Avoid freezing pickles, as this leads to a mushy texture and loses their delightful crunch.
Airtight Containers: Always use clean, airtight jars to prevent spoilage and extend freshness. Make sure brine fully covers pickles to keep them crisp.
Reheating: There’s no need to reheat; enjoy your crispy pickles straight from the fridge as a zesty snack or condiment!
Make Ahead Options
These Homemade Garlic Dill Pickles are perfect for meal prep, allowing you to enjoy the tangy crunch anytime you desire! You can layer the cucumbers, garlic, dill, and onions in the jars up to 3 days in advance, as this saves time during busy weeknights. Simply prepare the brine fresh on the day you plan to serve. Make sure to refrigerate them immediately after filling the jars to maintain their crispness and flavor integrity. For the best results, allow at least 24 hours of chilling time before enjoying, as this helps the pickles absorb that delicious brine. With these make-ahead tips, you can indulge in easy, zesty homemade pickles without the last-minute rush!
Expert Tips for Homemade Garlic Dill Pickles
-
Cucumber Choice: Select Kirby or Persian cucumbers for their crunch; avoid slicing cucumbers, as they release excess water and become soggy.
-
Brine Clarity: Always use filtered water to ensure a clear brine; tap water can cloud your pickles, affecting both appearance and flavor.
-
Packing Tips: Pack your cucumbers tightly in the jars to prevent them from floating, which can lead to spoilage.
-
Blossom End Trick: Don’t forget to slice off 1/16th inch from the blossom end; this simple trick helps to maintain a crisp texture in your Homemade Garlic Dill Pickles.
-
Storage Notes: Refrigerate your pickles immediately after cooling; they’ll stay fresh for 4-6 weeks, but remember, they’re not shelf-stable!
Homemade Garlic Dill Pickles Variations
Elevate your homemade pickles with these fun and delightful twists that will tantalize your taste buds!
-
Spicy Garlic Dill Pickles: Add sliced fresh jalapeños or habaneros to each jar for a fiery punch. Spice lovers will rejoice in this zesty adventure!
-
Sweetness Adjustment: Reduce or eliminate the cane sugar for a sharper flavor. For a keto-friendly option, try substituting with stevia to maintain sweetness without the carbs.
-
Chip Style: Slice cucumbers lengthwise to create thin pickle fries. Coat and fry them for a crunchy, delicious twist that’s perfect for dipping!
-
Herby Delight: Experiment by incorporating different herbs like tarragon or basil for a delightful twist. The fresh herbs will bring a burst of flavor that transforms your pickles!
-
Savory Infusion: Think about adding a few sprigs of fresh thyme or rosemary in the jars for a woodsy flavor. These herbs will meld beautifully with the garlic and dill.
-
Pickle Overload: Make a mixed batch by adding other vegetables like carrots or radishes. They soak up the brine similarly and add vibrant color and crunch!
-
Zesty Citrus: Add zest from a lemon or lime to the brine for a bright, refreshing note that complements the traditional garlic and dill.
-
Extra Crunch: Consider adding a small handful of grape leaves to the jars; they contain tannins that help maintain the crispness of your pickles longer.
With these variations, your Homemade Garlic Dill Pickles can be customized to match your cravings and preferences! Enjoy them on their own, or pair them with mouthwatering dishes like Cheesy Garlic Chicken or Homemade Pizza Pockets for a feast worth savoring!
What to Serve with Shatter Crisp Homemade Garlic Dill Pickles
These delightful pickles aren’t just a snack; they’re the perfect accompaniment for your meals that elevate every bite to a new level of flavor.
-
Juicy Burgers: A tangy, crunchy scoop on a burger adds layers of flavor that perfectly cuts through the richness of the meat.
-
Charcuterie Boards: Arrange them alongside cheeses and cured meats, as their zesty bite provides a refreshing contrast that guests will love.
-
Potato Salad: The bright tang of pickles enhances creaminess, adding a delightful crunch that elevates your potato salad to new heights.
-
Pulled Pork Sandwiches: Serve these pickles as a side to pulled pork; their garlic kick complements the sweet and smoky flavors beautifully.
-
Fresh Green Salads: Toss them into your salads for an unexpected crunch, infusing your greens with bold flavors and textures that intrigue the palate.
-
Spicy Calzones: The zesty flavors of the pickles balance the richness of cheesy calzones, making for a satisfying meal!
-
Iced Tea: Pair your pickles with a glass of refreshing iced tea, as the coolness balances the tang and makes a lovely afternoon pairing.
Indulge in these delicious combinations and make your meals more flavorful with each bite of your homemade garlic dill pickles!
Homemade Garlic Dill Pickles Recipe FAQs
What type of cucumbers are best for pickling?
Absolutely! For the best Homemade Garlic Dill Pickles, use Kirby or Persian cucumbers. These varieties have a firm texture that gives you that satisfying crunch. Steer clear of slicing cucumbers, as they tend to be too watery and can lead to mushy pickles.
How should I store my pickles after making them?
Very good question! After allowing your pickles to cool at room temperature for about an hour, pop them in the refrigerator. They will stay fresh and crispy for up to 4-6 weeks. Just be sure to keep the jars sealed tightly to preserve their flavor and crispness!
Can I freeze Homemade Garlic Dill Pickles?
Not at all! I highly recommend against freezing your pickles, as freezing causes them to lose their delightful crunch and becomes mushy. The best way to enjoy them is fresh from the fridge!
What should I do if my pickles float in the brine?
No worries! If your cucumbers are floating, it can lead to spoilage. To prevent this, pack the cucumbers tightly in the jars and ensure they are fully immersed in the brine. You can also place a clean weight or small jar on top of the cucumbers in the brine to keep them submerged if needed.
Are there any dietary concerns for my pickles?
Great point! If you’re avoiding sugar, you can reduce or even eliminate the cane sugar in the recipe. If you’re on a keto or vegan diet, I suggest substituting the sugar with stevia for a sweet touch without the carbs. Always check the labels of your ingredients to ensure they suit your dietary needs.
Can I reuse the brine once the pickles are gone?
Absolutely! The leftover brine from your pickles can be reused as a delicious marinade for meats or added to salad dressings. Just remember to strain out any solids before reusing to maintain freshness.
Crispy Homemade Garlic Dill Pickles with a Zesty Twist
Ingredients
Equipment
Method
- Begin by thoroughly washing the cucumbers to remove any dirt. Slice off about 1/16th inch from the blossom end.
- In five pint jars, evenly distribute the smashed garlic, chopped fresh dill, and thin slices of onion. Pack the cucumbers tightly, leaving about 1/2 inch of headspace.
- Combine vinegar, water, pickling salt, and sugar in a pot. Bring to a boil over medium heat, stirring until dissolved.
- Carefully pour the hot brine over the cucumbers, ensuring they are fully submerged. Secure the lids tightly on each jar.
- Allow to cool for about 1 hour, then refrigerate for at least 24 hours before enjoying.
Leave a Reply