
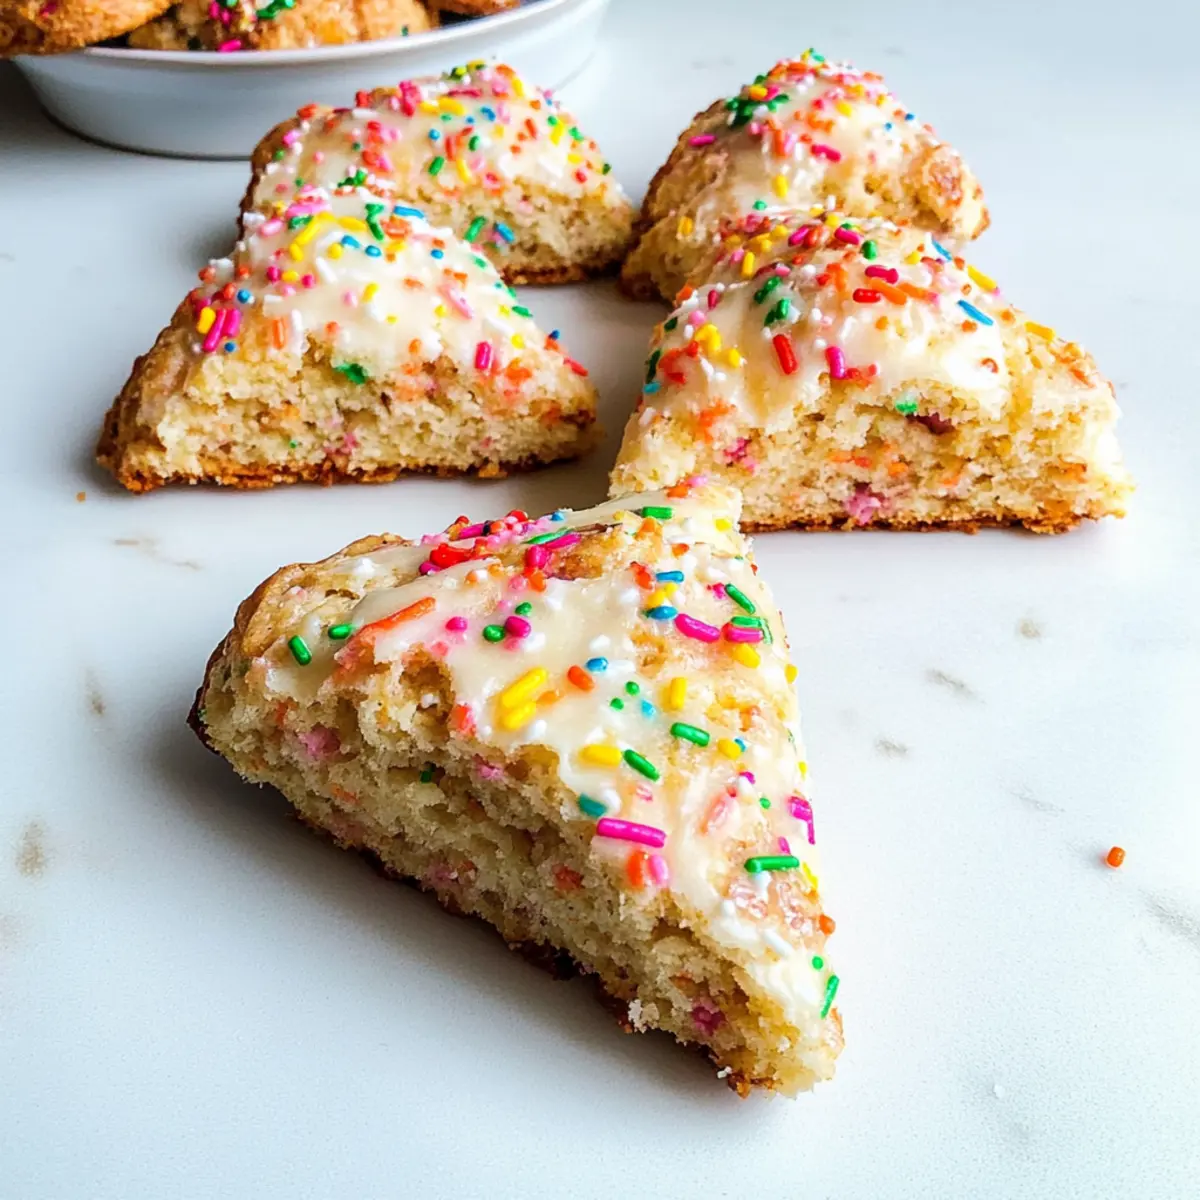
As I sifted through my pantry, a burst of nostalgia washed over me—those joyous birthday celebrations with cake, laughter, and sprinkles in every corner. Today, I’m bringing that festive spirit to breakfast with my Moist Funfetti Birthday Cake Scones. These delightful treats capture the essence of a birthday cake in scone form, making them a perfect pick-me-up for any occasion. Not only are they incredibly easy to whip up, but their fluffy texture and colorful sprinkles will leave you feeling like every morning deserves a celebration. Whether you’re treating yourself or sharing with loved ones, these scones promise joy with every bite. What fun flavors will you add to your own batch?

Why are Birthday Cake Scones So Irresistible?
Decadent, Fun Flavor: These scones combine the essence of a classic birthday cake with a hint of vanilla, offering a sweet treat perfect for any occasion.
Fluffy Texture: Achieving a light and airy crumb is easy! With just the right balance of ingredients, you’ll be left with a delightfully fluffy bite.
Colorful Sprinkles: They not only enhance the visual appeal but also add a joyful crunch! Perfect for anyone looking to brighten their breakfast or dessert table.
Quick & Easy: Ready in just about 30 minutes, these scones fit perfectly into your morning routine without the fuss.
Versatile Twist: Want to mix things up? Toss in chocolate chips or add citrus zest for a refreshing variation!
Pair these delightful scones with a cup of coffee or a light fruit salad for the ultimate breakfast experience. You might also love trying out my Lemon Cream Cake or indulging in something sweet with Caramel Brownie Cheesecake.
Birthday Cake Scone Ingredients
• Get ready to enjoy a delightful baking adventure!
For the Scones
- All-Purpose Flour – Provides structure for the scones; consider swapping with gluten-free flour for a gluten-free option.
- Granulated Sugar – Adds sweetness and enhances browning; you can substitute with powdered sugar for an even finer texture.
- Baking Powder – Acts as the leavening agent to ensure fluffiness; make sure it’s fresh for the best rise.
- Salt – Balances sweetness and enhances flavor; using sea salt can give a more complex taste.
- Unsalted Butter – Adds moisture and richness; keep it cold for best results, or use margarine for a dairy-free version.
- Heavy Cream – Essential for the scones’ moist texture; do not replace with milk as it lacks the necessary fat content.
- Egg – Binds the ingredients and enriches the flavor; a flax egg works well as a vegan alternative.
- Vanilla Extract – Offers depth of flavor; try adding almond extract for an exciting twist.
- Sprinkles – Bring a festive flair and fun colors; consider sugar-free sprinkles for a low-sugar choice.
Step‑by‑Step Instructions for Birthday Cake Scones
Step 1: Preheat and Prepare
Begin by preheating your oven to 400°F (200°C). Line a baking sheet with parchment paper to prevent sticking. This will ensure a perfect bake for your Birthday Cake Scones. While the oven heats, gather your ingredients to streamline the process and prepare for a fun baking adventure.
Step 2: Mix Dry Ingredients
In a medium-sized bowl, whisk together the all-purpose flour, granulated sugar, baking powder, and salt until combined. You’re aiming for a homogenous mixture that will help keep your Birthday Cake Scones light and fluffy. This step is essential as it infuses even flavor throughout the scone batter.
Step 3: Cut in Butter
Next, take your cold unsalted butter and cut it into the dry mixture using a pastry cutter or your fingers. Work until the mixture resembles small peas, which will ensure a tender crumb in your scones. This butter cutting is key to achieving that delightful flakiness—don’t rush it!
Step 4: Add Sprinkles and Chill
Gently fold in the sprinkles, adding a festive touch to your scones. Next, cover the bowl with plastic wrap and place it in the refrigerator while you prepare the wet ingredients. Chilling the mixture helps to keep the butter cold, which is crucial for the scones’ ultimate texture.
Step 5: Whisk Wet Ingredients
In a separate bowl, whisk together the heavy cream, egg, and vanilla extract until fully combined. This creamy mixture brings moisture and richness to your Birthday Cake Scones. For an added punch of flavor, consider blending in almond extract if you like a more robust taste.
Step 6: Combine Mixtures
Remove the chilled flour mixture from the fridge and pour the wet ingredients into it. Stir gently until just combined, ensuring there are still a few dry spots in the dough. Be cautious not to overmix, as this can lead to tough scones. The goal is to create a soft, uneven dough that will bake up beautifully.
Step 7: Shape and Freeze
Carefully transfer the dough onto a lightly floured surface and shape it into a 1.5-inch thick circle. Place this circle on your prepared baking sheet and pop it in the freezer for 1 to 2 hours, allowing it to firm up. This chilling step will help your Birthday Cake Scones maintain their shape while baking, ensuring a perfect presentation.
Step 8: Slice and Bake
Once firm, remove the dough from the freezer and slice it into 8 triangles. Brush the tops with a little heavy cream for a golden finish, then place them back in the oven. Bake for 20 to 22 minutes until lightly golden on top, and your kitchen fills with an irresistible aroma.
Step 9: Cool and Serve
After baking, take the scones out of the oven and allow them to cool slightly on a wire rack. This final step is key to helping them set properly. Once cooled, serve warm and indulge in the delightful flavors of your Birthday Cake Scones, perfect for any occasion.
What to Serve with Birthday Cake Scones
Elevate your scone experience with delightful pairings that bring joy, flavor, and even more celebration to your table.
- Fresh Berries: Bursting with sweetness, fresh berries complement the scones’ fluffiness beautifully, adding a vibrant color and nutritious touch.
- Whipped Cream: Creamy and light, whipped cream adds a luscious texture, making each bite feel indulgent while balancing the sweetness of the scones.
- Vanilla Yogurt: A dollop of vanilla yogurt provides a creamy contrast and a tangy note, enhancing the flavors of the birthday cake experience.
- Coffee or Tea: Warm beverages, like a rich cup of coffee or fragrant tea, create a comforting pairing that balances the sweetness of your baked treat.
- Lemon Glaze: A simple lemon glaze provides a bright, zesty finish that cuts through the sweetness, bringing a delightful burst of freshness with every bite.
- Chocolate Drizzle: For the chocolate lovers, a drizzle of melted chocolate can turn these scones into a decadent treat fit for any dessert table.
- Citrus Salad: A refreshing citrus salad, featuring oranges and grapefruits, will bring a burst of flavor, enhancing the joyful celebration these scones represent.
- Sparkling Water: To keep the refreshment light and festive, serve these scones with sparkling water, perhaps infused with a splash of fruit for that extra zing.
- Confetti Cake Pops: For a true celebration vibe, pair these scones with confetti cake pops that echo the birthday theme and add a playful touch.
Make Ahead Options
These Birthday Cake Scones are perfect for busy home cooks looking for a delightful meal prep option! You can prepare the dry ingredients and mix them with the sprinkles up to 24 hours in advance. Simply store the mixture in an airtight container in the refrigerator to maintain freshness. Additionally, you can shape the dough into a circle and freeze it for 1-2 hours until firm, then slice it into triangles and keep them in the freezer for up to a month. When ready to bake, simply preheat the oven and follow the baking instructions, brushing with heavy cream before placing them in the oven for fluffy, golden results—just as delicious as when freshly made!
Expert Tips for Birthday Cake Scones
-
Cold Ingredients: Ensure all ingredients, especially butter and cream, are cold. This helps maintain the scones’ tenderness and lightness.
-
Mixing Technique: Avoid overmixing the dough; mix just until combined to keep your Birthday Cake Scones fluffy and tender.
-
Chill for Success: Let the dough chill for 1-2 hours before slicing to help retain shape while baking. This makes a noticeable difference!
-
Uniform Sizing: When shaping the dough, aim for an even thickness. This ensures all scones bake evenly and come out perfectly golden.
-
Experiment with Flavors: Don’t hesitate to swap vanilla for almond extract or add citrus zest for fun variations—get creative with your scone-making!
Birthday Cake Scones Variations & Substitutions
Feel free to unleash your creativity by customizing these delightful scones to suit your taste preferences!
-
Dairy-Free: Substitute heavy cream with coconut cream and butter with a non-dairy alternative for a vegan-friendly option.
Your scones will still turn out wonderfully fluffy, making it easy for everyone to enjoy! -
Gluten-Free: Use a gluten-free flour blend instead of all-purpose flour for a celiac-friendly treat.
Many gluten-free blends work perfectly, ensuring your scones are just as delicious! -
Almond Flavored: Swap vanilla extract for almond extract for a nutty twist on the classic flavor profile.
This change can elevate your scones with a delightful depth that complements the sweetness beautifully. -
Citrus Zest: Add the zest of a lemon or orange for a refreshing burst of citrus flavor.
This bright addition pairs wonderfully with the sweetness of the scones, making them perfect for brunch! -
Chocolate Variation: Replace sprinkles with chocolate chips or chunks for a decadent chocolate scone.
This indulgent version is a sure hit among chocolate lovers—imagine the bliss in every bite! -
Extra Crunch: Incorporate chopped nuts like pecans or walnuts for added texture and flavor.
The crunch from the nuts can create a delightful contrast to the fluffy scone base. -
Spicy Heat: Add a pinch of cayenne or chili powder for those who crave a bit of heat.
This might just surprise your taste buds and bring an exciting new level to your scones! -
Fruit-Infused: Fold in 1/2 cup of dried fruits, like cranberries or raisins, for a sweet and chewy texture.
Each bite will burst with fruity flavor, making these scones even more delightful!
Don’t forget to try these scrumptious scones with a side of fresh fruit or a dollop of whipped cream. They’re also perfect alongside a cup of tea or coffee. For a different sweet treat, consider my Pumpkin Cheesecake Cinnamon Rolls or a classic Strawberry Shortcake Cinnamon. Enjoy your baking adventure!
Storage Tips for Birthday Cake Scones
Room Temperature: Store cooled scones in an airtight container at room temperature for up to 4 days to retain their moistness and fluffiness.
Fridge: If you prefer chilled scones, keep them in the fridge for up to 5 days, wrapped tightly to prevent drying out.
Freezer: For longer storage, freeze unbaked scone dough for up to 2 months. Simply shape, wrap well, and freeze until ready to bake.
Reheating: To enjoy warm scones later, reheat in the oven at 350°F (175°C) for 5-10 minutes, bringing back their freshness.

Birthday Cake Scones Recipe FAQs
How do I know if my ingredients are ripe or good to use?
Absolutely! When checking your ingredients, look for all-purpose flour that is free from lumps and has no strange odors. For unsalted butter, it should be firm and cold. Fresh baking powder should produce bubbles when mixed with water. If your eggs are clean and free from cracks, they’re good to go; however, check the expiration date on the carton for freshness.
How should I store my Birthday Cake Scones?
Store your cooled Birthday Cake Scones in an airtight container at room temperature for up to 4 days to keep them moist and fluffy. If you’d prefer them chilled, wrap individual scones tightly and place them in the fridge for up to 5 days. Enjoy them warm by gently reheating in a 350°F (175°C) oven for about 5-10 minutes.
Can I freeze the dough for my Birthday Cake Scones?
Absolutely! Freezing the unbaked dough is a wonderful way to enjoy fresh scones later. Shape the dough into a circle, wrap it tightly in plastic wrap, and store it in an airtight container or freezer bag. It can last up to 2 months in the freezer. When you’re ready, simply bake straight from frozen, adding a few extra minutes to the bake time.
What should I do if my scone dough is too crumbly?
If you find your Birthday Cake Scone dough is crumbly, it can be fixed! Start by adding a little more heavy cream, one tablespoon at a time, mixing gently until the dough comes together. Remember, it’s crucial not to overwork the dough, as this can make the scones tough. You want just enough moisture for the ingredients to bind.
Can I make these scones dairy-free or gluten-free?
Very! To make your Birthday Cake Scones dairy-free, simply substitute the unsalted butter with margarine and use coconut cream in place of heavy cream. For gluten-free options, swap all-purpose flour with a 1:1 gluten-free flour blend. Just ensure your baking powder and other ingredients are also gluten-free to avoid cross-contamination.
Are there any allergy considerations for this recipe?
Absolutely! While this recipe is still delightful, keep in mind it contains dairy, eggs, and gluten. For a vegan version, opt for a flax egg in place of the regular egg and use dairy-free substitutes as mentioned before. As for allergies, always check for gluten-free ingredients and ensure sprinkles are nut-free—your loved ones will appreciate you taking extra care!

Fluffy Birthday Cake Scones That Wow Your Taste Buds
Ingredients
Equipment
Method
- Preheat your oven to 400°F (200°C) and line a baking sheet with parchment paper.
- Whisk together the all-purpose flour, granulated sugar, baking powder, and salt until combined.
- Cut the cold unsalted butter into the dry mixture until it resembles small peas.
- Fold in the sprinkles and chill the mixture in the refrigerator.
- Whisk together the heavy cream, egg, and vanilla extract until fully combined.
- Combine the wet and dry mixtures gently until just combined.
- Shape the dough into a 1.5-inch thick circle, freeze for 1-2 hours.
- Slice the dough into 8 triangles and brush the tops with heavy cream before baking.
- Bake for 20 to 22 minutes until lightly golden, then cool on a wire rack.
Leave a Reply