
As I peeked into my fridge, the sight of those vibrant Hatch green chiles sparked a rush of inspiration. It’s amazing how one ingredient can transform a simple gathering into a memorable feast! The Creamy Hatch Green Chile Cheese Dip I whipped up not only came together in a mere 20 minutes, but it also checked all the boxes for my gluten-free and keto-loving friends. With its customizable spice levels, this dip is versatile enough to please palates of all kinds, making it a perfect addition to any game day spread. Whether you’re entertaining with chips or pairing it with fresh veggies, this dip is sure to steal the spotlight. Are you ready to dive into this cheesy delight that brings warmth and comfort in every bite?
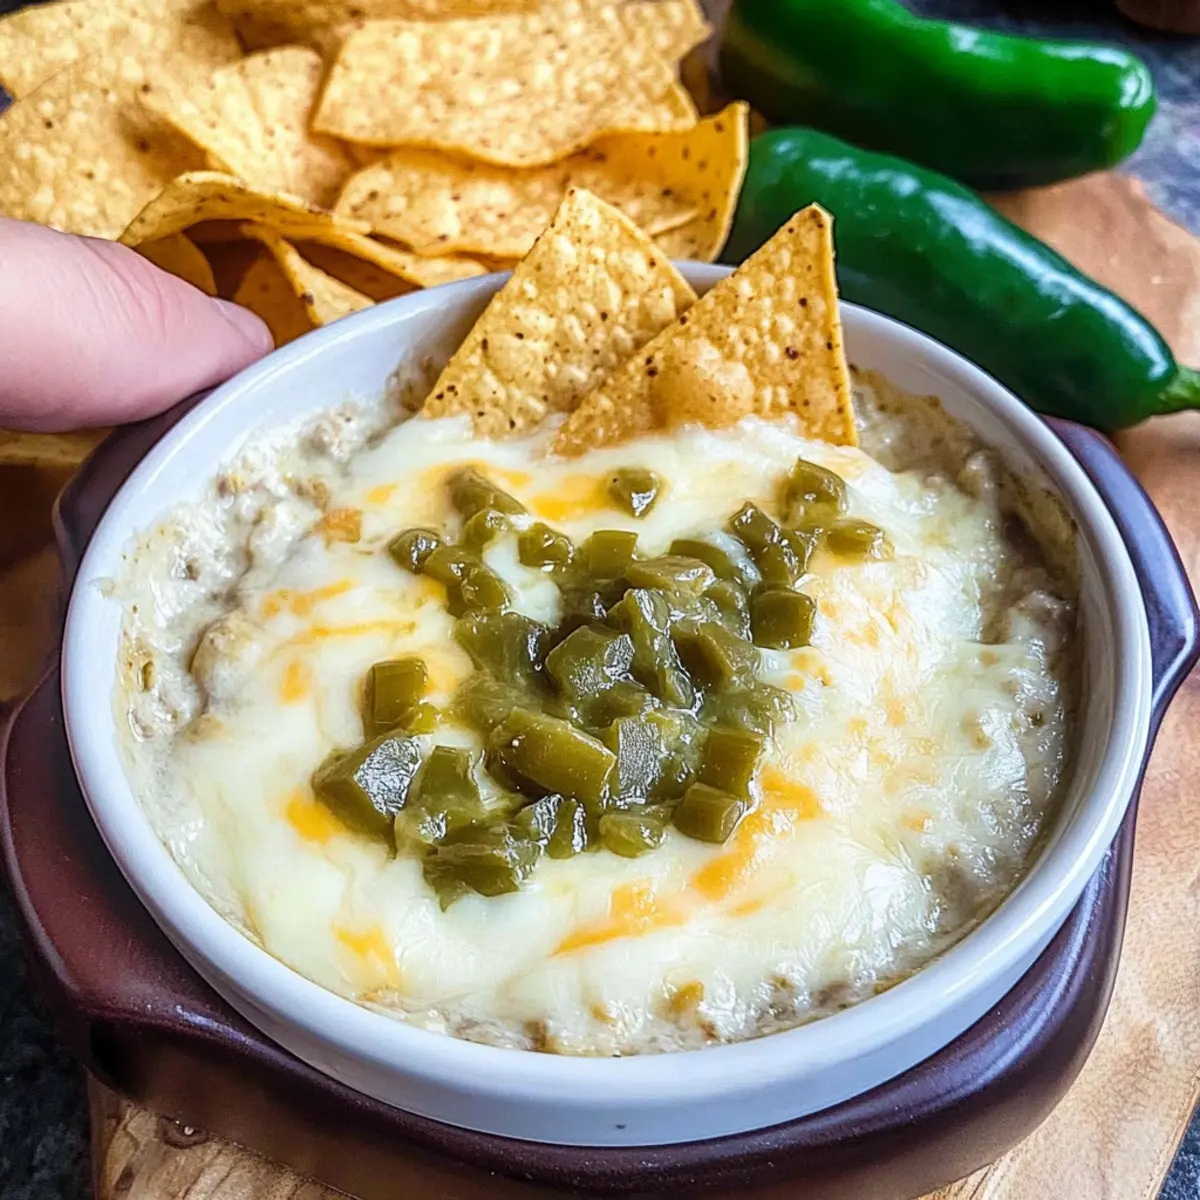
Why Is This Dip a Game Changer?
Decadent flavors come together in this Hatch Green Chile Cheese Dip, making it an unforgettable dish for any gathering. Quick preparation means you can delight guests in just 20 minutes, perfect for those last-minute plans. Customizable heat levels cater to your crowd’s preferences, ensuring everyone finds their sweet spot. Gluten-free and keto-friendly, this dip keeps health-conscious friends happy while still satisfying cravings. Finally, crowd-pleasing qualities make it a guaranteed hit; serve it with chips or fresh veggies for dipping, and watch it disappear! For more flavorful ideas, check out my Pumpkin Cheesecake Cinnamon or Cheese Spinach Crustless recipes.
Hatch Green Chile Cheese Dip Ingredients
For the Dip
• Hatch Green Chiles – Adds a rich, roasted flavor with varying heat; choose fresh, canned, or frozen based on your desired spice level.
• Cream Cheese – Provides a creamy base for the dip; ensure it’s softened for easy mixing.
• Shredded Monterey Jack Cheese – Contributes to a melt-in-your-mouth texture; feel free to substitute with mozzarella or pepper jack for extra flavor.
• Shredded Cheddar Cheese – Imparts a sharp taste; opt for medium or sharp cheddar for maximum flavor impact.
• Sour Cream – Ensures creaminess while balancing the richness; plain Greek yogurt works well as a nutritious substitute.
• Garlic Powder – Elevates the flavor with a subtle aromatic touch; consider fresh garlic for a bolder punch.
• Salt – Essential for flavor enhancement; adjust to your taste preference.
• Hot Sauce – Tailors the spice level to your crowd; select your favorite variety to fit the heat preference.
Transform your gatherings with this delightful Hatch Green Chile Cheese Dip, where every bite delivers comfort and joy!
Step‑by‑Step Instructions for Hatch Green Chile Cheese Dip
Step 1: Preheat the Oven
Begin by preheating your oven to 350°F (175°C). This step is essential as it prepares the environment for the creamy Hatch Green Chile Cheese Dip, ensuring even cooking. While the oven heats up, gather your mixing bowl and utensils to streamline your cooking process.
Step 2: Mix the Ingredients
In a medium bowl, combine the diced Hatch green chiles, softened cream cheese, shredded Monterey Jack, shredded cheddar cheese, sour cream, garlic powder, salt, and hot sauce. Use a spatula to blend the ingredients thoroughly until the mixture is creamy and well incorporated. This should take about 3-4 minutes of mixing to achieve that luscious texture.
Step 3: Prepare for Baking
Once your ingredients are well mixed, transfer the creamy cheese mixture into a small baking dish. Spread the mixture evenly into the dish, smoothing the top with a spatula. For a delicious golden finish, sprinkle a bit more shredded cheese over the top of the mixture to create a bubbling, cheesy crust as it bakes.
Step 4: Bake the Dip
Place the baking dish in the preheated oven and bake for approximately 15 minutes. Keep an eye on it; you’ll know the Hatch Green Chile Cheese Dip is ready when the cheese is melted and starts bubbling around the edges. The top should be beautifully golden, inviting you to dig in.
Step 5: Serve Immediately
Remove the baking dish from the oven, allowing it to cool for a minute before serving. Serve your warm Hatch Green Chile Cheese Dip immediately with tortilla chips, crostini, or fresh veggies for an enticing snack. Enjoy the creamy, cheesy goodness that is guaranteed to satisfy everyone at your gathering!
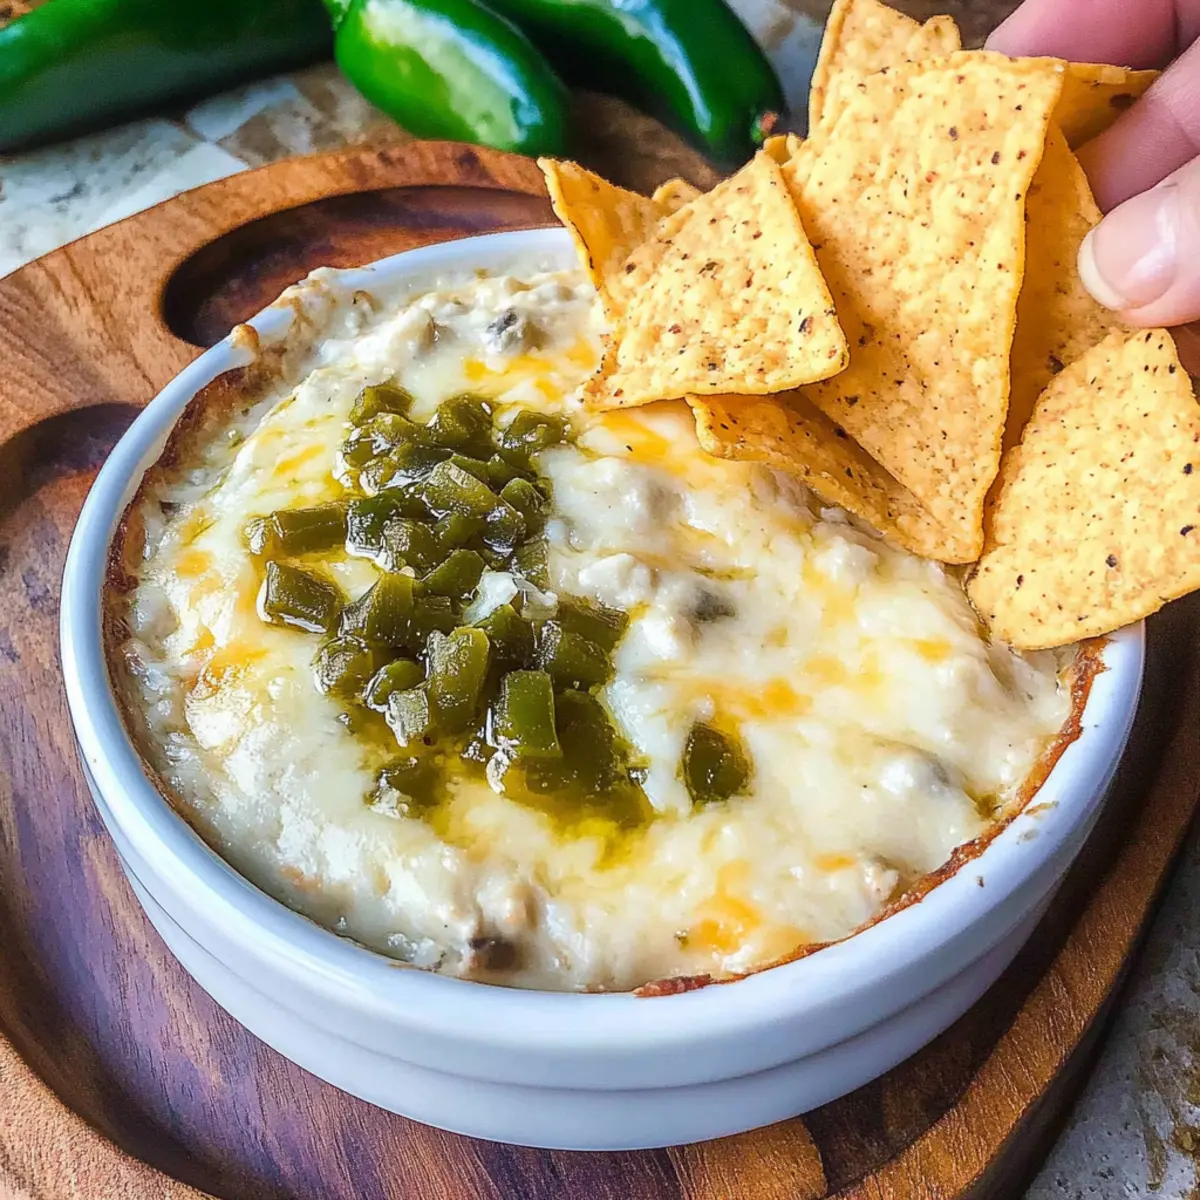
Expert Tips for Hatch Green Chile Cheese Dip
- Choose Your Chiles: Start with mild Hatch green chiles for a balanced flavor, and increase heat by adding hot sauce to suit your guests’ preferences.
- Proper Mixing: Ensure cream cheese is softened before mixing to avoid lumps in your Hatch Green Chile Cheese Dip; this creates a smooth, creamy texture everyone will love.
- Baking Tips: If your dip doesn’t brown nicely, briefly switch to broil and watch closely to prevent burning, achieving that perfect golden top.
- Slow Cooker Option: For an effortless approach, combine all ingredients (except topping cheese) in a slow cooker and heat until warmed through for a gather-and-go option.
- Storage Guidelines: Store leftovers in an airtight container in the fridge for up to 3 days; reheat gently to maintain the creamy goodness of your dip.
Make Ahead Options
These Hatch Green Chile Cheese Dip are perfect for busy home cooks looking to save time! You can prepare the entire dip mixture and refrigerate it up to 24 hours in advance, allowing the flavors to meld beautifully. Simply combine the hatch green chiles, cream cheese, shredded cheeses, sour cream, garlic powder, salt, and hot sauce in a bowl, and transfer to your baking dish. Cover tightly with plastic wrap to maintain freshness. When you’re ready to enjoy, remove from the fridge, top with extra cheese, and bake at 350°F (175°C) for about 15 minutes or until bubbly. This way, you can serve a delicious, restaurant-style dip with minimal effort, making your gatherings even more delightful!
Hatch Green Chile Cheese Dip Variations
Feel free to play around with the flavors and ingredients in this delightful dip to make it truly your own!
-
Canned Chiles: Swap fresh Hatch chiles for canned diced green chiles to save time while still enjoying that roasted flavor.
-
Spicy Blow: Use spicy pepper jack cheese instead of Monterey Jack for an extra kick that spice lovers will appreciate. It’ll make your taste buds dance with joy!
-
Protein Boost: Add cooked chorizo or shredded chicken to the mix for a hearty twist that adds depth and flavor. This adds both protein and satisfaction, ideal for a filling snack.
-
Vegetarian Twist: For a vegetable-packed version, incorporate diced bell peppers or corn into the dip. This adds a satisfying crunch and additional nutrition.
-
Creamy Greek Yogurt: Replace sour cream with plain Greek yogurt for a healthier alternative that still feels indulgent and creamy. The slight tang complements the richness beautifully.
-
Mild to Wild: Start with mild chiles and experiment with different hot sauces to tailor the heat level for your crowd. Every dip can be an adventure!
-
Savory Herbs: Stir in fresh herbs like cilantro or parsley for a burst of freshness that enhances the overall flavor profile. It’s like a little garden in every bite!
Check out how to enjoy this dip alongside some crunchy tortilla chips or fresh veggies for a delightful experience. Transform your gatherings with this creamy goodness and make memories with every cheesy bite!
What to Serve with Hatch Green Chile Cheese Dip
Indulging in this creamy cheese dip opens up a world of delicious pairing possibilities that can elevate your gathering.
- Crunchy Tortilla Chips: The classic choice! Their crispiness perfectly complements the creamy texture of the dip, creating an irresistible contrast.
- Fresh Veggies: Carrot sticks, bell pepper slices, or cucumber rounds offer a refreshing crunch and healthy balance to the rich dip.
- Crostini: Crispy toasted bread provides a delightful vehicle for scooping up the cheese dip, enhancing every bite with a satisfying crunch.
- Guacamole: Add a dollop of creamy guacamole on the side for a zesty twist that pairs beautifully with the warmth of the hatch chiles.
- Beer or Cider: A chilled beer or a light cider can enhance the flavors of the dip, making it a perfect match for game-day festivities.
- Spicy Salsa: A fresh, tangy salsa adds a burst of flavor and liveliness that complements the creamy dip while introducing some heat.
- Fruit Salad: A light fruit salad featuring citrus or berries can bring a sweet contrast, cooling the palate and brightening the spread.
Storage Tips for Hatch Green Chile Cheese Dip
Refrigerator: Store any leftovers in an airtight container for up to 3 days to maintain freshness and flavor.
Freezer: For longer storage, freeze the dip in a freezer-safe container for up to 2 months. Thaw in the fridge before reheating.
Reheating: Gently reheat the dip in the microwave or oven until warmed through, ensuring it stays creamy and delicious.
Serving: To enhance the experience, serve the reheat dip with fresh tortilla chips or crunchy veggies for dipping alongside the Hatch Green Chile Cheese Dip.

Hatch Green Chile Cheese Dip Recipe FAQs
What type of Hatch green chiles should I use for this dip?
Absolutely! You can use fresh, canned, or frozen Hatch green chiles depending on your convenience and desired heat level. Fresh chiles offer a vibrant flavor, while canned options are convenient on busy days. If you choose fresh, look for chiles that are firm and have a bright, vibrant color—this indicates they’re fresh and ready to add that rich roasted flavor.
How should I store leftovers of the dip?
Very important! Store any leftovers in an airtight container in the refrigerator for up to 3 days. To keep the dip tasting fresh, I recommend pressing a piece of plastic wrap directly onto the surface before sealing the container. When you’re ready to enjoy it again, gently reheat the dip in the microwave or oven, ensuring it stays creamy and delicious.
Can I freeze Hatch Green Chile Cheese Dip?
Yes, you can! To freeze, place the dip in a freezer-safe container and ensure it’s sealed tightly to avoid freezer burn. It can be stored for up to 2 months. When you’re ready to use it, thaw the dip in the fridge overnight and reheat gently until warmed through. If it seems too thick, add a splash of cream or milk to restore its creamy texture.
What if my dip turns out too thick after baking?
No worries, that’s a common hiccup! If your dip is thick after baking, simply add a little milk or cream while gently stirring, then reheat in the microwave or oven until it’s creamy again. This will help achieve that perfect, gooey texture that everyone loves!
Is this dip suitable for gluten-free and keto diets?
Absolutely! The Hatch Green Chile Cheese Dip is gluten-free and fits perfectly into a keto diet, as it avoids any carbs from bread or flour. Just ensure that any hot sauce you use is also gluten-free, and you’re good to go! For additional dietary considerations, you can substitute the sour cream with plain Greek yogurt if desired.
Can I add other ingredients to customize my dip?
The more, the merrier! Feel free to add cooked chorizo or shredded chicken for added protein, or spice it up with spicy pepper jack cheese. You can even experiment with adding sautéed onions or bell peppers for extra flavor and a bit of crunch. Enjoy customizing your dip to fit your taste!

Decadent Hatch Green Chile Cheese Dip to Wow Your Guests
Ingredients
Equipment
Method
- Preheat the oven to 350°F (175°C). Gather your mixing bowl and utensils.
- In a medium bowl, combine diced Hatch green chiles, softened cream cheese, shredded Monterey Jack, shredded cheddar cheese, sour cream, garlic powder, salt, and hot sauce. Mix until creamy.
- Transfer the mixture into a small baking dish, smoothing the top. Sprinkle additional cheese on top if desired.
- Bake for approximately 15 minutes until the cheese is melted and bubbly around the edges.
- Remove from the oven and let it cool for a minute before serving. Enjoy with tortilla chips or fresh veggies.
Leave a Reply