
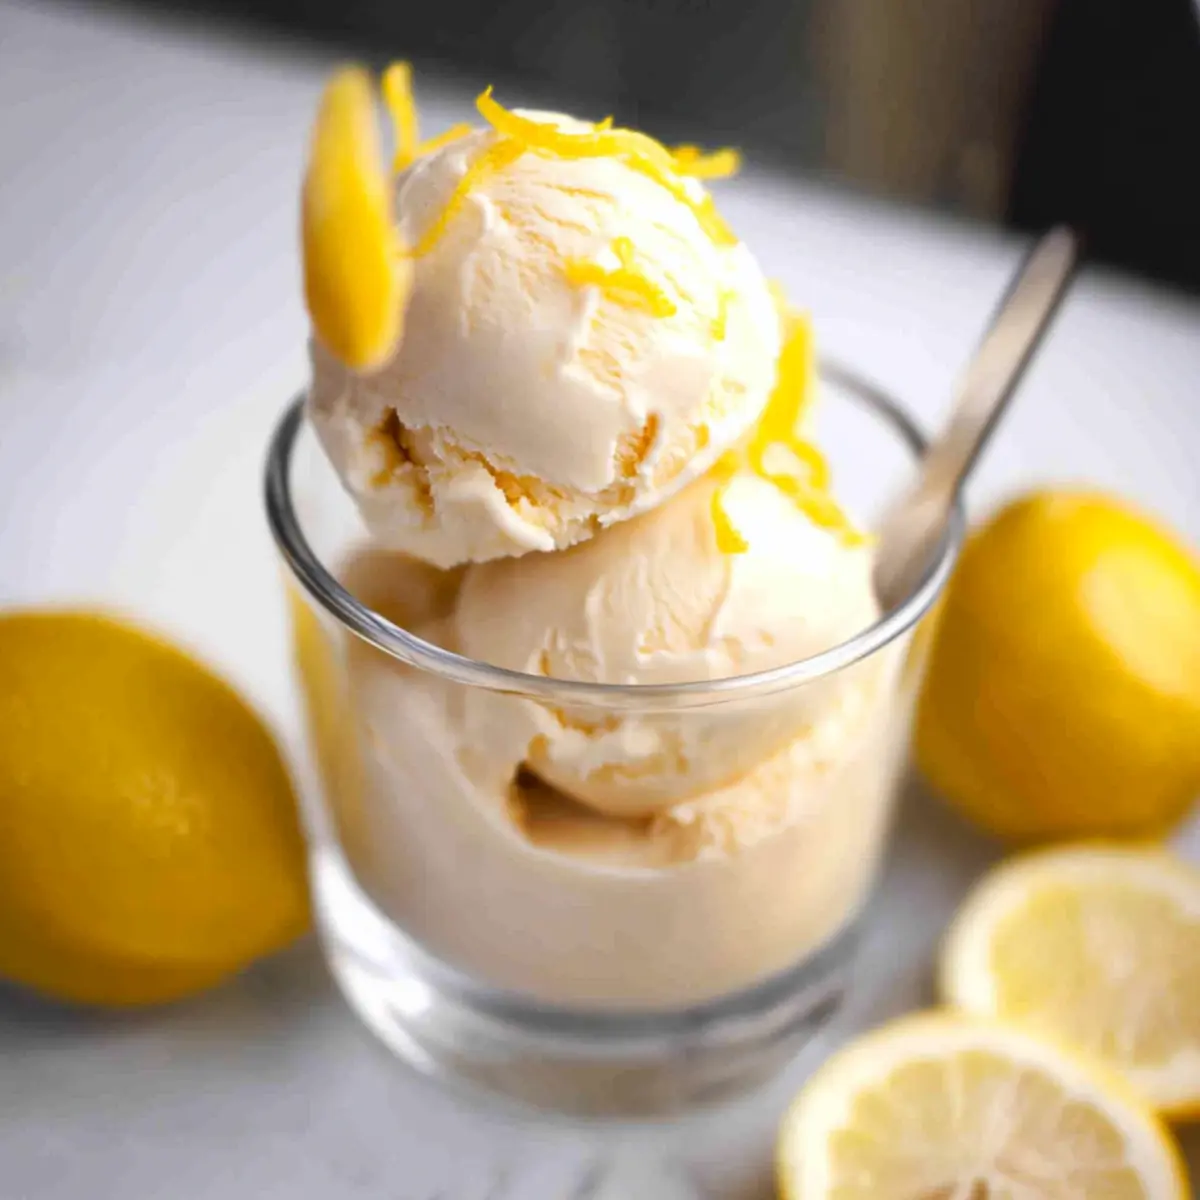
While rummaging through my kitchen a few hot afternoons ago, I stumbled upon a bag of fresh lemons, their bright yellow peels practically begging to be included in something delicious. That’s when the idea for this Easy Homemade Lemon Ice Cream sparked to life. With just 4 simple ingredients, this egg-free, Philadelphia-style treat balances the perfect zing of tangy citrus with creamy sweetness. Not only is this frozen delight a fantastic way to cool down on those sweltering days, but it also comes together in no time—ideal for anyone tired of the same old store-bought options. Are you ready to scoop into a refreshing summer indulgence that’s both effortless and bursting with flavor? Let’s dive in!
Why Homemade Lemon Ice Cream?
Simplicity at Its Best: With just 4 ingredients, you can whip up a delightful frozen treat without the fuss. No eggs, no complicated steps—just pure bliss!
Refreshing Flavor: The zesty lemon combined with creamy goodness creates a taste sensation that brightens up any hot summer day.
Quick and Easy: Ready to freeze in just 30 minutes, it’s the perfect solution for those who want a dessert without the wait.
Versatile Option: Feel free to get creative! Try other citrus fruits to mix up flavors or add fun toppings like crushed cookies or fresh berries for a twist.
Crowd Pleaser: Whether it’s a backyard BBQ or a family dinner, this Homemade Lemon Ice Cream is sure to impress your guests—they’ll be coming back for seconds!
Enjoy this treat alongside a slice of blueberry pie for an indulgent duo that everyone will love!
Homemade Lemon Ice Cream Ingredients
For the Ice Cream Base
• Heavy Cream – Provides creaminess and rich texture; avoid lower-fat options for the best results.
• Sugar – Sweetens the mixture, enhancing the natural lemon flavor; adjust for desired sweetness.
• Salt – Balances flavors while enhancing both sweetness and lemon tang; a pinch is all you need.
For the Lemon Flavor
• Lemon Zest – Adds intense lemon flavor and texture; fresh zest is key—bottled juice won’t provide the same vibrancy.
• Freshly Squeezed Lemon Juice – Gives the ice cream its tartness; about 3-4 large lemons will yield the right amount.
Step‑by‑Step Instructions for Easy Homemade Lemon Ice Cream
Step 1: Prepare the Cream Mixture
In a medium bowl, whisk together 2 cups of heavy cream, 1 cup of sugar, and a pinch of salt until thoroughly combined, with the sugar fully dissolved. This should take about 2-3 minutes. Once mixed, cover the bowl and refrigerate while you prepare the lemons to keep the mixture chilled and ready.
Step 2: Zest and Juice the Lemons
Zest 3-4 large lemons until you have 3 tablespoons of zest, ensuring you capture the bright yellow outer layer without the bitter white pith. Then, cut the lemons in half and squeeze until you have ½ cup plus 2 tablespoons of freshly squeezed lemon juice. This ensures a vibrant, zesty flavor essential for your Homemade Lemon Ice Cream.
Step 3: Combine the Lemon Ingredients
Add the freshly squeezed lemon juice and lemon zest to the chilled cream mixture. Whisk the components together for about 1-2 minutes until everything is fully integrated and the mixture appears smooth and creamy. The bright yellow color should be inviting, signifying the refreshing flavor that awaits.
Step 4: Chill the Mixture Thoroughly
To ensure a creamy texture, chill the combined mixture in the refrigerator for at least 1 hour or in the freezer for 20 minutes. This chilling step is crucial, as colder ingredients facilitate smoother churn times in your ice cream maker, leading to that delightful Homemade Lemon Ice Cream consistency.
Step 5: Churn the Mixture
Once chilled, pour the lemon cream mixture into your ice cream maker and churn according to the manufacturer’s instructions. This process typically takes about 20-25 minutes or until the ice cream reaches a soft-serve consistency. As it churns, you’ll notice it becoming thicker and fluffier, perfect for your refreshing dessert.
Step 6: Freeze the Ice Cream
Transfer the churned lemon ice cream into an airtight container, smoothing the top with a spatula. Cover the container tightly and place it in the freezer for at least several hours or overnight until it is solid. This final freezing will give your Homemade Lemon Ice Cream its perfect scoopable texture, ready for serving.

Make Ahead Options
These Easy Homemade Lemon Ice Cream delights are perfect for busy cooks looking to save time! You can prepare the cream mixture (heavy cream, sugar, and salt) up to 24 hours in advance by whisking it together and refrigerating until ready to use. Also, zest and juice your lemons ahead of time and keep them stored in an airtight container in the refrigerator for up to 3 days—this ensures maximum freshness and flavor. When you’re ready to churn the ice cream, simply combine the lemon juice and zest with the chilled mixture, churn it until smooth, and freeze until solid. With this prep, you’ll have a refreshing treat ready to enjoy with minimal effort!
Storage Tips for Homemade Lemon Ice Cream
Fridge: Store any leftover lemon ice cream in an airtight container in the refrigerator for up to 3 days for the best texture, but it will soften.
Freezer: Keep your homemade lemon ice cream in an airtight container in the freezer for up to 3 months. For optimal flavor, it’s best enjoyed fresh, within the first few weeks.
Reheating: If the ice cream becomes too hard to scoop, allow it to sit at room temperature for about 10 minutes before serving. This will soften it just enough for a perfect scoop.
Tips for the Best Homemade Lemon Ice Cream
• Chill Everything: Ensure your heavy cream, bowl, and whisk are cold before mixing; this greatly improves the texture and creaminess of your Homemade Lemon Ice Cream.
• Measure Ingredients Properly: Use a kitchen scale or measuring cups for accuracy, especially for the lemon zest and juice, to avoid overly tangy or bland ice cream.
• Don’t Over-Churn: Keep an eye on the consistency! Stop churning once it resembles soft serve to prevent icy texture; after freezing, it will firm up beautifully.
• Avoid Bottled Juice: Always opt for freshly squeezed lemon juice and zest. Bottled lemon juice lacks the vibrant flavor that gives the ice cream its refreshing kick.
• Storage Smarts: Store your ice cream in an airtight container for up to 3 months, but let it sit at room temperature for about 10 minutes before scooping if it’s too hard.
Variations & Substitutions for Homemade Lemon Ice Cream
Feel free to get creative with this ice cream recipe and make it your own!
-
Citrus Swap: Substitute lemon with lime or orange for a different flavor twist that’s equally refreshing. Each fruit will bring its unique brightness and zest!
-
Dairy-Free Delight: Use coconut cream in place of heavy cream for a luscious dairy-free version, while adding a tropical flair that pairs beautifully with the citrus flavor.
-
Sweetener Options: Try honey or maple syrup instead of sugar for a natural sweetness that adds depth to the flavor profile; just remember to adjust the quantity to taste!
-
Add Fun Mix-ins: Once your ice cream is churned, fold in crushed cookies, chocolate chips, or fresh berries for delightful texture and bursts of flavor in every bite.
-
Creamy Smoothness: Add a splash of vanilla extract to the cream mixture for a hint of warmth that beautifully complements the citrus notes. It’s a small tweak that makes a big difference!
Try serving this delicious treat alongside a scoop of Cookies Cream Peanut for a dessert pairing that will leave everyone wanting more!
-
Zing Up the Heat: For those who enjoy a little kick, toss in a dash of red pepper flakes or cayenne when mixing in the lemon juice. This will add an unexpected, delightful heat that wakes up your taste buds!
-
Sorbet Style: Skip the churning step entirely for a frozen dessert like a sorbet! Simply blend the ingredients and freeze until solid for a lighter option.
Be sure to enjoy your newly crafted ice cream treat alongside a slice of blueberry pie for a decadent twist!
What to Serve with Easy Homemade Lemon Ice Cream
Indulging in a scoop of refreshing lemon ice cream is a lovely way to cool down, but pairing it with complementary flavors elevates the entire dessert experience.
-
Graham Cracker Crust: The crunchy texture of a graham cracker crust adds a delightful contrast to the creamy softness of the ice cream, perfect for a tart treat.
-
Fresh Berry Compote: Sweet and tangy berries bring brightness and juiciness that beautifully balance the lemon’s zest, offering a fresh and vibrant addition.
-
Chocolate Chips: The rich, bittersweet flavor of chocolate chips creates a fun texture contrast and an indulgent twist, making each bite exciting.
-
Mint Leaves: Garnishing with fresh mint introduces a refreshing herbal note that enhances the lemon flavor, making the dessert even more fragrant and inviting.
-
Shortbread Cookies: The buttery, crumbly texture of shortbread cookies complements the smooth creaminess of lemon ice cream, perfect for a delightful crunch.
-
Lemon Zest Garnish: A sprinkle of extra lemon zest on top intensifies the citrus aroma and adds an appealing visual touch, inviting you to enjoy every scoop.
Enjoy this refreshing delight alone or with a dessert trio, making it the centerpiece of your summer gatherings!
Easy Homemade Lemon Ice Cream Recipe FAQs
How do I choose the best lemons for this recipe?
Absolutely! Look for lemons that feel firm and heavy for their size, with shiny, smooth skin. Avoid any with dark spots or wrinkles, as these may indicate overripeness. Fresh lemons should have a vibrant yellow color and a fragrant aroma, ensuring maximum juice and zest.
How should I store the Homemade Lemon Ice Cream?
I often store it in an airtight container in the freezer, where it can last for up to 3 months. For the best texture, consume it within the first few weeks. Keep in mind that if it becomes too hard, letting it sit at room temperature for about 10 minutes before scooping makes it much easier to serve!
Can I freeze this ice cream? What’s the best method?
Very! To freeze your Homemade Lemon Ice Cream, simply transfer it to an airtight container after churning and freeze until solid, typically several hours or overnight. To do this effectively, ensure the container is well-sealed to prevent freezer burn. When ready to enjoy, allow it to sit slightly at room temperature for 10 minutes for easier scooping.
What if my ice cream is too icy and not creamy?
If you notice your Homemade Lemon Ice Cream has an icy texture, it could be because it was over-churned or not chilled enough before churning. To avoid this, follow the chilling instructions carefully and stop churning when it reaches a soft-serve consistency—churning should take about 20-25 minutes. If it’s frozen too hard after storage, let it sit out for 10-15 minutes before scooping to allow the texture to soften.
Is this recipe safe for those with egg allergies?
Yes, it absolutely is! This Easy Homemade Lemon Ice Cream is egg-free, making it a great choice for anyone with egg allergies or those who prefer to avoid eggs in their desserts. Just be mindful of any additional mix-ins, as they may contain allergens.
How can I change the flavors of this lemon ice cream?
The more the merrier! You can substitute the lemon for other citrus fruits, such as lime or orange, to create a different flavor profile. You can also add mix-ins like crushed cookies or fresh fruit once the ice cream is churned to give it an exciting twist—so feel free to get creative!
Creamy Homemade Lemon Ice Cream with Just 4 Ingredients
Ingredients
Equipment
Method
- In a medium bowl, whisk together heavy cream, sugar, and a pinch of salt until combined. Refrigerate while preparing lemons.
- Zest 3-4 large lemons to get 3 tablespoons of zest, then squeeze to yield ½ cup plus 2 tablespoons of lemon juice.
- Add lemon juice and zest to the chilled cream mixture, whisk until smooth and integrated.
- Chill the mixture in the refrigerator for at least 1 hour or freezer for 20 minutes to ensure smooth texture.
- Pour the mixture into an ice cream maker and churn according to instructions, usually about 20-25 minutes.
- Transfer ice cream to an airtight container, smooth the top, cover, and freeze for several hours or overnight.
Leave a Reply