
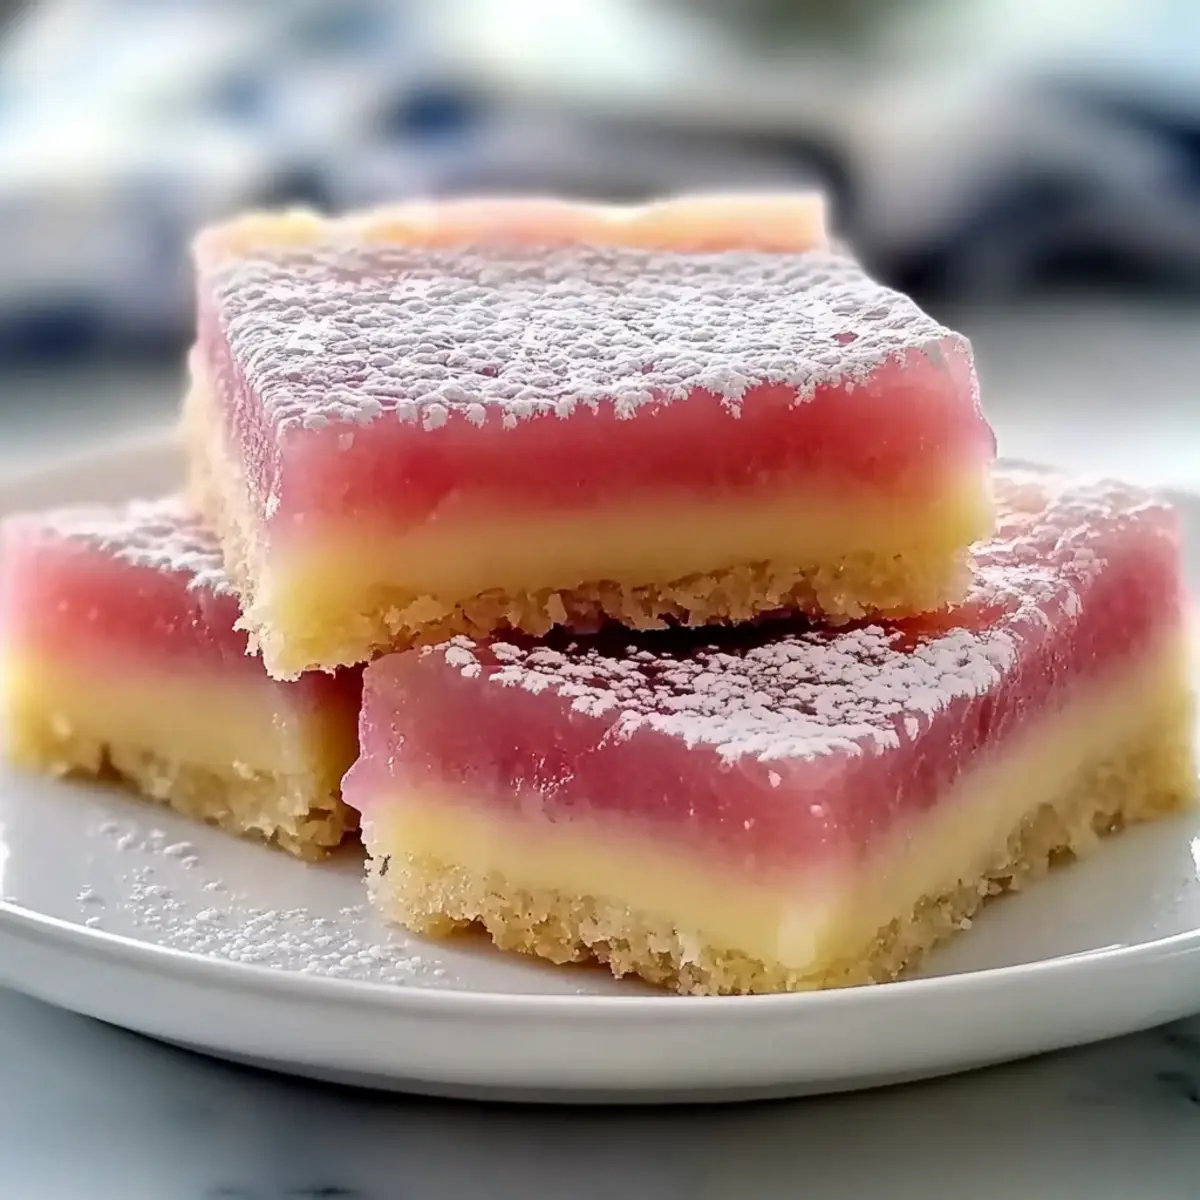
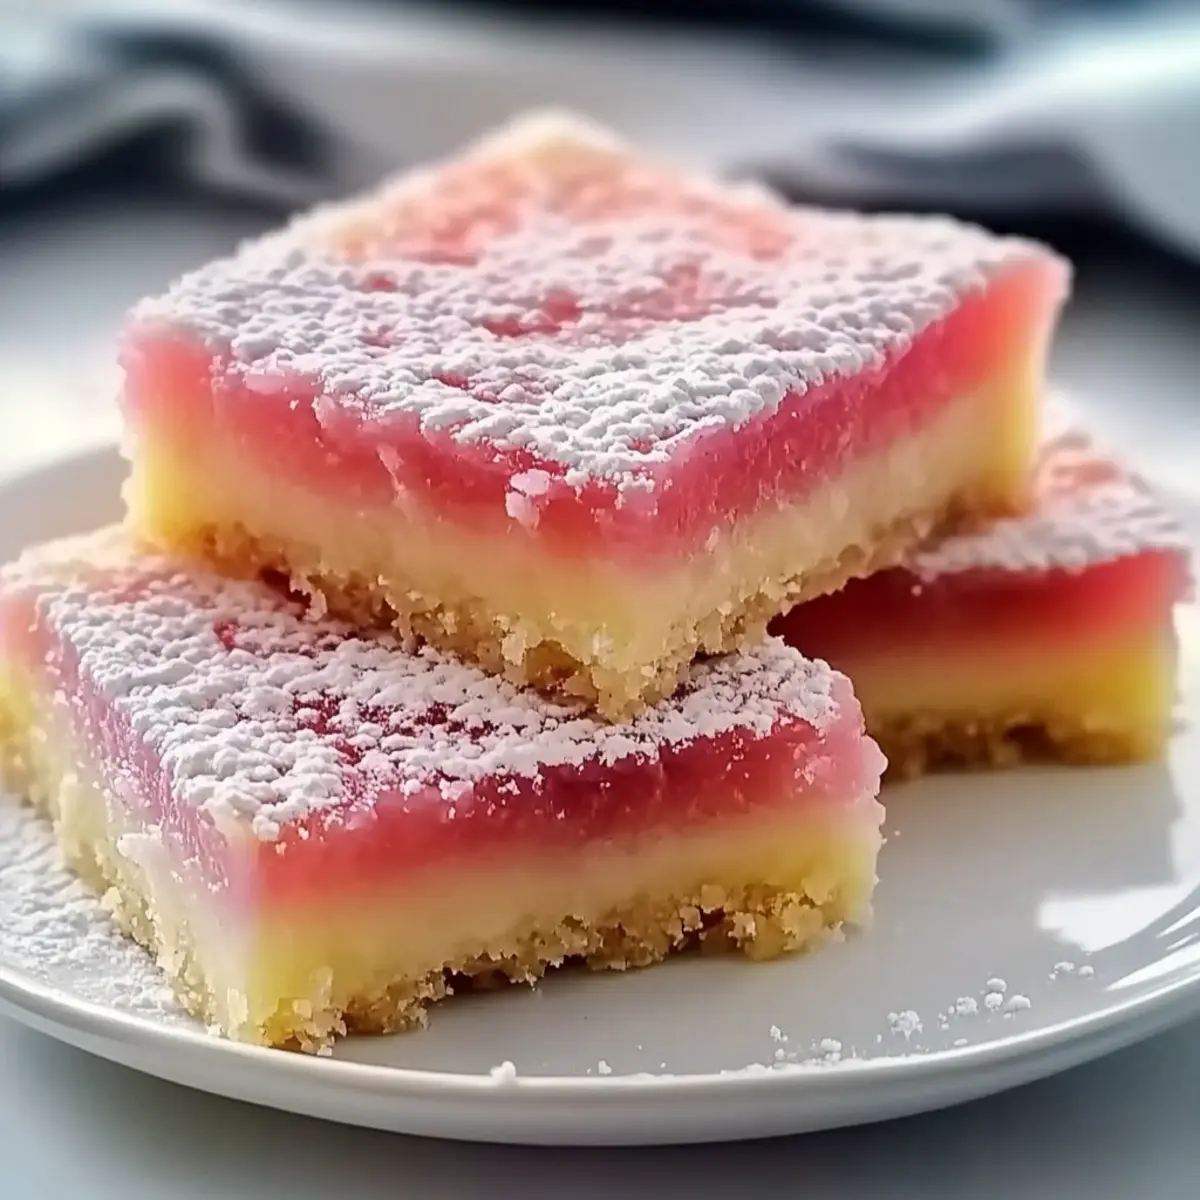
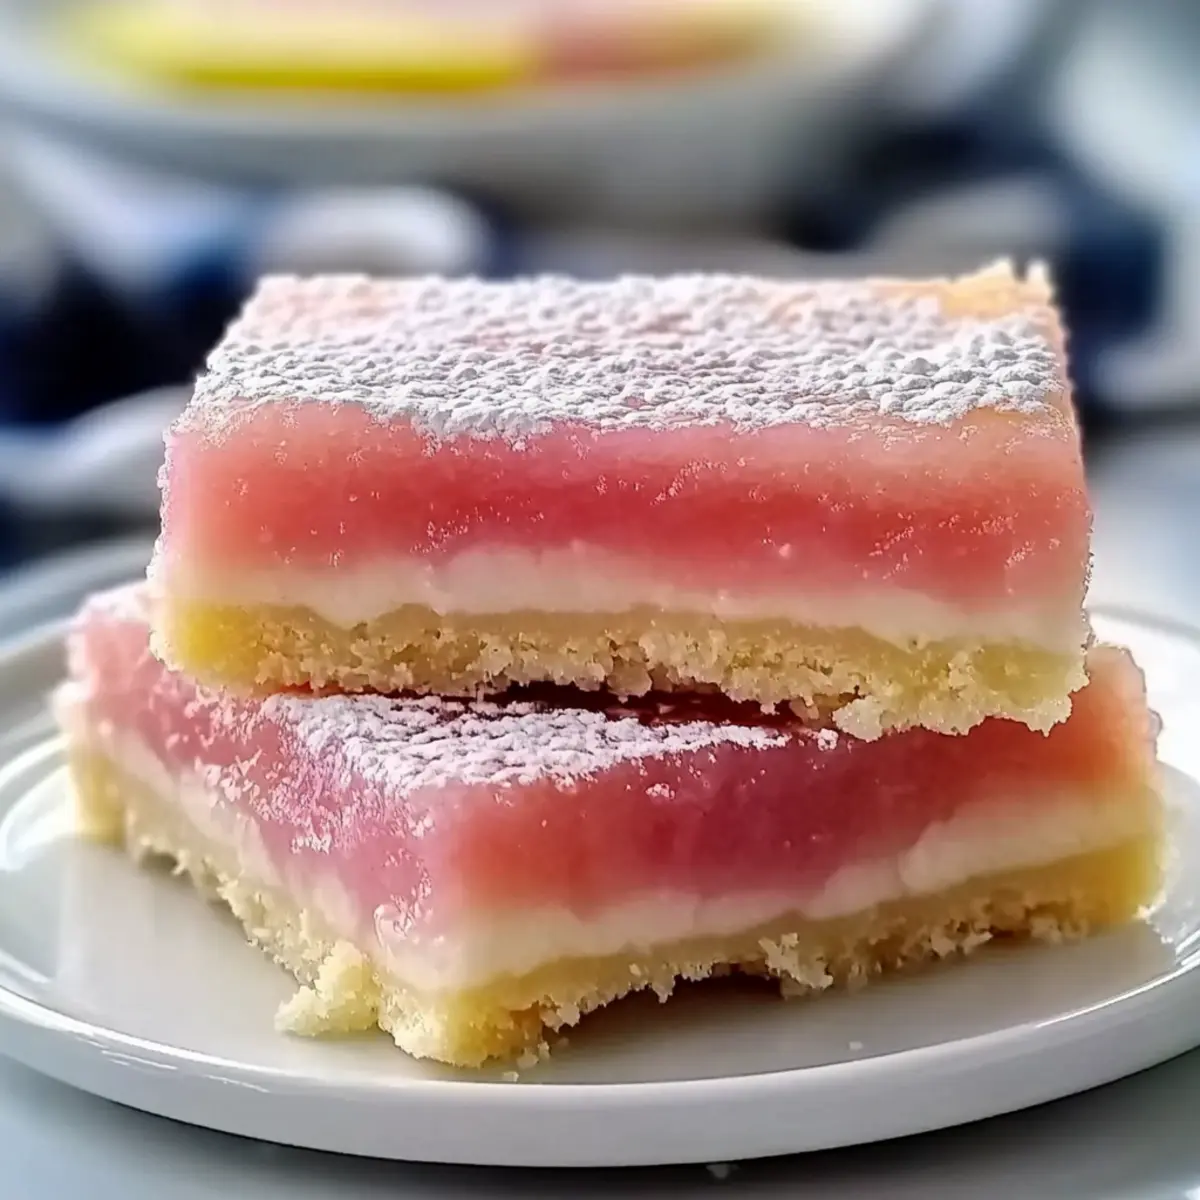
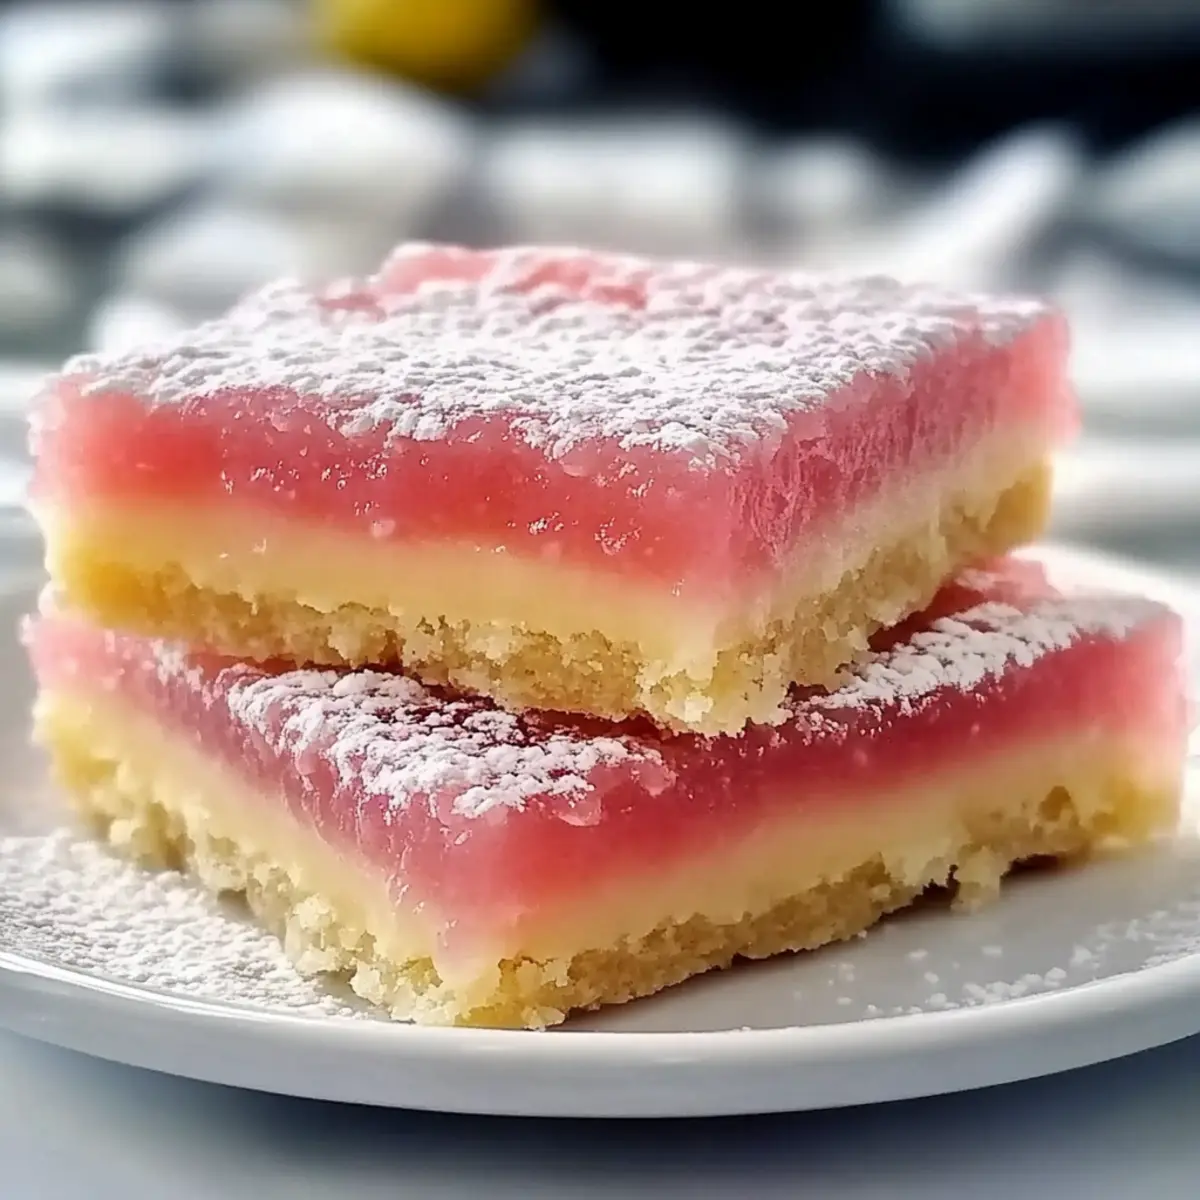
Strolling through a sunlit garden, you might stumble upon a vibrant hibiscus bloom, its floral notes dancing in the air. That same essence is captured in these Hibiscus Lemon Bars, a delightful fusion of tart lemon and the enchanting taste of hibiscus. With their quick preparation and vibrant pink hue, they are not only a feast for the eyes but also a refreshing dessert that brings a taste of spring to any gathering. Plus, I’ve made this recipe gluten-free and vegan-friendly, ensuring everyone can indulge in this sweet treat. Ready to impress your friends and family with a dessert that’s as stunning as it is easy to make? Let’s dive into the recipe!
Why Are Hibiscus Lemon Bars So Irresistible?
Refreshing flavors tantalize your taste buds as you experience the perfect blend of tart lemon and floral hibiscus. Quick preparation means you can whip these up in no time, making them ideal for last-minute events. Versatile in customization, you can easily adapt them to be gluten-free or vegan, ensuring everyone can dig in. Their stunning pink hue is a showstopper, guaranteed to impress at any gathering. Pair with fresh berries or a light mint tea, and these Hibiscus Lemon Bars will elevate your dessert game to a whole new level!
Hibiscus Lemon Bars Ingredients
For the Crust
- Butter – Provides richness and structure; use vegan butter for a dairy-free option.
- Granulated Sugar – Adds sweetness; can be replaced with coconut sugar for a lower glycemic index.
- Vanilla Bean Paste – Enhances flavor depth; substitute with ½ teaspoon of pure vanilla extract.
- All-Purpose Flour – Forms the base and thickens the filling; opt for gluten-free flour to keep the recipe gluten-free.
- Salt – Balances sweetness and enhances flavors.
For the Filling
- Dried Hibiscus Flowers – Adds floral flavor and vibrant color; powdered hibiscus or hibiscus tea can be used if unavailable.
- Fresh Lemon Juice – Provides tanginess; fresh juice yields the best flavor.
- Eggs – Contributes to custardy texture; replace with flaxseed meal (1 tablespoon mixed with 2.5 tablespoons water) for a vegan version.
Enjoy creating these Hibiscus Lemon Bars that are not only visually striking but also perfect for any gathering!
Step‑by‑Step Instructions for Hibiscus Lemon Bars
Step 1: Preheat Your Oven
Begin by preheating your oven to 350°F (175°C). While it heats up, gather all your ingredients and equipment, including a mixing bowl, a whisk, and a greased 9×9 inch baking pan. Having everything ready will streamline the process, ensuring your Hibiscus Lemon Bars come together seamlessly.
Step 2: Cream the Butter and Sugar
In your mixing bowl, cream together the softened butter, granulated sugar, and vanilla bean paste until the mixture is light and fluffy, about 3-4 minutes. You’ll know it’s ready when the texture is smooth and has increased in volume. This fluffy base will add richness to the crust of your Hibiscus Lemon Bars.
Step 3: Combine Dry Ingredients
Gradually add in the all-purpose flour and salt, folding them into the creamed mixture until just combined. Be careful not to overmix; you want the dough to come together without being tough. The dough should be slightly crumbly but still hold together, setting a solid foundation for your Hibiscus Lemon Bars.
Step 4: Form the Crust
Press the dough evenly into the bottom of the greased 9×9 inch pan to create a uniform layer. Make sure it extends slightly up the sides for extra support. Once pressed in, refrigerate the crust for 15 minutes. Chilling allows it to firm up, helping the crust hold its shape during baking.
Step 5: Bake the Crust
Remove the crust from the refrigerator and pop it into your preheated oven. Bake for approximately 15 minutes, or until the edges turn a light golden brown. This step sets the crust nicely and enhances the flavor, creating a delightful base for the tangy filling of your Hibiscus Lemon Bars.
Step 6: Steep the Hibiscus Flowers
While the crust is baking, steep the dried hibiscus flowers in fresh lemon juice for about 15 minutes, allowing the flavors to infuse. After steeping, strain the mixture to remove the flowers, leaving you with a vibrant, fragrant hibiscus-infused lemon juice that will give a beautiful color and flavor to your filling.
Step 7: Prepare the Filling
In a separate bowl, whisk together the eggs and granulated sugar until the mixture is frothy and pale. Next, mix in the hibiscus-infused lemon juice you’ve prepared, ensuring it’s well combined. This filling will give your Hibiscus Lemon Bars a refreshing and custardy texture that contrasts perfectly with the crust.
Step 8: Bake the Filling
Pour the vibrant filling over the pre-baked crust, spreading it evenly. Return the pan to the oven and bake for 20-25 minutes, or until the center is set and the filling is slightly puffed. It should no longer jiggle when you gently shake the pan; this will ensure perfectly finished Hibiscus Lemon Bars.
Step 9: Cool and Slice
Once baked, remove your Hibiscus Lemon Bars from the oven and let them cool completely in the pan at room temperature. Once cooled, dust the top with confectioner’s sugar for a lovely presentation and slice into squares. These vibrant treats are now ready to serve and impress your friends and family!
What to Serve with Hibiscus Lemon Bars
Imagine the vibrant colors and delicious flavors of a dessert tray that complements the refreshing zing of these delightful bars.
-
Fresh Berries: Juicy strawberries, raspberries, or blueberries add a tart sweetness that balances the floral notes of the hibiscus. They make for a beautiful presentation alongside the bars.
-
Whipped Coconut Cream: A dollop of this creamy topping provides a luscious, dairy-free complement that enhances the dessert’s softness and flavor. Vegan-friendly, it’s both light and indulgent.
-
Mint Tea: The crisp, refreshing nature of mint tea complements the citrusy notes of the lemon bars, bringing a soothing balance to their tanginess. Perfect for warm afternoons!
-
Sparkling Lemonade: The effervescence and citrus brightness of a sparkling lemonade elevate the experience, making every bite feel like a celebration. A great option for gatherings!
-
Almond Biscotti: Crunchy and nutty, these provide a delightful texture contrast to the creamy filling of the bars. Dipping them into tea or coffee makes for a lovely pairing.
-
Citrus Salad: A fresh salad of segmented oranges, grapefruit, and lime drizzled with honey brightens the palate and beautifully complements the hibiscus lemon flavor. It keeps things refreshing and light.
How to Store and Freeze Hibiscus Lemon Bars
Room Temperature: Store Hibiscus Lemon Bars in an airtight container for up to 2 days. They are best enjoyed fresh but can be kept at room temperature for a short time.
Fridge: For optimal freshness, refrigerate Hibiscus Lemon Bars in an airtight container for 4-5 days. This will help preserve their creamy texture and vibrant flavor.
Freezer: To enjoy Hibiscus Lemon Bars later, freeze them for up to 2 months. Wrap each square individually in plastic wrap, then place in a freezer-safe container.
Reheating: When ready to serve, thaw in the refrigerator overnight. For a slight refresh, you can briefly warm them in the microwave for about 10-15 seconds.
Helpful Tricks for Hibiscus Lemon Bars
- Select Fresh Flowers: Ensure that the dried hibiscus flowers you choose are deep red and aromatic. Avoid brittle specimens, as they may not provide full flavor.
- Don’t Overbake: If the filling jiggles after baking, return it to the oven for an additional 5-10 minutes. Overbaking can lead to a tougher texture.
- Cool Completely: Allow Hibiscus Lemon Bars to cool completely before slicing. This step is crucial for achieving the perfect, custardy texture without any crumbling.
Make Ahead Options
These Hibiscus Lemon Bars are perfect for busy home cooks looking to streamline their dessert prep! You can prepare the crust up to 24 hours in advance; simply press the dough into the pan, cover it tightly with plastic wrap, and refrigerate. The filling can also be made ahead and stored in an airtight container in the refrigerator for up to 3 days. When you’re ready to finish assembling, pour the filling over the crust and bake as directed. By prepping ahead, you’ll save time on the day of serving and still enjoy these delectable Hibiscus Lemon Bars fresh and vibrant, just as delicious as if made on the spot!
Hibiscus Lemon Bars: Flavorful Variations
Feel free to explore and customize your Hibiscus Lemon Bars with these delightful variations that cater to different tastes and dietary needs!
-
Gluten-Free: Use a gluten-free flour blend to make these bars suitable for gluten-intolerant friends. You’ll be surprised how well they hold up!
-
Vegan: Substitute the eggs with a mixture of 1 tablespoon flaxseed meal and 2.5 tablespoons water. This not only keeps the bars vegan but also enriches their texture beautifully.
-
Coconut Sugar: For a lower glycemic option, replace granulated sugar with coconut sugar. It adds a hint of caramel flavor that complements the hibiscus.
-
Floral Twist: Experiment with different floral teas, like chamomile or lavender, for a unique flavor profile that adds a personal touch to the recipe.
-
Bite-Sized Bars: Instead of a pan, pour the filling into mini muffin tins for perfect bite-sized treats that are easy to share and even easier to enjoy!
-
Graham Cracker Crust: Create a graham cracker crust by blending graham crackers with melted butter. This adds texture and sweetness that pairs beautifully with the tangy filling.
-
Extra Zest: Enhance the lemon flavor with additional lemon zest, which will give your bars a fresh, bright burst and elevate the overall taste experience.
-
Heat it Up: For a spicy kick, mix in a pinch of cayenne or chili powder into the filling for an unexpected yet delightful surprise!
Feel inspired to take your Hibiscus Lemon Bars further? If you’re looking for other flavor-packed desserts, you might enjoy checking out my Lemon Cream Cheese recipe or the savory Garlic Chicken Wraps. Each adds its unique twist to homemade goodness!
Hibiscus Lemon Bars Recipe FAQs
How do I select the best dried hibiscus flowers?
Absolutely! When choosing dried hibiscus flowers, look for those that are deep red, aromatic, and plump. Avoid any that appear brittle or discolored, as they won’t give you the vivid flavor and color needed for these Hibiscus Lemon Bars. You want your flowers to retain their floral notes while ensuring they impart a lovely hue to your dessert.
What’s the best way to store Hibiscus Lemon Bars?
For optimal freshness, store your Hibiscus Lemon Bars in an airtight container. At room temperature, they can last for about 2 days. If you want to keep them longer, refrigerate them; they’ll stay fresh for up to 4-5 days. If you plan to enjoy them later, freezing is a great option!
Can I freeze Hibiscus Lemon Bars? How do I do it?
Absolutely! To freeze your Hibiscus Lemon Bars, first allow them to cool completely after baking. Then, wrap each square individually in plastic wrap to prevent freezer burn. Place them in a freezer-safe container or bag, labeling them with the date. These delicious bars can be frozen for up to 2 months. When you’re ready to enjoy them, simply thaw overnight in the refrigerator.
What if my filling jiggles after baking?
Very! If your filling jiggles when you take it out of the oven, don’t panic! Simply pop the Hibiscus Lemon Bars back in the oven for an additional 5-10 minutes until the filling is set. Overbaking should be avoided, as it can create a tougher texture, so just keep a close eye on them.
Are Hibiscus Lemon Bars safe for those with allergies?
While these Hibiscus Lemon Bars are customizable, take care to read all ingredient labels, especially for allergens. The recipe can easily be made vegan by replacing eggs with a flaxseed mixture or chickpea flour. Always ensure your substitutes align with specific dietary restrictions, and consult with a healthcare professional if uncertain. Enjoy the vibrant flavors worry-free!
Hibiscus Lemon Bars: Refreshing Treat for Any Occasion
Ingredients
Equipment
Method
- Preheat your oven to 350°F (175°C). Gather all your ingredients and equipment.
- Cream together the softened butter, granulated sugar, and vanilla bean paste until light and fluffy, about 3-4 minutes.
- Gradually add in the all-purpose flour and salt, folding them into the creamed mixture until just combined.
- Press the dough evenly into the bottom of the greased 9x9 inch pan. Refrigerate the crust for 15 minutes.
- Bake for approximately 15 minutes, or until the edges turn a light golden brown.
- While the crust is baking, steep the dried hibiscus flowers in fresh lemon juice for about 15 minutes.
- Whisk together the eggs and granulated sugar until frothy, then mix in the hibiscus-infused lemon juice.
- Pour the filling over the pre-baked crust and bake for 20-25 minutes, or until the center is set.
- Let cool completely in the pan at room temperature, then dust with confectioner’s sugar and slice into squares.
Leave a Reply