
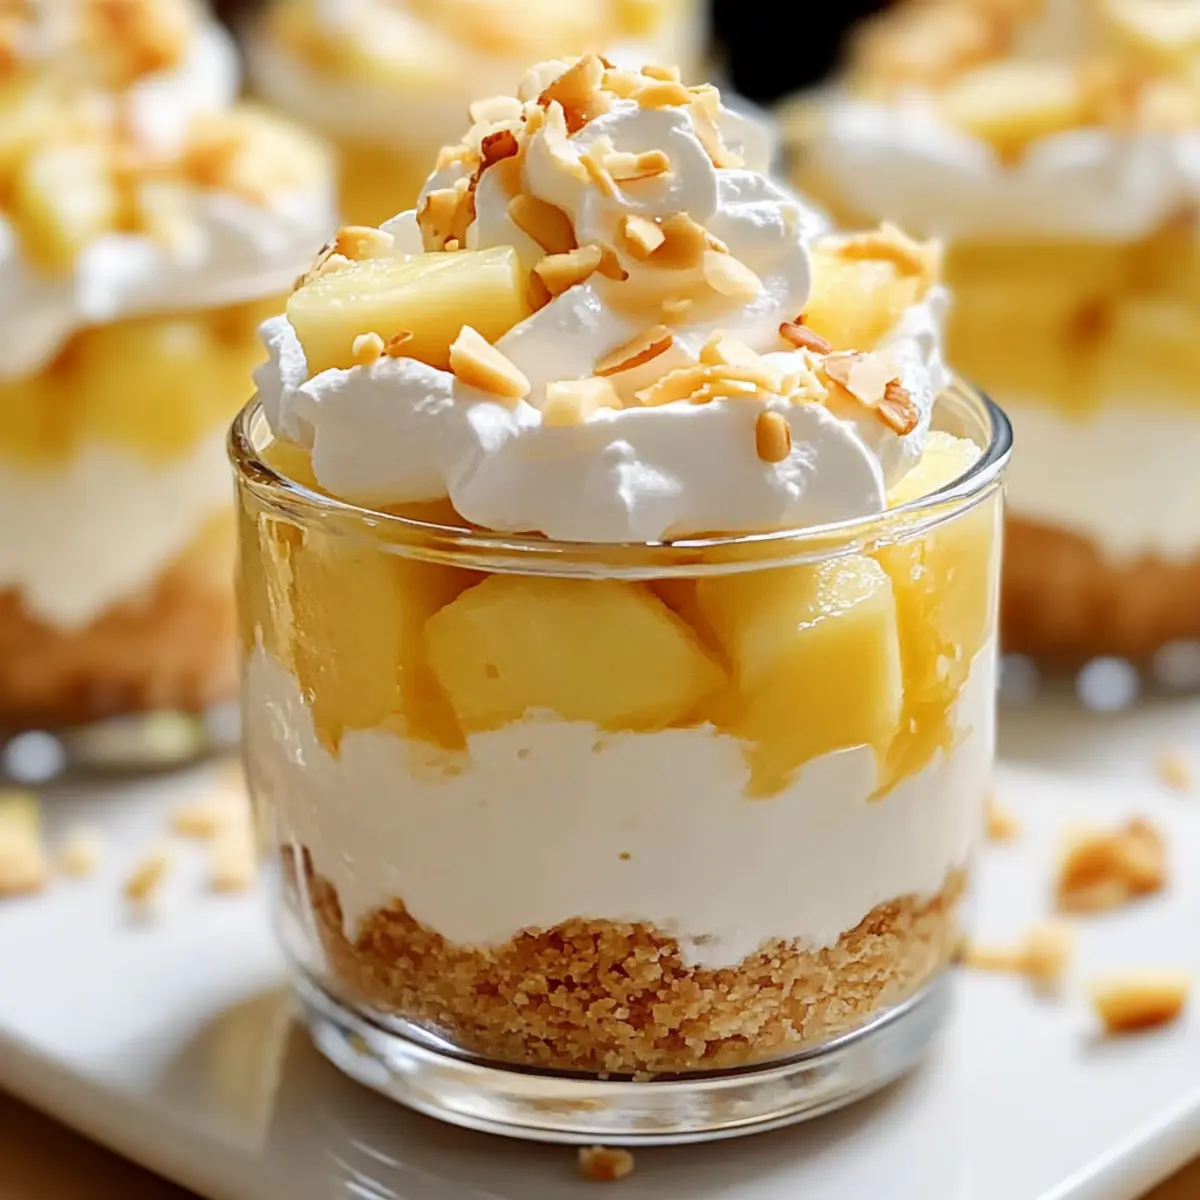
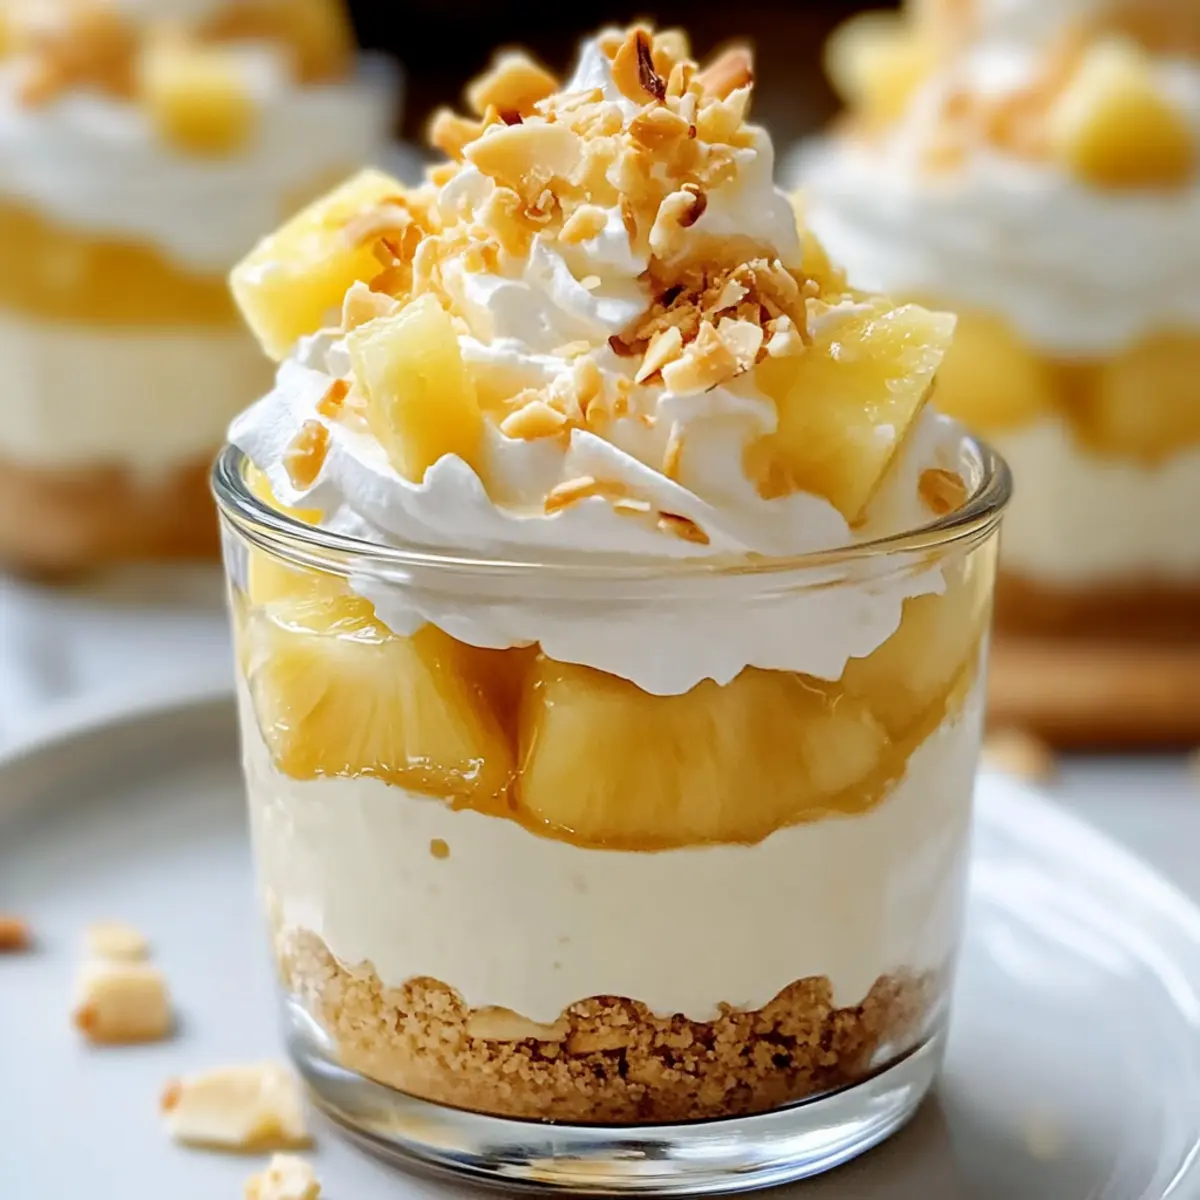
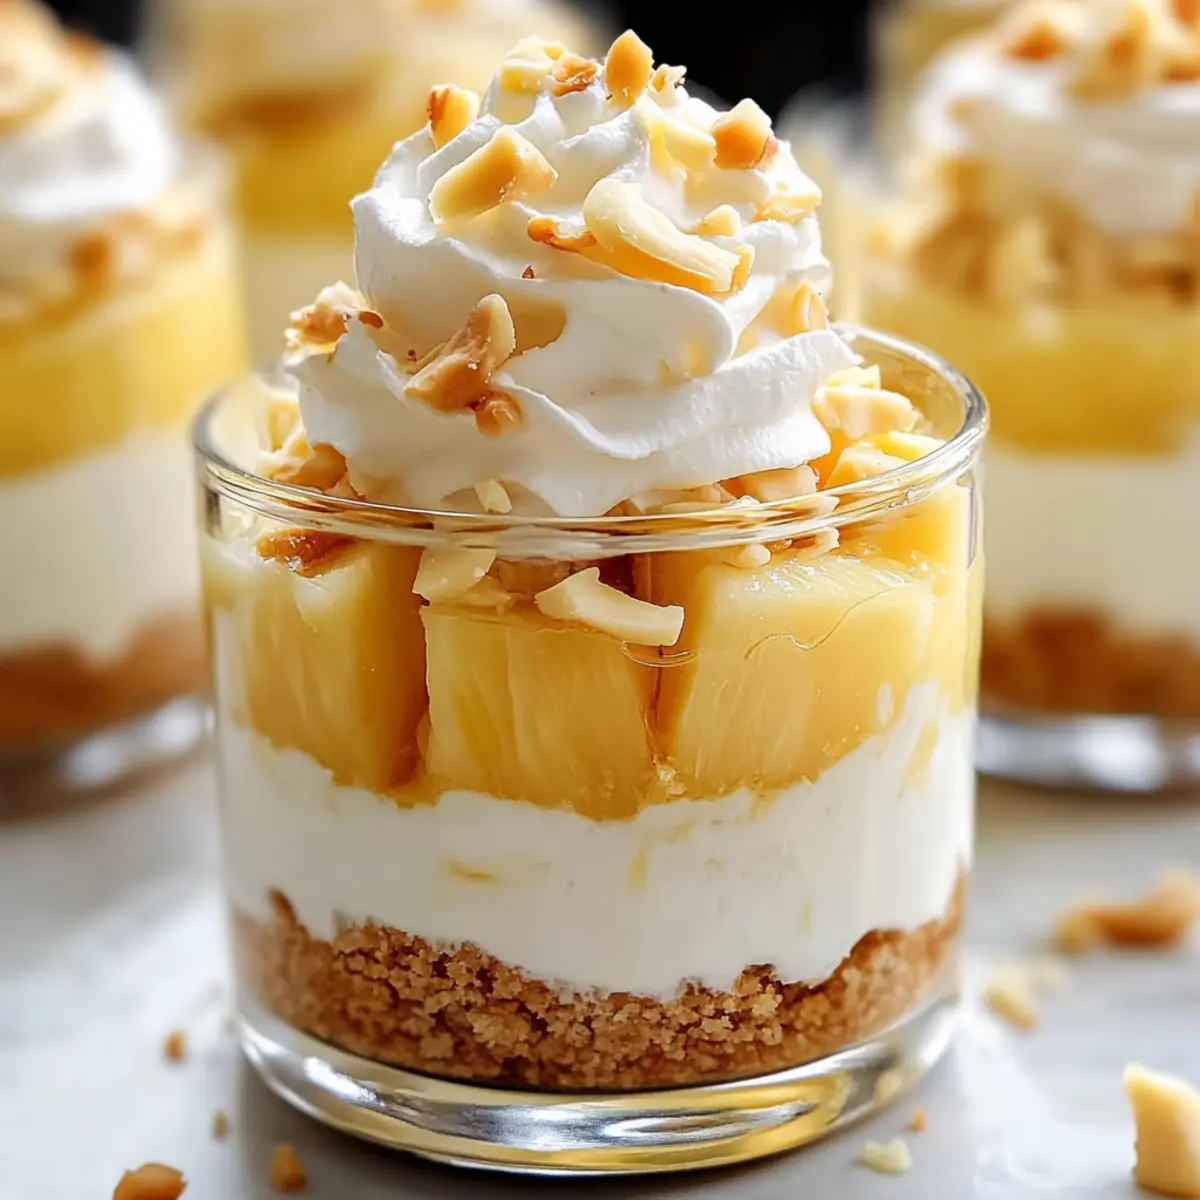
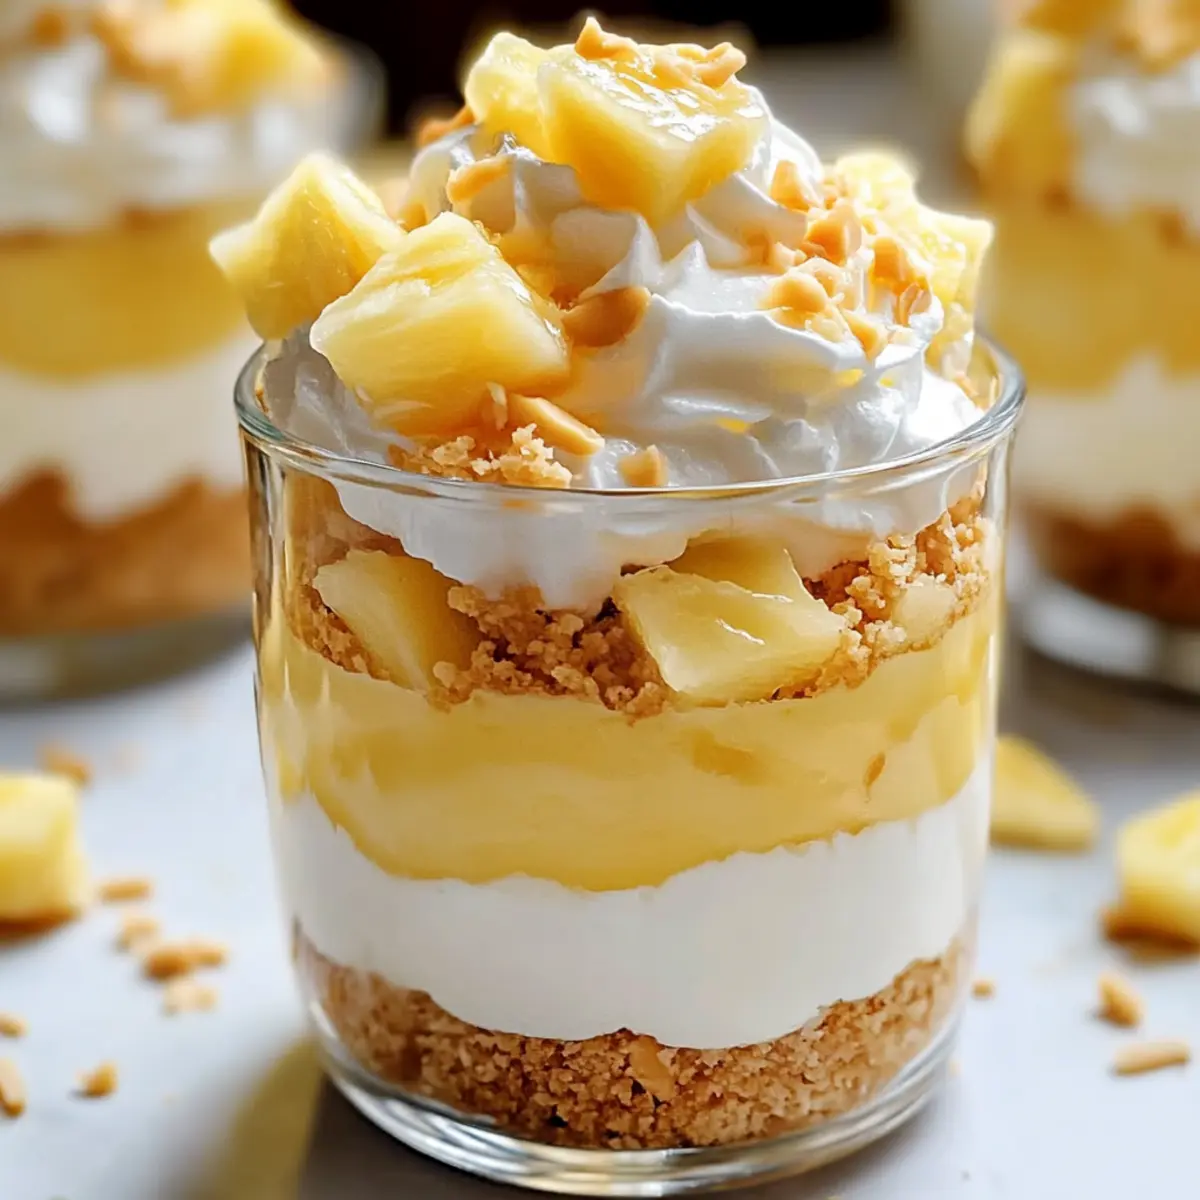
As I stood in my kitchen last summer, the scent of coconut and pineapple wafting through the air, I was whisked away to a sunny Hawaiian beach with each blissful layer of my Hawaiian Dream Dessert Cups. This no-bake tropical treat is a breeze to whip up, perfect for warm gatherings where you want to impress without the heat of the oven. Each cup features a crunchy macadamia nut crust and a luscious coconut pudding, topped off with a dollop of whipped cream and vibrant pineapple—creating a delightful blend of flavors that sings summer. Not only are these cups show-stoppers, but they also cater to those seeking gluten-free options, ensuring everyone can savor the paradise. Ready to bring a taste of the tropics to your table? Let’s dive into these luscious layers together!
Why Are Hawaiian Dream Dessert Cups Irresistible?
No-Bake Ease: These Hawaiian Dream Dessert Cups allow you to whip up a stunning dessert without any baking, making them perfect for last-minute gatherings.
Tropical Delight: With layers of creamy coconut and fresh pineapple, every spoonful transports you straight to a warm beach paradise.
Perfect for Everyone: Gluten-free options ensure that no guest is left out, accommodating different dietary needs without sacrificing flavor.
Quick Prep Time: In just a few simple steps, you can create a dessert that looks as good as it tastes—ideal for busy home cooks!
Endless Variations: Feel free to customize with different fruits or nuts; check out variations like those in our Cookies Cream Peanut recipe for inspiration.
Crowd-Pleaser: Whether for summer barbecues or family dinners, this dessert is sure to impress guests of all ages with its vibrant presentation and delightful taste!
Hawaiian Dream Dessert Cups Ingredients
For the Crust
- Unsalted, roasted macadamia nuts – A rich, buttery flavor base; try pecans or almonds for a twist.
- Granulated sugar (¼ cup) – Adds sweetness; coconut sugar works for a less refined option.
- Table salt (1 tsp) – Enhances sweetness and balances flavors.
- Butter (⅓ cup, melted) – Binds the crust together, providing moisture and richness.
For the Pudding Layer
- Instant coconut cream pudding mix (1 box, 3.4 oz) – The star of the creamy layer; use vanilla pudding mix for a change.
- Whole milk (1¾ cups) – Provides moisture; almond milk can be used for a dairy-free alternative.
- Cream cheese (12 oz, softened) – Adds creaminess and stability to the pudding.
- Sweetened, flaked coconut (¾ cup + 12 tsps) – Infuses tropical flavor and texture; opt for unsweetened for less sweetness.
- Pineapple juice (2 tbsps) – Brightens the flavor; fresh juice enhances the taste.
For the Toppings
- Heavy cream (2 tbsps) – Imparts richness in the whipped topping.
- Chopped macadamia nuts (½ cup) – Adds crunch and flavor; substitute with your favorite nuts if preferred.
- Pineapple rings (12, packed in juice) – A fresh garnish that adds natural sweetness; avoid syrup-packed varieties.
- Cool Whip (12 oz container) – Offers a light whipped topping; feel free to use homemade whipped cream for a healthier choice.
- Reddi Wip whipped cream (6.5 oz can) – An extra fluffiness boost on top!
- Chopped macadamia nuts (¼ cup) and toasted sweetened shredded coconut (¼ cup) – Final garnish for visual appeal and crunch.
These Hawaiian Dream Dessert Cups are a tropical escape on a plate, with each layer harmonizing flavors for a delightful treat that’s perfect for any occasion!
Step‑by‑Step Instructions for Hawaiian Dream Dessert Cups
Step 1: Prepare the Crust
In a food processor, blend 1 cup of roasted macadamia nuts, ¼ cup of granulated sugar, 1 teaspoon of salt, and ⅓ cup of melted butter until the mixture resembles wet sand. Press this crumbly mixture firmly into the bottom of individual dessert cups or a single serving dish to form an even layer. This crust should be compact and stable, ready to hold the creamy layers above.
Step 2: Make the Pudding Layer
In a mixing bowl, combine one box (3.4 oz) of instant coconut cream pudding mix with 1¾ cups of whole milk. Whisk vigorously for about 2 minutes until the mixture thickens. Next, add 12 ounces of softened cream cheese, whisking until completely smooth and incorporated. This creamy mixture forms the heavenly pudding layer for your Hawaiian Dream Dessert Cups.
Step 3: Add Coconut
Gently fold in ¾ cup of sweetened, flaked coconut and 2 tablespoons of pineapple juice into the pudding mixture. Stir until the coconut is evenly distributed throughout the creamy layer, enhancing the tropical flavor of your dessert cups. This delightful blend will bring an irresistible texture and a burst of flavor that perfectly complements the rich pudding.
Step 4: Layer the Cups
Start building the Hawaiian Dream Dessert Cups by spooning a generous layer of the coconut pudding over the macadamia nut crust in each cup. Place a pineapple ring atop the pudding layer, allowing its sweetness to soak in. Top with a dollop of whipped topping to create a beautiful contrast in textures and flavors, making these cups a treat for the eyes as well as the palate.
Step 5: Finish Garnishing
For an extra touch, sprinkle ½ cup of chopped macadamia nuts and ¼ cup of toasted sweetened shredded coconut over the whipped topping. This final layer adds enticing crunch and visual appeal to your Hawaiian Dream Dessert Cups. Ensure the garnishes are evenly distributed to make each bite a delightful experience bursting with tropical flavors.
Step 6: Chill
Cover the dessert cups carefully with plastic wrap and refrigerate for at least 2 hours. This chilling time is essential for allowing the layers to set properly and meld together beautifully. The final result should be a firm and refreshing treat, ready to be enjoyed by family and friends at your next gathering.
Expert Tips for Hawaiian Dream Dessert Cups
-
Room Temperature Cream Cheese: Ensure cream cheese is at room temperature to easily blend it into the pudding, resulting in a smoother texture.
-
Chill Thoroughly: Don’t skip the chilling time! This step not only helps the layers set, but also prevents them from mixing when served.
-
Ingredient Check: For gluten-free Hawaiian Dream Dessert Cups, make sure all ingredients, especially the pudding mix, are certified gluten-free.
-
Nut Substitutions: If you don’t have macadamia nuts on hand, pecans or almonds work beautifully too, while adding their unique flavors to the dessert.
-
Variations Welcome: Feel free to experiment with different fruits like mango or berries, allowing your Hawaiian Dream Dessert Cups to reflect your personal taste!
Storage Tips for Hawaiian Dream Dessert Cups
-
Fridge: Store Hawaiian Dream Dessert Cups in the refrigerator, covered, for up to 3 days to keep them fresh and flavorful.
-
Make-Ahead: Feel free to prepare these cups a day in advance! Just assemble, chill, and serve for an effortlessly impressive dessert.
-
Freezer: If you have leftovers, you can freeze the cups for up to a month, though the texture may slightly change. Thaw in the fridge before serving.
-
Reheating: These are best served chilled, so no reheating is necessary. Just take them out of the fridge and enjoy!
What to Serve with Hawaiian Dream Dessert Cups
Enhance your tropical delight with perfect pairings that will create a vibrant, memorable meal experience.
-
Grilled Pineapple Skewers: Juicy and caramelized, these skewers offer an irresistible burst of sweetness that complements the coconut flavors.
-
Mango Sorbet: This light and fruity treat refreshes the palate, making a delightful contrast to the creamy dessert cups.
-
Coconut Rice: The subtle coconut flavor and fluffy texture make this side a perfect, comforting complement to your Hawaiian Dream Dessert Cups.
-
Tropical Fruit Salad: A medley of fresh fruits like kiwi, banana, and dragon fruit enhances the tropical theme with bright, juicy notes.
-
Sparkling Water with Lime: The effervescence and zesty lime uplift the entire meal, providing a refreshing counterpoint to the richness of the dessert.
-
Mai Tai Cocktail: This classic fruity cocktail adds a festive touch to your gathering, echoing the sweet and tangy flavors of the Hawaiian dessert.
Combining these delightful complements with your Hawaiian Dream Dessert Cups will elevate any gathering, inviting your guests to indulge in a tropical escape for their taste buds!
Hawaiian Dream Dessert Cups Customization
Embrace your culinary creativity and transform these delightful dessert cups with simple swaps and twists that cater to your taste buds!
- Dairy-Free: Swap whole milk for almond milk and cream cheese for a dairy-free cream cheese to suit lactose-intolerant guests.
- Gluten-Free: Ensure the pudding mix and any other packaged ingredients are certified gluten-free for a worry-free indulgence.
- Nut-Free: Replace macadamia nuts with sunflower seeds or crushed graham crackers for those with nut allergies; the flavor will still sing!
- Fruit Fusion: Mix things up with different tropical fruits like mango or passion fruit to create exciting variations of flavor; your taste buds will thank you!
- Chocolate Bliss: Drizzle some chocolate syrup over the whipped cream for an indulgent twist that pairs beautifully with the sweetness of the fruit.
- Spicy Kick: Add a sprinkle of cayenne pepper to the pudding layer for a surprising heat that balances the sweetness; a true adventure in flavor!
- Toasty Coconut: For added texture, toast the shredded coconut before mixing it in, giving your dessert a delightful golden crunch.
- Layered Parfait: Instead of individual cups, layer the ingredients in a large trifle dish for a stunning centerpiece; it’s a sure-fire way to impress at gatherings.
Each of these variations invites you to make the Hawaiian Dream Dessert Cups your own. If you need more inspiration, check out the fun twists in our Cookies Cream Peanut recipe. Happy customizing!
Make Ahead Options
These Hawaiian Dream Dessert Cups are perfect for busy home cooks looking to save time while still delivering a delightful dessert! You can prepare the macadamia nut crust and pudding layer up to 24 hours in advance; simply refrigerate each layer separately to maintain their textures. The crust can be pressed into the cups, while the pudding should be kept covered to prevent it from absorbing any odors. When it’s time to serve, layer the pudding over the crust, add the pineapple rings, and top with Cool Whip and garnishes. This method ensures your Hawaiian Dream Dessert Cups remain just as delicious, elegant, and refreshing for your guests!
Hawaiian Dream Dessert Cups Recipe FAQs
How do I select ripe pineapple for my Hawaiian Dream Dessert Cups?
Absolutely! Look for pineapples that are firm but slightly soft when pressed, with a sweet aroma at the base. The color should be golden-yellow—not too green or overly brown. If you choose canned pineapple, opt for those packed in juice, avoiding syrup-packed varieties, which can make your dessert overly sweet.
How do I store leftovers of Hawaiian Dream Dessert Cups?
You can store any leftover Hawaiian Dream Dessert Cups in the refrigerator for up to 3 days. Be sure to keep them covered with plastic wrap or in an airtight container to maintain freshness. This helps preserve the texture of the creamy layers and prevents them from drying out.
Can I freeze Hawaiian Dream Dessert Cups?
Yes, you can freeze these dessert cups for up to a month! To do this, assemble them completely, then cover each cup tightly with plastic wrap and aluminum foil to prevent freezer burn. When you’re ready to enjoy them, thaw in the refrigerator overnight for the best texture.
What should I do if my pudding layer isn’t thickening?
If your pudding layer isn’t thickening as desired, try whisking it for a bit longer—about 2 to 4 additional minutes may do the trick. Make sure you’re using cold milk as recommended; too warm can prevent thickening. If it remains runny, consider adding a bit more instant pudding mix to help it set.
Are there any allergy considerations for Hawaiian Dream Dessert Cups?
Yes, these Hawaiian Dream Dessert Cups contain common allergens like dairy (in the cream cheese and milk) and nuts (macadamia nuts). For a dairy-free option, use almond milk and a dairy-free cream cheese alternative. Always check the labels of your pudding mix for gluten-free certifications if needed, especially if you have gluten sensitivities.
Can I make substitutions in the ingredients of Hawaiian Dream Dessert Cups?
The more the merrier! Feel free to experiment with different fruits like mango or berries for a delightful twist. Instead of macadamia nuts, pecans or walnuts can swap in beautifully and add their unique flavors. If you prefer less sweetness, you can also switch sweetened coconut for unsweetened. Enjoy customizing this recipe!
Hawaiian Dream Dessert Cups: Your No-Bake Tropical Escape
Ingredients
Equipment
Method
- In a food processor, blend macadamia nuts, sugar, salt, and melted butter until resembling wet sand. Press firmly into dessert cups or a serving dish.
- In a mixing bowl, combine pudding mix with milk and whisk for 2 minutes until thick. Add softened cream cheese and whisk until smooth.
- Gently fold in sweetened coconut and pineapple juice into the pudding mixture until evenly distributed.
- Spoon a layer of the coconut pudding over the crust, top with a pineapple ring, and add a dollop of whipped topping.
- Sprinkle chopped macadamia nuts and toasted shredded coconut over the whipped topping.
- Cover with plastic wrap and refrigerate for at least 2 hours before serving.
Leave a Reply