
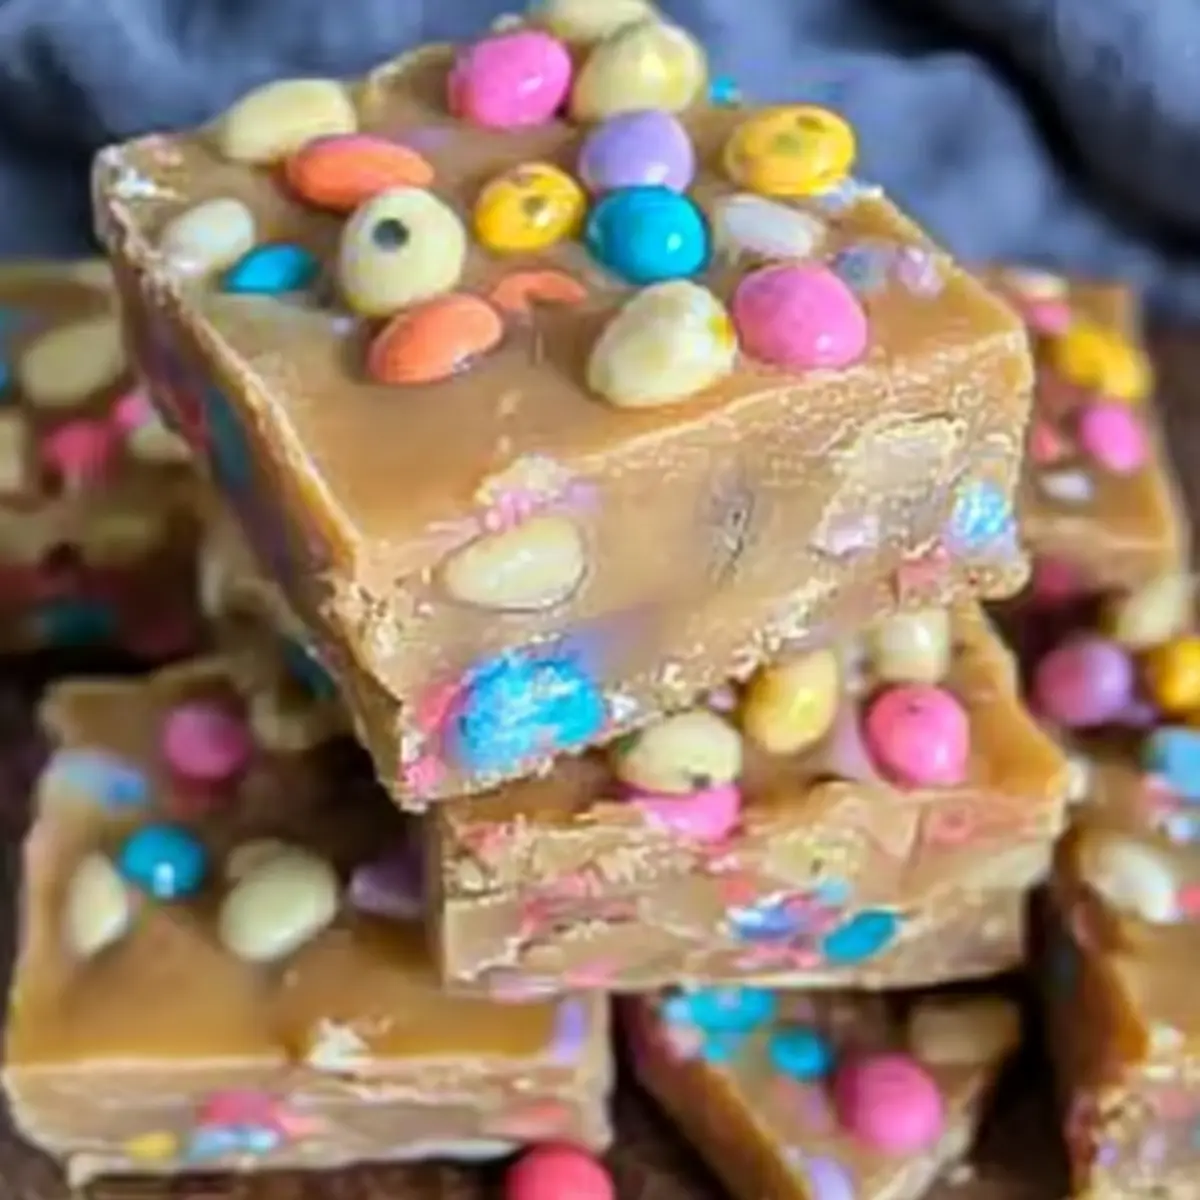
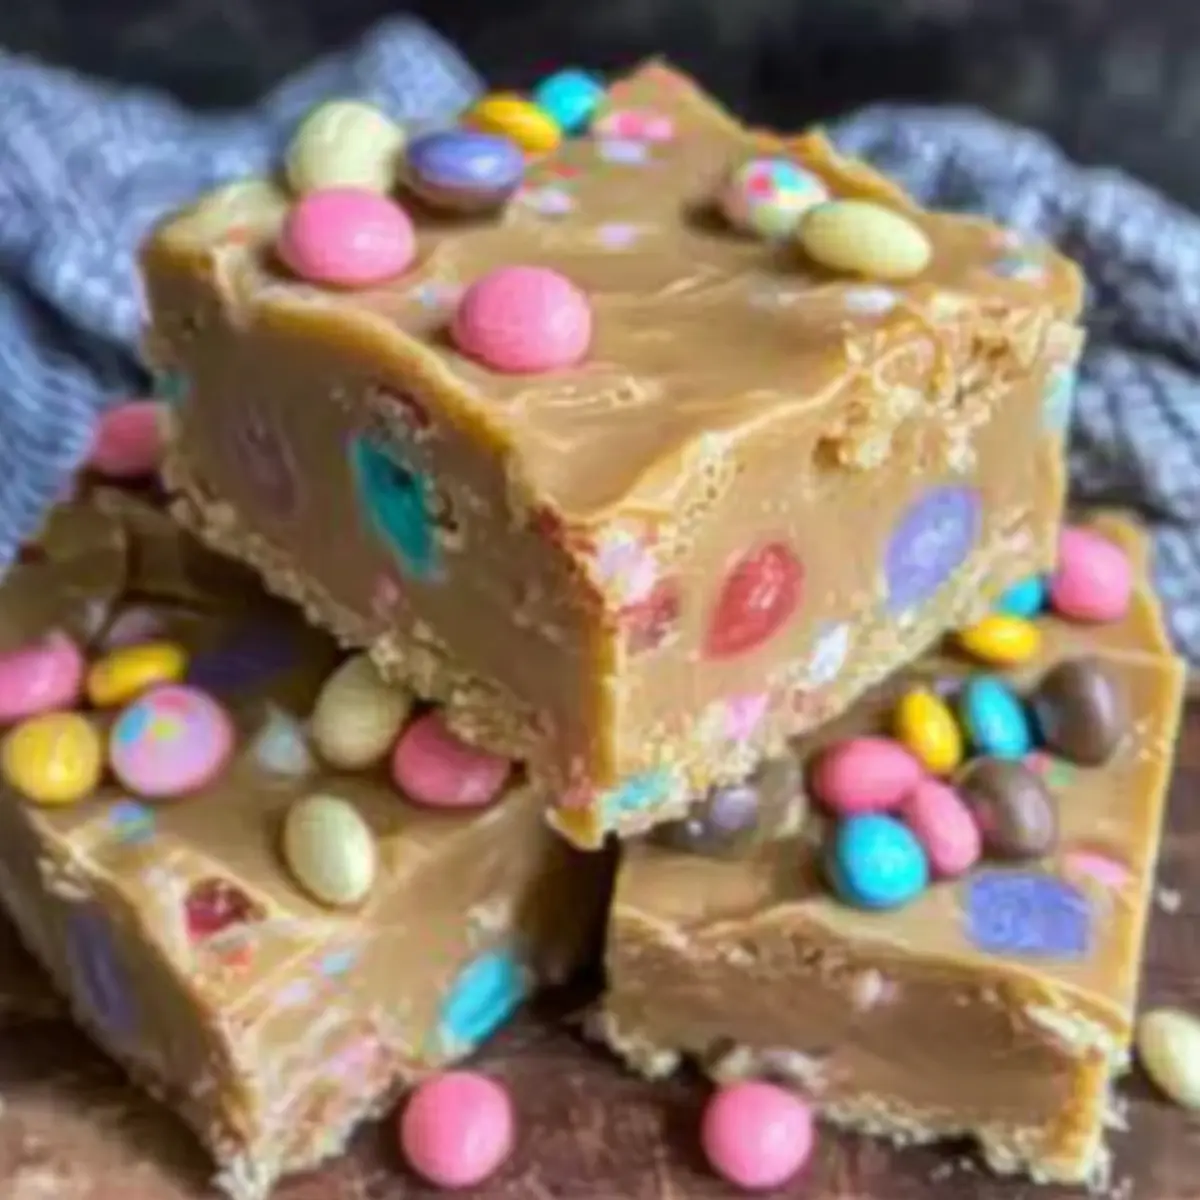
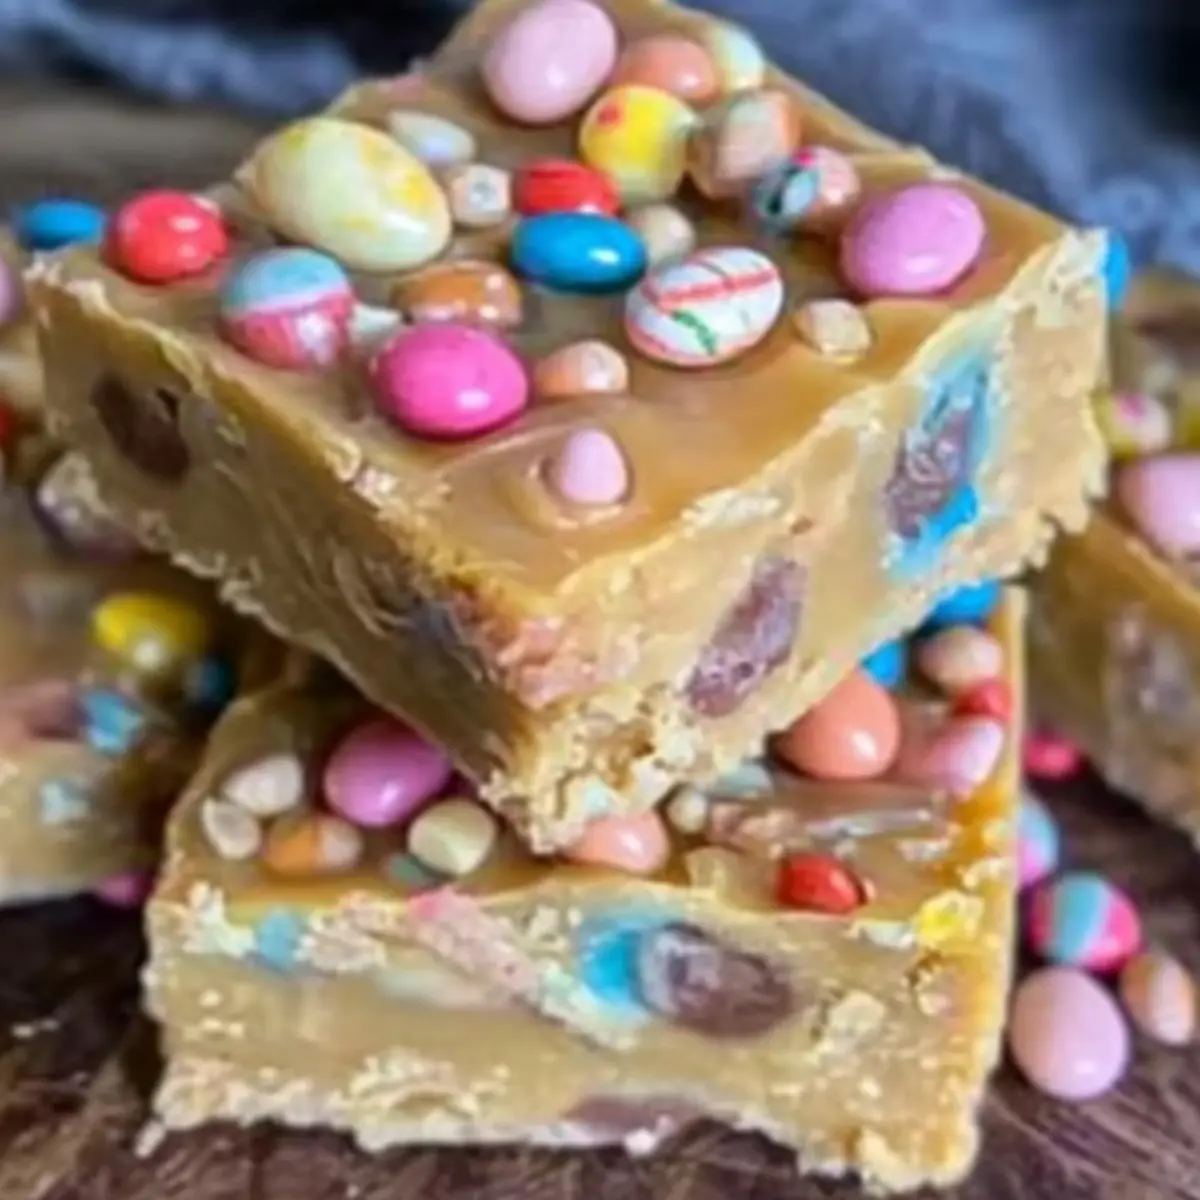
As the aroma of melting chocolate swirled through my kitchen, I couldn’t help but smile at the magic taking place. This Homemade Easter Fudge is more than just a dessert; it’s a delightful celebration of spring, rich in creamy white chocolate and playful bursts of colorful Easter candies. What I love most about this recipe is its ease—it’s so beginner-friendly that anyone can whip it up in no time. Plus, with its customizable nature, you can tailor it to your taste or even create a fun project with family. Whether you’re sharing this vibrant treat at a festive gathering or carefully packaging it as a sweet gift, it promises to evoke warm memories of cherished traditions. Are you ready to dive into the world of homemade fudge and make your Easter extra special?
What makes this fudge a holiday favorite?
Ease of Preparation: This Easter Fudge is incredibly simple to make, requiring only a handful of ingredients and minimal cooking skills. Perfect for busy home cooks!
Customizable Fun: Feel free to personalize your fudge by using different types of chocolate or adding your choice of mix-ins like nuts or dried fruit for a unique twist.
Nostalgic Flavor: The rich, creamy texture paired with colorful Easter candies invokes memories of joyful celebrations and family gatherings, making it an instant classic.
Gift-Worthy Delight: Cut into bite-sized pieces and package them in decorative tins for a thoughtful, homemade gift that friends and family will absolutely adore!
Crowd-Pleasing Treat: This fudge is sure to be the star of your holiday spread, capturing the hearts of both kids and adults alike. Get ready to impress!
Easter Fudge Ingredients
For the Base
• White Chocolate – Provides a creamy base for the fudge; high-quality bars over chips are preferred to avoid stabilizers affecting the texture.
• Sugar – Essential for sweetness and structure; granulated cane sugar works best for this recipe.
• Butter – Adds richness and creaminess; use unsalted butter to control the salt levels.
For the Sweet Additions
• Easter Candies (Mini Eggs, Creme Eggs) – Create a festive crunch and colorful appearance; feel free to swap with your favorite candies based on availability or preference.
• Vanilla Extract – Enhances the flavor profile; almond extract can be substituted for a different twist in your Easter fudge.
This delightful Easter Fudge is sure to become a beloved holiday staple!
Step‑by‑Step Instructions for Easter Fudge
Step 1: Prepare the Base
In a medium saucepan, combine 1 cup of granulated sugar, 4 tablespoons of unsalted butter, and a splash of cream over medium heat. Stir gently until the sugar dissolves completely, creating a smooth mixture—this should take about 5 minutes. Watch for small bubbles forming around the edges as the mixture heats up, signaling that you’re on the right track to making your delicious Easter Fudge.
Step 2: Heat to Perfection
Bring the mixture to a gentle boil while keeping an eye on the temperature, aiming for 116°C (soft-ball stage). Allow it to boil without stirring for approximately 5-7 minutes; the bubbling should be steady but not aggressive. When you see that the mixture has thickened slightly and has achieved a light golden hue, it’s ready to be removed from the heat.
Step 3: Add the White Chocolate
Take the saucepan off the heat and immediately stir in 2 cups of chopped high-quality white chocolate. Use a silicone spatula to mix vigorously until the chocolate is completely melted and the mixture is velvety smooth. This step is crucial for the rich texture of your Easter Fudge, so be patient and make sure there are no white chocolate lumps left.
Step 4: Incorporate the Easter Treats
Gently fold in 1 cup of the chopped Easter candies of your choice, such as Mini Eggs or Creme Eggs, using a spatula. Mix until the crunchy candies are evenly distributed throughout the creamy fudge mixture. This adds delightful color and texture to your Easter Fudge, ensuring each bite is a festive surprise.
Step 5: Set and Serve
Pour the fudge mixture into a lined 8×8 inch baking dish, spreading it evenly with a spatula. Allow the fudge to cool at room temperature for at least 4 hours, or overnight for the best results, until it’s firm and set. Once ready, cut into bite-sized pieces to serve or package beautifully as gifts, sharing the joy of your homemade Easter Fudge.
Easter Fudge Variations & Substitutions
Customize your Easter Fudge to match every craving or dietary need, making it a true celebration of flavors!
-
Milk Chocolate: Swap white chocolate for milk chocolate for a richer, sweeter experience. The creamy texture stays delightful, while the flavor deepens indulgently.
-
Dark Chocolate: For a more intense taste, use dark chocolate. It adds a sophisticated flavor and a nice contrast to the sweetness of the candies.
-
Nutty Crunch: Add chopped nuts like almonds or pecans for extra texture. They bring a delightful crunch that complements the creamy and smooth fudge.
-
Dried Fruit: Swap out some Easter candies for dried fruits like raisins or apricots. This substitution not only adds sweetness but also a delightful chewiness, creating a unique twist.
-
Coconut Alternative: Use unsweetened shredded coconut in place of some of the candies for a tropical vibe. It pairs beautifully with the creamy fudge base and adds visual appeal.
-
Spice Infusion: Add a pinch of cinnamon or nutmeg to the fudge mixture. This subtle addition will warm the flavors up, making each bite comforting and aromatic.
-
Flavor Extracts: Experiment with different extracts, such as peppermint or orange, instead of vanilla. This can transform your fudge into an exciting holiday treat with a fresh twist.
-
Vegan Option: For a dairy-free fudge, substitute with coconut cream and vegan chocolate. It’s equally luscious and caters to those seeking a plant-based treat.
Feel free to check out our article on easy homemade desserts for more delicious ideas or to explore creative mix-ins in our section on adding texture to desserts. Happy cooking!
Make Ahead Options
These delightful Easter Fudge treats are perfect for busy home cooks looking to save time! You can prepare the fudge mixture up to 24 hours in advance. Simply make the fudge as directed, allowing it to cool and set in the baking dish. For optimal freshness, cover it tightly with plastic wrap and refrigerate, which helps maintain its rich, creamy texture. When you’re ready to serve, just remove it from the fridge and cut it into bite-sized pieces—trust me, it’ll be just as delicious as when you first made it! This way, you’re not only prepping ahead but also ensuring that your Easter Fudge is ready to impress with minimal effort.
How to Store and Freeze Easter Fudge
Room Temperature: Store your Easter Fudge in an airtight container at room temperature for up to 2 weeks to maintain its creamy texture and flavor.
Fridge: For a firmer fudge, refrigerate in an airtight container for up to 3 weeks. Just remember, it may lose some of its signature softness.
Freezer: Freeze your fudge for up to 3 months in a freezer-safe container. Thaw it in the fridge overnight or at room temperature before serving.
Reheating: There’s no need to reheat fudge, but if you prefer it softened, let it sit at room temperature for about 30 minutes before enjoying this delightful Easter Fudge!
What to Serve with Homemade Easter Fudge
As the creamy sweetness of this delightful treat lingers on your palate, it’s time to think about the perfect sides to complement its festive joy.
-
Creamy Vanilla Ice Cream:
A scoop of velvety vanilla ice cream pairs beautifully, balancing the rich fudge with its refreshing chill. -
Fresh Berries:
Juicy strawberries or raspberries provide a tart contrast, enhancing the sweetness while adding a burst of vibrant color to your dessert spread. -
Coffee or Espresso:
The bold flavors of a cup of dark coffee or a shot of espresso complement the rich fudge, bringing out its chocolatey essence and offering a delightful after-meal experience. -
Fruit Tart:
A light and tangy fruit tart can act as a palate cleanser, making each bite of fudge feel even more indulgent after enjoying the fresh pastry. -
Chocolate Dipped Pretzels:
The savory crunch of pretzels dipped in chocolate adds a delightful texture, elegantly contrasting the softness of the fudge while echoing its sweetness. -
Nutty Trail Mix:
A crunchy trail mix featuring nuts and dried fruit can add a satisfying crunch to your dessert table, providing a hearty and healthful touch alongside the fudge.
Consider mixing these elements to create a festive, multi-dimensional dessert experience that celebrates the spirit of Easter while keeping it light and enjoyable for everyone!
Expert Tips for Easter Fudge
Quality Chocolate: Always use high-quality white chocolate bars instead of chips. Chips contain stabilizers that can affect the smooth texture of your Easter Fudge.
Monitor Temperature: Invest in a sugar thermometer. Accurate temperature measurement is key to perfect fudge texture; too hot can lead to graininess.
Don’t Rush the Setting: Allow the fudge to set at room temperature. Avoid cooling in the fridge too quickly as it may cause condensation and ruin the texture of your delicious Easter Fudge.
Mix-Ins Matter: When adding Easter candies, chop them into smaller pieces to ensure an even distribution and prevent large chunks from overwhelming each bite.
Be Gentle: When folding in the candies, mix gently to maintain the airy texture of your fudge and enhance the delightful crunch in every piece.
Easter Fudge Recipe FAQs
What type of white chocolate should I use?
Absolutely! For the best results, opt for high-quality white chocolate bars rather than chips. Bars often do not contain the stabilizers that can interfere with the smooth, creamy texture of your fudge. Look for brands that list cocoa butter as the primary ingredient for an indulgent treat.
How should I store my homemade Easter fudge?
You can store your Easter Fudge in an airtight container at room temperature for up to 2 weeks. If you prefer a firmer texture, feel free to refrigerate it for up to 3 weeks. Just remember to let it come to room temperature before serving for that melt-in-your-mouth experience!
Can I freeze Easter fudge, and how do I do it?
Yes, you can freeze your Easter Fudge! Wrap it tightly in plastic wrap or place it in a freezer-safe container. It’ll stay fresh for up to 3 months. When you’re ready to enjoy it, simply thaw it in the refrigerator overnight or let it sit at room temperature for about 30 minutes before indulging.
What should I do if my fudge comes out grainy?
If your fudge turns out grainy, it may have been cooked to too high a temperature or stirred too much during boiling. Next time, keep a close eye on the temperature—aim for 116°C and avoid stirring once it starts to boil. A sugar thermometer is a great investment for ensuring precision in your candy-making!
Are there any dietary considerations for Easter fudge?
Very much so! If you have dietary restrictions, you can adapt this recipe by using dairy-free chocolate and coconut cream for a vegan option. Just be sure to choose your mix-ins carefully, avoiding any that may contain allergens like nuts if you’re preparing this treat for guests with allergies.
Can I customize my Easter fudge with different mix-ins?
The more the merrier! Feel free to swap out the Easter candies with your favorites or add mix-ins like nuts or dried fruit. Just be sure to chop everything into smaller pieces to ensure an even distribution throughout the fudge for that delightful pop of flavor in every bite!

Creamy Easter Fudge: Your New Favorite Holiday Treat
Ingredients
Equipment
Method
- In a medium saucepan, combine 1 cup of granulated sugar, 4 tablespoons of unsalted butter, and a splash of cream over medium heat. Stir until the sugar dissolves completely, about 5 minutes.
- Bring the mixture to a gentle boil and aim for 116°C (soft-ball stage). Boil for about 5-7 minutes until thickened and lightly golden.
- Remove from heat and stir in 2 cups of chopped high-quality white chocolate until melted and smooth.
- Gently fold in 1 cup of chopped Easter candies until evenly distributed.
- Pour the mixture into a lined 8x8 inch baking dish and cool at room temperature for at least 4 hours until set.
Leave a Reply