
As I stood in my kitchen, the clock ticking ominously towards dinner time, a thought struck me—what if I could whip up a quick yet satisfying meal that could please the entire family? Enter the Canned Tuna Sushi Bowl, a vibrant mix of flavors that’s not just delicious but also protein-packed and customizable. In just 20 minutes, you can create a colorful dinner that mirrors the essence of sushi, featuring crispy pan-fried rice and zesty bang bang tuna. This easy recipe turns cans into culinary treasures, making it a stellar choice for anyone looking to escape fast food and dive into homemade goodness. Plus, it’s not just economical; it’s kid-friendly, ensuring even the pickiest eaters will ask for seconds. Curious about how to transform your weeknight dinners? Let’s dive into this delightful dish!
Why Choose a Canned Tuna Sushi Bowl?
Quick and Easy: This recipe brings together delicious flavors in a mere 20 minutes, making it perfect for busy weeknights. Protein-Packed: Featuring high-quality canned tuna, it offers a nourishing option that keeps everyone fueled. Customizable: Feel free to adapt toppings to your family’s preferences, just like you might with our Southern Style Low-Carb Vegetarian Casserole for a versatile twist. Kid-Friendly: With its fun assembly style, even the pickiest eaters are bound to enjoy diving into this colorful bowl. Economical: Using pantry staples, this recipe keeps your wallet happy while providing a satisfying meal.
Canned Tuna Sushi Bowl Ingredients
-
For the Base
• Cooked Sushi Rice – Provides the perfect foundation for your sushi bowl; great if you use leftover rice to save time.
• Olive Oil – Used for pan-frying the rice, giving it a delightful crispy texture; feel free to substitute with sesame oil for extra flavor. -
For the Protein
• Canned Tuna – The star of the dish, ideally drained tuna in oil; can easily be swapped for canned salmon for a different taste. -
For the Sauce
• Bang Bang Sauce – Adds a creamy, spicy kick; homemade or store-bought spicy mayo works wonders too.
• Sriracha Sauce – Introduces heat to the dish; any preferred hot sauce may be used for a personalized touch. -
For the Toppings
• Furikake – A Japanese seasoning that enhances flavor; if unavailable, crumbled Nori (seaweed) can be a fantastic alternative.
• Avocado – Contributes healthy fats and creaminess; can be sliced or diced based on your preference.
• Chopped Scallions – Provides a fresh and crunchy accent, essential for garnishing your bowl. -
Seasoning
• Salt and Black Pepper – To taste, ensuring the flavors come together beautifully.
With these ingredients, you’re on your way to creating a tantalizing Canned Tuna Sushi Bowl that everyone will love!
Step‑by‑Step Instructions for Canned Tuna Sushi Bowl
Step 1: Prepare the Sushi Rice
Begin by cooking sushi rice according to package instructions, which typically takes around 15 minutes. Once cooked, let it cool slightly before seasoning. Mix in rice vinegar, a pinch of sugar, and a few drops of sesame oil (if using) while the rice is still warm to infuse it with flavor, ensuring a perfectly seasoned base for your Canned Tuna Sushi Bowl.
Step 2: Mix the Bang Bang Tuna
While the rice is cooling, drain the canned tuna and place it in a bowl. Add your bang bang sauce to the tuna, stirring gently to combine. This creamy, spicy mixture will elevate the flavor of your Canned Tuna Sushi Bowl. Set aside while you prepare the other ingredients, ensuring the tuna is ready for assembly.
Step 3: Prepare the Vegetables
Take this time to chop your avocado and scallions. Slice the avocado into thin or thick pieces, depending on your preference, and finely chop the scallions for garnish. These fresh toppings add color and texture to the Canned Tuna Sushi Bowl, enriching your meal with their vibrant flavors.
Step 4: Pan-Fry the Rice
In a non-stick skillet, heat a tablespoon of olive oil over medium heat. Once hot, add the seasoned sushi rice, pressing it down evenly with a spatula. Cook for about 3-5 minutes until the bottom forms a golden-brown crust. Flip the rice carefully, cooking for another minute to achieve a nice crispy texture. Your Canned Tuna Sushi Bowl will benefit from this delightful crunch!
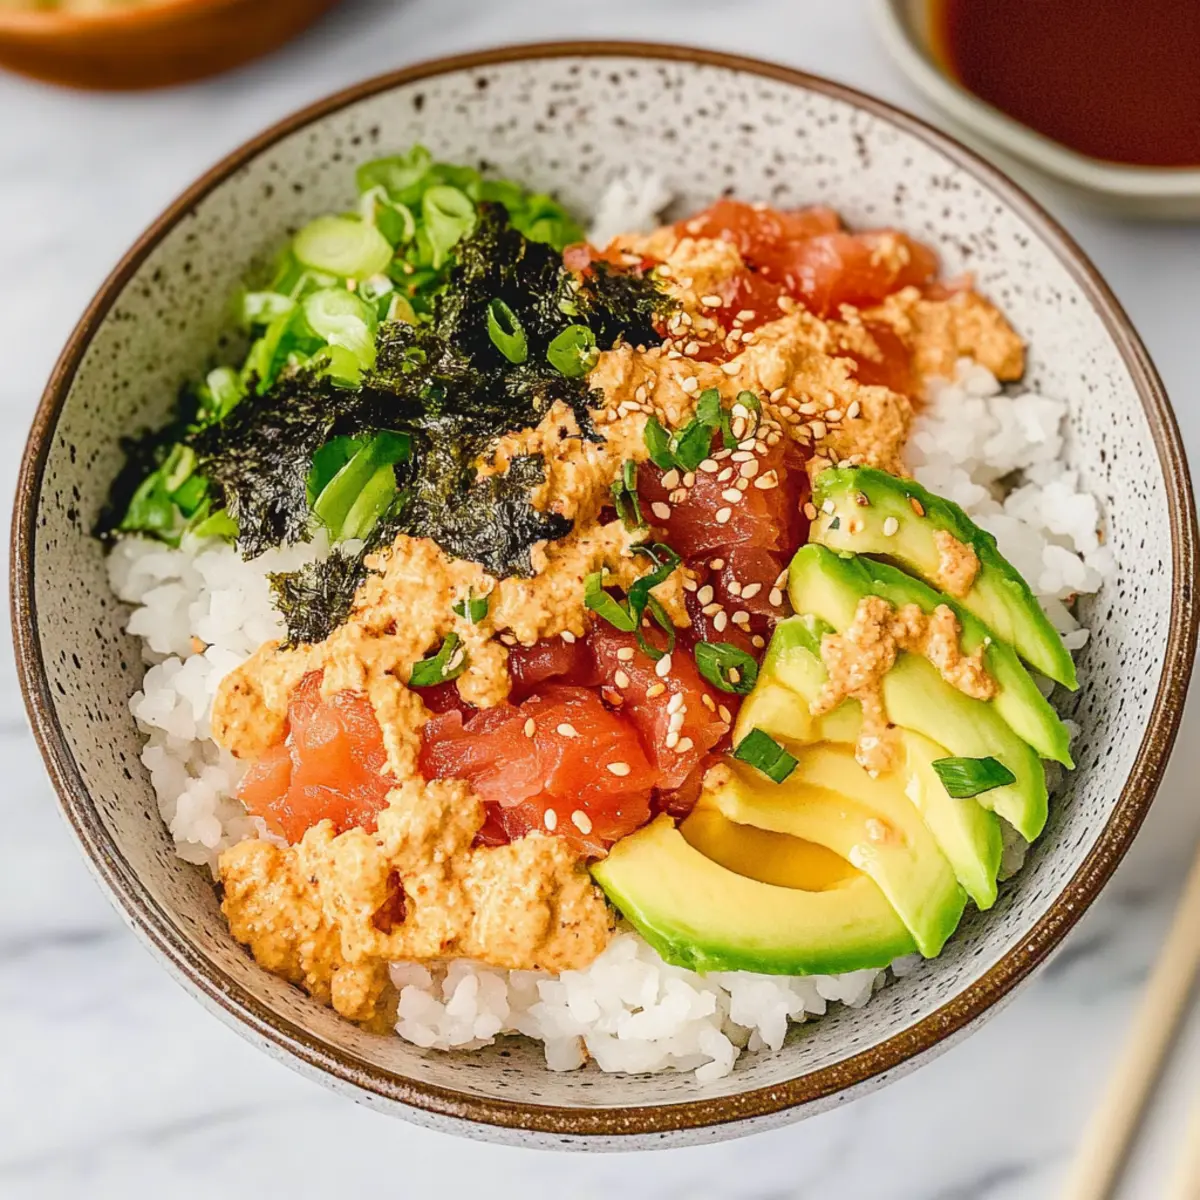
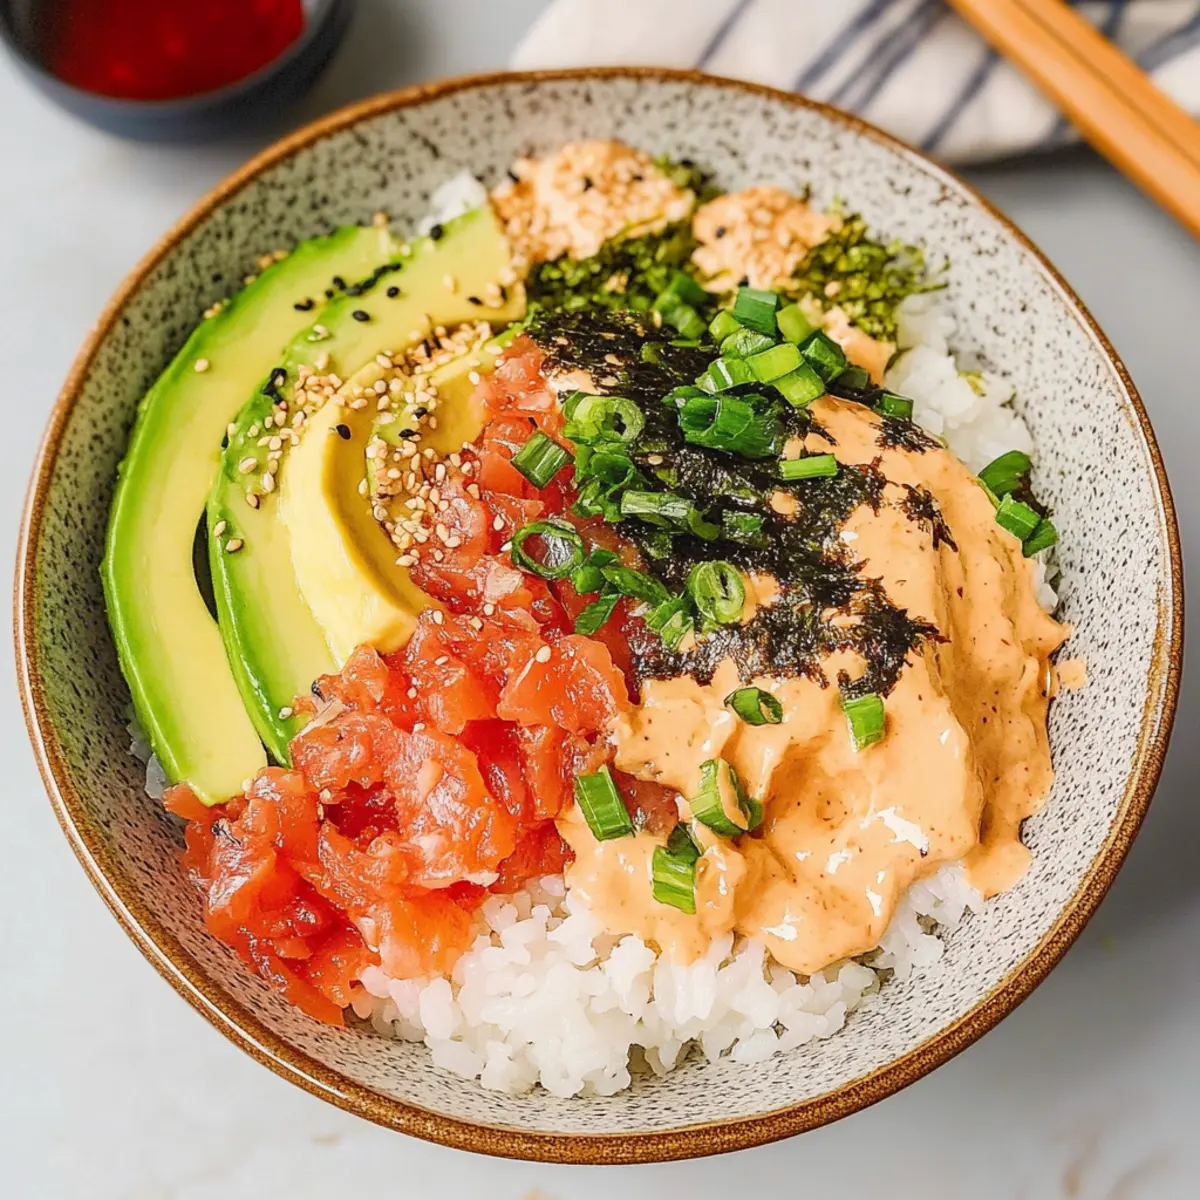
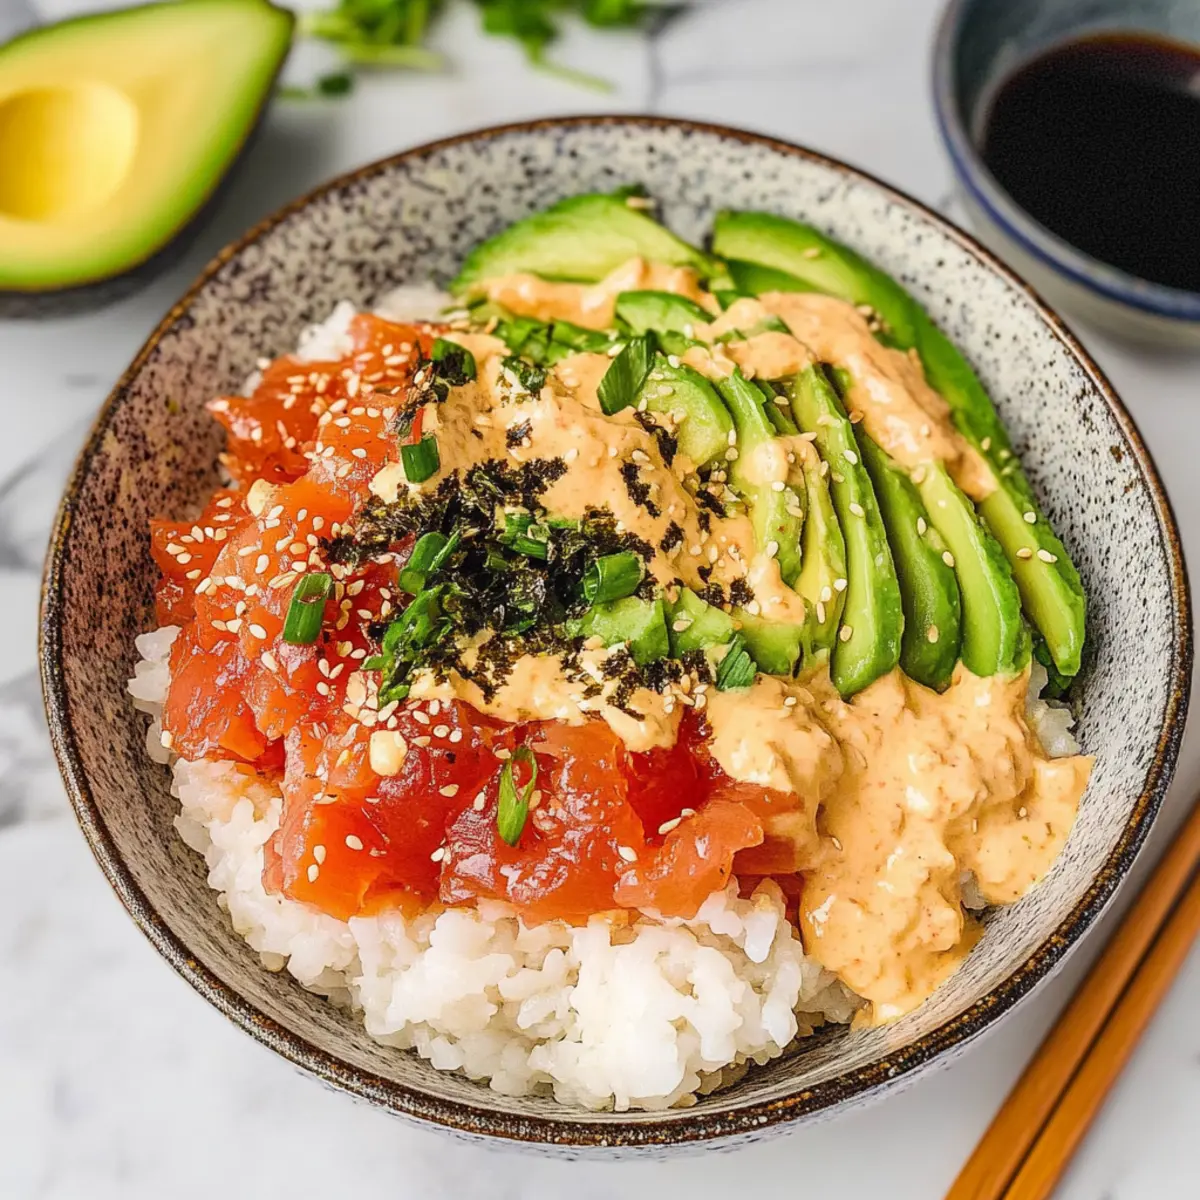
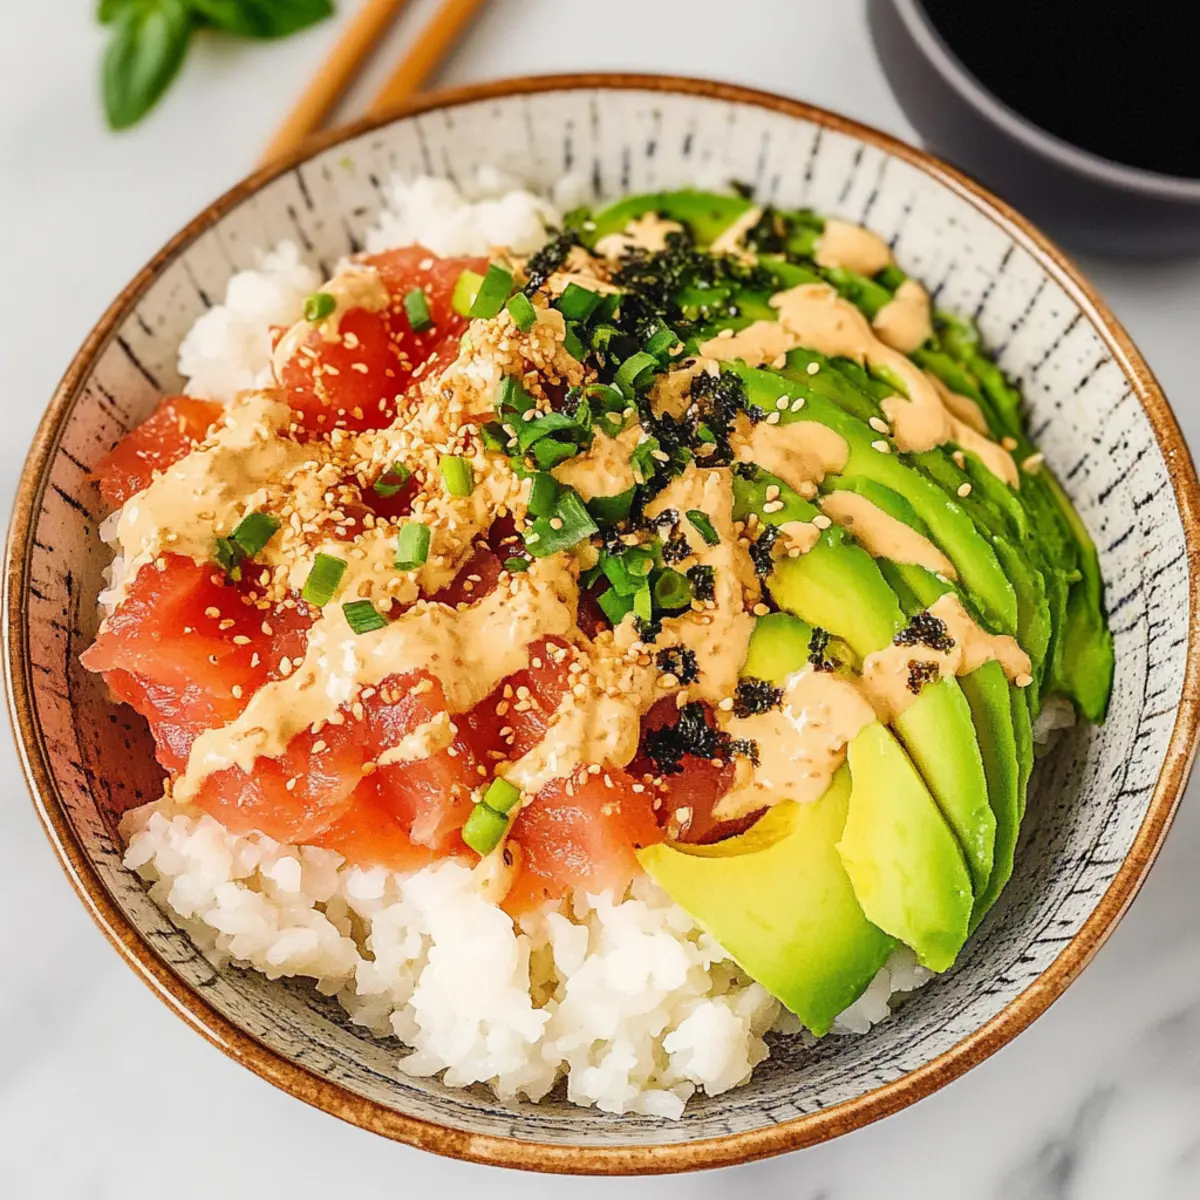
Step 5: Assemble the Bowl
Now it’s time to layer your Canned Tuna Sushi Bowl. Spoon the pan-fried rice into a bowl as the base, then generously top with the bang bang tuna mixture. Add avocado slices, a sprinkle of furikake, and the chopped scallions on top. For an extra kick, drizzle with Sriracha or your favorite hot sauce, ensuring a bold flavor profile that will tantalize your taste buds.
Step 6: Serve Immediately
Your colorful Canned Tuna Sushi Bowl is ready to enjoy! Serve it fresh and warm to take advantage of the contrast between the crispy rice and creamy toppings. This dish is not only visually appealing but also offers a delightful taste experience, making it a quick but satisfying dinner you’ll want to recreate again and again.
Expert Tips for Canned Tuna Sushi Bowl
-
Perfect Rice Texture: Achieve that golden, crispy base by frying the rice without stirring too much. This keeps the grains intact for your Canned Tuna Sushi Bowl.
-
Customize Sauces: Don’t hesitate to swap bang bang sauce for your favorite condiment. Experiment with different flavors that your family loves to make this dish their own.
-
Add Fresh Crunch: Enhance your bowl with additional veggies like cucumber or radishes for extra crunch. They bring freshness that balances the richness of the tuna and avocado.
-
Storage Solution: Keep leftovers separate for best results. Store pan-fried rice in one container and toppings in another to maintain texture for up to 2 days.
-
Balance the Heat: Adjust the spice level to your liking. If you’re serving kids, consider adding hot sauce on the side so they can choose their level of heat.
How to Store and Freeze Canned Tuna Sushi Bowl
Fridge: Store leftovers in an airtight container for up to 2 days. For optimal texture, keep the pan-fried rice separate from the toppings.
Freezer: While not recommended for the entire dish, you can freeze the cooked sushi rice for up to 1 month. Thaw in the fridge overnight before frying again.
Reheating: Reheat the rice in a skillet with a splash of olive oil to restore its crispy texture. Add toppings fresh for the best flavor.
Assembly Tip: Assemble your Canned Tuna Sushi Bowl fresh each time to enjoy the vibrant flavors and textures that make this dish so delightful!
Canned Tuna Sushi Bowl Variations
Unlock a realm of delicious possibilities with your Canned Tuna Sushi Bowl, allowing you to cater to your taste buds!
- Salmon Alternative: Swap canned tuna for canned salmon for a rich, flavorful twist that’s equally satisfying.
- Rice Choices: Use jasmine or brown rice instead of sushi rice for different textures and flavors. Explore what your family loves best!
- Veggie Power-Up: Add shredded carrots or thinly sliced cucumber for extra crunch and freshness in every bite. It’s a great way to spice up your bowl!
- Spice Level: Adjust the heat by incorporating diced jalapeños or red pepper flakes if you prefer a spicy kick. Your taste buds will thank you!
- Garnish Variations: Try sesame seeds or pickled ginger for a delightful and authentic Japanese flair that enhances your bowl.
- Herb-Infused: Mix in fresh herbs like cilantro or mint for a refreshing lift that adds a burst of flavor. They’ll brighten up your dish beautifully!
- Creamy Swap: Substitute the bang bang sauce with tzatziki or avocado dressing for a creamy yet light option that’s still full of flavor.
- Noodles Instead of Rice: Use cooked soba or rice noodles as the base for a delightful alternative that’s both hearty and satisfying.
With endless options, your dinner can shift seamlessly with your family’s preferences! Don’t forget to explore other scrumptious dishes like our Longevity Soup or Southern Style Low-Carb Vegetarian Casserole for more inspired meals your family will adore.
What to Serve with Canned Tuna Sushi Bowl
Elevate your dinner experience by pairing this delightful sushi bowl with complementary dishes that enhance its vibrant flavors.
-
Cucumber Salad: Light and refreshing, this salad brings a crunch that balances the creamy tuna and smooth avocado. Tossed in a tangy vinaigrette, it’s perfect for cutting through richness.
-
Miso Soup: A warm, umami-rich miso soup complements the sushi bowl’s flavors beautifully. Its soothing warmth pairs well with the crisp textures of the meal, making for a comforting combination.
-
Edamame: These slightly salted soybeans add a nutritious, protein-packed side that kids love. Their pop of color and subtle flavor make them an ideal snack alongside the sushi bowl.
-
Seaweed Salad: Earthy and slightly sweet, seaweed salad adds a unique texture and a burst of ocean flavor that echoes the theme of the sushi bowl. Its refreshing taste complements the spicy bang bang tuna perfectly.
-
Pickled Vegetables: A tangy assortment of pickled veggies brings a delightful sharpness that enhances the dish’s overall flavor profile. Add a bit of crunch and acidity for a well-rounded meal.
-
Sparkling Water with Lime: For a light beverage, sparkling water sprinkled with fresh lime adds a zesty zing. This refreshing drink cleanses the palate and enhances the meal.
-
Chocolate Mousse: Finish off the meal with a light, airy chocolate mousse. Its rich yet delicate flavor serves as the perfect sweet ending to a satisfying dinner.
Make Ahead Options
These Canned Tuna Sushi Bowls are a fantastic meal prep option for busy weeknights! You can prepare the sushi rice and mix the bang bang tuna up to 24 hours in advance—just store them separately in airtight containers in the refrigerator to maintain their textures. For even more convenience, chop the avocado and scallions ahead of time and keep them covered to prevent browning. When you’re ready to enjoy your meal, simply pan-fry the rice until crispy, layer it in a bowl, and add the prepared tuna with toppings. This way, you can have a delicious dinner ready with minimal effort, perfect for anyone seeking to save time without sacrificing taste!
Canned Tuna Sushi Bowl Recipe FAQs
What type of canned tuna should I use?
Absolutely! For the best flavor, use canned tuna packed in oil, which adds richness to your dish. If you prefer a lighter option, you can choose tuna packed in water, but the overall taste may be slightly less robust. Canned salmon is also a fantastic alternative if you’re looking for a twist!
How should I store leftovers?
Very! Place any leftovers in an airtight container and ensure to separate the pan-fried rice from toppings, as this maintains texture. They can be stored in the fridge for up to 2 days. If you want to keep the toppings fresh, consider assembling them just before eating.
Can I freeze the Canned Tuna Sushi Bowl?
Of course! You can freeze the cooked sushi rice separately for up to 1 month. Just make sure to cool it completely before transferring it to a freezer-safe container. To thaw, place it in the fridge overnight, then reheat it in a skillet with a drizzle of olive oil to revive that delightful crispy texture!
What can I do if my rice is too sticky?
No worries! If your rice turns out sticky, try adding a little olive oil to your pan while frying to help it crisp up. You can also break it apart gently with a spatula while it cooks to improve the texture. Next time, consider rinsing your sushi rice before cooking to remove excess starch, which helps achieve that perfect grain separation.
Are there any allergy considerations with this dish?
Absolutely! This Canned Tuna Sushi Bowl contains common allergens like fish and soy (in soy sauce, if used). If you’re serving someone with a seafood allergy, you can substitute canned tuna with cooked chicken or a plant-based protein. Always check sauce labels for gluten, dairy, or other allergens if necessary.
How can I customize my toppings?
Very much so! This recipe is incredibly flexible. You can add whatever toppings you desire, such as sliced cucumbers, carrots, or pickled ginger. Feel free to experiment with different sauces and vegetables, such as sesame seeds or radishes, to make the bowl even more personalized and delicious!
Canned Tuna Sushi Bowl: Easy, Tasty, Family-Friendly Delight
Ingredients
Equipment
Method
- Prepare the sushi rice by cooking it according to package instructions, which typically takes around 15 minutes.
- While the rice is cooling, drain the canned tuna and combine it with the bang bang sauce in a bowl. Stir gently.
- Chop the avocado and scallions for garnish.
- In a skillet, heat olive oil over medium heat and add the seasoned sushi rice. Cook for 3-5 minutes until browned, then flip and cook for another minute.
- Assemble the bowl by adding the rice, then topping it with the bang bang tuna, avocado, furikake, and scallions.
- Serve immediately for the best texture and flavor.
Leave a Reply