
As I stared at the colorful decorations springing to life around me, inspiration struck for a festive and fun appetizer: Baby Chick Mini Cheese Balls. These playful, no-bake treats combine the creamy tang of cheddar and cream cheese, creating an absolute favorite for gatherings. What I love most about this recipe is how quick it is—ready in under 20 minutes—and how appealing it is to both kids and adults alike. They’re not just an adorable centerpiece; they’re a creamy, savory snack that invites everyone to gather around the table. Whether it’s Easter brunch or a casual spring get-together, these little guys are sure to bring smiles and spark conversations. Ready to roll up your sleeves and get creative with your appetizer game? Let’s dive into the delightful world of Baby Chick Mini Cheese Balls!
Why Are These Baby Chick Mini Cheese Balls Special?
Quick and Easy: This no-bake recipe can be ready in just 20 minutes, making it a perfect choice for last-minute gatherings.
Kid-Friendly Fun: The cheerful chick shape and creamy texture make these cheese balls a hit with kids and adults alike.
Festive Presentation: Serve these adorable bites at your next brunch or spring celebration to add a whimsical touch to your table.
Versatile Flavor: With creamy cheddar and customizable options, you can easily cater to different tastes and dietary preferences.
Crispy and Creamy Contrast: Coated in shredded cheese, they offer a delightful crunch that complements the smooth interior, creating a satisfying experience.
These Baby Chick Mini Cheese Balls are not only delicious but also a conversation starter—perfect for gatherings like Easter brunch or picnics. Want more festive ideas? Check out these Pumpkin Cream Cheese treats or explore savory options like the Cheese Spinach Crustless quiche!
Baby Chick Mini Cheese Balls Ingredients
For the Cheese Mixture
• Cream Cheese – Base of the cheese mixture that provides creaminess; let sit at room temperature for easier mixing.
• Sharp Cheddar Cheese – Adds bold flavor and vibrant color; avoid pre-shredded for better adherence.
• Worcestershire Sauce – Enhances flavor profile with a tangy, savory note; essential for that distinctive taste.
• Garlic Powder – Adds savory depth; feel free to skip if you prefer a milder flavor.
• Onion Powder – Complements the savory elements; also optional depending on your taste.
For Decoration
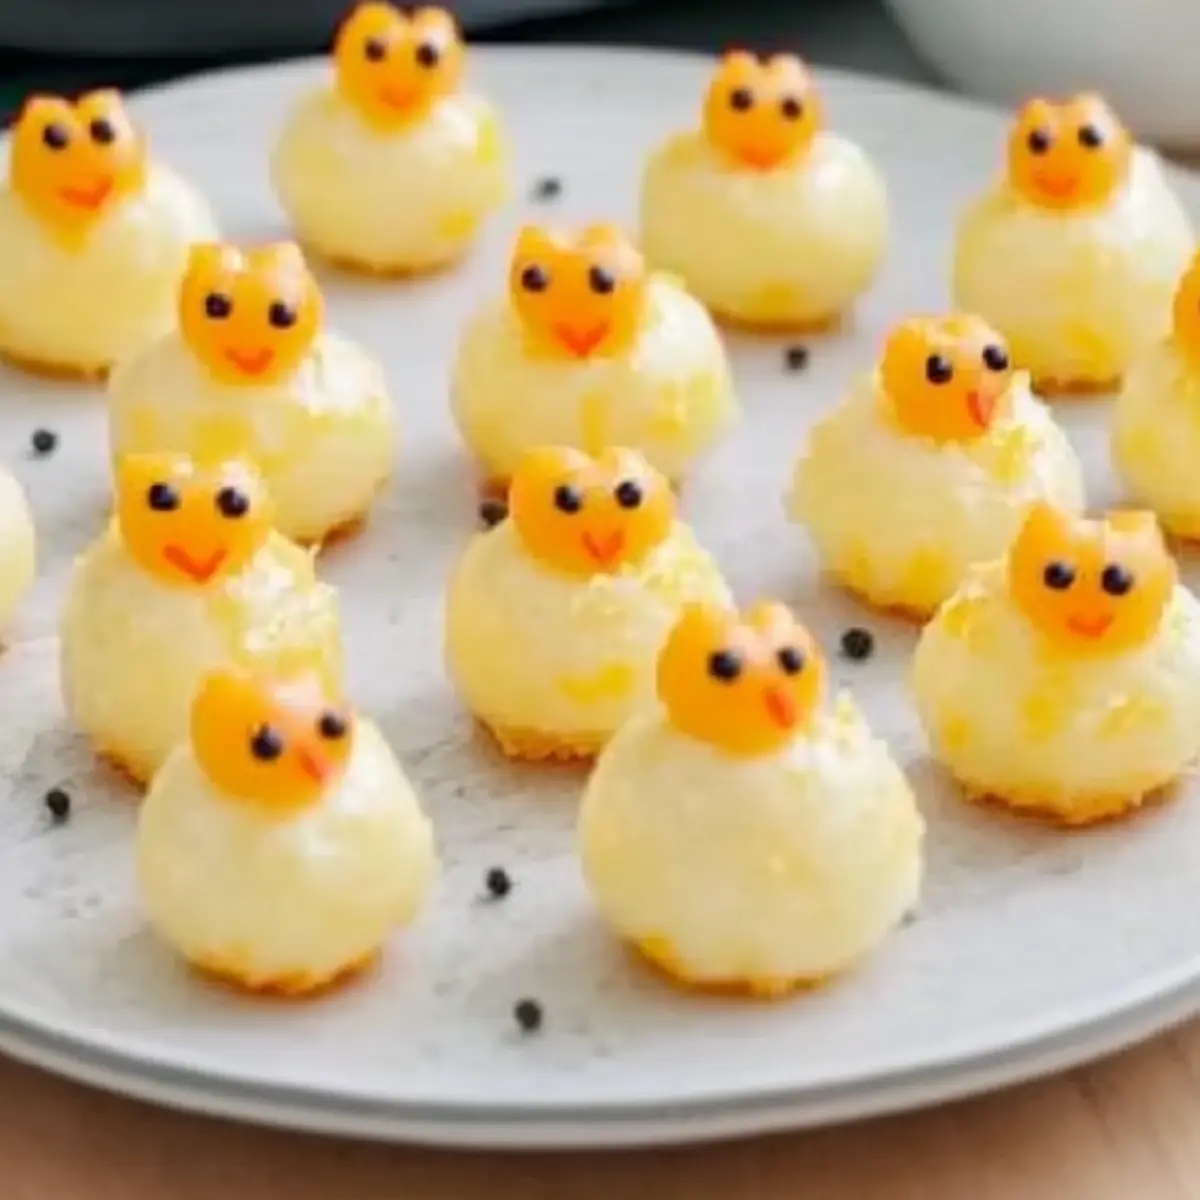
• Carrots – Used as beaks and feet; add a fun visual element to your Baby Chick Mini Cheese Balls.
• Whole Peppercorns – Create cute eyes for the chicks; they’re just for decoration and not meant to be eaten.
For Coating
• Shredded Cheese – Provides a delightful crunch and color on the outside; press lightly to coat evenly for the best result.
These Baby Chick Mini Cheese Balls are not only adorable but offer a creamy, savory flavor that is perfect for your next spring gathering!
Step‑by‑Step Instructions for Baby Chick Mini Cheese Balls
Step 1: Mix the Cheese Mixture
In a large mixing bowl, combine the softened cream cheese, sharp cheddar cheese, Worcestershire sauce, garlic powder, and onion powder. Use an electric mixer or a sturdy spatula to blend the ingredients until smooth and creamy, about 2-3 minutes. You’ll know it’s ready when the mixture is homogenous and free of lumps, making it easy to roll into balls.
Step 2: Form the Cheese Balls
Using your hands, scoop out approximately one tablespoon of the cheese mixture and roll it into a ball, about 1 inch in diameter. Place the formed cheese balls on a parchment-lined baking sheet, ensuring they are spaced apart for easy coating. Continue this process until all the cheese mixture is shaped, creating a delightful batch of Baby Chick Mini Cheese Balls that are perfect for your spring gatherings.
Step 3: Coat the Cheese Balls
On a plate, spread a generous layer of shredded cheddar cheese. Roll each cheese ball in the cheddar, pressing lightly to ensure an even coating. This adds a delightful crunch and color to your Baby Chick Mini Cheese Balls. Be sure to cover all sides, giving them a cheerful, festive appearance that’s sure to impress your guests.
Step 4: Decorate the Chick Faces
Using small pieces of carrot, press them gently into the front of each cheese ball to create cute beaks. Next, delicately insert whole peppercorns as the eyes, giving each chick a whimsical expression. Ensure the decorations are secure but be cautious with the peppercorns, as they are not meant to be eaten. This step adds charm and personality to your Baby Chick Mini Cheese Balls.
Step 5: Chill (Optional)
If the cheese balls are too soft to handle, place the decorated cheese balls in the refrigerator for about 30 minutes. This chilling time helps them firm up, making them easier to serve and ensuring they hold their shape. You’ll know they’re ready when they are slightly firmer to the touch, making for a perfect presentation at your gathering.
Step 6: Serve and Enjoy
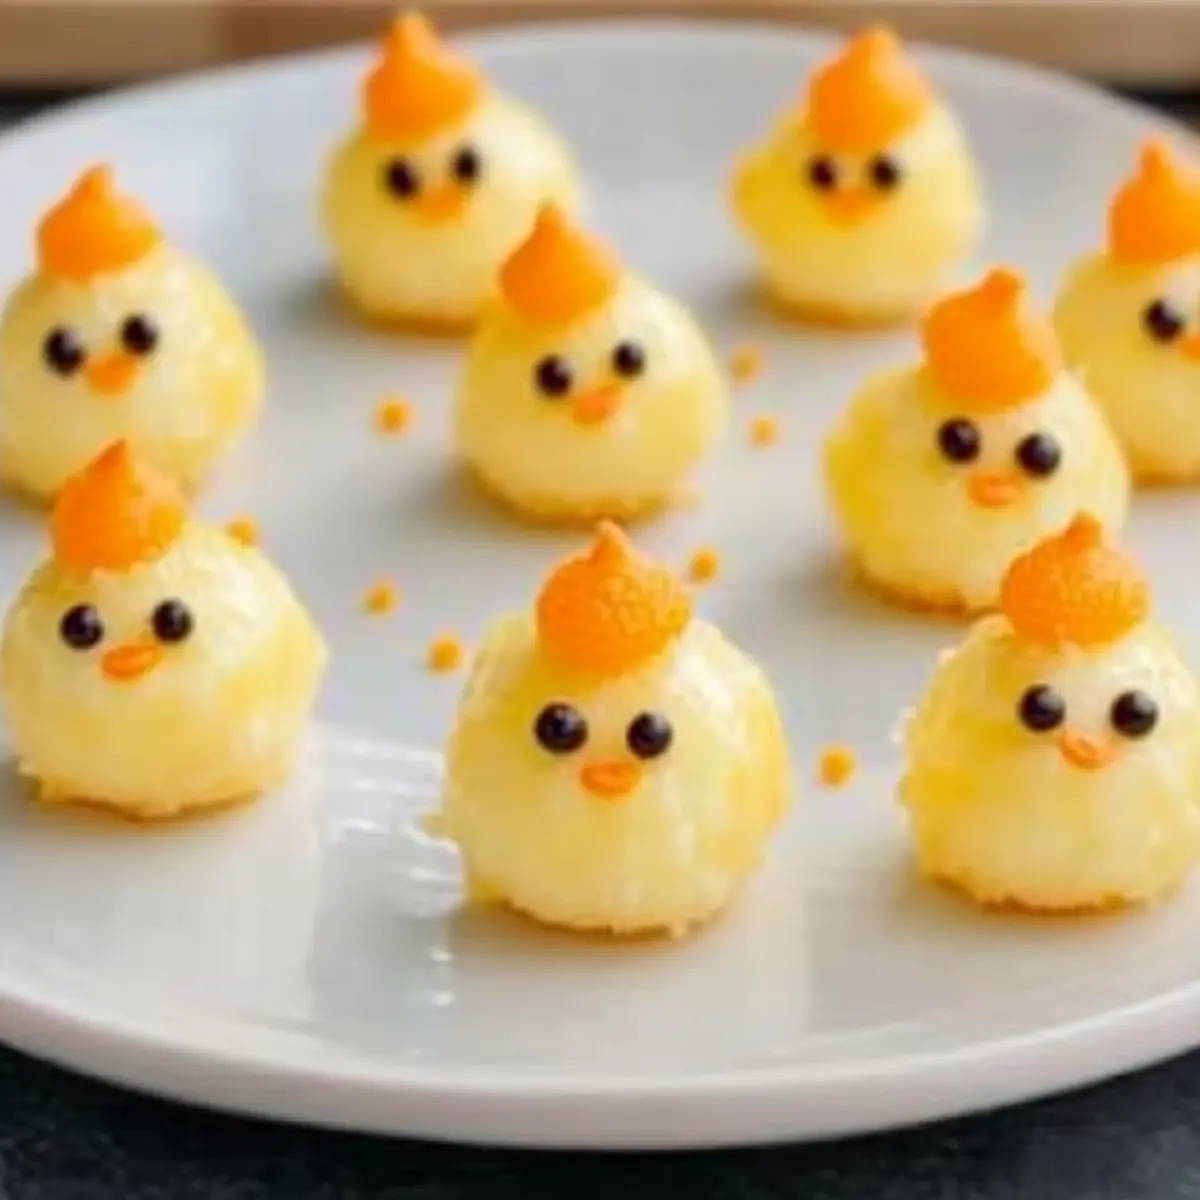
Arrange your Baby Chick Mini Cheese Balls on a festive platter, accompanied by an assortment of crackers, fresh veggies, or your favorite dipping sauces. This charming spread not only looks adorable but also invites everyone to gather around and enjoy. Get ready to delight your guests with these creamy and savory treats that are sure to become a favorite at any spring event!
Storage Tips for Baby Chick Mini Cheese Balls
Fridge: Store in an airtight container for up to 2 days to maintain freshness. Assemble just before serving to keep crackers crisp.
Freezer: These cheese balls can be frozen individually on a baking sheet for 1-2 hours, then transferred to a freezer bag. They keep well for up to 1 month.
Reheating: For best results, thaw in the refrigerator overnight before serving. They can be enjoyed cold or left out for 30 minutes to reach room temperature.
Make-Ahead: Prepare the cheese mixture up to 24 hours in advance and refrigerate it, but roll and decorate the Baby Chick Mini Cheese Balls just before serving for optimal presentation.
Make Ahead Options
These Baby Chick Mini Cheese Balls are a fantastic choice for busy home cooks wanting to save time with meal prep! You can prepare the cheese mixture up to 24 hours in advance; simply combine the softened cream cheese, cheddar, and seasonings, then refrigerate it in an airtight container. When you’re ready to serve, roll the mixture into balls, coat them in shredded cheese, and decorate with carrots and peppercorns. If desired, chill the finished cheese balls for about 30 minutes to ensure they stay firm and beautiful. Having the prep done ahead of time allows you to effortlessly impress your guests with these delightful treats, all while keeping your kitchen stress-free!
What to Serve with Baby Chick Mini Cheese Balls
These delightful mini snacks bring a playful touch to your spring gatherings, making them even more memorable when paired with the right accompaniments.
- Crispy Crackers: Light and crunchy crackers provide the perfect vehicle for scooping up the creamy cheese balls, enhancing the flavor experience.
- Fresh Veggie Platter: Colorful baby carrots, cucumber rounds, and bell pepper strips add a fresh crunch and vibrant colors, balancing the richness of the cheese.
- Tangy Dipping Sauce: A zesty ranch or a creamy herb dip elevates the overall taste and offers a contrast that complements the savory cheese balls wonderfully.
- Fruit Salad: A refreshing medley of seasonal fruits provides a sweet counterpoint, bringing a delightful burst of flavor that will captivate your guests.
- Wine Pairing: A light, crisp white wine like Sauvignon Blanc pairs beautifully, enhancing the flavors and adding a touch of sophistication to your gathering.
- Mini Sweet Treats: Add whimsy with small sweet options like chocolate-covered strawberries or brownie bites, creating a delightful contrast to the savory cheese balls.
- Herbed Breadsticks: Serve warm, herbed breadsticks for a deliciously fragrant addition that complements the appetizers while inviting everyone to indulge in more.
Baby Chick Mini Cheese Balls Variations
Embrace your creativity and make these Baby Chick Mini Cheese Balls your own with exciting twists and adaptations!
-
Cheese Swap: Substitute gouda or pepper jack for a different flavor profile. These swaps infuse a smoky or spicy kick, adding depth to your appetizer.
-
Herb Infusion: Incorporate fresh herbs like chives or dill into the cheese mixture for an aromatic lift. The vibrant flavors will tie in beautifully with spring gatherings.
-
Texture Twist: Add crushed pretzels or finely chopped nuts for a delightful crunch. This extra layer of texture can make each bite even more satisfying and interesting.
-
Heat Level: Crank up the heat with a sprinkle of cayenne pepper or add diced jalapeños into the cheese mix. This spicy version will certainly liven up your appetizer spread!
-
Larger Portions: Form larger cheese balls for a centerpiece snack. They can be cut into wedges for easy serving while maintaining that fun chick look.
-
Sweet Surprise: Mix in a touch of honey or maple syrup for a sweet-savory flavor combo. This unexpected twist pairs well with spicy crackers or fresh fruit.
-
Bacon Boost: Fold crumbled cooked bacon into the cheese mixture for a savory upgrade that everyone will love! The smokiness of bacon combines wonderfully with the creamy cheese.
-
Veggie Delight: Roll in finely chopped spinach or toasted sesame seeds for a healthy and flavorful outside layer. This colorful addition adds both nutrients and visual appeal.
These variations not only enhance flavor but also spark creativity in the kitchen! Looking for more ideas? Check out these delicious Sausage Cheese Potato bites or enjoy the comforting warmth of Disney’s Grilled Cheese.
Expert Tips for Baby Chick Mini Cheese Balls
• Room Temperature Cream Cheese: Start with cream cheese that’s at room temperature for easy mixing. Cold cream cheese makes it harder to combine the ingredients smoothly.
• Avoid Pre-Shredded Cheese: Using block sharp cheddar instead of pre-shredded ensures better adherence and a creamier texture. Anti-caking agents in pre-shredded varieties can impact flavor and consistency.
• Chilling is Key: If the cheese balls feel too soft while decorating, don’t skip the chilling step! Refrigerating them for 30 minutes helps them firm up for better presentation.
• Fun Variations: Consider adding herbs, spices, or even crumbled bacon to the cheese mixture for an extra flavor twist. Experimenting can make your Baby Chick Mini Cheese Balls even more delightful!
• Eye-Catching Decor: Securely press whole peppercorns for the eyes and carrots for the beaks, but remember they’re decorative; inform guests not to eat the peppercorns for safety!
Baby Chick Mini Cheese Balls Recipe FAQs
What kind of cream cheese should I use?
Absolutely! For these Baby Chick Mini Cheese Balls, it’s best to use full-fat cream cheese that has been left to sit at room temperature for about 30 minutes before mixing. This ensures a smoother consistency, making it easier to combine with the other ingredients.
How should I store leftover Baby Chick Mini Cheese Balls?
You can store any leftovers in an airtight container in the refrigerator for up to 2 days. Just remember to assemble them right before serving to maintain the crispness of the crackers, which adds texture to your delightful bites!
Can I freeze Baby Chick Mini Cheese Balls, and how?
Yes! To freeze these little cuties, first, arrange the formed cheese balls on a baking sheet in a single layer and freeze for about 1-2 hours until firm. Afterward, transfer them to a freezer bag, ensuring to squeeze out as much air as possible. They can be stored for up to 1 month. When you’re ready to enjoy them, simply thaw in the refrigerator overnight.
What if I have allergies to certain ingredients?
The great news is that you can customize your Baby Chick Mini Cheese Balls! If you have dairy allergies, consider using dairy-free cream cheese and cheese alternatives. For those avoiding Worcestershire sauce, you can substitute with soy sauce or coconut aminos for a similar savory kick. Just make sure to check labels for allergens related to your specific dietary needs!
Can I use a different cheese for the coating?
Very! While shredded cheddar gives a delightful color and flavor, you can certainly experiment with other cheeses like Gouda or Pepper Jack. Just remember that the cheese should be finely shredded to help it stick better to the cheese balls. Enjoy the creative process!
What if my cheese balls are too soft to decorate?
No worries! If your Baby Chick Mini Cheese Balls feel too soft to handle after forming, simply pop them in the refrigerator for about 30 minutes. This will help them firm up enough for you to decorate them easily. Once they’re nice and chilled, you’ll find them much easier to work with!
Cute and Creamy Baby Chick Mini Cheese Balls for Spring Fun
Ingredients
Equipment
Method
- In a large mixing bowl, combine the softened cream cheese, sharp cheddar cheese, Worcestershire sauce, garlic powder, and onion powder. Blend until smooth and creamy, about 2-3 minutes.
- Scoop out approximately one tablespoon of the cheese mixture and roll it into a ball, about 1 inch in diameter. Place on a parchment-lined baking sheet.
- Spread a generous layer of shredded cheese on a plate and roll each cheese ball in the cheddar, pressing lightly to coat evenly.
- Press small pieces of carrot into the front of each cheese ball to create beaks, and insert whole peppercorns as the eyes.
- If the cheese balls are too soft, chill them in the refrigerator for about 30 minutes to firm up.
- Arrange on a festive platter and serve with crackers, fresh veggies, or your favorite dipping sauces.
Leave a Reply