
The morning sun peeked through my kitchen window, and I could almost hear the sizzle of something extraordinary. When I discovered the magic of Crispy Waffle Maker Hash Browns, breakfast transformed from a mundane routine into a delightful adventure. This quick preparation method not only ensures a wonderfully crunchy texture, but it’s also perfect for those busy mornings when you crave something homemade yet speedy. Imagine serving these golden treats at your next brunch gathering, where everyone raves about the satisfying crunch and hearty flavor! Plus, they’re gluten-free, making them a fantastic choice for every guest. Are you ready to elevate your breakfast game and impress your family? Let’s get cooking!

Why Love Waffle Maker Hash Browns?
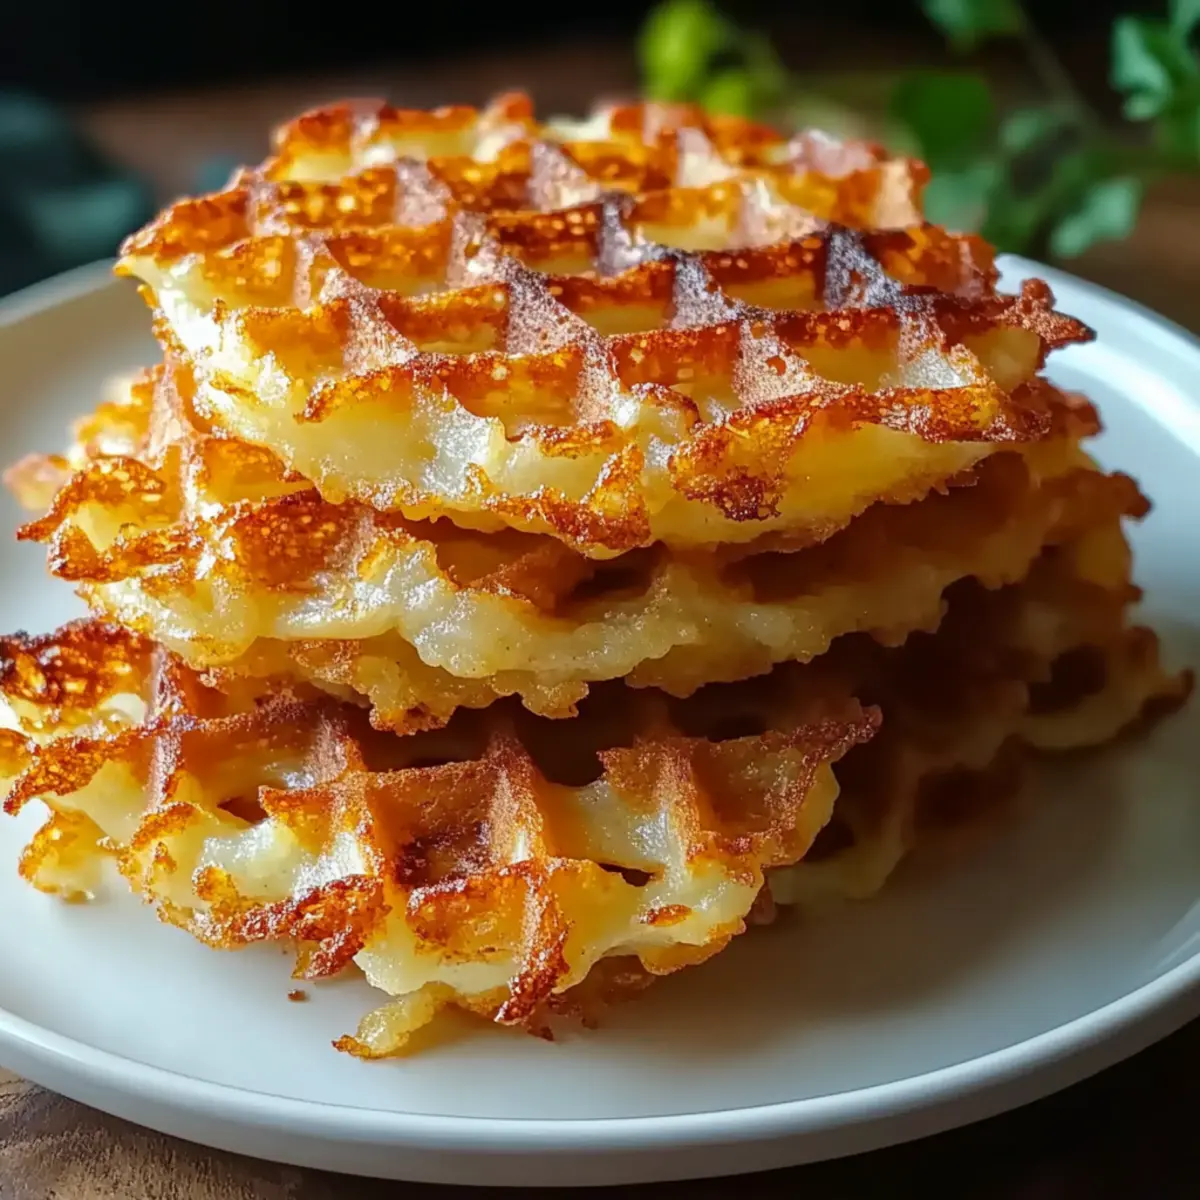
Irresistible Crunch: The unique waffle maker technique guarantees a golden, crunchy exterior that makes each bite a flavorful delight.
Quick Preparation: In just 30 minutes, you can have a gourmet breakfast that beats any fast food option.
Gluten-Free Goodness: These hash browns cater to gluten-sensitive eaters, ensuring everyone at your table can enjoy them.
Flavorful Versatility: Customize with cheese, bacon, or fresh veggies, allowing you to tailor the dish to your family’s preferences.
Brunch Showstopper: Serve them alongside fresh fruit and Gluten Free Waffles for a delightful brunch spread sure to impress.
Time-Saving Solution: Make-ahead tips allow you to prepare the potato mixture in advance, making it even easier to enjoy these delicious hash browns on busy mornings!
Waffle Maker Hash Browns Ingredients
• Get ready to whip up deliciousness!
For the Hash Browns
- Russet Potatoes – The key to achieving that perfect crispy finish; you can even try Yukon Gold or sweet potatoes for a twist.
- Salt – Essential for enhancing the flavors; just a touch goes a long way!
- Black Pepper – Adds a hint of warmth; feel free to skip if you prefer a milder taste.
- Garlic Powder – Brings depth and savoriness; fresh garlic can replace it, just adjust the quantity to your liking.
- Onion Powder – Delivers a nice sweet onion flavor; consider using fresh onions for added texture.
- Olive Oil – Necessary for a crispy exterior; swap it out for vegetable oil if that’s what you have on hand.
- Cooking Spray – Ensures your hash browns don’t stick in the waffle maker; look for a gluten-free option if needed.
This tasty assembly of Waffle Maker Hash Browns ingredients will have your family anticipating breakfast with every delicious crunch!
Step‑by‑Step Instructions for Waffle Maker Hash Browns
Step 1: Preheat Waffle Maker
Begin by preheating your waffle maker according to the manufacturer’s instructions, typically until it reaches a steady, medium-high temperature. This is essential for achieving the desired crispy texture for your Waffle Maker Hash Browns. You can check if it’s ready by sprinkling a drop of water on the surface; if it sizzles, you’re good to go!
Step 2: Prepare Potato Mixture
While the waffle maker heats, wash and grate your russet potatoes using a box grater. In a large bowl, combine the grated potatoes with salt, black pepper, garlic powder, and onion powder. Mix thoroughly to ensure the seasoning is evenly distributed. The mixture should have a rustic look, showcasing those earthy potato shreds, which will create a delightful crunch when cooked.
Step 3: Add Olive Oil
Next, drizzle the olive oil over the seasoned potato mixture. Stir gently but thoroughly until each strand of potato is well-coated in oil. This step is crucial, as the oil will help in achieving that golden-brown crispiness that makes Waffle Maker Hash Browns so addictive. Your mixture should now glisten slightly, ready for cooking!
Step 4: Prep Waffle Maker
Once your waffle maker is preheated, lightly spray the cooking surface with cooking spray to prevent sticking. Make sure to coat the inside evenly for an effortless release of the hash browns. This will ensure your crispy creations come out intact and look as inviting as they taste!
Step 5: Cook Hash Browns
Spread half of the potato mixture evenly over the hot waffle maker, creating a nice, compact layer. Close the lid and cook for 8-10 minutes, or until the hash browns turn a beautiful golden brown on the outside. You’ll know they’re done when a crispy scent fills the kitchen, making it hard to resist peeking!
Step 6: Repeat Cooking
Carefully remove the first batch of Waffle Maker Hash Browns, using a fork or spatula if needed, and transfer them to a warm plate. Return the waffle maker to heat and repeat the process with the remaining potato mixture, ensuring every hash brown gets the same love and crispy treatment as the first batch.
Step 7: Serve Hot
Your Waffle Maker Hash Browns are now ready! Serve them hot and crispy, garnished with your favorite toppings such as sour cream, fresh chives, or shredded cheese for an extra kick. The contrast of textures and flavors will certainly make this breakfast a standout choice for any occasion!
What to Serve with Crispy Waffle Maker Hash Browns
Elevate your breakfast experience with delightful pairings that complement the golden crunch of your hash browns.
- Scrambled Eggs: Soft, fluffy eggs provide a creamy contrast to the crispy texture of hash browns, creating a harmonious breakfast plate.
- Crispy Bacon: The savory kick of bacon adds a satisfying crunch that pairs perfectly with your Waffle Maker Hash Browns. Enjoy the symphony of flavors!
- Fresh Fruit Salad: Bright, juicy fruits like berries or melon add a refreshing sweetness, balancing the savory crunch of the hash browns wonderfully.
- Sour Cream and Chives: A dollop of tangy sour cream with fresh chives elevates the hash browns, making every bite a burst of flavor.
- Avocado Slices: Creamy avocado slices on the side bring a luscious texture and healthy fats that beautifully complement the crispy hash browns.
- Tomato Salsa: A zesty salsa provides a refreshing and spicy kick that enhances the overall palate, giving your breakfast a vibrant twist.
- Herbed Yogurt: A dollop of herbed yogurt adds a creamy, tangy layer that pairs wonderfully with the hash browns, making for a gourmet touch.
- Coffee or Tea: Sipping on a rich cup of coffee or a soothing tea sets the stage for a cozy breakfast experience, rounding it out perfectly.
- Orange Juice: A glass of freshly squeezed orange juice brings a bright, citrusy note to your meal, enhancing the flavors of each dish while also refreshing your palate.
Expert Tips for Waffle Maker Hash Browns
• Preheating is Key: Always ensure your waffle maker is properly preheated to achieve that delightful crunchy texture on your hash browns.
• Coat Potatoes Evenly: Drizzle the olive oil well over the grated potatoes; this step is crucial for ensuring they crisp up beautifully without having any soggy bits.
• Don’t Overstuff: Avoid the temptation to fill the waffle maker to the brim; working in batches helps maintain even cooking and that perfect golden crisp.
• Timing Matters: Keep an eye on your hash browns during cooking; 8-10 minutes is usually perfect, but each waffle maker may vary slightly in cooking time.
• Perfect Pairings: Serve with toppings like sour cream or chives to elevate your Waffle Maker Hash Browns from delicious to extraordinary!
Waffle Maker Hash Browns Variations
Feel free to get creative and make these hash browns uniquely yours!
-
Cheesy Delight:
Mix in shredded cheese for an extra creamy texture. Cheddar or pepper jack brings rich flavor, melting beautifully into the potatoes. -
Savory Bacon Bits:
Stir in crispy bacon bits for a smoky flavor boost. The saltiness from the bacon pairs perfectly with the crispy, tender hash browns. -
Veggie Medley:
Add diced bell peppers or green onions for a splash of color and crunch. These vibrant veggies not only enhance flavor but also bring a delightful freshness. -
Spicy Kick:
Toss in some diced jalapeños or a pinch of cayenne pepper to bring the heat. This pleasing warmth elevates your breakfast to a whole new level of excitement! -
Herb Infusion:
Season with fresh herbs like parsley or chives for a herbaceous twist. Fresh herbs can brighten the flavors and make your dish feel more gourmet. -
Sweet Potato Variation:
Swap russet potatoes with sweet potatoes for a naturally sweet take. The result is a beautiful golden hue with a hint of sweetness, perfect for a change! -
For a Gluten-Free Option:
Double-check your cooking spray to ensure it’s gluten-free, ensuring everyone at your table enjoys these delectable hash browns. -
Savory Garlic Touch:
Use fresh minced garlic instead of garlic powder for a more robust flavor. Just make sure to sauté it briefly before mixing with the potatoes for that aromatic touch.
Feel free to mix and match these ideas for an unforgettable breakfast experience! Want to keep it gluten-free? You can also enjoy these variations with Gluten Free Waffles on the side!
Make Ahead Options
Preparing these Waffle Maker Hash Browns in advance is a fantastic way to save time on busy mornings! You can prep the potato mixture up to 24 hours in advance; simply grate the russet potatoes and mix them with salt, black pepper, garlic powder, onion powder, and olive oil. Store this mixture in an airtight container in the refrigerator to keep it fresh. When you’re ready to enjoy your hash browns, stir the mixture well to redistribute any moisture that may have settled. Then, just preheat your waffle maker, cook the mixture for 8-10 minutes, and serve them hot for a delicious breakfast that feels effortless!
How to Store and Freeze Waffle Maker Hash Browns
Fridge: Store leftover hash browns in an airtight container for up to 3-4 days to keep them fresh. Reheat in your waffle maker or skillet for optimal crispiness.
Freezer: For longer storage, freeze cooked hash browns in a single layer on a baking sheet before transferring to a freezer bag. They can stay frozen for up to 2 months.
Reheating: To enjoy, reheat from frozen in the waffle maker for about 10-12 minutes or in a skillet over medium heat until heated through and crispy.
Make-Ahead Tip: Prepare the potato mixture up to 24 hours ahead and store it in the fridge, ensuring you’re ready to whip up your Waffle Maker Hash Browns with ease!

Waffle Maker Hash Browns Recipe FAQs
How do I know if my potatoes are ripe enough for hash browns?
Absolutely! For hash browns, look for russet or Yukon Gold potatoes that are firm, with smooth skin and no dark spots or bruises. They should feel heavy for their size—a sign of good moisture content. Avoid any potatoes with sprouts or excessive blemishes, as these can affect both flavor and texture.
What’s the best way to store leftover Waffle Maker Hash Browns?
After savoring your delicious hash browns, let them cool completely before transferring them into an airtight container. Store in the refrigerator for up to 3-4 days. When you’re ready to enjoy them again, the waffle maker or skillet is your best friend for reheating to restore that crispy texture.
Can I freeze Waffle Maker Hash Browns?
Certainly! To freeze, spread your cooked hash browns in a single layer on a baking sheet and freeze them until solid (about 1-2 hours). Then transfer them to a freezer-safe bag or container. They can be frozen for up to 2 months. When ready to eat, reheat from frozen in your waffle maker for about 10-12 minutes for that crunchy perfection.
What common issues should I watch for when making hash browns?
Very! If your hash browns aren’t crispy, they may be too thick in the waffle maker or not coated evenly with oil. Make sure to preheat the waffle maker thoroughly before adding your potato mixture, and don’t overstuff it! If they come out mushy, ensure you’re using the right type of potato, as starchy varieties like russet provide the best results.
Are Waffle Maker Hash Browns safe for pets or individuals with allergies?
It’s important to note that while the base ingredients (potatoes, salt, etc.) are generally safe for pets in small amounts, the oils and additives may not be suitable. Always check for allergies in your family. For gluten-sensitive individuals, ensure your cooking spray and other ingredients are certified gluten-free to prevent any issues.

Crispy Waffle Maker Hash Browns for a Quick Breakfast Treat
Ingredients
Equipment
Method
- Preheat your waffle maker according to the manufacturer's instructions until it reaches a medium-high temperature.
- Wash and grate the russet potatoes. In a large bowl, combine grated potatoes with salt, black pepper, garlic powder, and onion powder.
- Drizzle the olive oil over the seasoned potato mixture and stir until well-coated.
- Lightly spray the preheated waffle maker with cooking spray to prevent sticking.
- Spread half of the potato mixture evenly over the hot waffle maker. Close the lid and cook for 8-10 minutes until golden brown.
- Remove the first batch and repeat the process with the remaining potato mixture.
- Serve hot and crispy, garnished with your favorite toppings.
Leave a Reply