
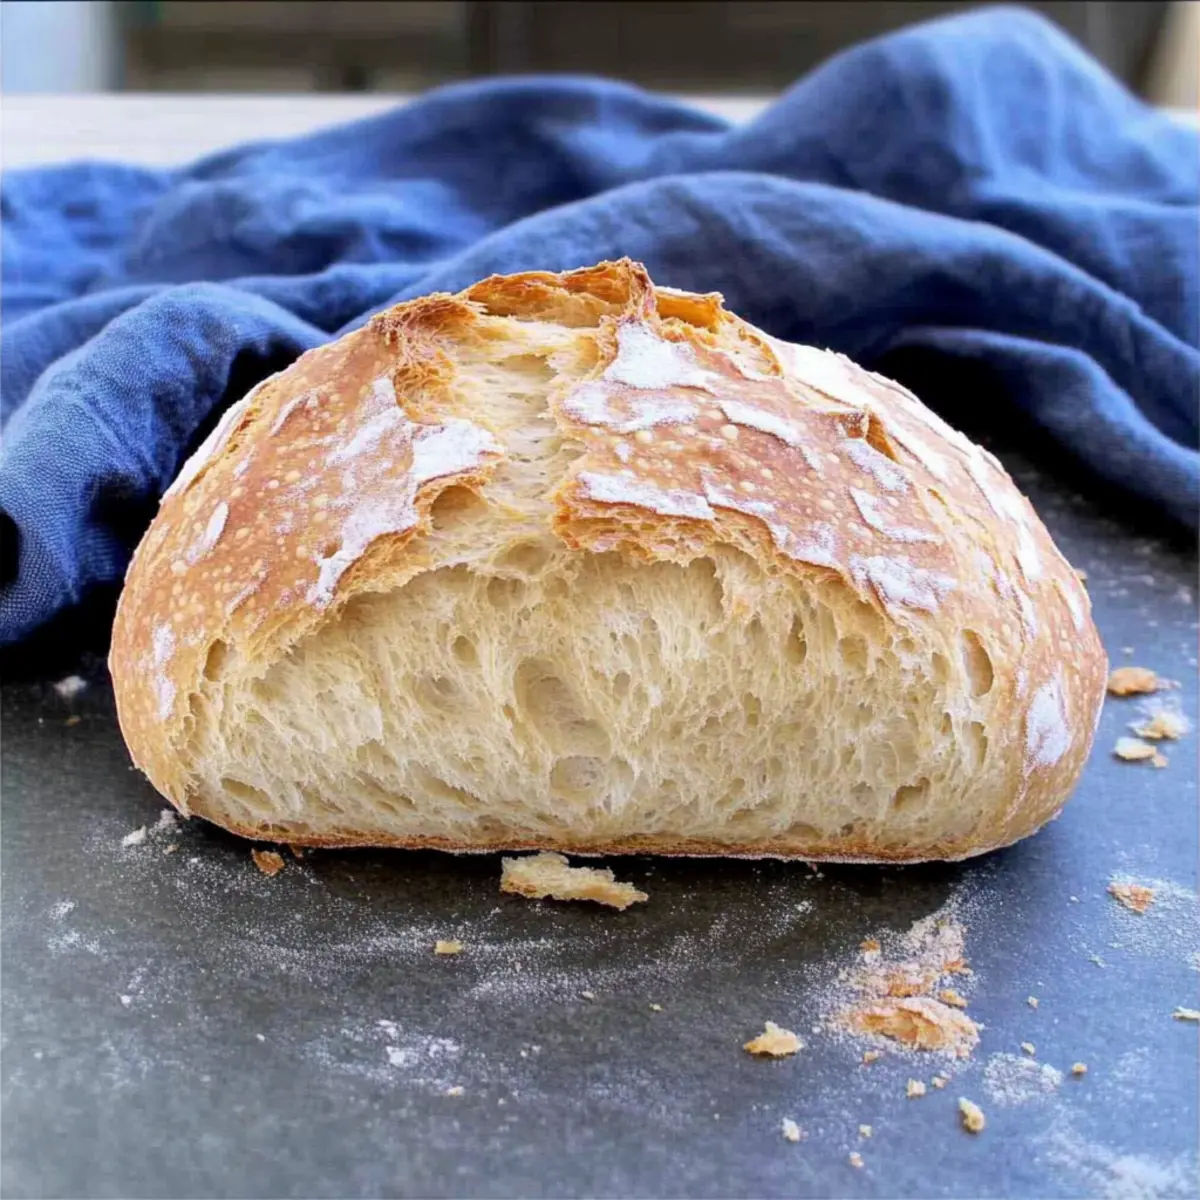
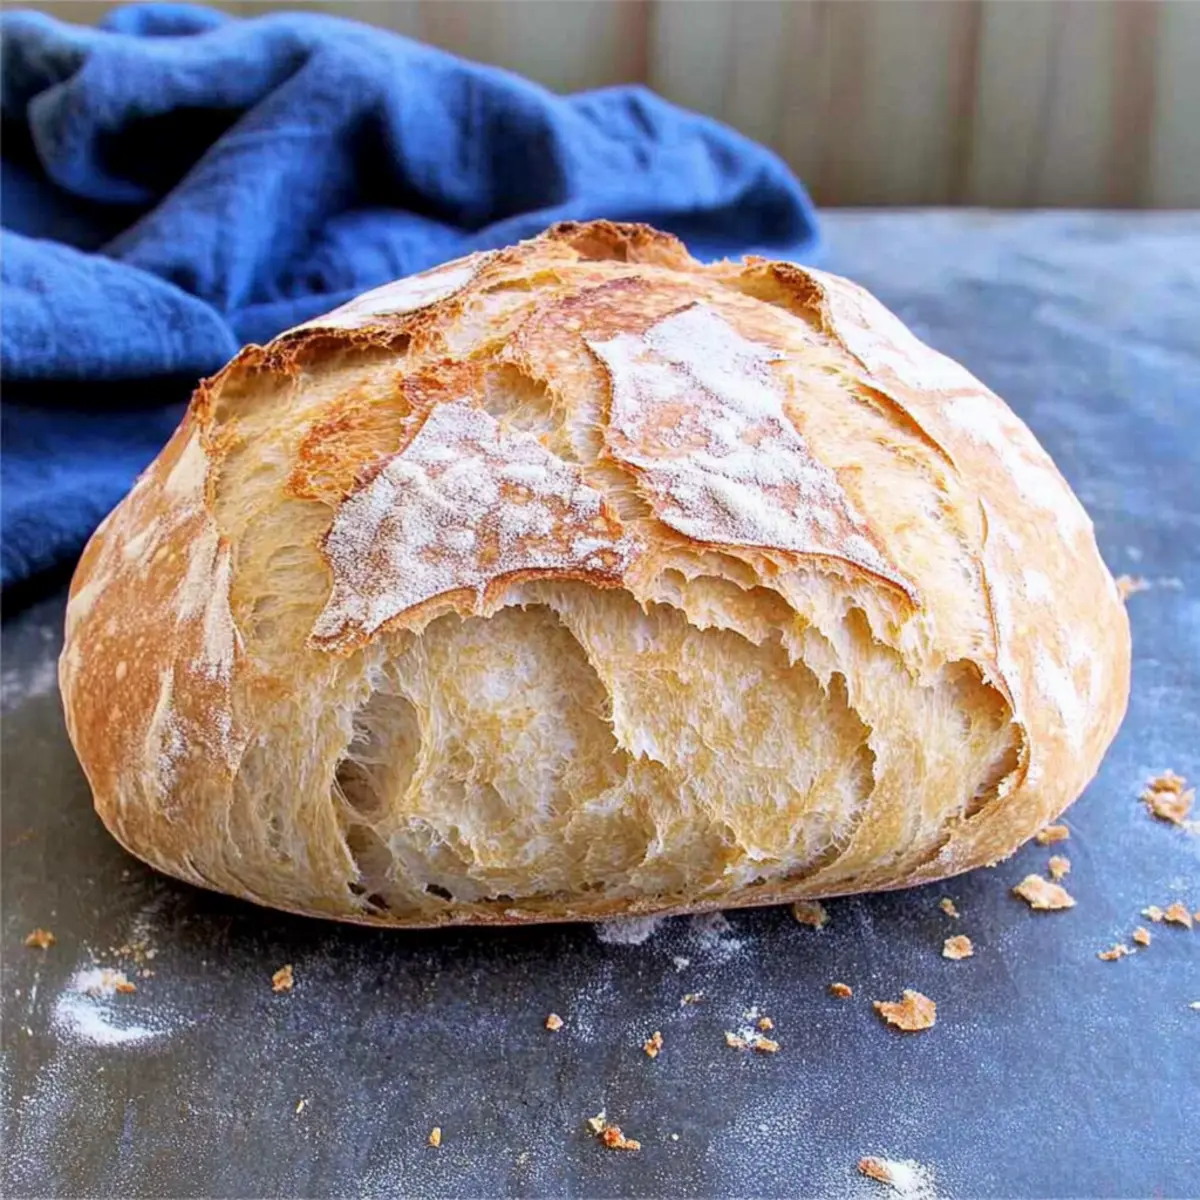
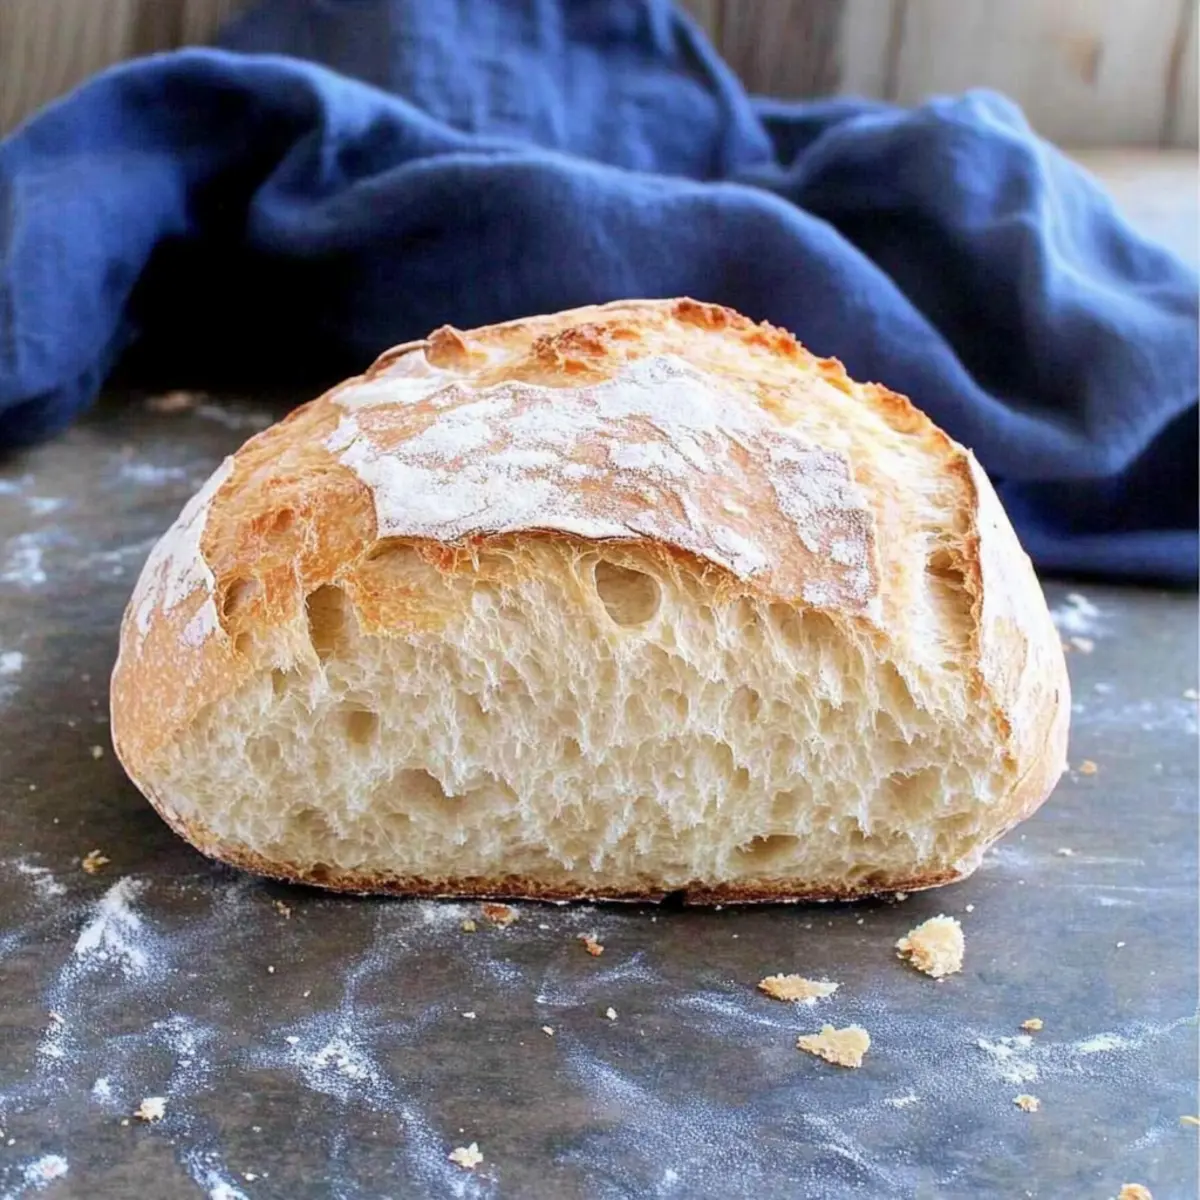
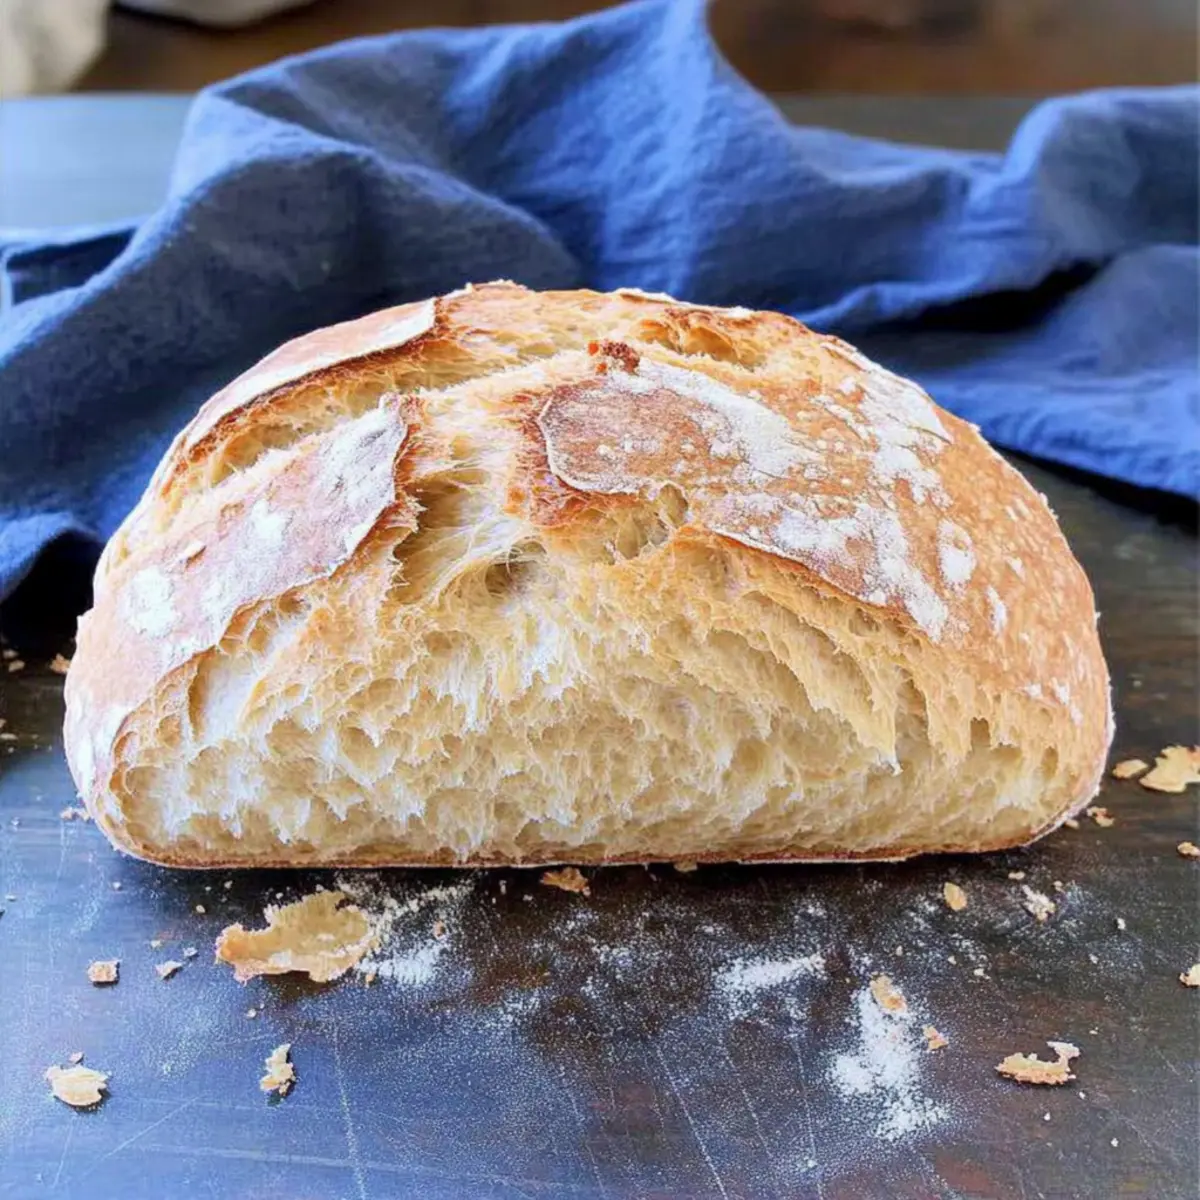
As the warm scent of freshly baked bread fills my kitchen, I can’t help but smile—it’s like a big, comforting hug. Today, I’m excited to share my recipe for Rustic Italian Crusty Bread, a delightful artisan loaf that’s both easy to make and incredibly rewarding. With just four simple ingredients and a no-knead technique, this recipe delivers a beautifully crackling crust and airy interior in just two hours! Not only is it perfect for dunking in soups or serving with bruschetta, but it’s also a crowd-pleaser that invites delightful conversation around the table. Imagine the joy of serving a loaf that’s beautifully rustic and homemade, and the best part? It’s a foolproof way to bring that authentic Italian bakery vibe right into your home. Ready to roll up your sleeves and get started? Let’s dive into the details!
Why is Homemade Bread So Irresistible?
Homemade bread is a true delight, transforming your kitchen into a warm haven of delicious aromas. No-Knead Convenience: This recipe allows you to create artisan bread without the fuss of kneading, perfect for busy home cooks. Quick Rise: With just a 2-hour wait, your patience is rewarded with a stunning loaf. Versatile Serving Options: Enjoy it with soups, as a bruschetta base, or simply paired with olive oil. Crowd-Pleasing Flavor: Its golden crust and soft interior make it irresistible to family and friends alike. Ready to elevate your meals? Try adding fresh herbs for an extra flavor boost or check out the Zucchini Flatbread Herbs for more homemade goodness!
Rustic Italian Crusty Bread Ingredients
For the Bread Dough
- All-Purpose Flour – Provides structure to the bread; substituting with bread flour gives a chewier texture.
- Sea Salt – Enhances flavor; kosher salt works well as a substitute.
- Warm Water – Activates yeast properly; ensure it’s warm, not hot, to keep the yeast alive.
- Instant Yeast – A fermentation agent perfect for quick rise; if using active dry yeast, bloom it in water first.
Optional Flavor Additions
- Fresh Herbs – Add rosemary or oregano for a burst of flavor that complements the rustic taste.
- Garlic – Incorporate finely minced garlic for a delightful, aromatic kick in the bread.
Feel free to experiment and enjoy your homemade Rustic Italian Crusty Bread!
Step‑by‑Step Instructions for Rustic Italian Crusty Bread
Step 1: Mix Dry Ingredients
In a large mixing bowl, combine 3 cups of all-purpose flour, 2 teaspoons of sea salt, and 1 teaspoon of instant yeast. Using a whisk, mix these dry ingredients thoroughly until evenly blended. This simple step sets the foundation for your Rustic Italian Crusty Bread, ensuring an even rise and flavor throughout the loaf.
Step 2: Add Water
Gradually pour in 1 ½ cups of warm water while stirring with a wooden spoon or spatula. Mix until a soft, sticky dough forms, ensuring no dry flour remains. The dough should feel tacky and slightly loose; this will help create that beautifully airy interior typical of artisan bread.
Step 3: First Rise
Cover the bowl loosely with plastic wrap and a clean tea towel to retain warmth. Let the dough rise at room temperature for 2-3 hours, or until it has doubled in size. You will know it’s ready when the surface appears bubbly and puffy, signaling that the yeast is working its magic.
Step 4: Shape Dough
Once risen, lightly flour a clean surface and transfer the dough onto it. With floured hands, gently fold the dough into a ball without kneading, ensuring you maintain its airy structure. Score the top with an ‘X’ or a few shallow cuts to allow for expansion during baking, adding a rustic touch to your Italian bread.
Step 5: Preheat Oven
Preheat your oven to 450°F (232°C) while placing a Dutch oven or pizza stone inside. This should be done at least 45 minutes prior to baking. An added bowl of water on the bottom rack will create steam, encouraging that perfect, crackling crust on your Rustic Italian Crusty Bread.
Step 6: Bake
Once preheated, carefully transfer the dough onto the hot pizza stone or inside the Dutch oven. Bake the bread for 30-45 minutes, or until it achieves a deep golden brown color. You’ll know it’s done when you hear a hollow thump when tapped on the bottom, a signature sound of perfect crusty bread.
Step 7: Cool Down
After baking, use tongs to transfer your Rustic Italian Crusty Bread to a cooling rack. Allow it to cool completely for at least 30 minutes before slicing. This cooling period is crucial to maintaining that delightful crust and achieving the best flavor and texture in every slice.
Expert Tips for Rustic Italian Crusty Bread
-
Choose Flour Wisely: Opt for all-purpose flour for balanced results; bread flour will yield a chewier texture if preferred.
-
Water Temperature: Always use warm water, around 100°F (38°C). Too hot can kill the yeast, preventing your dough from rising.
-
Don’t Rush the Rise: Allowing the dough to rise for the full 2-3 hours ensures maximum flavor and airy texture in your Rustic Italian Crusty Bread.
-
Steam is Key: For that crackling crust, don’t skip the steaming step. A Dutch oven holds moisture perfectly and enhances the crust without needing extra water.
-
Cool Completely: Patience is a virtue! Let the bread cool fully on a wire rack before slicing to maintain that crunchy crust and soft interior.
What to Serve with Rustic Italian Crusty Bread
Pairing this delightful loaf with the right accompaniments amplifies its enjoyable flavors and textures, making every meal extraordinary.
-
Savory Olive Oil Dip:
A rich, herby olive oil for dipping brings an indulgent, flavorful twist that perfectly complements the bread’s crust. -
Classic Tomato Bruschetta:
Fresh diced tomatoes, basil, and a drizzle of balsamic glaze atop warm slices create a vibrant, refreshing appetizer bursting with summer flavors. -
Creamy Tomato Basil Soup:
This comforting soup’s velvety texture pairs beautifully with the crispy crust, perfect for a cozy night in with loved ones. -
Garlic Herb Butter:
Spreading this aromatic butter over the warm bread elevates its rustic charm, adding a fragrant touch that invites lingering bites. -
Italian Antipasto Platter:
A selection of olives, cured meats, and cheeses offers a delightful mix of flavors and textures, inviting everyone to gather around and share. -
Mixed Green Salad:
A light salad with tangy vinaigrette provides a refreshing contrast to the bread’s density, ensuring a well-rounded meal experience. -
Cheese Board Pairing:
An assortment of cheeses, from sharp cheddar to creamy brie, complements the crunchy texture of the bread while enhancing its artisan essence. -
Chardonnay or Chianti:
A glass of crisp Chardonnay or a bold Chianti enhances the meal, highlighting the rustic flavors of the bread and accompanying dishes. -
Chocolate Fondue:
For a fun dessert twist, serve slices of bread with warm chocolate fondue—unexpected yet deliciously satisfying for a sweet finish!
Storage Tips for Rustic Italian Crusty Bread
Room Temperature: Store your Rustic Italian Crusty Bread in a paper bag at room temperature for up to 2-3 days to maintain its crusty texture.
Freezer: If you need to freeze, slice the bread and wrap it tightly in plastic wrap, then place it in a freezer bag. It can last up to 3 months.
Reheating: To revive the crustiness, reset your oven to 350°F (175°C) and warm the bread for about 10-15 minutes, allowing it to crisp up beautifully.
Avoid Refrigeration: Keep the bread out of the fridge, as it can dry out quickly and lose its delightful texture.
Make Ahead Options
These Rustic Italian Crusty Bread loaves are a fantastic option for meal prep enthusiasts! You can prepare the dough up to 24 hours in advance by mixing and letting it rise, then covering it tightly and refrigerating. This not only saves you time but also allows the bread to develop a deeper flavor. When ready to bake, simply take the dough out, let it sit at room temperature for about 30 minutes while preheating your oven, then shape and score it before baking as directed. This way, you’ll have a stunning artisan loaf ready to impress your family with minimal effort on busy days!
Rustic Italian Crusty Bread Variations
Feel free to explore delightful twists and substitutions for your rustic bread, all aimed to satisfy your culinary curiosity!
-
Herb-Infused: Mix in 1 tablespoon of dried herbs like oregano or rosemary for an aromatic bread that elevates your meals.
-
Garlic Lover’s Delight: Add 3-4 minced garlic cloves to the dough for a savory kick that pairs wonderfully with olive oil for dipping.
-
Whole Wheat Twist: Substitute half of the all-purpose flour with whole wheat flour to introduce a nutty flavor and hearty texture.
-
Cheesy Goodness: Fold in shredded cheese, like parmesan or mozzarella, into the dough before the first rise for delicious cheesy bites in every slice.
-
Nutty Crunch: Add ½ cup of crushed nuts, such as walnuts or almonds, to the dough for added texture and a delightful crunch!
-
Spicy Kick: Incorporate 1-2 teaspoons of red pepper flakes into the dough for a subtle heat that complements the rustic flavors beautifully.
-
Sweet Option: For a sweeter variation, add 2 tablespoons of honey or sugar to the warm water before mixing with the dry ingredients.
-
Dipping Delight: Serve your Rustic Italian Crusty Bread with flavored olive oils or rich balsamic vinegar for a vibrant, appealing appetizer. You could even try it as a base for bruschetta, inspired by the classic Pesto Chicken Flatbread to enjoy the flavors of Italy in a whole new way!
Each variation brings a little something unique to the table, inviting heartwarming conversations and memories around your dining space. Enjoy personalizing your homemade experience!
Rustic Italian Crusty Bread Recipe FAQs
How do I choose the best flour for Rustic Italian Crusty Bread?
Absolutely! Using all-purpose flour gives you a perfect balance of texture and taste. If you’re looking for a chewier crust, opt for bread flour instead. Just be mindful that the hydration level may slightly change, so adjust your water content accordingly.
What’s the ideal temperature for the water when making the dough?
Very important! Aim for warm water at around 100°F (38°C)—this is warm enough to activate the yeast without killing it. If you don’t have a thermometer, it should feel comfortably warm to the touch.
How should I store my Rustic Italian Crusty Bread?
I recommend keeping your bread in a paper bag at room temperature for 2-3 days. This helps maintain the crust’s delightful crunch! If you want it to last longer, wrap it tightly in plastic wrap and freeze it. For the best results, consume it within 3 months.
Can I freeze my Rustic Italian Crusty Bread? If so, how?
Absolutely! To freeze, slice the bread and wrap each slice tightly in plastic wrap. Then, place all the wrapped slices into a freezer bag for extra protection. This way, you can enjoy fresh-tasting bread whenever you want! When you’re ready, just reheat in the oven at 350°F (175°C) for 10-15 minutes to bring back that crispy crust.
What are common troubleshooting tips if my bread doesn’t rise properly?
If your bread isn’t rising, it may be due to the yeast quality. Ensure your yeast is fresh; if you’re using active dry yeast, it should bloom in the warm water. Also, keep in mind that cooler environments slow down rising, so try finding a warm spot in your kitchen, or let the dough rest longer if needed.
Are there any dietary considerations for Rustic Italian Crusty Bread?
Very much so! This recipe is vegetarian-friendly, but make sure to check for any allergies, especially with ingredients like yeast or flours. Additionally, if sharing with pets, remember that bread isn’t advised for them. It’s best to keep it human-focused for us to enjoy!
Rustic Italian Crusty Bread: No-Knead Magic at Home
Ingredients
Equipment
Method
- In a large mixing bowl, combine 3 cups of all-purpose flour, 2 teaspoons of sea salt, and 1 teaspoon of instant yeast. Mix thoroughly with a whisk.
- Gradually pour in 1 ½ cups of warm water while stirring with a wooden spoon or spatula until a soft, sticky dough forms.
- Cover the bowl loosely and let the dough rise for 2-3 hours until doubled in size.
- Transfer the dough to a floured surface and fold into a ball. Score the top with an 'X' or shallow cuts.
- Preheat your oven to 450°F (232°C) at least 45 minutes before baking, placing a Dutch oven or pizza stone inside.
- Transfer the dough onto the hot pizza stone or in the Dutch oven and bake for 30-45 minutes until golden brown.
- After baking, transfer the bread to a cooling rack and let it cool for at least 30 minutes before slicing.
Leave a Reply