
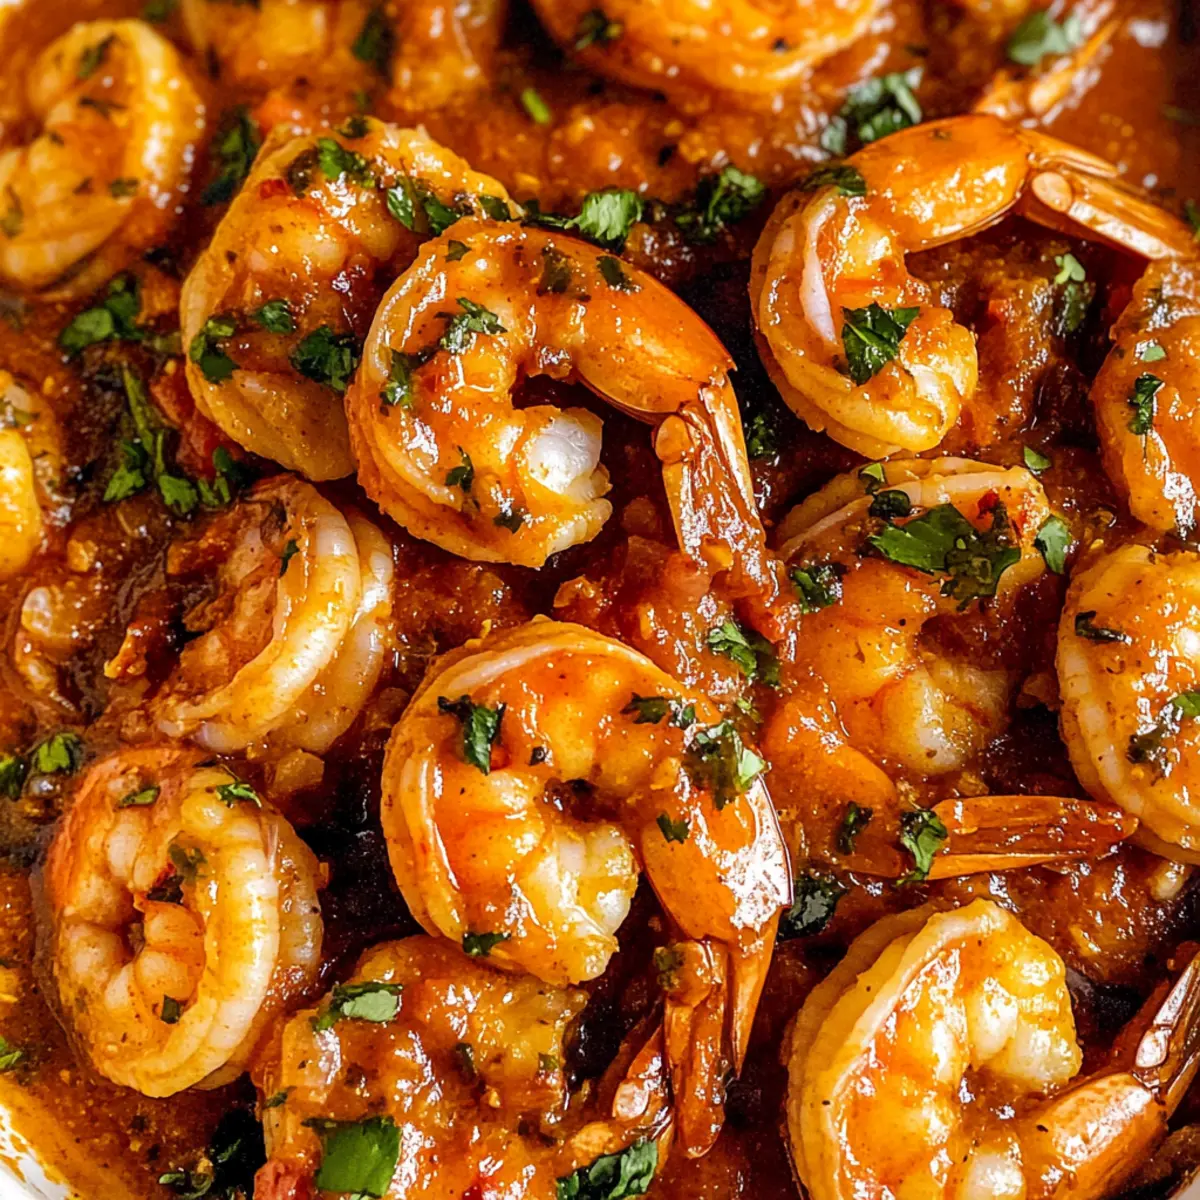
As the aroma of sizzling garlic fills the kitchen, I can’t help but feel transported to a bustling Portuguese seaside, where the flavors of the ocean mingle with vibrant spices. This Spicy Portuguese Garlic Shrimp with Peri-Peri Sauce is a dish that effortlessly captures the essence of that culinary paradise. Not only is this recipe quick and easy to whip up, making it perfect for busy weeknights, but it also serves up a delectable explosion of spicy, garlicky goodness that’s sure to impress your friends and family. Think tender shrimp enveloped in a rich, fiery tomato sauce that’s just begging for a side of crusty bread to soak it up. Ready to turn your home into a gourmet getaway? Let’s dive in!
Why is Portuguese Garlic Shrimp So Incredible?
Quick and Easy: This dish is a breeze to prepare, perfect for busy nights when you crave something special without the hassle.
Flavor Explosion: With its fiery peri-peri spice and rich garlic aroma, each bite offers a taste of savory paradise that excites the palate.
Crowd-Pleasing Appeal: Impress your guests with this exotic dish that invites everyone to enjoy a taste of Portugal from the comfort of home.
Versatile Ingredients: Don’t hesitate to swap shrimp for your favorite seafood or add extra veggies for a nutritious twist! And for those who enjoy a touch of garlic in their meals, paired with Cheesy Garlic Chicken Wraps or a delightful serving of Garlic Butter Steak, the flavor harmonizes beautifully.
Perfect for Sharing: Whether it’s a family dinner or a casual get-together, this dish fosters a sense of togetherness and indulgence. Get your friends and family around the table to enjoy!
Portuguese Garlic Shrimp Ingredients
For the Shrimp
• Shrimp – 1 – 1 1/2 lbs, shell-on, de-veined; freshness is key for optimal flavor.
For the Sauce
• Olive Oil – 2 tbsp or more; great for sautéing; vegetable oil can be used as a substitute.
• Butter – 3 tbsp; adds richness to the sauce; margarine works for a dairy-free option.
• Garlic – 8 cloves, fresh, minced; essential for that robust flavor; avoid using garlic powder for the best result.
• Onion – 1/2 medium, diced; contributes sweetness and depth; shallots can be an excellent alternative.
• Tomato Paste – 2 tbsp; enhances color and richness of the sauce; crushed tomatoes can also be used.
• Peri-Peri Spice Mix – 2 tsp (add more for extra spice); provides that signature heat; if unavailable, blend paprika, cayenne, and oregano.
• White Wine – 3/4 cup, dry; used for deglazing and adds acidity; non-alcoholic versions can use chicken or vegetable broth.
• Chicken Broth – 1 cup; provides depth; substitute with vegetable broth for vegetarian needs.
• Cilantro – 1/4 cup, chopped; fresh herb to elevate the dish; parsley is a fine substitute if preferred.
Step‑by‑Step Instructions for Portuguese Garlic Shrimp
Step 1: Sear Shrimp
Season the shrimp with salt while you heat a medium pan over medium-high heat. Add 2 tablespoons of olive oil and sear the shrimp for 2-3 minutes on each side until they turn pink and are just cooked through. Remove the shrimp from the pan and set them aside, as they will finish cooking later in the rich sauce.
Step 2: Prepare Sauce
Lower the heat to medium-low and, in the same pan, add 3 tablespoons of butter, along with 8 minced garlic cloves and 1/2 diced onion. Sauté these ingredients for about 2-3 minutes until the onion becomes translucent and fragrant, allowing the delicious aromas of garlic to fill your kitchen.
Step 3: Add Tomato Paste
Stir in 2 tablespoons of tomato paste, mixing it well with the garlic and onion. Allow this to cook for approximately 7 minutes, stirring occasionally, until the mixture deepens in color and the flavors intensify, creating a rich base for your Portuguese garlic shrimp.
Step 4: Incorporate Spices
In the last 2 minutes of cooking the tomato paste, add 2 teaspoons of peri-peri spice mix to the pan. Stir it into the mixture to release its vibrant flavors, infusing the sauce with a delightful heat that will enhance your garlic shrimp.
Step 5: Deglaze
Carefully pour in 3/4 cup of dry white wine, and let it simmer for about 3 minutes. Use a wooden spoon to scrape up any browned bits stuck to the bottom of the pan, as these will add incredible depth and richness to the sauce for your Portuguese garlic shrimp.
Step 6: Add Broth and Shrimp
Once the white wine has reduced slightly, mix in 1 cup of chicken broth and let it simmer for about 5 minutes to thicken. Return the seared shrimp to the pan along with any juices they released, and let them cook for another 3 minutes until they are fully cooked and nicely coated in the flavorful sauce.
Step 7: Serve
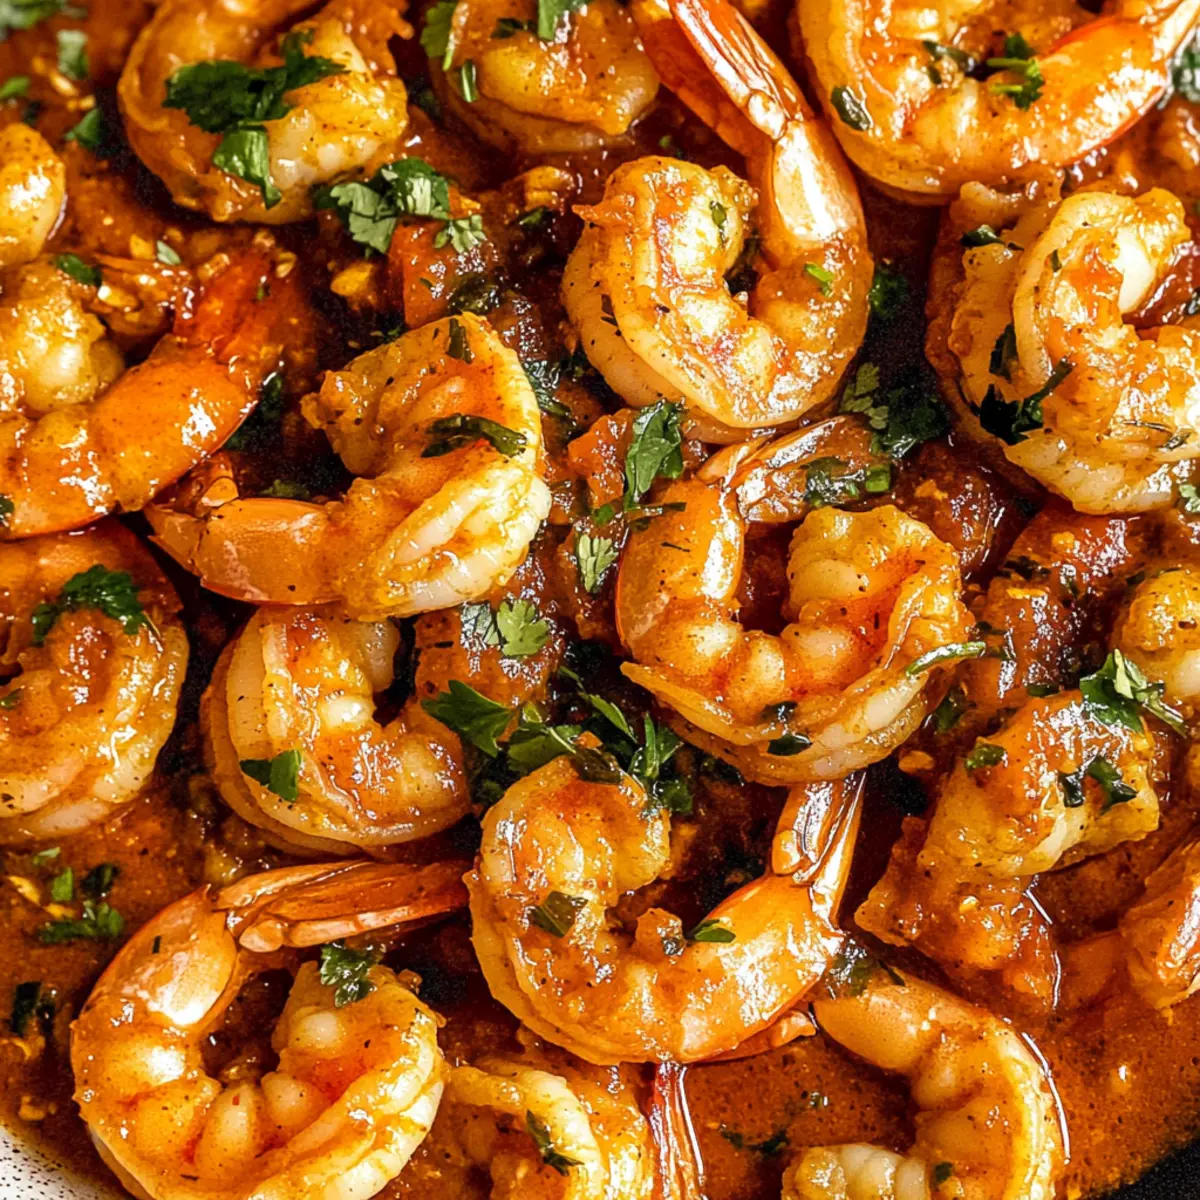
Finally, remove the pan from heat and garnish your Portuguese garlic shrimp with 1/4 cup of chopped cilantro. Serve the dish immediately over fluffy rice or alongside crusty bread, allowing everyone to indulge in the rich, spicy goodness you’ve created!
Storage Tips for Portuguese Garlic Shrimp
Fridge: Store leftover Portuguese garlic shrimp in an airtight container for up to 1-2 days to maintain freshness.
Freezer: Place cooled shrimp in a freezer-safe container and freeze for up to 3 months. Make sure to wrap tightly to prevent freezer burn.
Reheating: Thaw shrimp in the refrigerator overnight and reheat gently on the stove over low heat, adding a splash of broth or water to keep the sauce moist.
Room Temperature: Avoid leaving the shrimp out at room temperature for more than 2 hours to ensure food safety.
Expert Tips for Portuguese Garlic Shrimp
- Fresh is Best: Use fresh or properly thawed shrimp to ensure optimal flavor and texture; avoid using previously frozen shrimp that may be mushy.
- Perfect Sear: Do not overcrowd the pan when searing the shrimp; this helps achieve a beautiful golden crust and prevents steaming.
- Watch the Heat: Keep the heat moderate when cooking garlic to prevent it from burning; burnt garlic can impart a bitter taste to your sauce.
- Deglaze Wisely: Use a good quality dry white wine for deglazing; it enhances the sauce’s depth and complements the peri-peri in your Portuguese garlic shrimp.
- Timing Matters: Be mindful of the shrimp’s cooking time; they should be just cooked through before adding them back to the sauce to avoid rubbery shrimp.
What to Serve with Spicy Portuguese Garlic Shrimp
There’s nothing quite like complementing a vibrant, spicy dish with sides that enhance its allure and bring your meal to life.
- Fluffy White Rice: This classic base soaks up the rich, garlicky sauce, allowing you to savor every last drop.
- Crusty Bread: Perfect for dipping, a fresh baguette or sourdough provides a satisfying crunch against the tender shrimp.
- Crisp Green Salad: A light salad adds a refreshing crunch, with ingredients like arugula and cherry tomatoes bringing brightness to your plate.
- Garlic Butter Rice: Elevate your rice by mixing in a little butter and garlic; it echoes the flavors of your shrimp.
- Grilled Asparagus: The smokiness of grilled asparagus pairs beautifully, adding a green element that balances the dish’s spices.
- Roasted Potatoes: Crispy, golden potatoes serve as a hearty complement, offering a satisfying contrast to the succulent shrimp.
- Mango Salsa: A fruity salsa brightens the plate, with sweet and tangy notes that play off the shrimp’s heat perfectly.
- Chilled White Wine: A glass of crisp white wine, like Sauvignon Blanc, enhances the dish’s flavors while keeping the meal light.
- Chocolate Mousse: End your meal on a sweet note with a rich chocolate mousse; its creamy texture and indulgent flavor make for a heavenly finale.
Make Ahead Options
Portuguese Garlic Shrimp is a fantastic meal prep option for busy weeks ahead! You can sear the shrimp up to 24 hours in advance and store them in an airtight container in the refrigerator. Additionally, you can prepare the sauce (without the shrimp) and refrigerate it for up to 3 days; simply reheat it on the stove before adding the shrimp. To maintain the quality of the shrimp, be sure not to overcook them during initial searing as they’ll finish cooking in the sauce. When you’re ready to enjoy your dish, just combine the shrimp with the warmed sauce for a quick, flavorful meal that’s just as delicious as if made fresh!
Portuguese Garlic Shrimp Customizations
Feel free to make this delightful dish your own with these simple tweaks and substitutions!
-
Seafood Swap: Try using scallops or white fish instead of shrimp for a different protein twist. Each seafood option will bring its own unique flavor to the dish.
-
Heat Up: Increase the peri-peri spice for an extra kick! If you prefer, you could also add fresh chopped chili peppers for an allure of warmth that dances on your palate.
-
Veggie Boost: Add diced bell peppers, spinach, or even zucchini to the mix for a nutrition upgrade. Not only will the veggies add color, but they’ll also elevate the dish’s texture and flavor profile.
-
Herb Substitution: Use fresh parsley instead of cilantro for a milder herb taste. This is a great option for those who prefer something less assertive in flavor.
-
Broth Choice: For a richer taste, try using seafood broth instead of chicken or vegetable broth. This will amplify the oceanic vibe of the dish and enhance its overall flavor.
-
Tomato Twist: Substitute tomato paste with crushed tomatoes for a heartier sauce that has more texture. You could even add a touch of honey for a contrasting sweetness.
-
Gluten-Free: For those avoiding gluten, enjoy this dish with cauliflower rice or quinoa instead of traditional rice. It’s a light and nutritious alternative that soaks up the sauce beautifully.
-
Fresh Garlic: Want even more garlic flavor? Roast a few additional cloves to add on top before serving. This will bring a sweet, caramelized note that complements the savory elements beautifully.
The beauty of the Portuguese Garlic Shrimp recipe lies in its flexibility! Whether you want to keep it traditional or explore new flavor avenues, this dish can easily adapt to your tastes and dietary preferences. For more garlic goodness, you might check out Cheesy Garlic Chicken Wraps for a different take, or indulge in a tasty pairing with Beef Kofta Garlic that celebrates robust flavors as well!
Portuguese Garlic Shrimp Recipe FAQs
How do I know if my shrimp are fresh?
Absolutely! Fresh shrimp should be slightly translucent and smell like the ocean, not fishy. Look for a firm texture without dark spots or a strong odor—those are signs of freshness!
What’s the best way to store leftover Portuguese garlic shrimp?
I recommend refrigerating any leftovers in an airtight container for up to 1-2 days. This way, you can enjoy the rich flavors another day! When reheating, do it gently on the stove over low heat with a splash of broth to keep the sauce nice and moist.
Can I freeze Portuguese garlic shrimp? How do I do it?
Yes, you can freeze this delightful dish! First, let the shrimp cool completely. Then, place them in a freezer-safe container or a resealable freezer bag, making sure to remove as much air as possible. You can keep them in the freezer for up to 3 months. When you’re ready to enjoy, thaw in the fridge overnight and reheat gently.
What if my garlic turns bitter while cooking?
Very! If you find your garlic has burnt during cooking, don’t worry. The key is to keep your heat moderate, allowing the garlic to sauté until fragrant without burning. If it does burn, you might want to start over, as burnt garlic can impart that strong, unpleasant bitterness to the dish.
Are there any dietary considerations for this dish?
Yes, definitely! This recipe contains shellfish, which can be a common allergen. If you’re serving it to guests, be sure to ask about allergies beforehand. Also, you can replace butter with margarine for a dairy-free option or swap the chicken broth for vegetable broth to make it vegetarian-friendly.
Can I increase the spice level in my Portuguese garlic shrimp?
Of course! If you love heat, feel free to add more peri-peri spice blend to the sauce. You can also include diced hot peppers or a splash of hot sauce for that extra fiery touch. Just remember—start small, taste, and adjust according to your spice preference!
Savoring Portuguese Garlic Shrimp: A Spicy Delight in Minutes
Ingredients
Equipment
Method
- Season the shrimp with salt while you heat a medium pan over medium-high heat. Add 2 tablespoons of olive oil and sear the shrimp for 2-3 minutes on each side until they turn pink and are just cooked through. Remove the shrimp from the pan and set them aside.
- Lower the heat to medium-low and, in the same pan, add 3 tablespoons of butter, along with 8 minced garlic cloves and 1/2 diced onion. Sauté these ingredients for about 2-3 minutes until the onion becomes translucent and fragrant.
- Stir in 2 tablespoons of tomato paste, mixing it well with the garlic and onion. Allow this to cook for approximately 7 minutes, stirring occasionally, until the mixture deepens in color and the flavors intensify.
- In the last 2 minutes of cooking the tomato paste, add 2 teaspoons of peri-peri spice mix to the pan. Stir it into the mixture to infuse the sauce with delightful heat.
- Carefully pour in 3/4 cup of dry white wine and let it simmer for about 3 minutes while scraping up any browned bits stuck to the bottom of the pan.
- Once the white wine has reduced slightly, mix in 1 cup of chicken broth and let it simmer for about 5 minutes to thicken. Return the shrimp to the pan and let them cook for another 3 minutes.
- Finally, remove the pan from heat and garnish your Portuguese garlic shrimp with 1/4 cup of chopped cilantro. Serve immediately over rice or alongside crusty bread.
Leave a Reply