
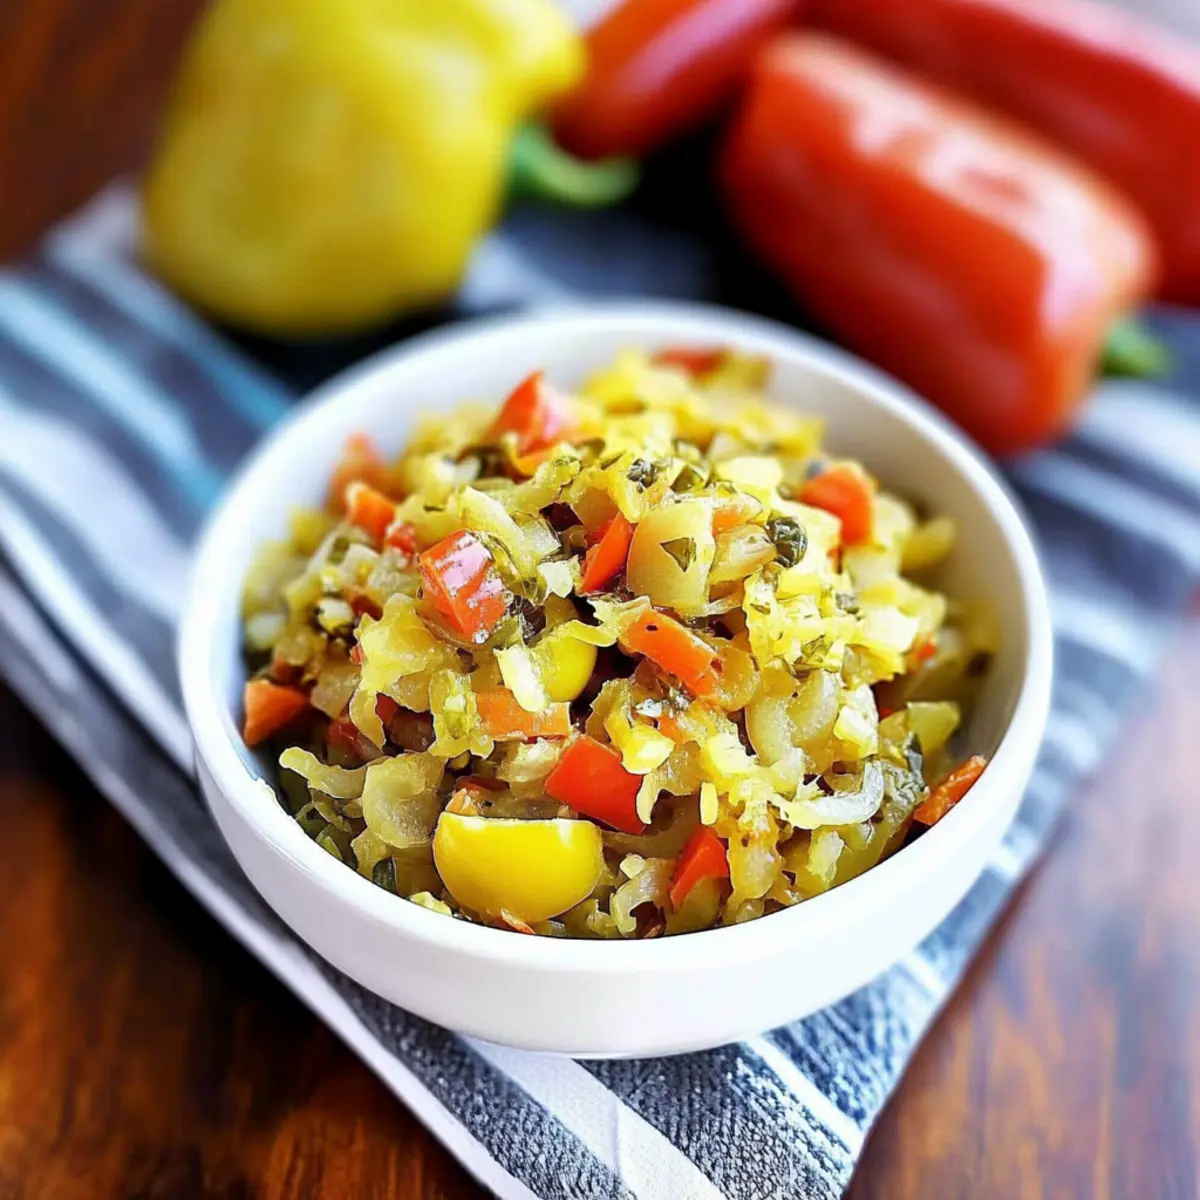
The first time I bit into a spicy, tangy bite of pepperoncini relish, it felt like unlocking a treasure chest filled with vibrant flavor. This Quick and Tangy Pepperoncini Relish takes just 10 minutes to whip up, making it a go-to for busy cooks like me looking to elevate everyday meals without fuss. Its versatility shines through, whether you’re topping a hot dog or adding a zing to your salad. Plus, it’s entirely homemade and vegetarian, giving you full control over the ingredients. Why settle for bland when you can bring excitement to your plate with this delightful relish? Ready to discover how to make your meals sing? Let’s dive in!
Why is Pepperoncini Relish a Must-Try?
Quick Prep Time: You’ll love how this relish comes together in just 10 minutes, making it a lifesaver for busy weeknights.
Vibrant Taste: The zesty combination of peppers and spices adds a punchy flavor that transforms any dish from dull to dazzling.
Versatile Use: It’s not just a condiment; enjoy it in salads, sandwiches, or even as a dip. The possibilities are endless!
Homemade Goodness: Knowing you’ve created this fresh relish from scratch guarantees quality and flavor, free of preservatives.
Party Favorite: Impress guests at gatherings with this crowd-pleaser that pairs perfectly with meats and appetizers alike. Give your taste buds a flavorful treat and elevate your culinary experience with this Quick and Tangy Pepperoncini Relish.
Pepperoncini Relish Ingredients
• To create your own Pepperoncini Relish, gather these fresh ingredients that pack a flavorful punch!
For the Relish Base
- Mezzetta Golden Greek Peperoncini – Adds mild tang and a signature briny taste. Substitution: Banana peppers can be used for a similar flavor profile, though with a slightly different sweetness.
- Mezzetta Sliced Tamed Jalapeno Peppers – Introduces a touch of moderate heat without overwhelming flavors. Note: Adjust quantity for desired spice level.
- Red Bell Pepper – Provides sweetness and color to the relish. Prep Note: Ensure seeds are removed and chop roughly for even texture.
- Yellow Bell Pepper – Adds further sweetness and visual appeal. Prep Note: Similar to red bell pepper, ensure seeds are removed.
- White Onion – Contributes sharpness and crunch. Prep Note: Can be swapped with yellow onion for a milder flavor.
- Garlic – Offers pungent aroma and flavor depth. Note: Use fresh garlic for the best flavor; halved cloves enhance blending.
For the Dressing
- Mezzetta Golden Greek Peperoncini Juice – For added tang and moisture in the relish. Note: Use additional brine if a more liquid consistency is desired.
- Fresh Lemon Juice – Brightens flavor; use fresh for the best taste. Note: Reduce store-bought lemon juice to avoid excessive sourness.
- Red Pepper Flakes – Brings subtle heat and a hint of spice. Note: Adjust to taste or omit for a milder relish.
- Fresh Parsley – Adds freshness and color. Note: Substitute other fresh herbs like cilantro or dill as preferred.
For Seasoning and Flavor
- Olive Oil – Enhances richness and mouthfeel. Note: Extra virgin olive oil is recommended for best flavor.
- Salt & Black Pepper – Basic seasonings that elevate overall flavors. Note: Adjust to personal taste.
Step‑by‑Step Instructions for Pepperoncini Relish
Step 1: Blend the Base Ingredients
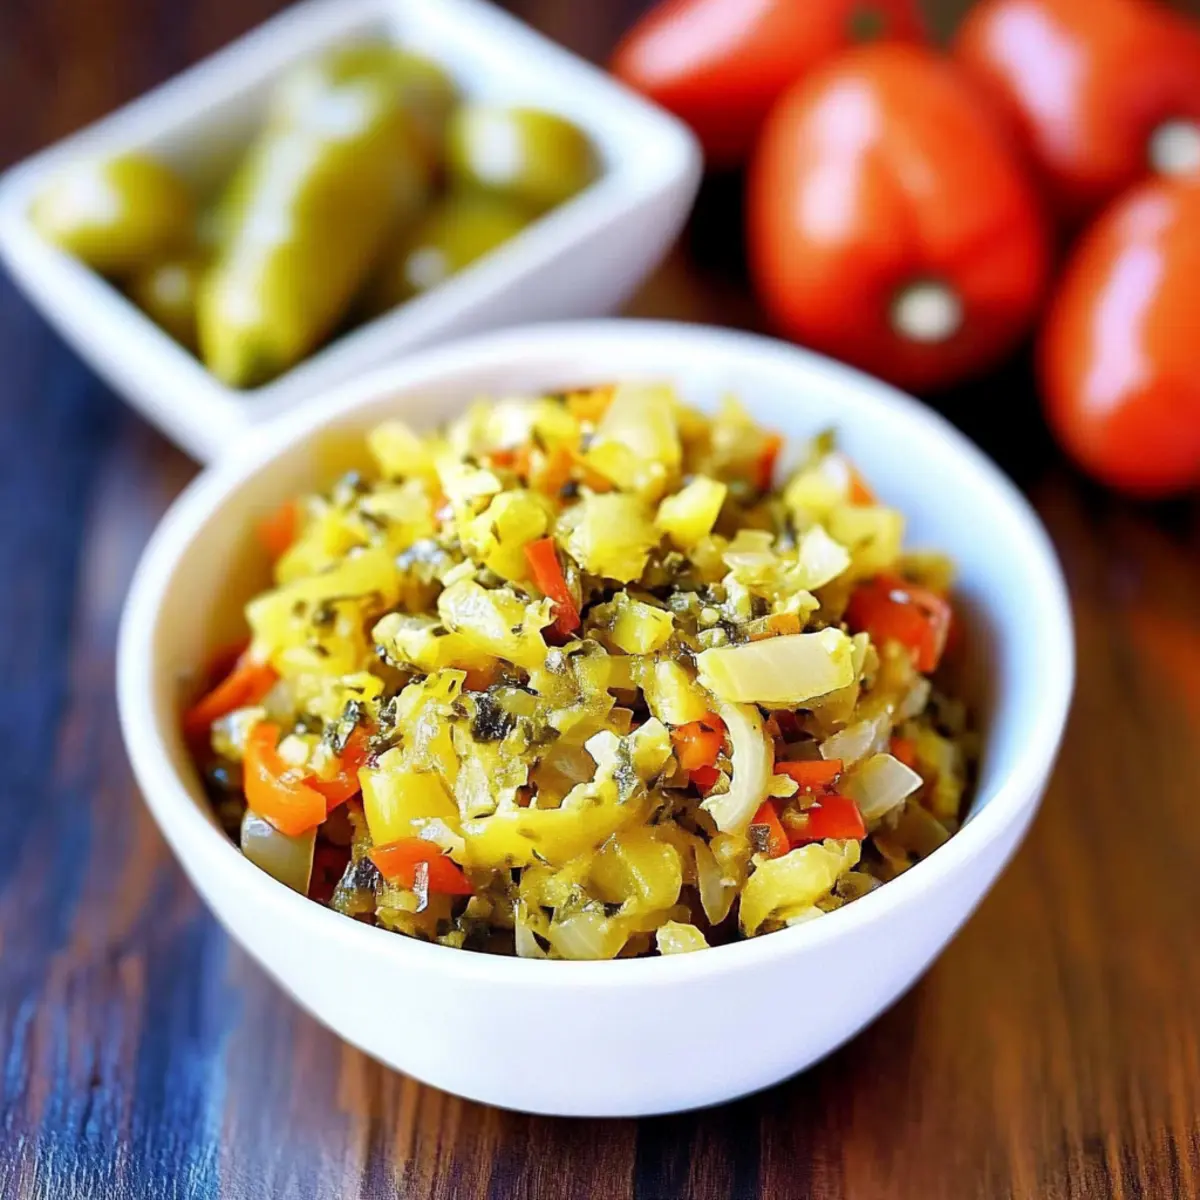
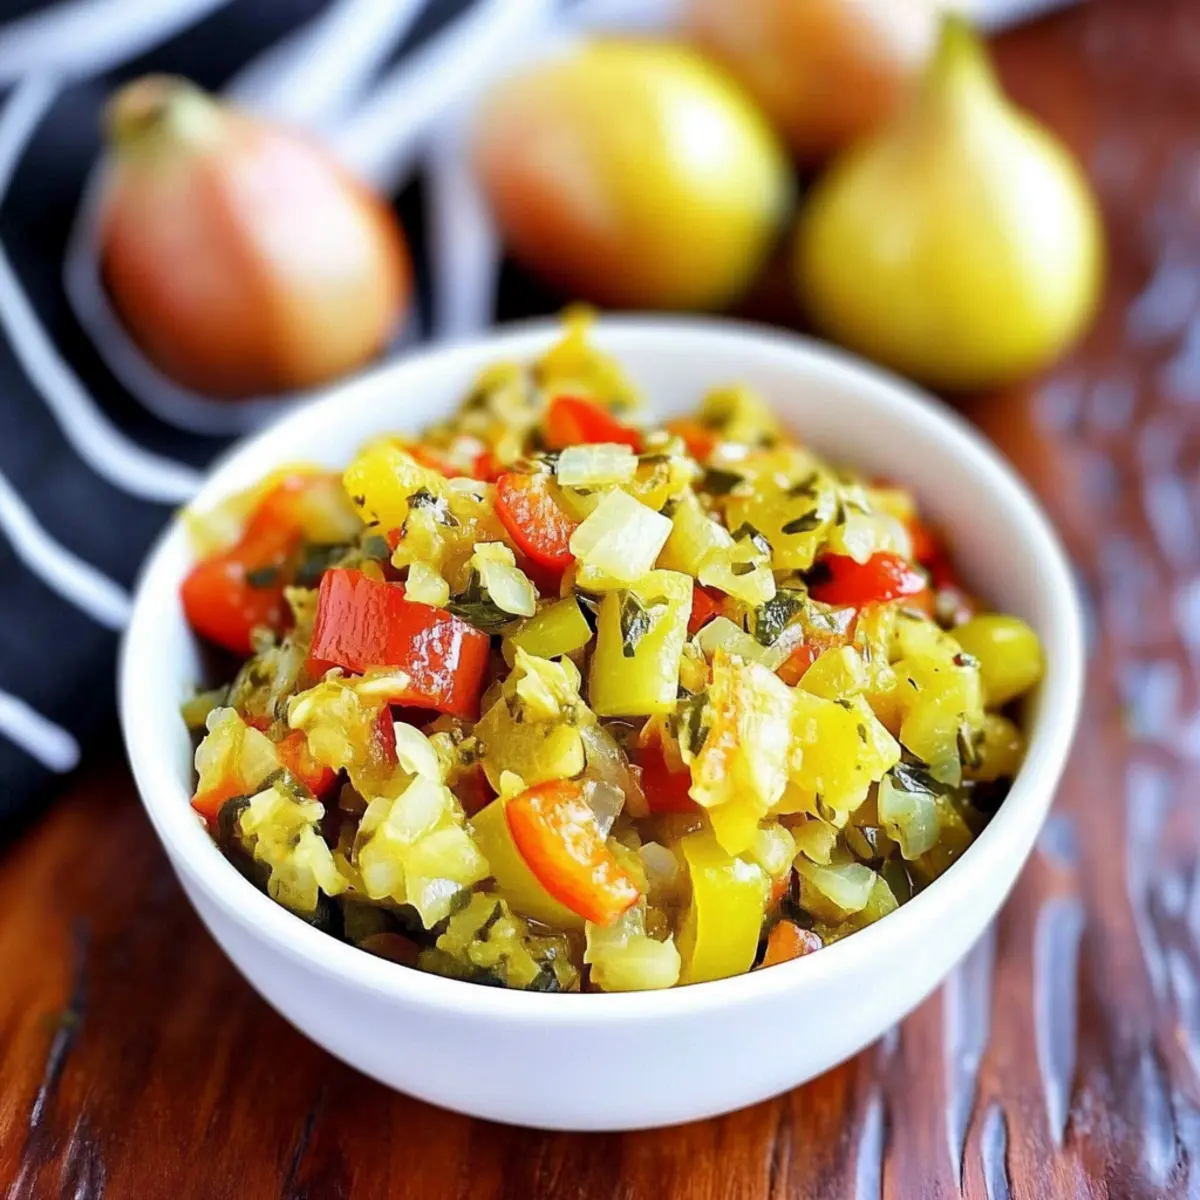
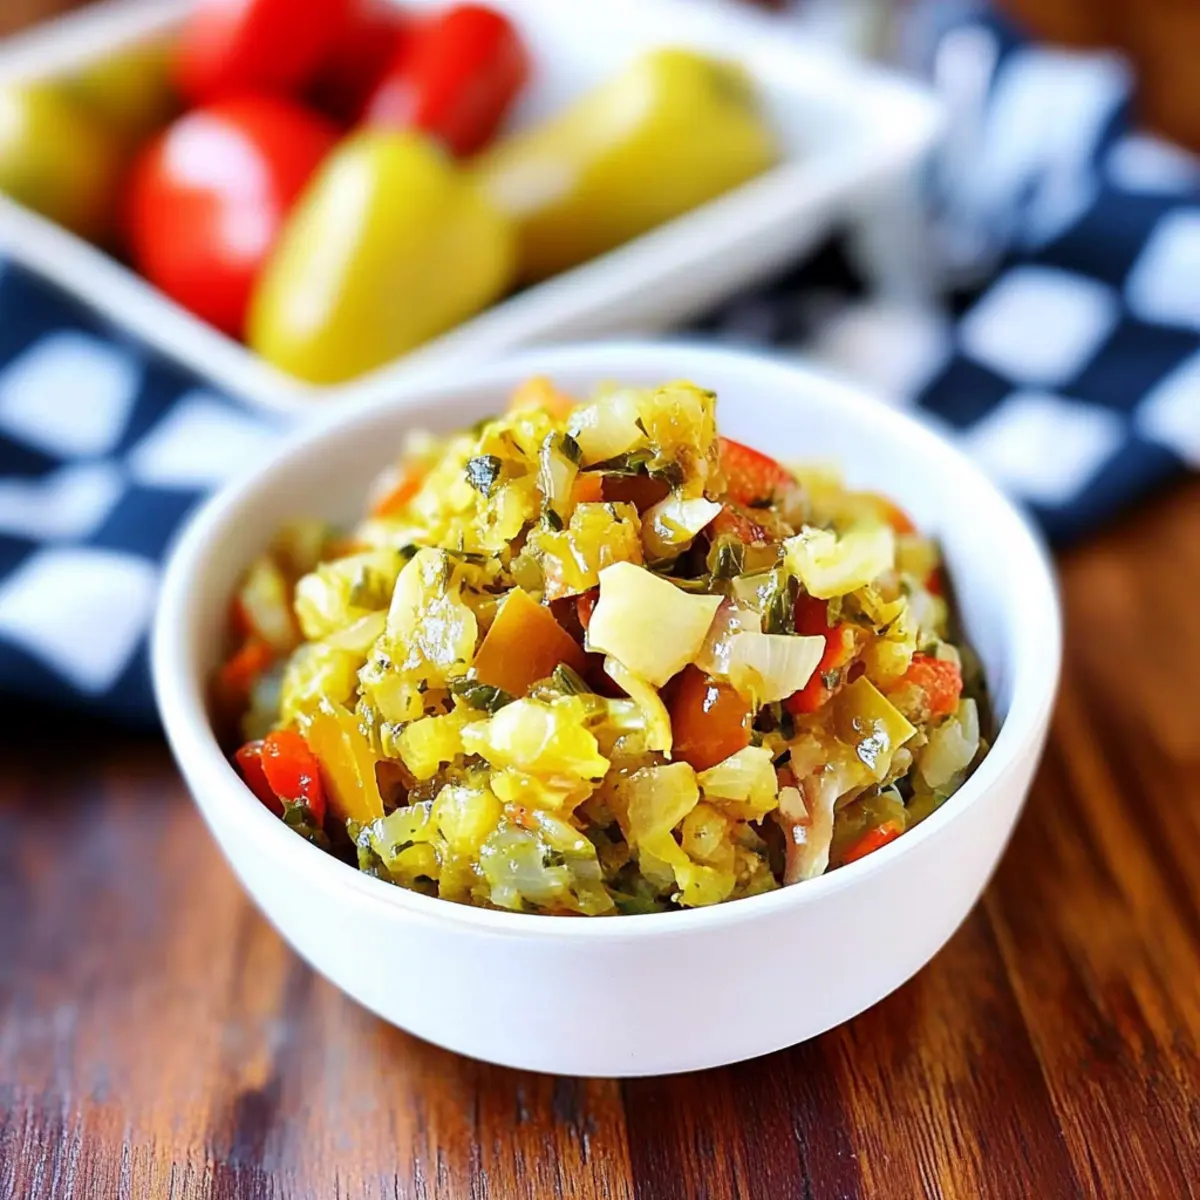
In a large food processor, combine the Mezzetta Golden Greek Peperoncini, sliced jalapeños, red and yellow bell peppers, white onion, and garlic cloves. Pulse the mixture on high for 10-15 seconds until finely chopped, taking care not to puree. You want a chunky relish that retains some texture; it should look colorful and vibrant.
Step 2: Cook the Mixture
Transfer the finely chopped vegetable mix into a medium saucepan over medium heat. Add the peperoncini juice, fresh lemon juice, and red pepper flakes. Stir occasionally for 3-5 minutes, cooking until the vegetables soften but still retain a slight crunch and their vibrant colors. The mixture should be heated through and fragrant.
Step 3: Drain and Cool
Remove the saucepan from heat and carefully pour the mixture into a fine mesh sieve placed over a bowl to drain excess liquid. Allow it to cool for about 10 minutes, ensuring that the relish thickens slightly. The goal is to achieve a well-balanced consistency without being overly watery.
Step 4: Add Fresh Ingredients
Once cooled, return the mixture to a bowl and stir in chopped fresh parsley, extra virgin olive oil, salt, and black pepper. Adjust the seasoning to your taste, ensuring that the vibrant flavors of your Pepperoncini Relish shine through. The olive oil will add a rich texture, making every bite delightful.
Step 5: Store the Relish
Pour the finished Pepperoncini Relish into an airtight container, like a mason jar, for best storage. Seal it tightly and store it in the refrigerator. This relish can be enjoyed for 1-2 weeks, allowing time for the flavors to develop. Use it generously as a condiment or topping for your favorite dishes!
What to Serve with Quick and Tangy Pepperoncini Relish
Imagine a table filled with vibrant flavors and textures, all brought together by the zesty touch of a homemade relish.
- Grilled Hot Dogs: The spicy tang of the relish enhances juicy hot dogs, bringing a burst of flavor in every bite. Serve it up for a backyard barbecue twist!
- Savory Bratwurst: Drizzle this relish atop bratwurst for a deliciously tangy companion that cuts through the richness of the sausage. It’s a match made in flavor heaven!
- Crispy Tacos: Add a spoonful to your tacos for an extra crunch and a delightful hit of acidity. It brightens up the dish like a fiesta on your plate!
- Garden Salad Upgrade: Toss it into a garden salad for a zesty dressing replacement; the relish provides freshness and a pop of color that is simply irresistible.
- Cream Cheese Spread: Combine with cream cheese for a tasty spread on crackers or bagels, perfect for snacking or entertaining guests.
- Grilled Chicken: Layer the relish on grilled chicken breast for an instant upgrade, infusing each bite with a punchy taste that’s truly satisfying.
- Charcuterie Board Star: Make your charcuterie boards sing by including this relish; it complements cheeses and cured meats, inviting diners to explore bold flavors.
- Fresh Lemonade: Enjoy a glass of fresh lemonade on the side; its sweetness balances the spicy tang, making for a refreshing pairing with your meal.
How to Store and Freeze Pepperoncini Relish
Fridge: Store your Pepperoncini Relish in an airtight container, like a mason jar, for up to 1-2 weeks to maintain its fresh flavor.
Freezer: For longer storage, you can freeze the relish in freezer-safe containers. It will keep well for up to 3 months; just thaw before serving.
Reheating: When ready to enjoy, simply thaw the relish in the fridge overnight or warm it gently on the stove to bring back its vibrant taste.
Keep it Fresh: Avoid allowing the relish to sit at room temperature for more than 2 hours to ensure its quality and safety.
Pepperoncini Relish Variations & Substitutions
Feel free to get creative and adjust this pepperoncini relish to suit your taste buds and dietary needs!
- Spicy Kick: Add extra red pepper flakes for a fiery relish that brings heat to every bite.
- Herb Infusion: Switch out parsley for fresh basil or cilantro to customize the flavor profile with aromatic freshness.
- Sweet Twist: Mix in a tablespoon of honey or maple syrup for a delightful sweet contrast to the tangy and spicy elements.
- Smoky Flavor: Incorporate smoked paprika instead of regular paprika for an exciting twist that adds depth.
- Creamy Addition: Blend a scoop of sour cream or Greek yogurt into your relish for a creamy dip or spread perfect for parties.
- Savory Umami: Stir in a tablespoon of soy sauce or Worcestershire sauce for a more robust umami flavor.
- Nutty Texture: Add chopped nuts or sunflower seeds for a satisfying crunch and healthy fat addition.
- Cucumber Crunch: Incorporate diced cucumbers for added crunch and freshness, making it taste like a summer garden in a jar.
Feel inspired? This relish is adaptable, so don’t hesitate to check out other unique recipes like my delicious Deviled Eggs or a refreshing Potato Salad where you can incorporate your favorite variations!
Tips for the Best Pepperoncini Relish
• Chop with Care: Ensure that all vegetables are roughly chopped for even blending. Uniform pieces help create that ideal relish texture.
• Taste Test: After cooling, taste your Pepperoncini Relish and adjust salt, pepper, and spice levels. A small tweak can dramatically enhance flavor!
• Chill Before Serving: Letting the relish chill in the fridge for an hour allows the flavors to meld together beautifully, resulting in a more vibrant taste.
• Customize Your Heat: If you’re sensitive to spice, reduce the amount of jalapeños and red pepper flakes. You can always add more later!
• Storage Solution: Use a mason jar to store your relish; it’s airtight and perfect for keeping your Pepperoncini Relish fresh for up to two weeks.
• Experiment Freely: Don’t hesitate to try different peppers in your relish for personalized flavor variations. A little creativity goes a long way!
Make Ahead Options
These Pepperoncini Relish delights are perfect for meal prep enthusiasts! You can chop and cook the pepper mixture up to 24 hours in advance, allowing the flavors to meld together beautifully. Simply store the cooled concoction in an airtight container in the refrigerator. When you’re ready to enjoy, stir in the fresh parsley, olive oil, salt, and black pepper right before serving. This ensures your relish remains fresh and flavorful. For optimal quality, avoid adding the fresh ingredients until you’re ready to serve, as they add that perfect dash of brightness. You’ll have delicious, homemade Pepperoncini Relish at your fingertips, elevating any meal with minimal effort!
Pepperoncini Relish Recipe FAQs
How do I select the best ingredients for my Pepperoncini Relish?
Absolutely! When selecting your peppers, look for vibrant colors and firm textures. Avoid any that have dark spots or wrinkling, which can indicate overripeness. For the best flavor, fresh garlic and bright vegetables are key – they add crunch and zest that elevate the relish.
How do I store my Pepperoncini Relish?
Very simply, store your Pepperoncini Relish in an airtight container, preferably a mason jar, in the refrigerator. It will stay fresh for 1-2 weeks. Just make sure to use a clean utensil each time to avoid contamination.
Can I freeze my Pepperoncini Relish?
Yes, you can! To freeze your Pepperoncini Relish, ladle it into freezer-safe containers or zip-top bags, leaving some space for expansion. It will keep well for up to 3 months. When you’re ready to use it, thaw it in the fridge overnight or warm it gently on the stove to regain that lovely flavor.
What should I do if my relish is too watery?
If your relish turns out watery, don’t worry! You can drain the excess liquid using a fine mesh sieve after cooking, making sure to let it sit for a bit to remove all the moisture. Additionally, simmering the mixture a little longer can help thicken it up. Aim for a chunky yet cohesive texture that’s perfect for topping your favorite dishes.
Are there any dietary considerations when making Pepperoncini Relish?
Absolutely! This recipe is vegetarian and can easily be made vegan by using plant-based substitutes for certain ingredients. If you’re concerned about garlic allergies, feel free to omit it or substitute it with a pinch of garlic powder. Always double-check the labels of packaged ingredients like the peppers to avoid any hidden allergens.
Can I adjust the spice level in my Pepperoncini Relish?
Very much so! If you prefer a milder flavor, simply reduce the amount of jalapeño and red pepper flakes to suit your taste. The beauty of this relish is that it’s customizable, so feel free to play around with the spices until you achieve your perfect balance!
Pepperoncini Relish: Quick, Tangy Magic for Every Meal
Ingredients
Equipment
Method
- Blend the base ingredients in a food processor until finely chopped, maintaining a chunky texture.
- Cook the mixture in a saucepan over medium heat with the dressing ingredients for 3-5 minutes.
- Drain excess liquid using a fine mesh sieve and let cool for about 10 minutes.
- Stir in chopped fresh parsley, olive oil, salt, and black pepper after cooling.
- Store the relish in an airtight container in the refrigerator.
Leave a Reply