
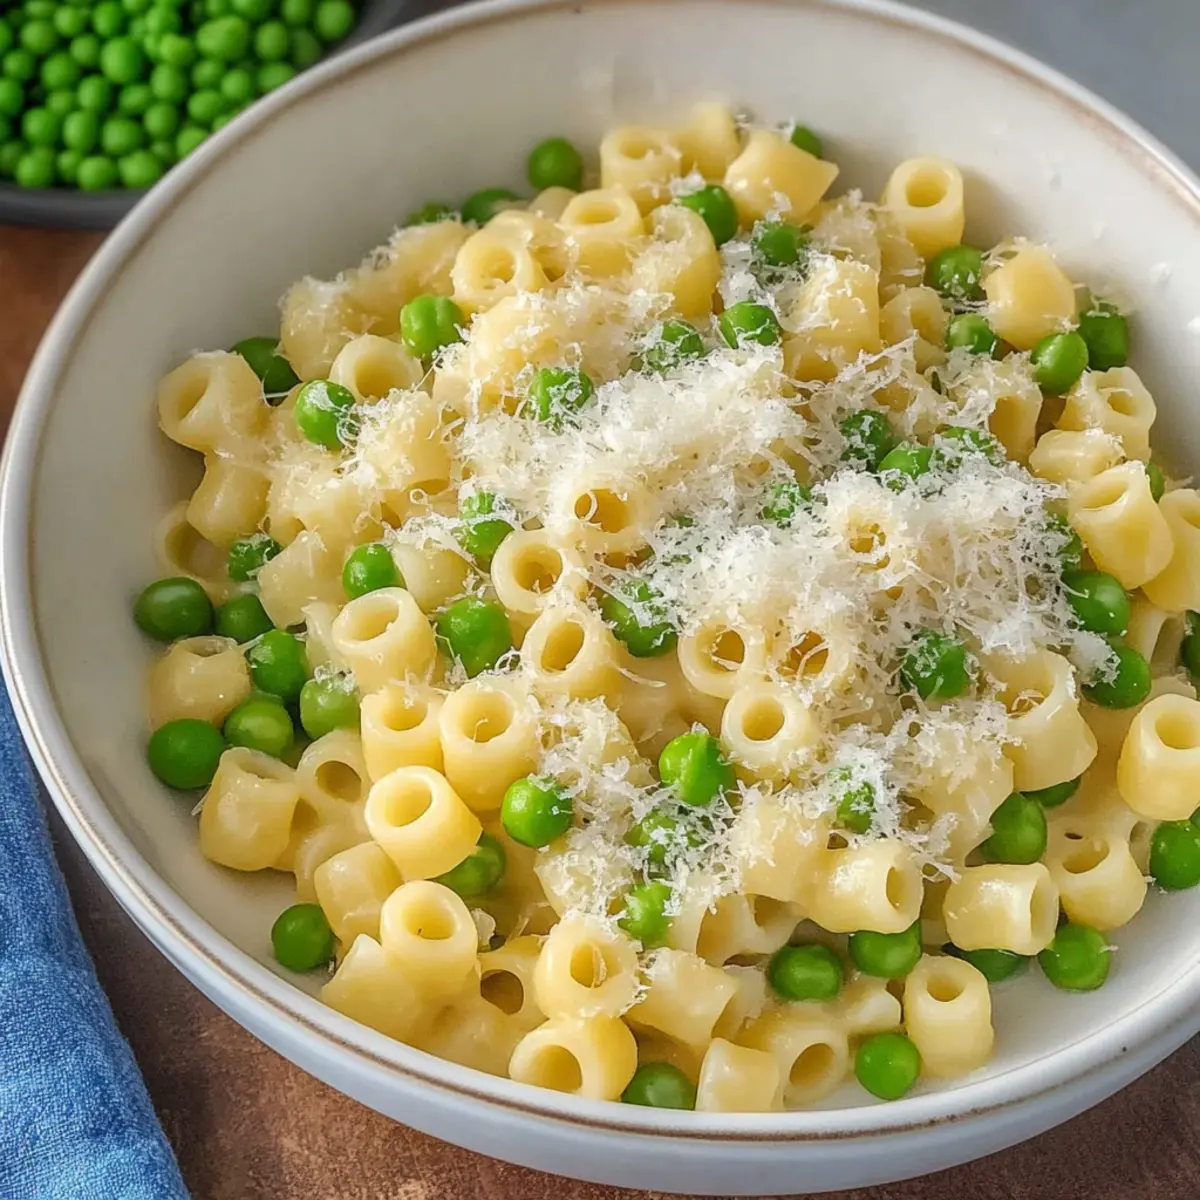
Midweek meals can often feel like a race against time, leaving us reaching for the takeout menu. But what if I told you that making a heartwarming dish like Pasta e Piselli could be just a quick 30-minute affair? This creamy Italian delight marries tender pasta with sweet peas, offering a delicious and satisfying blend that’s just right for busy weeknights. Plus, it’s a flexible recipe that allows you to tailor it with flavorful twists like crispy bacon or fresh herbs—perfect for pleasing any palate. As winter evenings draw in, cozy up with a bowl of this vibrant comfort food that will not only nourish your family but also spark joy in your kitchen. Curious about how to whip up this delightful dish? Let’s dive into the recipe!
Why is Pasta e Piselli a Must-Try?
Comforting, this dish embraces the essence of Italian cuisine with its creamy texture and sweet peas, making it feel like a warm hug on a plate. Quick to prepare, you can have this delightful meal on the table in just 30 minutes—perfect for busy weeknights. Customizable, feel free to get creative by adding bacon, fresh herbs, or even tomatoes to suit your taste. Healthy and nutritious, this vegetarian option is rich in protein and fiber, making it a wholesome pick for your family. Plus, it’s an excellent way to use up seasonal vegetables, showcasing the beauty of simplicity in home cooking. If you’re looking for more delicious pasta recipes, you might enjoy trying out this Spinach Shrimp Pasta or perhaps some Cheesy Cajun Sauce for a spicy twist!
Pasta e Piselli Ingredients
• Here’s everything you need to create this comforting Italian delight!
For the Pasta
• Ditalini Pasta (410g) – A small pasta that holds the sauce beautifully; any small-shaped pasta like macaroni or orzo will work as substitutes.
For the Sauce
• Olive Oil – Use extra virgin for the best flavor and richness.
• Shallot (1, finely chopped) – Provides subtle sweetness; you can substitute it with a small onion if needed.
• Onion (1, chopped) – Adds depth and aroma; opt for yellow or sweet onion for a milder taste.
• Fresh or Frozen Peas (450g or 1 pound) – These star ingredients bring sweetness and a vibrant green color; fresh peas are best in their season.
For the Creaminess
• Parmesan Cheese (1 and 1/4 cups, freshly grated, divided) – This adds a savory depth and creaminess; substitute with Pecorino Romano for a sharper flavor.
For Seasoning
• Salt & Pepper – Essential for enhancing the dish; adjust according to your taste.
Discover the joy of making Pasta e Piselli and create a comforting meal that your family will love!
Step‑by‑Step Instructions for Pasta e Piselli
Step 1: Boil Pasta
Begin by bringing a large pot of salted water to a rolling boil over high heat. Once boiling, add the Ditalini pasta and cook according to package directions until al dente, typically 8-10 minutes. Before draining, reserve about 3 cups of the starchy pasta water to help create a creamy sauce later on, then drain the pasta and set it aside.
Step 2: Sauté Aromatics
In a large skillet, heat 2 tablespoons of extra virgin olive oil over medium heat. Add the finely chopped shallot and chopped onion, sautéing for about 4-5 minutes until they are softened and translucent but not browned. The aromatic smell of sautéing onions and shallots will fill your kitchen, setting a warm tone for your Pasta e Piselli.
Step 3: Simmer Peas
Add the fresh or frozen peas to the skillet, along with 2 cups of the reserved pasta water. Stir gently to combine, and let this mixture simmer for 5-8 minutes, or until the peas are tender and vibrant green. The water should reduce slightly, creating a light broth that will form the base of your sauce.
Step 4: Combine Pasta
Once the peas are tender, gently incorporate the cooked Ditalini pasta into the skillet. Stir everything together, adding more reserved pasta water as needed to reach your desired consistency. Allow the mixture to simmer for an additional 3 minutes, ensuring that the pasta fully absorbs the flavors of the peas and aromatic broth.
Step 5: Finish with Cheese
After the pasta has simmered, add 1 cup of freshly grated Parmesan cheese to the skillet. Stir well until the cheese melts and combines with the sauce, creating a creamy, cohesive texture. Taste and season with salt and pepper to your liking, then serve the Pasta e Piselli warm, garnished with additional cheese if desired.
Expert Tips for Pasta e Piselli
-
Pasta Timing: Make sure the pasta is al dente before combining. Overcooking can lead to mushiness, so monitor closely.
-
Pasta Water Magic: Always save extra pasta water! It’s essential for creating a smooth, creamy sauce without making the dish too salty.
-
Quality Ingredients: Use high-quality extra virgin olive oil and freshly grated Parmesan. They’ll enhance flavors and make the dish a true delight.
-
Herb Freshness: For an elevated taste, sprinkle fresh herbs like basil or mint just before serving. They brighten up the creamy sauce beautifully.
-
Customization Options: Don’t hesitate to add proteins like bacon or ham for a heartier meal. These variations keep the recipe fresh and exciting!
What to Serve with Creamy Pasta e Piselli?
Creating a comforting meal around this creamy Italian delight opens the door to wonderful flavor pairings that elevate your dining experience.
-
Garlic Bread: Nothing beats the crunch of warm, buttery garlic bread. It soaks up the creamy sauce beautifully, enhancing every bite.
-
Side Salad: A light, mixed greens salad with a lemon vinaigrette adds freshness and a crisp texture, perfectly balancing the richness of the pasta.
-
Roasted Vegetables: Seasonal roasted veggies, like asparagus or bell peppers, bring a touch of earthy sweetness to the table, complementing the dish’s creamy notes.
-
Crispy Bacon: For those who enjoy a savory crunch, adding crispy bacon or prosciutto elevates the flavors and adds a delightful texture.
-
Italian Red Wine: A glass of Chianti or a medium-bodied red wine enhances the Italian comfort while pairing beautifully with the creamy pasta.
-
Dessert: Conclude your meal with a light tiramisu. The coffee-infused layers offer a sweet finish that contrasts beautifully with the savory pasta.
-
Cheesy Polenta: Soft, creamy polenta topped with Parmesan can serve as a delightful alternative base, providing a comforting twist to your meal.
Storage Tips for Pasta e Piselli
Fridge: Store leftovers in an airtight container for up to 4 days. Make sure the dish has cooled down before sealing to preserve freshness.
Freezer: If you want to store Pasta e Piselli for longer, place it in freezer-safe containers. It can last up to 3 months in the freezer.
Reheating: When ready to enjoy again, reheat gently on the stovetop over low heat. Add a splash of reserved pasta water or broth to help regain its creamy consistency.
Enjoy Warm: For the best experience, enjoy your heated Pasta e Piselli warm, garnished with additional Parmesan cheese if desired!
Make Ahead Options
Pasta e Piselli is a fantastic recipe for meal prep enthusiasts looking to save time during busy weeknights! You can prepare the pasta and sauté the aromatics (shallots and onions) up to 24 hours in advance. Simply cook the pasta until al dente, then toss it with a drizzle of olive oil to prevent sticking. Store the peas and aromatics in separate airtight containers in the refrigerator. When you’re ready to enjoy this comforting dish, just reheat the peas with the reserved pasta water, combine with the pasta, and mix in the Parmesan cheese for a dish that’s just as delightful as when freshly made. This makes it a breeze to whip up a warm meal!
Pasta e Piselli: Customize Your Dish
Let’s make this comforting Italian dish uniquely yours with a few delightful twists!
- Add Proteins: Incorporate cooked bacon, ham, or prosciutto for a savory touch. The meaty goodness pairs perfectly with the creamy peas.
- Different Pasta Shapes: Swap Ditalini for spaghetti, fusilli, or macaroni based on your preference. Get creative with pasta shapes to keep it interesting!
- Herb Additions: Experiment with fresh mint or basil to brighten the dish. Adding herbs just before serving will enhance the flavors beautifully.
- Tomato Option: Stir in canned crushed tomatoes or diced fresh garden tomatoes along with the peas for a fresh and saucy version.
- Spicy Kick: Sprinkle red pepper flakes into the skillet for a subtle heat. This variation adds an exciting depth to your meal.
- Creamy Vegan Twist: Replace Parmesan with a nut-based cheese or nutritional yeast. Use almond milk instead of dairy for a creamy, vegan-friendly version.
- Seasonal Veggies: Mix in seasonal vegetables like zucchini or spinach for added color and nutrition. These veggies can complement the sweetness of peas splendidly.
- Lemon Zest: Grate fresh lemon zest over the dish just before serving for a refreshing hint of citrus that brightens every bite.
Remember, this Pasta e Piselli can be a canvas for your culinary creativity. If you’re interested in exploring more comforting pasta dishes, consider checking out this delightful Southern Style Low casserole or our creamy Cheesy Cajun Sauce for a little kick!
Pasta e Piselli Recipe FAQs
How do I choose the perfect peas?
Absolutely! For Pasta e Piselli, whether fresh or frozen, look for sweet, bright green peas. Fresh peas should be firm, plump, and have a sweet aroma, while frozen peas should be bright green without any dark spots or ice crystals, indicating they are still fresh.
What is the best way to store leftovers?
Very! After enjoying your pasta, let the leftovers cool completely, then transfer them to an airtight container. They can be stored in the fridge for up to 4 days. Just remember to reheat gently on the stovetop and add a splash of water to keep the creaminess!
Can I freeze Pasta e Piselli?
Definitely! To freeze, allow your dish to cool completely. Then, portion it into freezer-safe containers. It can last up to 3 months in the freezer. To reheat, transfer to the fridge the night before, and when ready, heat gently on low with a bit of broth or pasta water until warmed through.
What should I do if my sauce is too thick?
No worries! If you find your sauce is thicker than desired, simply add a bit of the reserved pasta water gradually. This will help loosen the mixture and bring everything back to that creamy consistency. Stir well and keep adjusting until it’s just right!
Is this recipe safe for my pets?
Absolutely not! While Pasta e Piselli is a delicious vegetarian dish, avoid feeding it to pets, especially due to the garlic and onions, which can be harmful to dogs and cats. Always check specific ingredient safety for your furry friends before sharing any human food!
Can I substitute the pasta type in this recipe?
Very much so! You can swap Ditalini with small pasta shapes like macaroni, or even orzo or mini shells. The important thing is to choose a pasta shape that will hold the creamy sauce beautifully, just like in our Pasta e Piselli!
Pasta e Piselli: Comforting Italian Delight in 30 Minutes
Ingredients
Equipment
Method
- Begin by bringing a large pot of salted water to a rolling boil. Once boiling, add the Ditalini pasta and cook according to package directions until al dente, typically 8-10 minutes. Reserve about 3 cups of the starchy pasta water before draining, then set the pasta aside.
- In a large skillet, heat 2 tablespoons of extra virgin olive oil over medium heat. Add the finely chopped shallot and chopped onion, sautéing for about 4-5 minutes until softened and translucent.
- Add the fresh or frozen peas to the skillet, along with 2 cups of the reserved pasta water. Stir gently and let simmer for 5-8 minutes, until peas are tender and vibrant green.
- Once the peas are tender, gently incorporate the cooked Ditalini pasta into the skillet, adding more reserved pasta water as needed to reach your desired consistency. Simmer for an additional 3 minutes.
- After simmering, add 1 cup of freshly grated Parmesan cheese to the skillet. Stir well until the cheese melts and combines with the sauce, then season with salt and pepper to taste.
Leave a Reply