
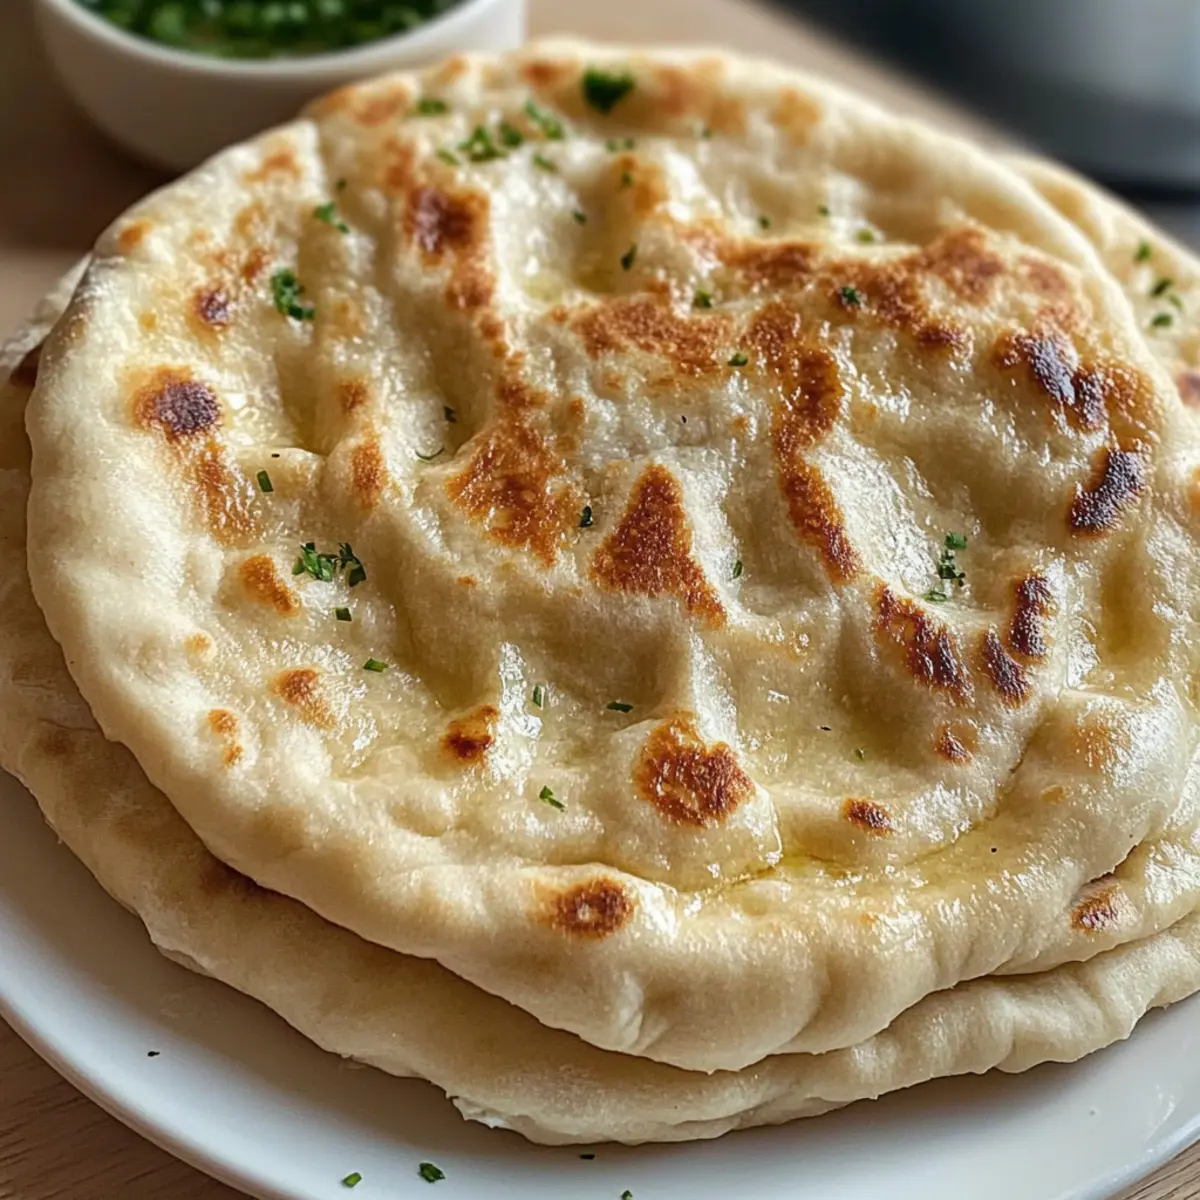
There’s something magical about the aroma of warm bread wafting through your kitchen—a cozy reminder that homemade meals bring love and connection to the table. Today, I’m thrilled to share my No-Knead Turkish Bread recipe, a lush, fluffy flatbread that’s perfect for wrapping around savory fillings or soaking up your favorite sauce. With minimal ingredients and no kneading required, this easy Turkish bread recipe is a time-saver that allows you to spend less time in the kitchen and more time enjoying delicious meals with your loved ones. Plus, it’s freezer-friendly, making it an excellent go-to for busy days when you want a taste of homemade goodness without the hassle. Are you ready to elevate your cooking game with this delightful recipe? Let’s dive in!
Why is This Turkish Bread So Special?
Simplicity at its finest: This no-knead recipe is perfect for anyone—whether you’re a seasoned chef or a busy home cook.
Fluffy texture: With a light and airy interior, this bread complements any meal beautifully, making it a fantastic option for dipping.
Versatility is key: Wrap it around savory fillings like grilled chicken or use it to soak up flavorful sauces. You’ll find it pairs beautifully with dishes like Pesto Chicken Flatbread.
Make-ahead convenience: Freeze extras for quick meals later—simply reheat, and you’re good to go!
Flavor-packed goodness: The use of warm milk and butter adds a rich taste that elevates your dining experience. Trust me, this Turkish bread will quickly become a staple in your kitchen!
No-Knead Turkish Bread Ingredients
For the Dough
• Bread Flour or All-Purpose Flour – Provides structure and a delightful chew; whole wheat flour can be used for added nutrition.
• Warm Milk – Enriches the dough and activates the yeast; substitute with non-dairy milk for a lactose-free option.
• Warm Water – Essential for hydration; ensure it’s warm, not hot, to maintain yeast effectiveness.
• Instant Dry Yeast – Crucial for rising; if you only have active dry yeast, adjust the quantity accordingly.
• Sugar – Helps with yeast activation and adds a hint of sweetness; can be omitted for a purely savory bread.
• Salt – Enhances overall flavor and regulates yeast fermentation; do not substitute for best results.
• Melted Unsalted Butter or Olive Oil – Adds moisture and richness; use olive oil for a dairy-free alternative.
• Chopped Parsley (optional) – For garnish and a pop of flavor; feel free to swap in other herbs like cilantro for variation.
This easy Turkish bread is perfect for dipping or wrapping your favorite fillings, making it a delightful addition to any meal!
Step‑by‑Step Instructions for No-Knead Turkish Bread
Step 1: Prepare the Yeast Mixture
In a large bowl, mix together 1 cup of warm milk, 1/2 cup of warm water, 2 teaspoons of sugar, and 2 teaspoons of instant dry yeast. Stir gently until well combined, and let it sit for about 5-10 minutes until it becomes frothy—this indicates your yeast is activated and ready to work its magic in your no-knead Turkish bread.
Step 2: Combine the Dry Ingredients
In another bowl, whisk together 3 cups of bread flour and 1 teaspoon of salt. Creating this dry mixture separately ensures an even distribution of flavors when combined with the wet ingredients, making for an aromatic and fluffy Turkish bread.
Step 3: Mix the Dough
Gradually add the dry mixture into your yeasted milk mixture. Stir with a wooden spoon or spatula until the dough starts to come together and pulls away from the sides of the bowl, forming a shaggy mass. This should take about 3-5 minutes of mixing, and it’s perfectly okay if the dough remains a bit sticky—this is the beauty of a no-knead recipe!
Step 4: Let the Dough Rise
Cover the bowl with a damp cloth or plastic wrap and place it in a warm, draft-free spot to rise. Allow the dough to double in size, which usually takes about 1-2 hours. You’ll know it’s ready when the surface looks puffy and bubbles have formed in the dough, a vital aspect of achieving that light texture in your no-knead Turkish bread.
Step 5: Shape the Dough
Once risen, gently deflate the dough on a lightly floured surface. Divide it into 6 equal portions and form each into a round ball. Let the balls rest for about 15 minutes, covering them with a cloth to retain moisture—this helps maintain flexibility for rolling them out into beautiful flatbreads.
Step 6: Roll Out the Dough
Using a rolling pin, flatten each round into an 18cm disc about 5mm thick. Aim for an even thickness to ensure even cooking throughout. Allow each disc to rest for another 10 minutes, which will help them puff up nicely while cooking.
Step 7: Cook the Bread
Preheat a medium skillet over medium heat until it’s hot, then carefully place one disc of dough into the pan. Cook for about 1-2 minutes or until bubbles form and it puffs slightly. Flip it over and cook the other side for another 1-2 minutes until golden brown. The fragrant aroma will fill your kitchen, signaling that your no-knead Turkish bread is almost ready!
Step 8: Keep Warm & Serve
Once each piece of bread is cooked, reduce the heat to low, cover the skillet with a clean cloth, and let the bread stay warm while you finish cooking the remaining pieces. Brush the warm bread with melted butter or olive oil before serving. This finishing touch adds luscious flavor and enhances the golden, crisp texture you desire in your homemade Turkish bread!
What to Serve with Easy Homemade Turkish Bread
There’s nothing quite like the aroma of freshly baked bread inspiring a full meal, and this fluffy Turkish bread wonderfully complements a variety of dishes.
-
Creamy Hummus: The smooth and rich texture of hummus creates a perfect partner for this Turkish bread, enhancing your dipping experience.
-
Spicy Lamb Kebabs: The juicy, seasoned meat of kebabs pairs beautifully with the airy bread, allowing you to wrap them up with ease.
-
Tzatziki Sauce: The cool, tangy yogurt sauce brings a refreshing contrast that lightens up the warm bread, making each bite a flavorful delight.
-
Vegetable Curry: This fragrant dish, with its bold spices and rich sauces, generously clings to the bread, making it not just a side but an essential component of the meal.
-
Mediterranean Salad: A vibrant mix of fresh vegetables and herbs adds a crunchy texture that balances the soft bread, providing a satisfying contrast.
-
Homemade Falafel: The crispy exterior and soft interior of falafel are a fabulous filling wrapped in this Turkish bread, capturing an explosion of flavors in each bite.
-
Mint Yogurt Dip: This wonderful cooling condiment adds a refreshing lift that perfectly complements the warm, fluffy texture of the bread.
-
Pomegranate Juice: A glass of this sweet-tart beverage brings a fruity counterpoint to your meal, refreshing your palate between bites of rich, savory dishes.
-
Baklava: Indulge in this sweet pastry for dessert; the nutty and honey-syrupy layers beautifully round out a delicious meal anchored by the Turkish bread.
How to Store and Freeze No-Knead Turkish Bread
-
Room Temperature: Store your no-knead Turkish bread in an airtight container at room temperature for up to 2 days to maintain its lovely freshness and texture.
-
Fridge: Avoid refrigerating the bread as it can dry out more quickly; instead, opt for room temperature storage to keep it soft and fluffy.
-
Freezer: For longer storage, freeze the bread for up to 1 month. Wrap each piece tightly in cling film, then place them in a freezer bag to prevent freezer burn.
-
Reheating: To enjoy your frozen no-knead Turkish bread, simply reheat in a skillet over medium heat for a couple of minutes on each side, or microwave for about 15-20 seconds until warm.
Variations & Substitutions for No-Knead Turkish Bread
Get ready to make this delightful Turkish bread your own with some fun and easy tweaks!
-
Whole Wheat: Substitute half of the bread flour with whole wheat flour for a heartier, nutritious twist. This adds a nutty flavor that pairs wonderfully with savory fillings.
-
Gluten-Free: Use a gluten-free flour blend to accommodate those with gluten sensitivities. Just make sure to add a binder like xanthan gum for the right texture!
-
Herb-Infused: Mix in fresh herbs like rosemary or thyme into the dough for an irresistible aroma. Combining them with a bit of garlic can create a flavorful garlic herb bread, making it a perfect match for any Italian dish.
-
Spiced Up: Incorporate spices such as cumin or smoked paprika into the dry ingredients for a delightful flavor kick. These spices will transform your Turkish bread into a savory experience!
-
Cheesy Bliss: Add shredded cheese, like feta or mozzarella, directly into the dough. It melts beautifully and enhances the bread’s flavor while providing a gooey surprise with every bite.
-
Sweet Twist: If you’re in the mood for something sweeter, drizzle honey or maple syrup into the warm milk instead of sugar. This makes for a delightful companion to breakfast dishes or sweet dips.
-
Stuffed Bread: Roll out the dough and fill it with your favorite ingredients such as sautéed vegetables or meats before sealing and baking. It creates a delicious stuffed Turkish bread that is perfect for meals on-the-go.
-
Dipping Sauces: Pair your Turkish bread with vibrant sauces like tzatziki or fresh tomato salsa to elevate your dining experience. Dipping adds an interactive element that everyone will love!
With these variations, you can personalize your no-knead Turkish bread for any occasion—whether you’re having a cozy family dinner or hosting a fun gathering. Don’t forget to check out my Zucchini Flatbread Herbs and Pesto Chicken Flatbread for even more delicious inspirations! Enjoy your culinary adventure!
Make Ahead Options
These No-Knead Turkish Bread are perfect for busy cooks looking to save time during the week! You can prepare the dough and let it rise up to 24 hours in advance by covering it tightly and refrigerating. This not only enhances the flavor but also fits seamlessly into your meal prep routine. When you’re ready to enjoy, simply bring the dough to room temperature, shape it, and cook as instructed. Additionally, you can freeze the cooked bread for up to 1 month. Just reheat in a pan or microwave before serving to maintain that delightful texture. With these make ahead options, you’ll always have fresh, homemade Turkish bread ready at a moment’s notice!
Expert Tips for No-Knead Turkish Bread
-
Temperature Matters: Always use warm milk and water—not hot. This will help activate the yeast without killing it, ensuring your no-knead Turkish bread rises beautifully.
-
Let It Rise: Don’t rush the rising process. Allow the dough to double in size to get that light, airy texture that makes this bread irresistible.
-
Keep It Sticky: If the dough is slightly sticky at the end of mixing, that’s okay! It’s a no-knead recipe, and that stickiness contributes to a soft crumb.
-
Pan Preheating: Ensure your skillet is sufficiently preheated before cooking. This avoids the risk of soggy bread and promotes that perfect puff!
-
Experiment with Flavors: Feel free to add spices or herbs to your dough for a unique twist. This flexibility makes your no-knead Turkish bread even more versatile!
-
Store Wisely: If making extras, store them correctly. Keep in an airtight container for up to 2 days or freeze for future quick and tasty meals!

No-Knead Turkish Bread Recipe FAQs
What type of flour should I use for no-knead Turkish bread?
You can use either bread flour or all-purpose flour for this recipe. Bread flour will give you a slightly chewier texture, while all-purpose flour yields a softer crumb. For a healthier option, feel free to swap in whole wheat flour—just keep in mind it may alter the bread’s color and taste slightly.
How should I store my no-knead Turkish bread?
Store your no-knead Turkish bread in an airtight container at room temperature for up to 2 days. This method will help keep it fresh and fluffy. If you plan to enjoy it later, wrap the bread in cling film or foil and place it in the freezer for up to 1 month. Just remember, never refrigerate as it tends to dry out!
Can I freeze no-knead Turkish bread?
Absolutely! To freeze, wrap each piece tightly in cling film to prevent freezer burn, then place them in a labeled freezer bag. This way, your bread can be stored for up to 1 month. When you’re ready to enjoy it again, just reheat in a skillet over medium heat for a couple of minutes or microwave for about 15-20 seconds until warm.
What can I do if my dough doesn’t rise?
If your dough isn’t rising, it might be due to the yeast being expired or the liquids being too hot, which can kill the yeast. Always ensure that your warm milk and water are just warm to the touch (about 100°F/37°C). If it still doesn’t rise, try moving it to a warmer spot, away from drafts, and give it more time—sometimes, patience is the magic ingredient!
Is this recipe suitable for people with nut allergies?
Yes! The no-knead Turkish bread recipe is free from nuts, making it a safe choice for those with nut allergies. However, always double-check your ingredient labels, especially for any alternative milks or oils you might use, to ensure they’re nut-free.
Can I add herbs or spices to the dough?
Very! You can enhance the flavor of your no-knead Turkish bread by adding spices like cumin or za’atar directly into the dry ingredients. Fresh herbs such as chopped parsley or cilantro can also be mixed in for extra flavor. Get creative with your additions—homemade bread is all about personal touches!
Fluffy No-Knead Turkish Bread Perfect for Dipping and Sharing
Ingredients
Equipment
Method
- Prepare the yeast mixture by mixing warm milk, warm water, sugar, and instant dry yeast in a large bowl. Let it sit for 5-10 minutes until frothy.
- Combine the dry ingredients by whisking together bread flour and salt in another bowl.
- Mix the dough by gradually adding dry ingredients to the yeasted milk mixture, stirring until a shaggy dough forms.
- Let the dough rise by covering the bowl and placing it in a warm spot for 1-2 hours until doubled in size.
- Shape the dough by gently deflating it and dividing it into 6 equal portions, forming each into a round ball and resting them for 15 minutes.
- Roll out the dough using a rolling pin to form 18cm discs about 5mm thick.
- Cook the bread by preheating a skillet and cooking each disc for 1-2 minutes on each side until golden brown.
- Keep the bread warm by covering with a clean cloth as you finish cooking the remaining pieces.
Leave a Reply