
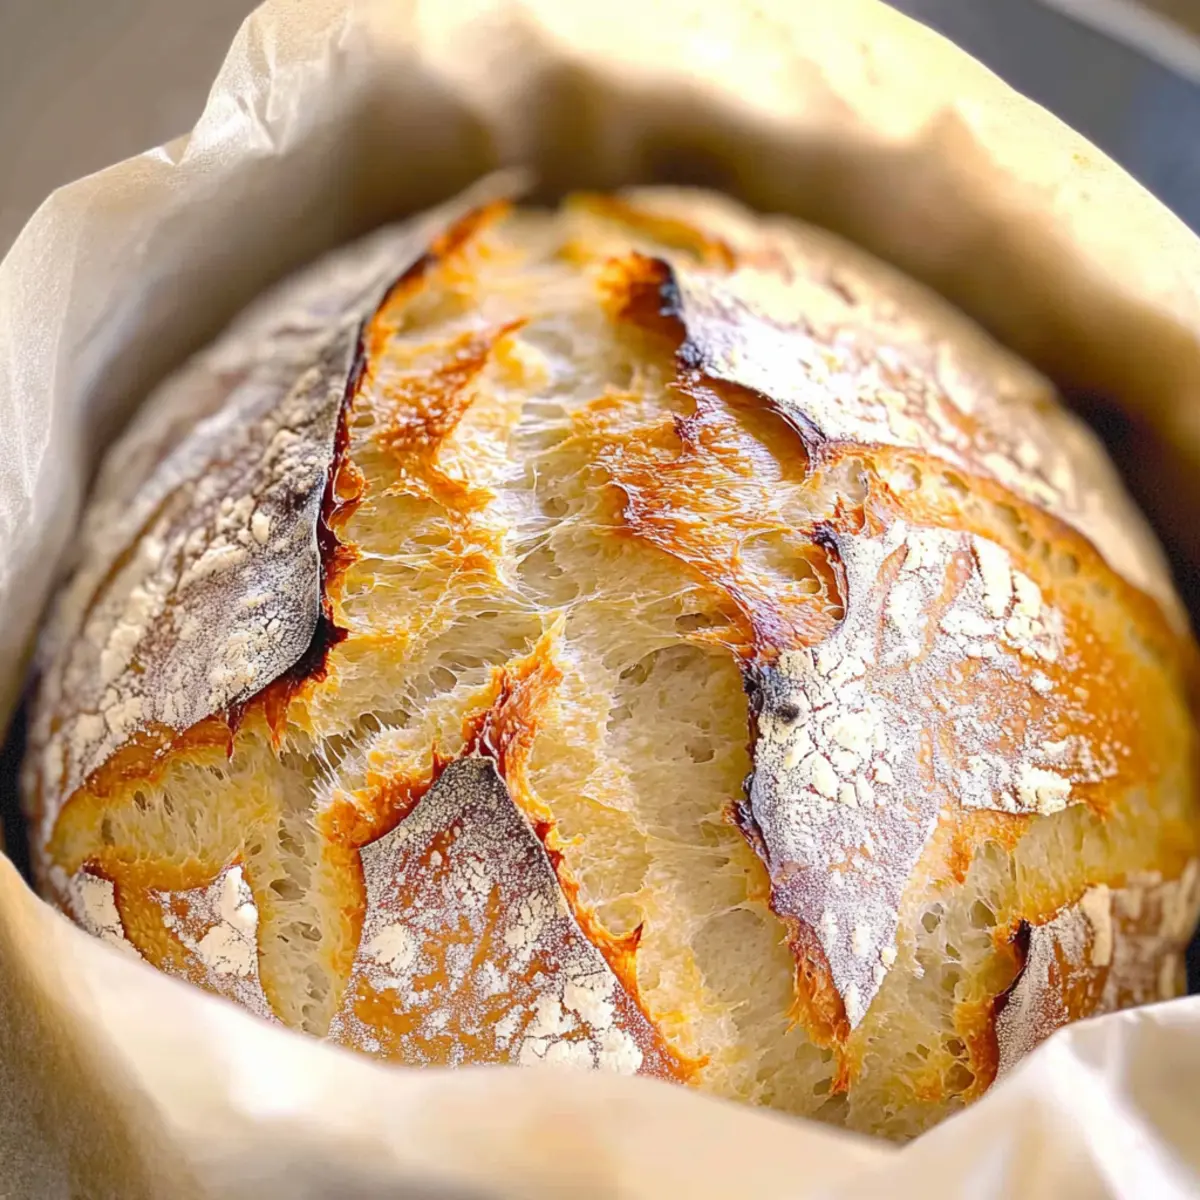
The aroma wafting through my kitchen was enough to transport me to a cozy bakery—one where artisans craft bread with a story to tell. Meet my No Knead Dutch Oven Bread, a recipe that transforms basic pantry staples into a beautifully rustic loaf with the kind of crunch that makes each bite a joy. This beginner-friendly treasure requires only five minutes of your hands-on time while the dough takes care of itself, making it a perfect choice for anyone who craves home-baked goodness without the fuss. Not only will it impress family and friends, but it’s also ideal for those who want to elevate their meals effortlessly. Ready to learn how to bring the bakery home? Let’s dive into this delightful journey of bread making!
Why Is No Knead Bread So Special?
Simplicity, this recipe requires just five minutes of active prep, allowing the dough to rise and develop flavors on its own. Artisan-quality, you’ll achieve a crispy crust and airy crumb that rivals your favorite local bakery. Versatility, feel free to customize with herbs or spices like rosemary or garlic for a unique twist. Crowd-pleasing, your family and friends will be amazed at your baking prowess. Pair it with a delightful Caprese Salad or enjoy it with a warm pat of butter for a perfect meal. Discover more creations like this Pesto Chicken Flatbread for an effortless dining experience!
No Knead Dutch Oven Bread Ingredients
Get ready to create your own bakery-style loaf at home!
For the Dough
- Warm Water – Lukewarm water hydrates the dough and activates the yeast, ensuring a perfect rise.
- All-Purpose Flour – The base of your bread; substitute with bread flour for a chewier texture if desired.
- Fine Grain Salt – Essential for flavor and gluten strength; don’t skip this step for the best bread experience.
- Yeast – Use active dry yeast to help the bread rise; freshness is key for great results.
Optional Add-Ins
- Herbs or Spices – Customize your dough with ingredients like rosemary or garlic to elevate your No Knead Dutch Oven Bread’s taste.
Step‑by‑Step Instructions for No Knead Dutch Oven Bread
Step 1: Combine Ingredients
In a large mixing bowl, whisk together 1.5 cups of warm water, 2.25 teaspoons of active dry yeast, and 0.5 tablespoons of fine grain salt until the salt dissolves completely. This should take only a minute. The warm water encourages yeast activation and is crucial for your No Knead Dutch Oven Bread to rise properly.
Step 2: Form the Dough
Gradually add 3.25 cups of all-purpose flour to the mixture while stirring with a wooden spoon or spatula. Mix until a sticky dough forms, ensuring that no dry flour remains at the bottom of the bowl. The dough will feel shaggy and wet, which is perfectly normal for this no-knead method, setting the stage for a beautifully airy bread.
Step 3: Rising Time
Cover the bowl with plastic wrap or a clean kitchen towel and place it in a warm area of your kitchen. Allow the dough to rise for 2 to 3 hours, or until it has doubled in size. You’ll know it’s ready when it appears puffy and bubbly—this is a key step for your No Knead Dutch Oven Bread’s texture.
Step 4: Prepare the Dough for Baking
Once the dough has risen, dust a clean surface with flour and scrape the dough onto it using a spatula. With floured hands, gently fold the edges of the dough towards the center to shape it into a round loaf. Avoid excessive handling to maintain the airy bubbles formed during rising.
Step 5: Parchment Preparation
Lay a sheet of parchment paper on your countertop and carefully transfer the shaped dough onto it, seam-side down. Dust the top lightly with flour and cover it with a kitchen towel. Let the dough rest for about 30 minutes while you preheat your oven, allowing it to rise slightly more before baking.
Step 6: Preheat the Dutch Oven
While the dough rests, place a Dutch oven (with its lid) in the oven and preheat it to 450°F (232°C). Preheating this way ensures your No Knead Dutch Oven Bread gets that perfect crispy crust when it goes in. Leave it in the oven for at least 30 minutes to get it thoroughly hot.
Step 7: Transfer Dough to Dutch Oven
Once the Dutch oven is preheated, carefully remove it from the oven—use oven mitts! Lift the parchment with the dough and place it into the hot Dutch oven, ensuring the dough is floured side up. The parchment paper makes handling easier and helps prevent sticking for your beautiful artisan loaf.
Step 8: Bake Covered
Cover the Dutch oven with its lid and bake the bread for 35 minutes. This covered baking traps steam, creating that perfect crust and helping the bread rise beautifully. As it bakes, enjoy the delightful aroma wafting through your kitchen—it’s a true indication of wonderful things to come!
Step 9: Bake Uncovered
After 35 minutes, carefully remove the lid from the Dutch oven. Bake the bread for an additional 5 to 10 minutes, or until the loaf is a deep golden brown and sounds hollow when tapped on the bottom. This final touch ensures a crispy exterior for your No Knead Dutch Oven Bread.
Step 10: Cool Before Serving
Once baked, carefully remove the bread from the Dutch oven using the parchment paper. Let the loaf cool on a wire rack for at least 20 minutes before slicing. This cooling period allows the interior to set properly, ensuring that each slice will have the perfect texture and flavor for you and your loved ones to enjoy.
Make Ahead Options
Creating your No Knead Dutch Oven Bread in advance can save you significant time on busy nights! You can prepare the dough up to 24 hours ahead by mixing all the ingredients, covering the bowl with plastic wrap, and placing it in the refrigerator. This slow rise enhances the flavor. When you’re ready to bake, simply remove the dough from the fridge and allow it to warm up for about 30 minutes before shaping and preheating the oven. Keep in mind that for the best results, ensure you correctly store the dough in an airtight container, as this maintains its quality. Enjoy the convenience of homemade bread with minimal effort!
No Knead Dutch Oven Bread Variations
Feel free to get creative with your bread-making experience and customize it to your taste!
-
Whole Wheat: Substitute 1 cup of all-purpose flour with whole wheat flour for a heartier, more nutritious loaf. Whole wheat brings a nutty flavor that pairs wonderfully with soups or stews.
-
Herb-Infused: Add 1-2 tablespoons of dried herbs, such as rosemary or thyme, to the dough for a fragrant twist. Swirling in herbs makes for an impressive loaf that will fill your kitchen with delightful aromas.
-
Cheesy Goodness: Incorporate 1 cup of shredded cheese, like cheddar or mozzarella, into the dough for a rich, savory touch. The melted cheese adds delicious flavor and a delightful texture that enhances any meal.
-
Garlic Lovers: Mix in 2-3 cloves of minced garlic for a robust flavor. This version is perfect for garlic bread aficionados, making every bite irresistibly tempting!
-
Spicy Kick: Toss in 1-2 teaspoons of crushed red pepper flakes to the dough for a tantalizing heat. This spicy variation complements dishes like marinara sauce or adds flair to your charcuterie board.
-
Sweet Touch: For a sweet spin, add ¼ cup of honey and a teaspoon of cinnamon. This version pairs delightfully with butter or as a base for your favorite jam or spread.
-
Nutty Texture: Include 1/2 cup of chopped nuts, such as walnuts or pecans, for added crunch and nutrition. The nuts’ richness also adds depth to the flavor profile, making each bite hearty and satisfying.
Each of these variations opens a world of possibilities for your No Knead Dutch Oven Bread. Great bread can elevate any meal, much like how the delightful flavors in my Zucchini Flatbread Herbs can transform your dining experience! Feel free to mix and match these ideas to create personalized loaves that you and your loved ones will cherish.
How to Store and Freeze No Knead Dutch Oven Bread
Room Temperature: Keep bread wrapped in a clean kitchen towel or paper bag for up to 2 days. This will help maintain its crisp crust while still keeping the interior soft.
Fridge: It’s best to avoid refrigeration as it can dry the bread out. Instead, consume it within a couple of days for maximum freshness and taste.
Freezer: For longer storage, freeze sliced bread for up to 2 months. Wrap slices tightly in plastic wrap or aluminum foil, then place them in a zip-top freezer bag to prevent freezer burn.
Reheating: To enjoy your No Knead Dutch Oven Bread again, reheat slices in a preheated oven at 350°F (175°C) for about 10 minutes. This revives the crustiness and warmth that you love!
Expert Tips for No Knead Dutch Oven Bread
-
Sticky Dough is Good: Don’t worry if your dough remains sticky; this is essential for achieving that airy texture in your No Knead Dutch Oven Bread.
-
Flour Lightly: When shaping the loaf, use flour sparingly to avoid sticking, but remember that the dough should still be quite moist for optimal results.
-
Sharp Knife for Scoring: Use a very sharp knife or a razor blade to score the top of the loaf before baking—this helps the bread expand beautifully.
-
Listen for Doneness: After baking, tap the bottom of the loaf; it should sound hollow. This indicates your No Knead Dutch Oven Bread is perfectly done.
-
Warm Area for Rising: Create a warm environment for the dough to rise, as too cool of a space can slow fermentation, leading to denser bread.
What to Serve with No Knead Dutch Oven Bread
Looking to create a delightful spread that showcases your freshly baked bread? Here are some perfect companions that will elevate your meal and tantalize your taste buds.
-
Creamy Mashed Potatoes: Rich and buttery, these mashed potatoes make a cozy pairing, perfect for slathering with warm bread.
-
Caprese Salad: Fresh mozzarella, ripe tomatoes, and fragrant basil provide a bright and refreshing contrast to the crunch of the bread.
-
Savory Garlic Butter Shrimp: Succulent shrimp sautéed in garlic butter create a flavor explosion, inviting you to soak up every drop with your bread.
-
Homemade Tomato Soup: A warm, tangy bowl of tomato soup is comfort food at its finest, especially when enjoyed with a slice of your artisan loaf.
-
Lemon-Dill Salmon: The bright, zesty flavors of lemon-dill salmon lift the wholesome taste of the bread, creating a well-balanced meal.
-
Roasted Vegetable Medley: Seasonal vegetables roasted to perfection add a delightful texture and sweetness, harmonizing beautifully with your No Knead Dutch Oven Bread.
-
Classic Gazpacho: This chilled Spanish soup, full of vibrant flavors, makes for a refreshing side, ideal for those warm days of summer.
-
Chocolate Chip Cookies: Sweeten your meal with a warm cookie to create a satisfying end note, rounding out the enjoyment of homemade goodness.
No Knead Dutch Oven Bread Recipe FAQs
How do I know if my yeast is fresh enough?
Absolutely! To check for yeast freshness, combine 1.5 cups of warm water with the yeast and a pinch of sugar. If it bubbles and foams within 5-10 minutes, your yeast is active and ready to go. If not, it’s time to get a fresh batch!
What should I do if my dough didn’t rise?
Don’t worry; it happens! If your dough doesn’t rise, check the temperature of your rising area. It should be warm (around 75-80°F). If it’s too cool, try placing your bowl in a slightly warm oven (turned off) or a sunny spot. Alternatively, look for any signs of old, inactive yeast. With a little warmth and patience, you can get it back on track!
Can I make this bread ahead of time?
Yes, of course! You can prepare the dough and let it rise, then cover it and refrigerate for up to 24 hours. This slow fermentation will deepen the flavor. Just allow it to come back to room temperature and rise slightly before shaping and baking.
How should I store No Knead Dutch Oven Bread?
To keep your bread fresh, wrap it in a clean kitchen towel or place it in a paper bag at room temperature for up to 2 days. For longer storage, slice and freeze it. Wrap slices tightly in plastic wrap, then store in a zip-top freezer bag for up to 2 months.
Is there a gluten-free option for this recipe?
Certainly! While I recommend sticking to the original recipe for great results, you can try using a gluten-free all-purpose flour blend. Make sure it includes xanthan gum, which helps mimic the texture provided by gluten. Follow the same steps, and you should achieve a delightful loaf!
No Knead Dutch Oven Bread: Your Easy Artisan Favorite
Ingredients
Equipment
Method
- In a large mixing bowl, whisk together 1.5 cups of warm water, 2.25 teaspoons of active dry yeast, and 0.5 tablespoons of fine grain salt until the salt dissolves completely.
- Gradually add 3.25 cups of all-purpose flour to the mixture while stirring with a wooden spoon or spatula.
- Cover the bowl with plastic wrap or a clean kitchen towel and place it in a warm area of your kitchen for rising.
- Dust a clean surface with flour and scrape the dough onto it using a spatula.
- Lay a sheet of parchment paper on your countertop and carefully transfer the shaped dough onto it.
- Preheat your oven to 450°F (232°C) with the Dutch oven inside.
- Lift the parchment with the dough and place it into the hot Dutch oven, ensuring the dough is floured side up.
- Cover the Dutch oven with its lid and bake the bread for 35 minutes.
- After 35 minutes, carefully remove the lid and bake for an additional 5 to 10 minutes.
- Once baked, carefully remove the bread from the Dutch oven using the parchment paper and let it cool.
Leave a Reply