
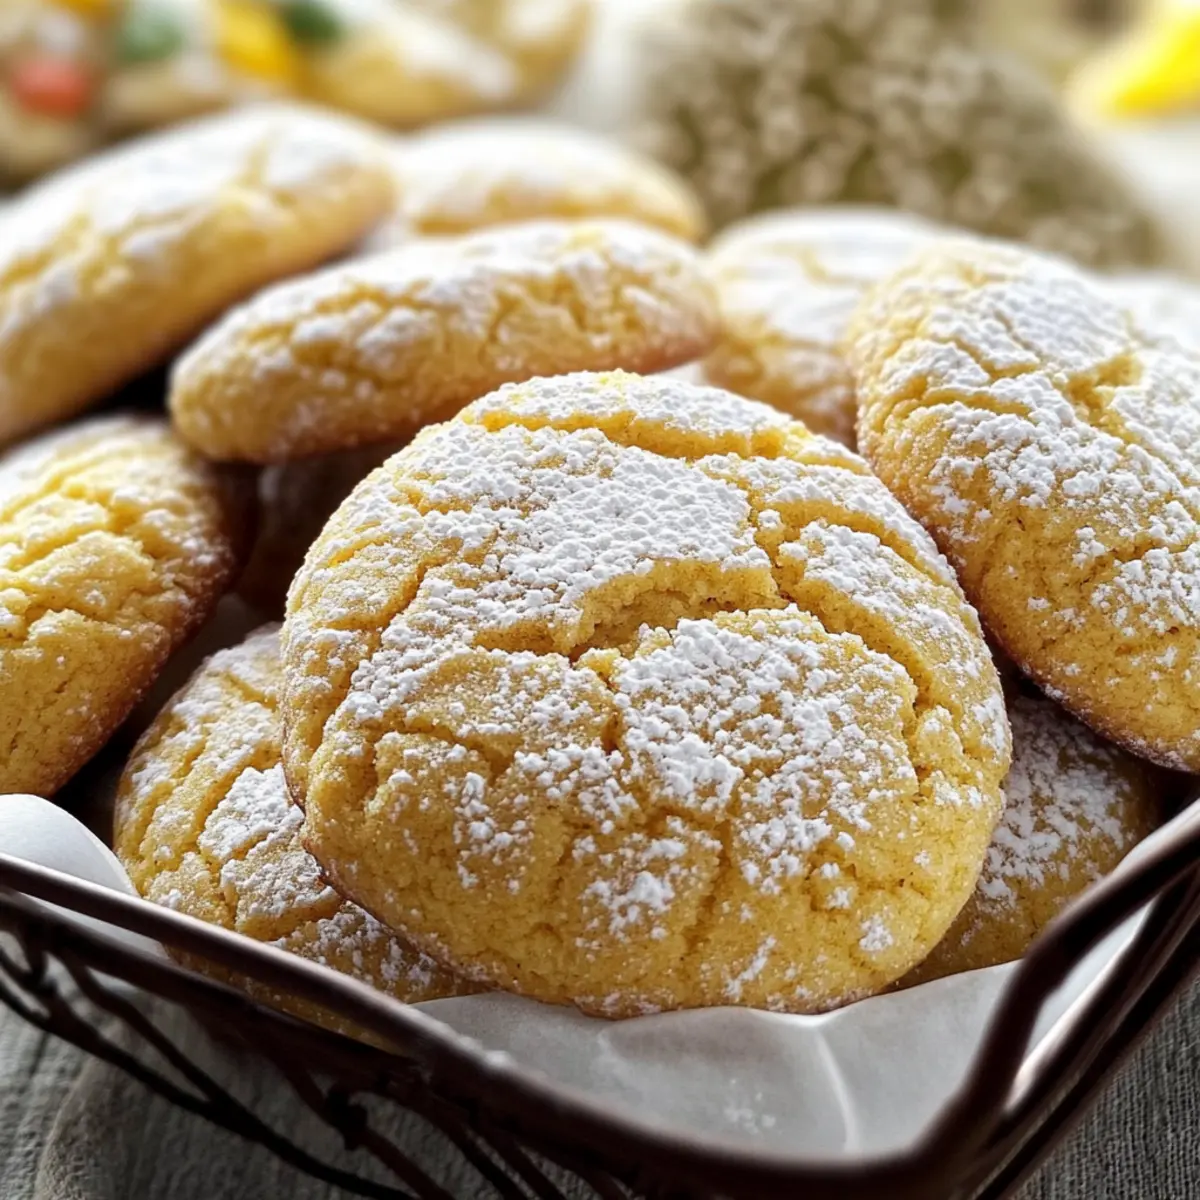
The kitchen fills with the sweet scent of citrus as I pull a batch of Lemon Snowflakes from the oven, each delicate cookie promising a burst of sunshine amidst the winter chill. These glorious Christmas cookies are not only a delightful addition to any festive spread but also incredibly easy to whip up—what’s better than that during the bustling holiday season? With a light, airy texture and a hint of tanginess that dances on the palate, they are sure to enchant your family and friends. Plus, they can be made gluten-free, ensuring everyone can indulge in this treat. If you’re looking to add a zesty twist to your holiday cookie collection, you’ll want to keep scrolling for the full recipe—I promise these little snowflakes will bring warmth to your celebrations!
Why You’ll Love These Lemon Snowflakes
Zesty Flavor: A delightful burst of citrus that brightens up any dessert table.
Light and Airy: Their delicate texture allows them to melt in your mouth, creating a heavenly experience.
Versatile Treat: Perfect for holiday gatherings, these cookies can also suit casual celebrations or even backyard barbecues.
Quick to Make: With simple steps, you can whip these cookies up in no time, giving you more moments to enjoy with family.
Gluten-Free Option: Enjoy these cookies worry-free, as they can be easily adapted to cater to gluten sensitivities.
If you want to explore more festive treats, check out Lemon Cream Cheese for a creamy delight or some flavorful Garlic Chicken Wraps for a savory option to balance your holiday spread!
Lemon Snowflakes Ingredients
• For the Cookie Batter
- All-Purpose Flour – The main base; for a gluten-free option, substitute with a 1:1 gluten-free flour blend.
- Powdered Sugar – Provides sweetness and contributes to the cookies’ delicate texture; be sure to sift for a lighter result.
- Unsalted Butter – Essential for richness; use room temperature butter for easy mixing.
- Lemon Zest – Infuses a fresh citrus flavor, uplifting the entire cookie experience; use organic lemons for the best taste.
- Lemon Juice – Adds a wonderful tangy flavor, balancing the sweetness; fresh-squeezed juice is preferred.
- Baking Powder – Helps create the light, airy texture of the cookies; ensure it’s fresh for the best lift.
- Salt – Enhances the other flavors; a small pinch is all you need.
- Egg – Binds the ingredients together; for a vegan option, consider using flax eggs.
• For Dusting
- Powdered Sugar – Sprinkle on top after baking to create a snow-like appearance, adding both sweetness and charm.
These Lemon Snowflakes are the perfect holiday cookies to bring a zesty twist to your festive celebrations!
Step‑by‑Step Instructions for Lemon Snowflakes
Step 1: Prep the Baking Surface
Begin by preheating your oven to 350°F (175°C). Line a baking sheet with parchment paper to prevent the Lemon Snowflakes from sticking. This step ensures easy removal later and helps maintain their delicate structure. Keep your mixer’s bowl and a spatula handy for the upcoming mixing process.
Step 2: Combine the Dry Ingredients
In a separate mixing bowl, whisk together 2 cups of all-purpose flour, 1 teaspoon of baking powder, and a pinch of salt. Sifting the flour will help create a lighter, airier texture in your cookies. Set this mixture aside as you prepare the wet ingredients, allowing the flavors to meld before combining.
Step 3: Cream the Butter and Sugar
In a large bowl, beat together ½ cup of unsalted butter and 1 cup of powdered sugar using an electric mixer until the mixture is light and fluffy, about 3-4 minutes. The pale color indicates that you’ve aerated the butter properly. Add in 1 tablespoon of lemon zest and 2 tablespoons of fresh lemon juice, mixing until just combined.
Step 4: Incorporate the Egg
Crack in 1 large egg into the butter and sugar mixture, mixing until it’s fully integrated. This will help bind your Lemon Snowflakes together, providing structure to their tender texture. Make sure there are no visible streaks of egg, ensuring a smooth and creamy batter.
Step 5: Blend in Dry Ingredients
Gradually add your dry flour mixture into the wet ingredients, mixing on low speed until just combined. Be gentle to avoid overworking the dough; you want the cookies to remain light and airy. The dough should be soft but manageable—it’s a delightful indicator of your Lemon Snowflakes coming together.
Step 6: Chill the Dough
Cover your mixing bowl with plastic wrap and refrigerate the dough for about 20-30 minutes. Chilling will help set the flavors and ensure the cookies keep their shape while baking. In the meantime, clean your baking area for decorating after baking.
Step 7: Shape the Cookies
Once chilled, scoop out portions of dough and roll them into small balls, about 1 inch in diameter. Place them evenly spaced on your prepared baking sheet, ensuring some room to expand. At this point, these Lemon Snowflakes should look like tiny citrus orbs ready to transform into delicious cookies.
Step 8: Bake the Cookies
Transfer your baking sheet to the preheated oven and bake for 10-12 minutes, or until the edges are lightly golden but the centers remain soft. The key is to ensure they don’t overbake, as they should retain a melt-in-your-mouth texture that defines Lemon Snowflakes.
Step 9: Cool and Dust
Remove the cookies from the oven and allow them to cool on the baking sheet for about 5 minutes before transferring them to a wire rack. Dust generously with powdered sugar while they are still warm, giving them their iconic snow-kissed appearance and an extra touch of sweetness as they cool.
Step 10: Serve and Enjoy
Once fully cooled, serve your Lemon Snowflakes on a festive platter or store them in an airtight container for up to a week. These light, zesty treats will surely delight during holiday gatherings, sharing the warmth and joy of the season!
How to Store and Freeze Lemon Snowflakes
Room Temperature: Keep Lemon Snowflakes in an airtight container at room temperature for up to one week to maintain their delightful texture and zesty flavor.
Fridge: If you prefer a chilled treat, store them in the fridge for up to 10 days. Just be sure they are well covered to avoid absorbing any odors.
Freezer: For longer storage, freeze the cookies in a single layer on a baking sheet before transferring them to a freezer bag. They can be stored for up to 3 months—perfect for holiday prepping!
Reheating: To enjoy their delightful softness after freezing, let them thaw at room temperature. Reheat gently in the oven at 300°F (150°C) for about 5 minutes, bringing them back to their fresh-baked glory!
What to Serve with Lemon Snowflakes
The delightfully zesty Lemon Snowflakes will brighten up any holiday table, and pairing them with complementary dishes will create a well-rounded festive spread.
-
Rich Hot Chocolate: The creamy, chocolaty warmth contrasts beautifully with the light texture of the cookies, making each bite a heavenly experience.
-
Coffee or Espresso: The robust flavors of coffee enhance the subtle citrus notes in the cookies, creating a perfect balance for your taste buds.
-
Fresh Berries: Juicy blueberries or raspberries add a refreshing, tart element that enhances the lemony goodness, bringing a burst of color and flavor to your plate.
-
Vanilla Ice Cream: A scoop of creamy vanilla ice cream serves as a delightful counterpart to the cookies, allowing the bright lemon flavor to shine through in each bite.
-
Tangy Yogurt Parfait: Layering Lemon Snowflakes with yogurt and fruit creates a luscious dessert that’s both indulgent and light—perfect for any gathering.
-
Holiday Punch: A festive, citrus-infused punch will echo the flavors of the cookies while refreshing your guests during the celebration.
-
Savory Cheese Platter: Including creamy brie or tangy goat cheese provides a sophisticated touch, contrasting the sweetness of the cookies beautifully.
-
Sangria: A chilled glass of sangria, filled with fruits, spices, and wine, will add a refreshing twist to your snacks, harmonizing with the lemon’s brightness.
Add any combination of these pairings to elevate your cookie experience and enchant your holiday gatherings!
Lemon Snowflakes Variations & Substitutions
Feel free to customize your Lemon Snowflakes and make them uniquely yours with these delightful twists!
-
Gluten-Free: Swap all-purpose flour for a 1:1 gluten-free flour blend to cater to dietary needs. They’ll still be light and delicious!
-
Vegan Delight: Replace the egg with a flax egg or ¼ cup of unsweetened applesauce for a vegan-friendly treat that’s just as mouthwatering.
-
Zesty Herb Twist: Add a teaspoon of finely chopped fresh rosemary or thyme to your dough for a herbal flavor that complements the lemon beautifully.
-
Nutty Addition: Incorporate ½ cup of finely chopped nuts, such as almonds or pecans, into the dough for added texture and flavor that enhances the cookie experience.
-
Fruity Variations: Fold in dried cranberries, blueberries, or chopped candied ginger into the batter for bursts of fruity sweetness in each bite.
-
Citrus Mix: Experiment with limoncello for an adult twist or mix in zest from oranges or limes to create a bright, citrus medley.
-
Chocolate Drizzle: Finish your cookies with a drizzle of melted dark or white chocolate for an indulgent touch that contrasts beautifully with the zesty flavor.
While you’re at it, why not pair these cookies with other holiday treats? Check out my Lemon Cream Cheese for a creamy delight or serve them alongside flavorful Garlic Chicken Wraps to round out your festive spread!
Expert Tips for Lemon Snowflakes
-
Chill for Success: Always chill the dough before baking. This helps maintain the airiness and shape of your Lemon Snowflakes during the baking process.
-
Parchment Paper: Use parchment paper to line your baking sheets. It prevents sticking and aids in keeping the cookies fluffy and intact.
-
Sift Ingredients: Sift the powdered sugar and flour for the batter. This ensures a lighter texture, making your Lemon Snowflakes melt in your mouth.
-
Fresh Ingredients: Opt for fresh lemon juice and zest. The zest gives a more vibrant flavor that elevates the cookies, bringing brightness to your festive treats.
-
Watch the Bake Time: Keep an eye on your cookies as they bake. They should be lightly golden around the edges, but the centers should remain soft to achieve that sought-after delicate chew.
Make Ahead Options
These Lemon Snowflakes are a wonderful candidate for meal prep, perfect for busy holidays! You can prepare the dough up to 24 hours in advance. Simply complete steps 1 through 6 (chilling the dough is essential for maintaining its delicate texture). Once chilled, shape the cookies into balls, place them on a baking sheet lined with parchment, and wrap the sheet tightly in plastic wrap before refrigerating. When you’re ready to serve, just bake the cookies directly from the fridge, adding an extra minute or two to the baking time if necessary. This way, you’ll enjoy fresh, zesty treats without the rush, and they’ll be just as delicious as if made on the same day!
Lemon Snowflakes Recipe FAQs
What type of lemons should I use for the best flavor?
Absolutely! For the most zesty and refreshing taste in your Lemon Snowflakes, I recommend using organic lemons. They tend to have a more intense flavor and natural oils in the zest, enhancing your cookies with that bright citrus punch.
How should I store my Lemon Snowflakes for freshness?
To keep your Lemon Snowflakes delightful and fresh, store them in an airtight container at room temperature for up to one week. If you prefer a slightly chilled treat, you can also refrigerate them for up to 10 days. Just make sure they’re well covered to avoid absorbing any undesirable odors.
Can I freeze Lemon Snowflakes, and if so, how?
Very! You can absolutely freeze Lemon Snowflakes for longer storage. Start by placing the cookies in a single layer on a baking sheet lined with parchment paper. Freeze the cookies for about 2 hours until solid, then transfer them to a freezer bag. They will keep well for up to 3 months. To enjoy them, simply let them thaw at room temperature, or gently reheat in the oven at 300°F (150°C) for about 5 minutes to restore that fresh-baked softness.
What should I do if my cookies spread too much while baking?
If your Lemon Snowflakes spread too much during baking, it might be due to the dough being too warm or not having been chilled enough. Always ensure you chill the dough for 20-30 minutes to help them keep their shape. Additionally, check the flour measurement; keeping it leveled off helps maintain the structure!
Are there any allergy considerations for making Lemon Snowflakes?
For those concerned about allergies, you can easily make these Lemon Snowflakes gluten-free by substituting the all-purpose flour with a 1:1 gluten-free flour blend. If you’re accommodating egg allergies, you can use a flax egg—simply mix 1 tablespoon of flaxseed meal with 2.5 tablespoons of water, let it sit for 5 minutes, and use it in place of one egg.
Can I add other flavors to the Lemon Snowflakes?
Absolutely! While the zesty lemon flavor is delightful on its own, you can add a burst of flavor by incorporating poppy seeds for added texture or even replace a tablespoon of lemon juice with a splash of vanilla extract for a lovely twist. Just remember to keep the balance of dry and wet ingredients in mind!
Lemon Snowflakes: Light, Zesty Treats for Every Celebration
Ingredients
Equipment
Method
- Preheat your oven to 350°F (175°C) and line a baking sheet with parchment paper.
- Whisk together 2 cups of flour, 1 teaspoon of baking powder, and a pinch of salt in a separate bowl.
- Beat together ½ cup of butter and 1 cup of powdered sugar until light and fluffy.
- Mix in 1 tablespoon of lemon zest and 2 tablespoons of lemon juice.
- Incorporate 1 large egg until fully integrated.
- Gradually mix in the dry ingredients until just combined.
- Chill the dough covered in plastic wrap for 20-30 minutes.
- Scoop and roll dough into 1-inch balls, placing them on the prepared baking sheet.
- Bake for 10-12 minutes until edges are lightly golden.
- Allow to cool for 5 minutes then dust with powdered sugar before transferring to a wire rack.
- Serve once fully cooled.
Leave a Reply