
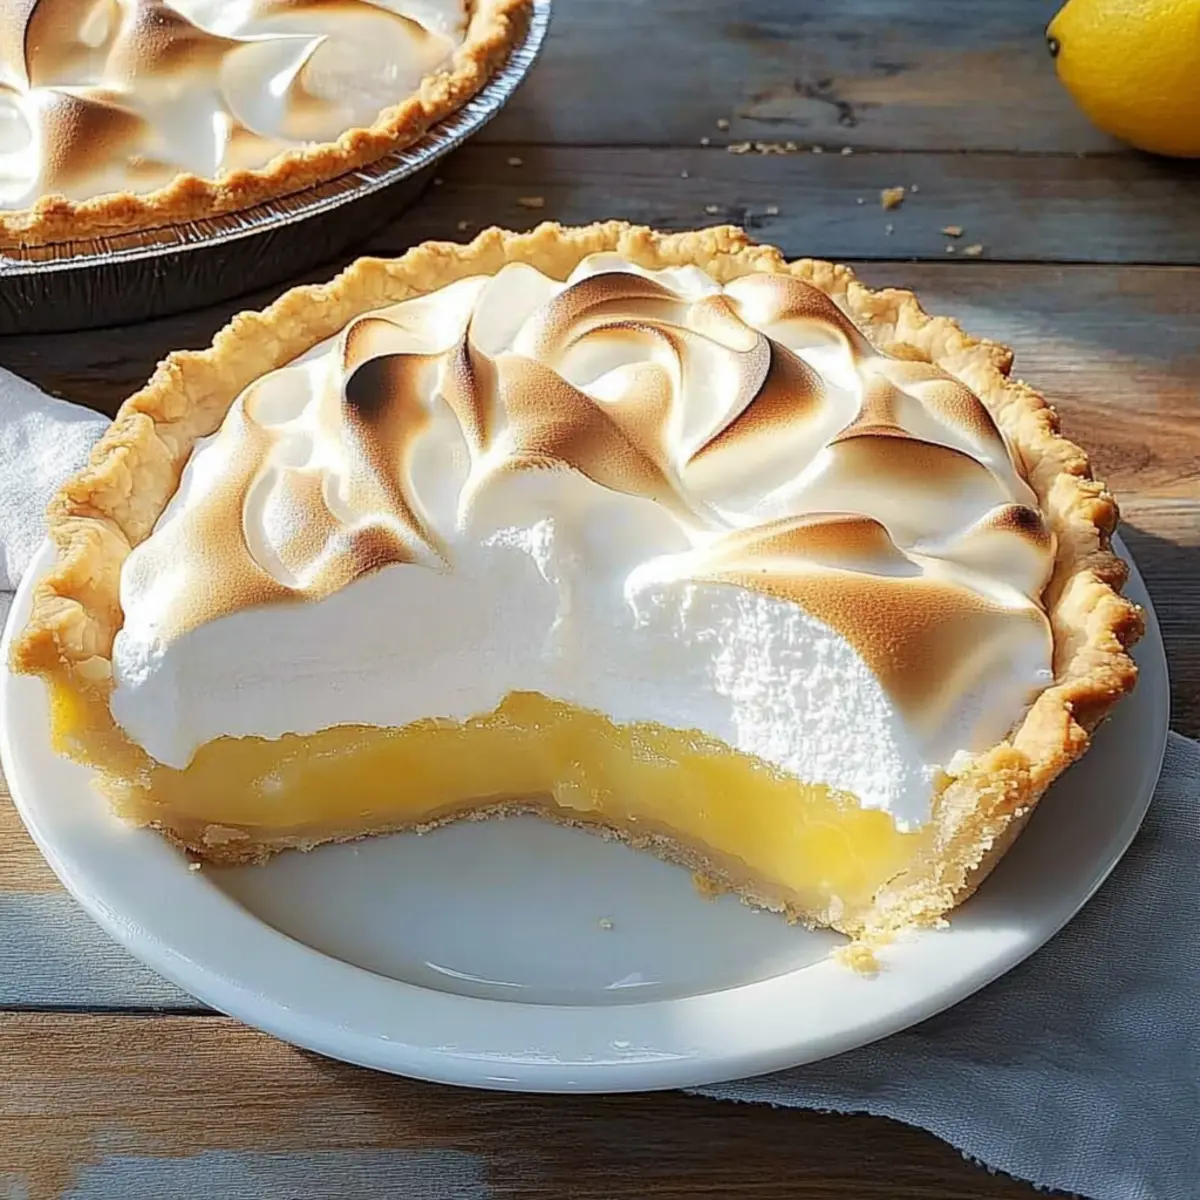
As I pulled my lemon meringue pie from the oven, the golden-brown peaks of the meringue glistened under the kitchen light, inviting me to take that first indulgent slice. This classic dessert, with its zesty lemon filling and fluffy topping, has a special place in my heart. It’s the perfect blend of sweet and tart, making it a surefire crowd-pleaser for any gathering. What I love most about this homemade lemon meringue pie is how adaptable it is; you can tweak the lemon juice to amp up the flavor to your liking. Plus, it’s a delightful way to showcase your culinary skills without spending all day in the kitchen! Curious to see how to create this showstopper? Let’s dive into the recipe!
Why is Lemon Meringue Pie a Favorite?
Sweet and Tangy Delight: The lively contrast of zesty lemon filling and sweet meringue is truly irresistible!
Impressive Presentation: With its lofty peaks and golden hue, this pie is a show-stopper at any gathering.
Versatile Flavor: Tailor the tartness by adjusting the lemon juice to suit your taste buds.
Quick and Simple: You can achieve this classic dessert with minimal prep, making it perfect for last-minute occasions.
Crowd-Pleasing Treat: Whether for holidays or casual get-togethers, this pie will impress friends and family alike.
Don’t forget, if you’re a fan of delightful desserts, you might also love Pumpkin Pie Stuffed for another fantastic flavor experience!
Lemon Meringue Pie Ingredients
• Unlock the tasty layers of flavor!
For the Crust
- Dough for single-crust pie – You can use store-bought for convenience or make your own for that extra touch!
For the Filling
- 1 cup sugar – This adds the perfect sweetness to balance the zesty filling.
- 1/4 cup cornstarch – A must-have thickening agent for a stable lemon filling.
- 3 tablespoons all-purpose flour – Provides additional structure; feel free to substitute with gluten-free flour!
- 1/4 teaspoon salt – Just a pinch helps to balance all that sweetness.
- 2 cups water – Hydrates the filling; replace some with lemon juice for an extra zing!
- 3 large egg yolks, beaten – Adds a rich creaminess to the filling; no substitutes for this essential!
- 1 tablespoon butter – This adds a lovely creamy richness to the filling.
- 1/4 cup lemon juice – The star of the show! Freshly squeezed juice gives the best flavor.
- 1 teaspoon grated lemon zest – Enhances the citrus notes beautifully!
For the Meringue
- 3 large egg whites, room temperature – Ensure no yolks for optimal volume and stability in your meringue.
- 1/4 teaspoon salt – Helps stabilize the egg whites for a perfect meringue.
- 1/2 cup sugar – Sweetens the meringue and allows for a lovely texture.
Whip up your delicious lemon meringue pie with these fresh ingredients and get ready to impress!
Step‑by‑Step Instructions for Lemon Meringue Pie
Step 1: Prepare Dough
Roll out your dough to a 1/8-inch thickness and carefully transfer it to a 9-inch pie plate. Trim the edges, crimping them to create a decorative border. Refrigerate the crust for about 30 minutes, which helps to prevent shrinking during baking.
Step 2: Blind Bake
Preheat your oven to 425°F. Line the chilled crust with aluminum foil and fill it with pie weights or dried beans to prevent puffing. Bake for 15 minutes until the edges are golden, then carefully remove the foil and weights, baking for an additional 5-10 minutes until the bottom is lightly golden. Cool the crust on a wire rack and reduce the oven temperature to 350°F.
Step 3: Make Filling
In a medium saucepan, whisk together sugar, cornstarch, flour, and salt. Gradually stir in the water and cook over medium heat, stirring constantly, until the mixture becomes bubbly and thick (about 5-7 minutes). Remove from heat, and slowly whisk in the beaten egg yolks, cooking for an additional 2 minutes to achieve the perfect consistency. Stir in butter, lemon juice, and zest until smooth and glossy.
Step 4: Prepare Meringue
In a large mixing bowl, beat the egg whites and salt using an electric mixer on medium speed until soft peaks form. Gradually add sugar, continuing to beat until the meringue becomes glossy and stiff peaks form—this process takes about 5 minutes. Ensure your mixing bowl is completely grease-free for the best volume.
Step 5: Assemble and Bake
Pour the vibrant lemon filling into the baked crust and spread it evenly. Spoon the prepared meringue over the hot filling, making sure to seal the edges to prevent shrinkage. Bake the assembled lemon meringue pie in the oven at 350°F for 12-15 minutes, or until the meringue is golden brown. Allow the pie to cool completely before slicing to ensure that the filling sets properly.
Expert Tips for Perfect Lemon Meringue Pie
-
Non-Soggy Crust: Blind bake your crust well before adding the filling. If meringue is added to a cool crust, it can become soggy.
-
Grease-Free Utensils: Ensure all bowls and mixing tools are free from grease to achieve fluffy, stable meringue. Any fat can prevent proper whipping.
-
Seal the Meringue: Spread the meringue right to the crust’s edge to prevent weeping—a common issue where moisture leaks from the filling below.
-
Enhance Lemon Flavor: For a more intense citrus experience, replace some water in the filling with additional lemon juice or zest. This delivers that delightful lemony punch.
How to Store and Freeze Lemon Meringue Pie
Refrigerator: Store leftover lemon meringue pie in an airtight container or cover it lightly with plastic wrap; enjoy within 2-3 days for the best flavor and texture.
Freezer: For longer storage, you can freeze lemon meringue pie, but it’s best to freeze only the filling and meringue separately. Use a freezer-safe container for up to 1 month; thaw in the fridge before serving.
Reheating: If you’ve frozen the filling, reheat gently on the stove over low heat until warmed through. Re-whip meringue just before serving for a fluffy texture.
Avoid Sogginess: When storing, cover the meringue lightly to prevent it from getting too moist, which can lead to a soggy topping.
Lemon Meringue Pie Variations & Substitutions
Feel free to play around with this recipe and make it your own; after all, the kitchen is your canvas!
-
Meyer Lemon Juice: Swap regular lemon juice for Meyer lemon juice for a sweeter, more fragrant flavor profile. The pie takes on a delightful twist with this tender citrus!
-
Individual Tartlets: Create mini lemon meringue tartlets instead of one large pie. Adjust the baking time down to 10-12 minutes for those charming bites.
-
Citrus Zest Medley: Mix in zest from other citrus fruits, like lime or orange, for a unique flavor combination. This is a wonderful way to bring a fresh vibrancy to your pie.
-
Sugar-Free Option: Use a sugar substitute instead of granulated sugar for a healthier take. This can change the texture slightly, but it’s a great option for those watching their sugar intake.
-
Gluten-Free Crust: Replace regular flour with a gluten-free flour blend in the crust for those with gluten sensitivities. Just make sure it’s a good all-purpose mix to ensure the right structure.
-
Extra Lemon Flavor: For a zesty punch, increase the lemon juice to 1/3 cup and reduce the water accordingly. This adjustment can enhance the tangy flavor that many adore!
-
Flavored Meringue: Add a drop of vanilla or almond extract to the meringue for a subtle flavor twist. These notes can elevate the meringue to a new level of sweetness.
In the mood for more deliciousness? Check out my Lemon Cream Cheese recipe for something equally delightful, or try my Toasted Pumpkin Pie for a seasonal treat!
Make Ahead Options
These Lemon Meringue Pies are perfect for busy home cooks looking to save time! You can prepare the pie crust and filling up to 24 hours in advance. Simply blind bake the crust and let it cool, then store it in an airtight container at room temperature. For the filling, once cooled, cover it with plastic wrap directly on the surface to prevent a skin from forming and refrigerate. The meringue, however, is best made fresh before serving to ensure it retains its fluffy texture. When you’re ready to enjoy, reheat your filling gently, pour it into the crust, and top with freshly whipped meringue. This way, you’ll have a delightful dessert ready with minimal last-minute effort!
What to Serve with Lemon Meringue Pie
Delight in a full meal experience by pairing your luscious lemon treat with complementary dishes that sing in harmony.
-
Creamy Mashed Potatoes: Their buttery richness contrasts beautifully with the bright zing of the lemon pie, creating a satisfying balance.
-
Grilled Asparagus: The earthy flavor and slight crispness add freshness to your table, making each bite feel lively and vibrant.
-
Classic Roast Chicken: Juicy and seasoned to perfection, this savory option enhances the meal while allowing the pie’s sweetness to shine through.
-
Mixed Green Salad: Tossed with a zesty vinaigrette, the clean, crunchy veggies provide the perfect palette cleanser between bites of the pie.
-
Chocolate Chip Cookies: For a sweet finale, these warm, gooey cookies resonate with nostalgia, balancing the tartness expertly.
-
Strawberry Lemonade: This drink not only refreshes but its tangy flavor aligns wonderfully with the lemony notes of your pie.
Each of these options brings varied textures and flavors, elevating your lemon meringue pie into a memorable meal!

Lemon Meringue Pie Recipe FAQs
How do I choose ripe lemons for my lemon meringue pie?
Absolutely! Look for lemons that are bright yellow and feel heavy for their size, which indicates juiciness. Avoid any that are dull or have dark spots. Freshly squeezed lemon juice makes a world of difference, so reach for those perfectly ripe lemons!
What is the best way to store leftover lemon meringue pie?
Very good question! Store your leftover lemon meringue pie in the refrigerator. Place it in an airtight container or gently cover it with plastic wrap. It’s best enjoyed within 2-3 days for optimal taste and texture, which keeps that fluffy meringue nice and fresh.
Can I freeze lemon meringue pie?
Yes, you can! While it’s best to freeze only the filling and meringue separately to maintain texture, here’s how:
- Allow the pie to cool completely.
- Wrap the entire pie tightly in plastic wrap or aluminum foil.
- Place it in a freezer-safe container.
You can freeze it for up to 3 months. To serve, thaw it in the fridge overnight and re-whip the meringue if necessary for that beautiful fluffy look!
Why did my meringue weep or shrink?
Great question! Tears in your meringue can happen for a few reasons. To avoid weeping, make sure to spread the meringue all the way to the crust’s edges; this seals in the moisture. Additionally, always ensure your mixing bowl is completely free from grease and whip the egg whites to stiff peaks before incorporating sugar.
Can I make lemon meringue pie gluten-free?
Absolutely! You can easily adapt this recipe by substituting the all-purpose flour in the filling with a gluten-free flour blend. Make sure to check the ingredients on your store-bought crust, or you could make your own using gluten-free alternatives.
Are there any dietary concerns I should consider for my guests?
Indeed! This lemon meringue pie contains eggs, and the pie crust may also include gluten if not specified. For those who need gluten-free options, use a certified gluten-free crust. Always check for any allergies to citrus or eggs when serving, as these are common allergens.
Lemon Meringue Pie: Delightful Citrus Comfort in Every Slice
Ingredients
Equipment
Method
- Roll out your dough to a 1/8-inch thickness and transfer it to a 9-inch pie plate. Refrigerate for 30 minutes.
- Preheat your oven to 425°F. Blind bake the crust for 15 minutes, then remove the foil and bake for an additional 5-10 minutes.
- In a saucepan, whisk together sugar, cornstarch, flour, and salt. Gradually stir in water and cook until bubbly and thick.
- Remove from heat, slowly whisk in beaten egg yolks, then stir in butter, lemon juice, and zest until smooth.
- Beat egg whites and salt until soft peaks form. Gradually add sugar and beat until glossy and stiff peaks form.
- Pour lemon filling into baked crust, spread meringue over filling, sealing edges. Bake at 350°F for 12-15 minutes until golden.
- Allow the pie to cool completely before slicing.
Leave a Reply