
As I knead the dough, the satisfying rhythm of the process brings me joy and a hint of nostalgia for those weekends spent in the kitchen with loved ones. There’s something magical about making your own Homemade Slider Buns, and once you try this recipe, you’ll understand why these soft, golden delights are destined to become your go-to for any occasion. Not only are they remarkably easy to whip up from scratch, but these buns are also a delightful crowd-pleaser, perfect for weeknight dinners or game day gatherings. With just a few simple ingredients, you can elevate any meal and add a touch of homemade comfort that fast food simply can’t compete with. Ready to learn how to make these irresistible slider buns? Let’s dive in!
Why Are Homemade Slider Buns a Must-Try?
Simplicity at its finest: With just a handful of ingredients, you can master the art of baking without any fancy equipment. Flavorful and fresh: The rich, buttery taste of these buns elevates everything from mini burgers to gourmet sliders. Versatile for any occasion: Whether it’s a casual lunch or a festive gathering, these buns adapt beautifully. Crowd-pleaser at its best: Serve them warm, and watch as they disappear in no time! If you’re up for another delicious homemade treat, consider trying these Low Carb Casserole for a wholesome addition to your weeknight meals!
Homemade Slider Buns Ingredients
For the Dough
- All-Purpose Flour – Provides structure and texture; substitute with whole wheat flour for a heartier option.
- RapidRise Yeast – Essential for leavening, creating that fluffy texture; always check for freshness!
- Granulated Sugar – Adds just the right hint of sweetness and helps achieve a lovely golden crust.
- Table Salt – Enhances the flavors of your buns; reduce if using salted butter.
- Warm Water – Activates the yeast; ensure it’s between 100-110°F for optimal effectiveness.
- Eggs – Contribute to richness and moisture; use room temperature for better incorporation.
- Unsalted Butter – Adds that rich, buttery goodness; make sure it’s softened for smooth mixing.
For the Topping
- Sesame Seeds – An optional topping that adds delightful texture and a nutty flavor; use for extra flair!
These Homemade Slider Buns are not just buns; they are the building blocks of memories, the perfect companions to burgers or sandwiches, and a warm hug for your taste buds. Enjoy crafting these delightful treats!
Step‑by‑Step Instructions for Homemade Slider Buns
Step 1: Combine Dry Ingredients
In a large mixing bowl, whisk together 4 cups of all-purpose flour, 2 teaspoons of RapidRise yeast, 2 tablespoons of granulated sugar, and 1 teaspoon of table salt. Make sure there are no lumps. This mixture will form the backbone of your homemade slider buns, providing structure and flavor.
Step 2: Add Wet Ingredients
Pour in 1¾ cups of warm water (100–110°F) and crack in 1 large egg. Mix until a shaggy dough starts to form, ensuring everything is well incorporated. At this stage, the dough will look a bit messy but that’s perfectly normal.
Step 3: Knead the Dough
Incorporate ¼ cup of softened unsalted butter into your shaggy dough. Turn the mixture onto a lightly floured surface and knead for about 8-10 minutes using a stand mixer or 10-12 minutes by hand until the dough becomes smooth and elastic. You’ll know it’s ready once it springs back when poked gently.
Step 4: First Rise
Place your kneaded dough in a greased bowl, covering it with a damp cloth or plastic wrap. Let it rise in a warm spot for 1 to 1½ hours, or until it has doubled in size. This step is crucial for achieving the light, airy texture of your homemade slider buns.
Step 5: Shape the Buns
Once risen, punch down the dough gently to release any air bubbles. Divide the dough into 8 equal pieces and shape each piece into a smooth ball. Place these dough balls on a parchment-lined baking pan, ensuring there’s some space between each to allow for further rising.
Step 6: Second Rise
Cover the shaped slider buns with a clean kitchen towel and let them rise again in a warm place for 45-60 minutes, until they are puffy. This second rise allows for that perfect softness that makes your homemade slider buns irresistible.
Step 7: Prepare for Baking
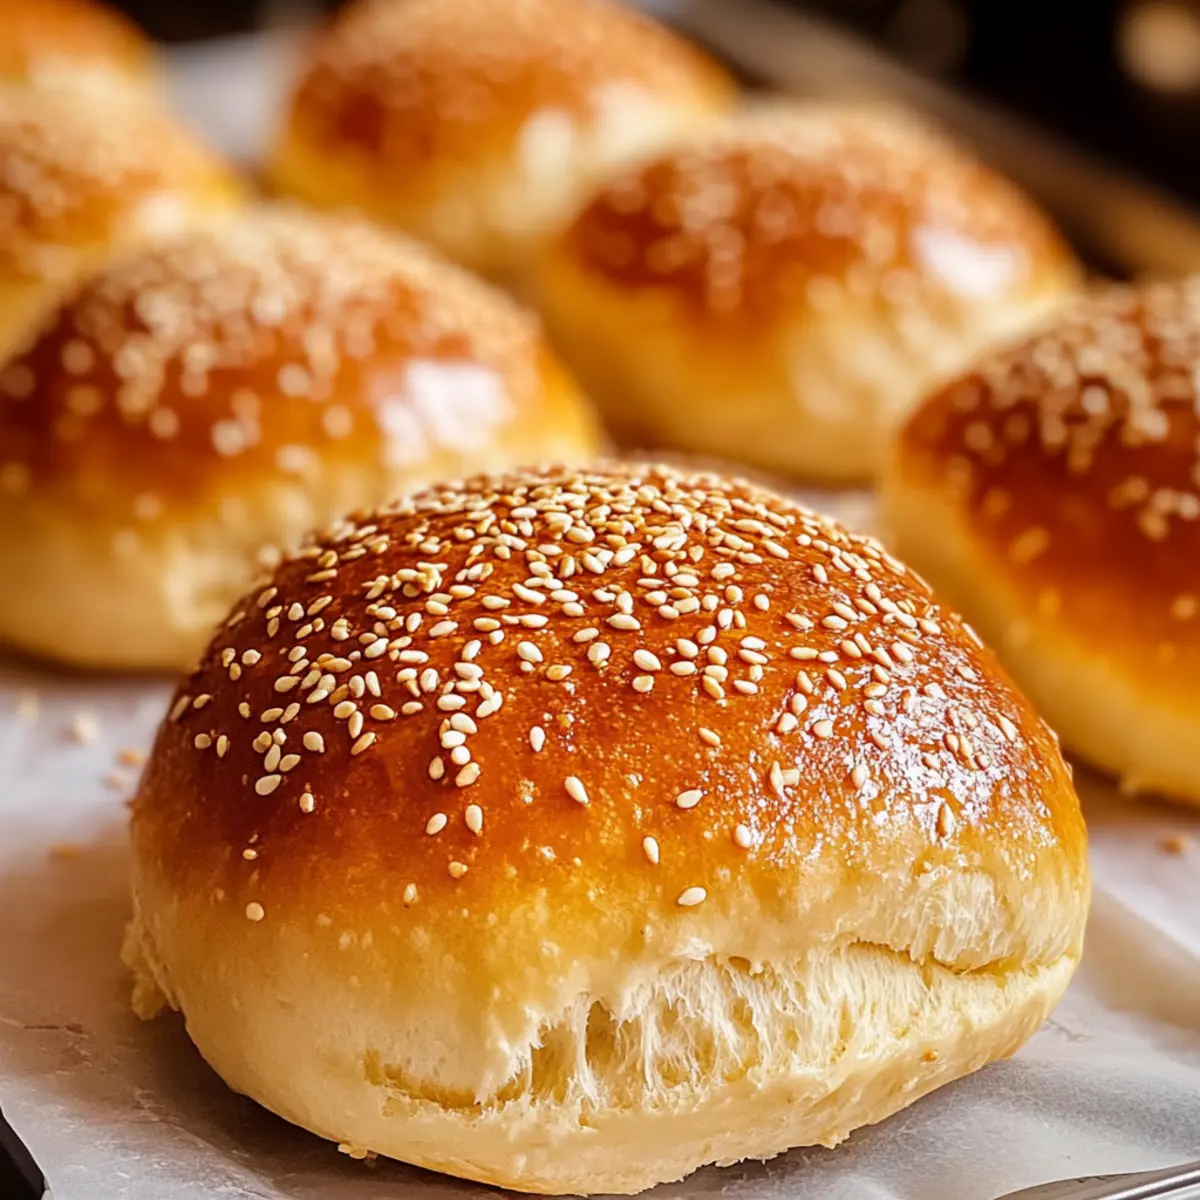
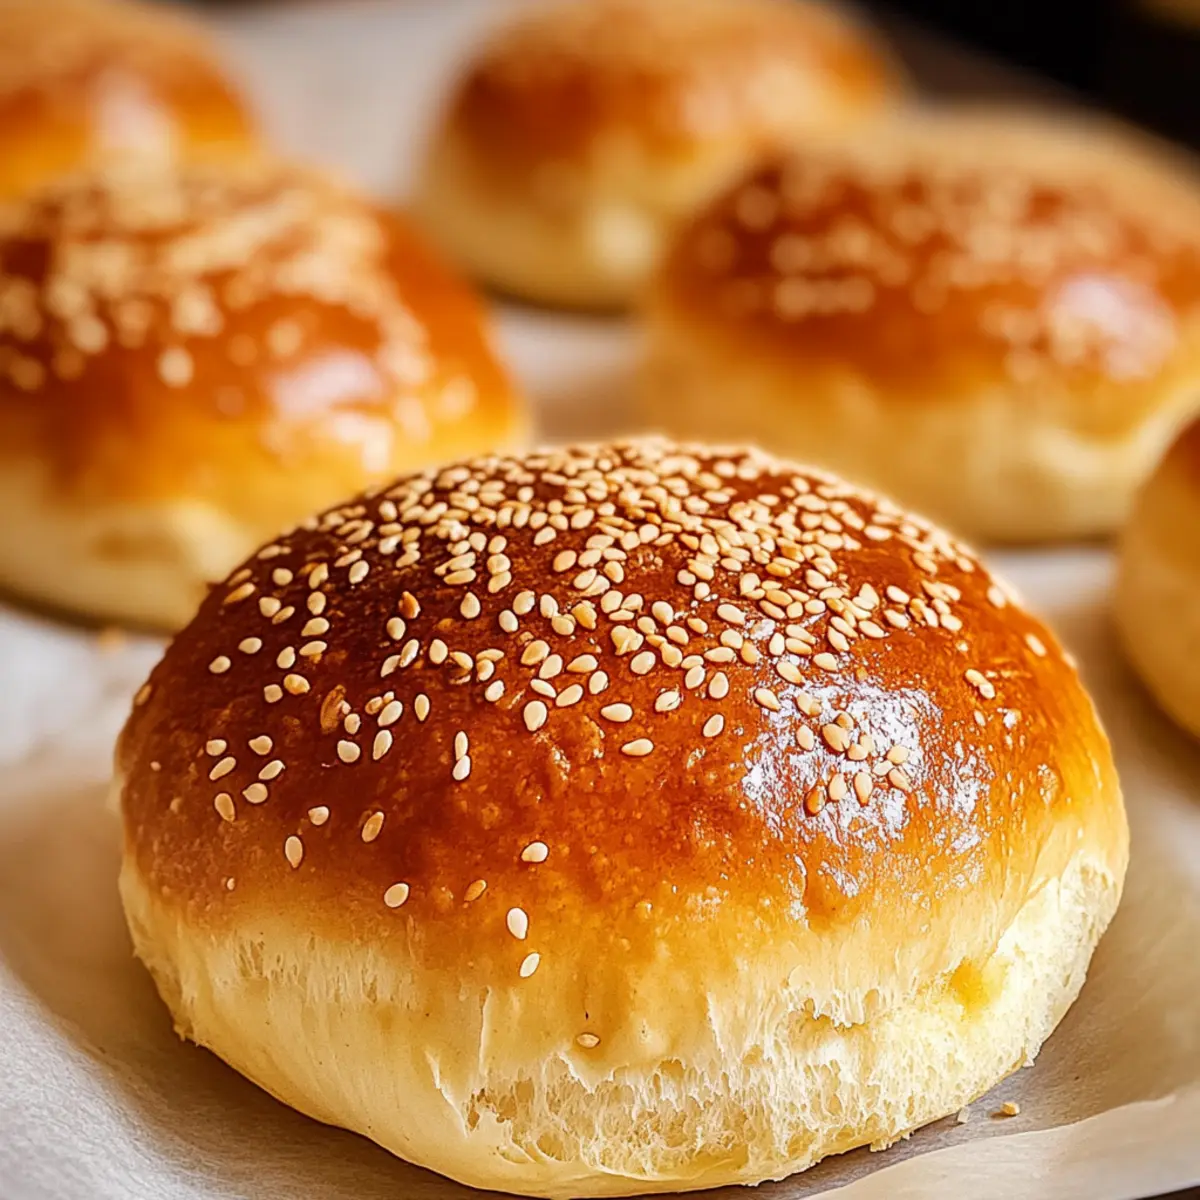
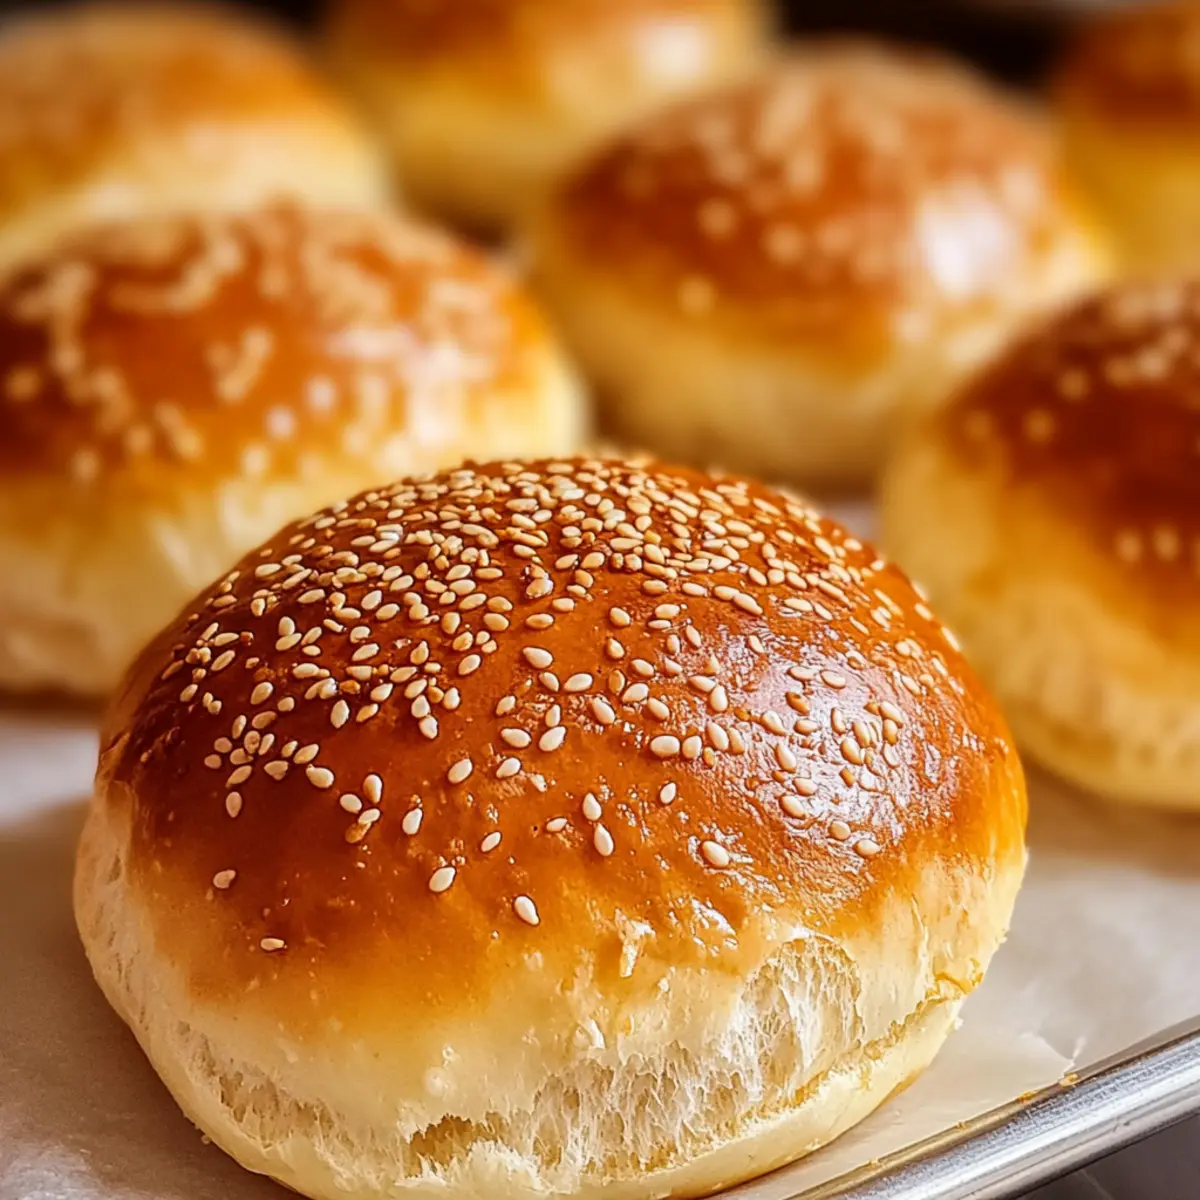
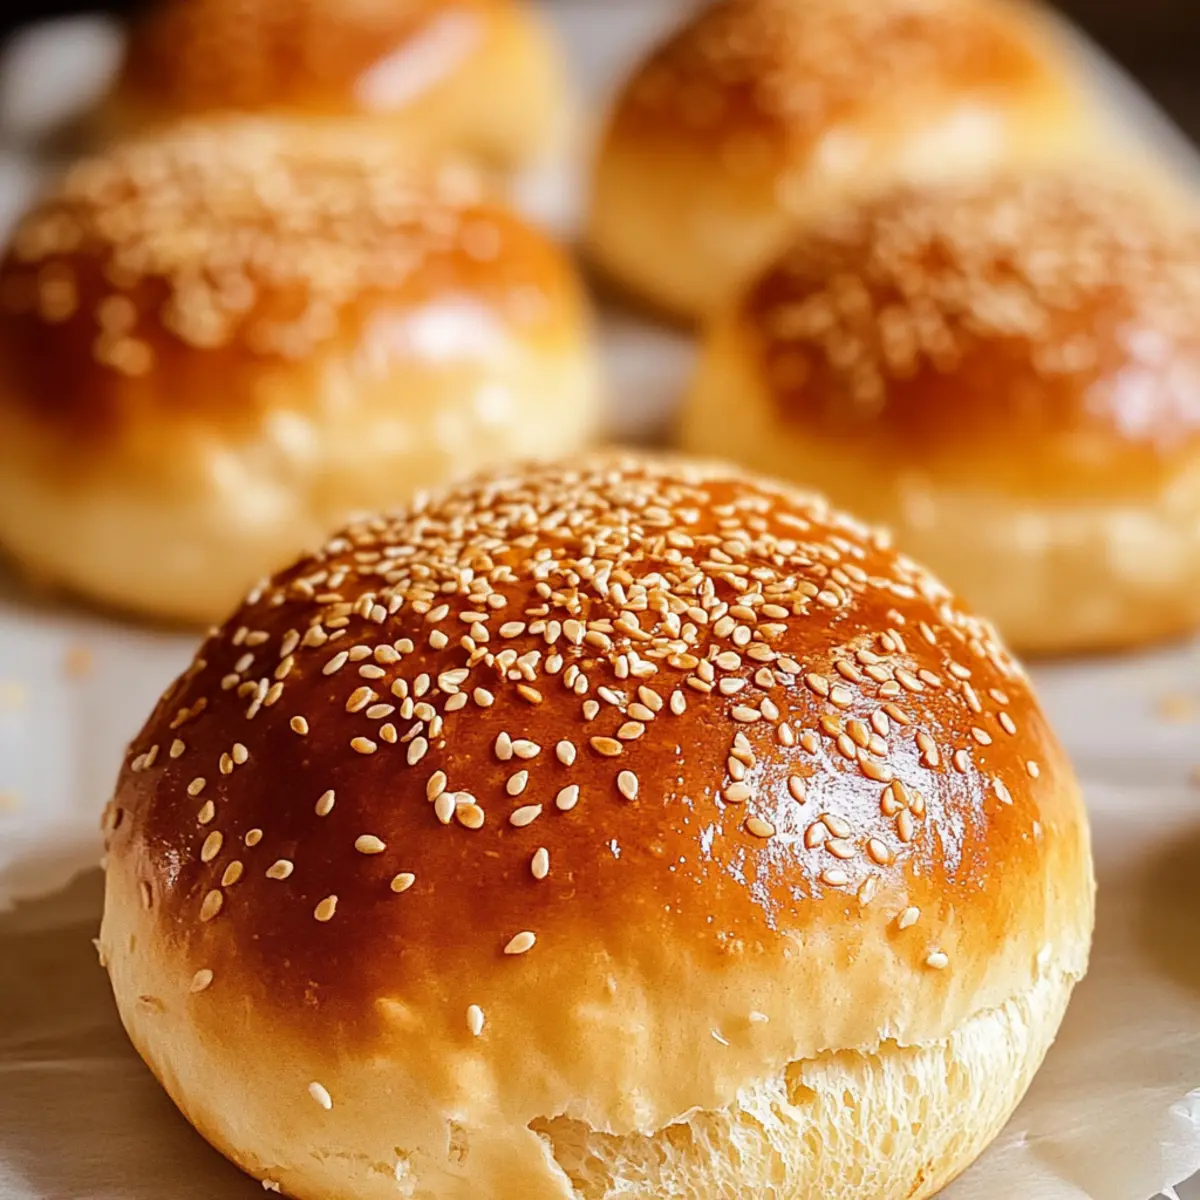
Preheat your oven to 375°F (190°C). While the oven heats, brush the tops of the buns with an egg wash made of 1 beaten egg mixed with 1 tablespoon of water. For a delightful finish, sprinkle sesame seeds over the tops if desired.
Step 8: Bake the Buns
Carefully place the baking pan in the oven and bake for 18–22 minutes, or until the slider buns are golden brown and sound hollow when tapped on the bottom. Those gorgeous, soft, and fluffy buns are nearly ready!
Step 9: Cool and Serve
Remove the baked homemade slider buns from the oven and let them cool on a wire rack for about 10 minutes. This cooling step allows the buns to set up perfectly, making them easy to slice and fill. Enjoy them fresh and warm, ready for any delicious fillings!
Homemade Slider Buns Variations
Feel free to get creative and personalize your slider buns with these fun twists that will make your kitchen adventures even more delightful!
-
Whole Wheat: Swap all-purpose flour for whole wheat flour to boost fiber and add a nuttier flavor. These hearty buns are perfect for a wholesome meal!
-
Cheesy Delight: Mix shredded cheese into the dough for a savory touch. Cheddar, mozzarella, or even pepper jack add wonderful flavor and a gooey texture.
-
Herb Infusion: Add dried herbs like basil, oregano, or garlic powder to the dough for an aromatic flavor boost. Your sliders will come alive with an enticing scent!
-
Sweet Twist: Incorporate a tablespoon of honey or maple syrup into the dough for a subtly sweet note. These sweet slider buns are wonderful for breakfast sandwiches.
-
Flavored Toppings: Experiment with different seeds for the topping, such as poppy seeds or flaxseeds, to create visual and taste variety. These toppings can add that extra crunch!
-
Spicy Kick: Heat things up by adding crushed red pepper flakes to the dough. A little spice goes a long way, and your sliders will certainly have an exciting flavor profile!
-
Vegan Option: Use dairy-free butter and substitute the egg with flaxseed meal or applesauce for a vegan-friendly version. Everyone can enjoy these scrumptious buns!
-
For a quick and easy meal solution, serve your homemade slider buns with these delightful Homemade Pizza Pockets that will surely impress your friends and family!
Storage Tips for Homemade Slider Buns
Room Temperature: Store cooled slider buns in an airtight container at room temperature for up to 2 days to maintain freshness.
Freezer: For longer storage, wrap individual buns in plastic wrap and place in a resealable freezer bag; they can last for up to 3 months in the freezer.
Reheating: To enjoy a warm bun again, simply thaw overnight in the fridge, then reheat in the oven at 350°F (175°C) for about 10 minutes, keeping them soft and fluffy.
Make-Ahead Tip: Prepare the dough a day in advance and refrigerate it after the first rise. This allows for a convenient option when you’re ready to bake your delicious Homemade Slider Buns!
Expert Tips for Homemade Slider Buns
-
Temperature Matters: Ensure your water is between 100-110°F to activate the RapidRise yeast effectively; too hot can kill the yeast, resulting in dense buns.
-
Kneading Technique: Knead the dough until it springs back when poked. If your dough is sticky, add a bit more flour gradually to maintain the right consistency.
-
Rising Time: Allow sufficient rising time for both the first and second rise—rushing this step can lead to dense slider buns instead of the light, fluffy texture you desire.
-
Custom Flavors: Get creative! Consider adding herbs, spices, or cheese to the dough for unique twists on your Homemade Slider Buns that will delight your guests.
-
Egg Wash Finish: Applying an egg wash before baking not only gives a beautiful golden color but also a slightly crispy exterior that enhances the overall eating experience.
Make Ahead Options
These Homemade Slider Buns are perfect for busy home cooks looking to save time during the week! You can prepare the dough up to 24 hours in advance by mixing it and placing it in the fridge after the first rise; this slow fermentation enhances the flavor. If you’d prefer to shape the buns ahead, simply divide the dough into balls and place them on a baking sheet; cover and refrigerate for up to 3 days. When you’re ready to enjoy, let the dough come to room temperature and proceed with the second rise before baking. By planning ahead, you’ll have freshly baked, restaurant-quality buns without any last-minute rush!
What to Serve with Homemade Slider Buns?
Imagine a cozy gathering filled with friends, laughter, and the delicious aroma of homemade meals wafting through the air. These slider buns are the perfect canvas for culinary creativity, ready to elevate any meal or party spread.
-
Juicy Mini Burgers: These slider buns cradle juicy patties beautifully, offering a delightful mix of flavors and textures that satisfy any burger lover.
-
Crispy Sweet Potato Fries: Their sweetness and crunch provide a wonderful counterpoint to the soft, fluffy buns, adding a delightful textural contrast to your meal.
-
Zesty Coleslaw: A tangy coleslaw bursts with fresh crunch and flavor, perfectly balancing the richness of the fillings and refreshing your palate.
-
Homemade Dipping Sauces: From creamy ranch to zesty BBQ, a variety of dips can enhance every bite and invite fun, interactive eating around the table.
-
Grilled Vegetable Medley: Colorful, charred veggies bring freshness and a smoky depth to your meal, seamlessly complementing the savory goodness of the sliders.
-
Pickles and Olives: A tangy assortment of pickles and olives adds a burst of flavor and a nice crunch that contrasts wonderfully with the softness of the buns.
-
Chilled Sparkling Lemonade: A refreshing drink with a hint of sweetness invigorates the senses, making it a perfect flavor match for your sliders.
-
Decadent Chocolate Brownies: For dessert, fudgy brownies are a sweet finale with their rich, deep flavor, contrasting the savory sliders and leaving everyone satisfied.
Homemade Slider Buns Recipe FAQs
What type of flour should I use for the best slider buns?
You can use all-purpose flour as it provides the ideal structure and texture for your homemade slider buns. If you’re looking for a heartier option, I recommend substituting with whole wheat flour. However, note that this may change the texture slightly, making them denser.
How should I store homemade slider buns to keep them fresh?
Once cooled, store your slider buns in an airtight container at room temperature for up to 2 days. For longer storage, wrap them individually in plastic wrap and place them in a resealable freezer bag, where they can stay fresh for up to 3 months.
Can I freeze the dough for homemade slider buns?
Absolutely! To freeze the dough, follow these steps: after kneading, shape the dough into a ball and place it in a greased bowl. Cover it tightly with plastic wrap and then foil. Freeze for up to 3 months. When you’re ready to use it, thaw in the fridge overnight, let it rise as directed, and continue with the recipe.
What should I do if my dough is too sticky?
If your dough feels too sticky while kneading, don’t worry! Gradually add small amounts of flour, about a tablespoon at a time, until it reaches a smooth consistency. Remember, kneading is key, so ensure you knead it well until it springs back when poked.
Are these homemade slider buns suitable for people with allergies?
These slider buns contain common allergens like gluten and eggs, which may not be suitable for those with wheat or egg allergies. If you have dietary restrictions, consider using gluten-free flour blends and egg substitutes. Always read labels, and make sure to inform guests about the contents if serving at gatherings.
How can I enhance the flavor of my slider buns?
To add an extra touch to your homemade slider buns, consider mixing in fresh herbs, spices, or cheese into the dough. You could also try sprinkling different seeds on top before baking, like poppy or caraway seeds, to cater to various taste preferences and elevate your buns even more!
Homemade Slider Buns: Soft, Fluffy, and Irresistible!
Ingredients
Equipment
Method
- In a large mixing bowl, whisk together the flour, RapidRise yeast, granulated sugar, and table salt until no lumps remain.
- Pour in the warm water and add the egg. Mix until a shaggy dough starts to form.
- Incorporate the softened butter into the dough and knead for about 8-10 minutes using a stand mixer, or 10-12 minutes by hand until smooth.
- Place the kneaded dough in a greased bowl, cover, and let it rise in a warm spot for 1 to 1½ hours.
- Punch down the dough and divide it into 8 equal pieces, shaping each piece into a ball. Place on a parchment-lined baking pan.
- Cover the shaped buns with a towel and let them rise for 45-60 minutes until puffy.
- Preheat your oven to 375°F. Brush the tops with an egg wash and sprinkle with sesame seeds if desired.
- Bake for 18-22 minutes until golden brown and sound hollow when tapped.
- Cool on a wire rack for about 10 minutes before serving.
Leave a Reply