
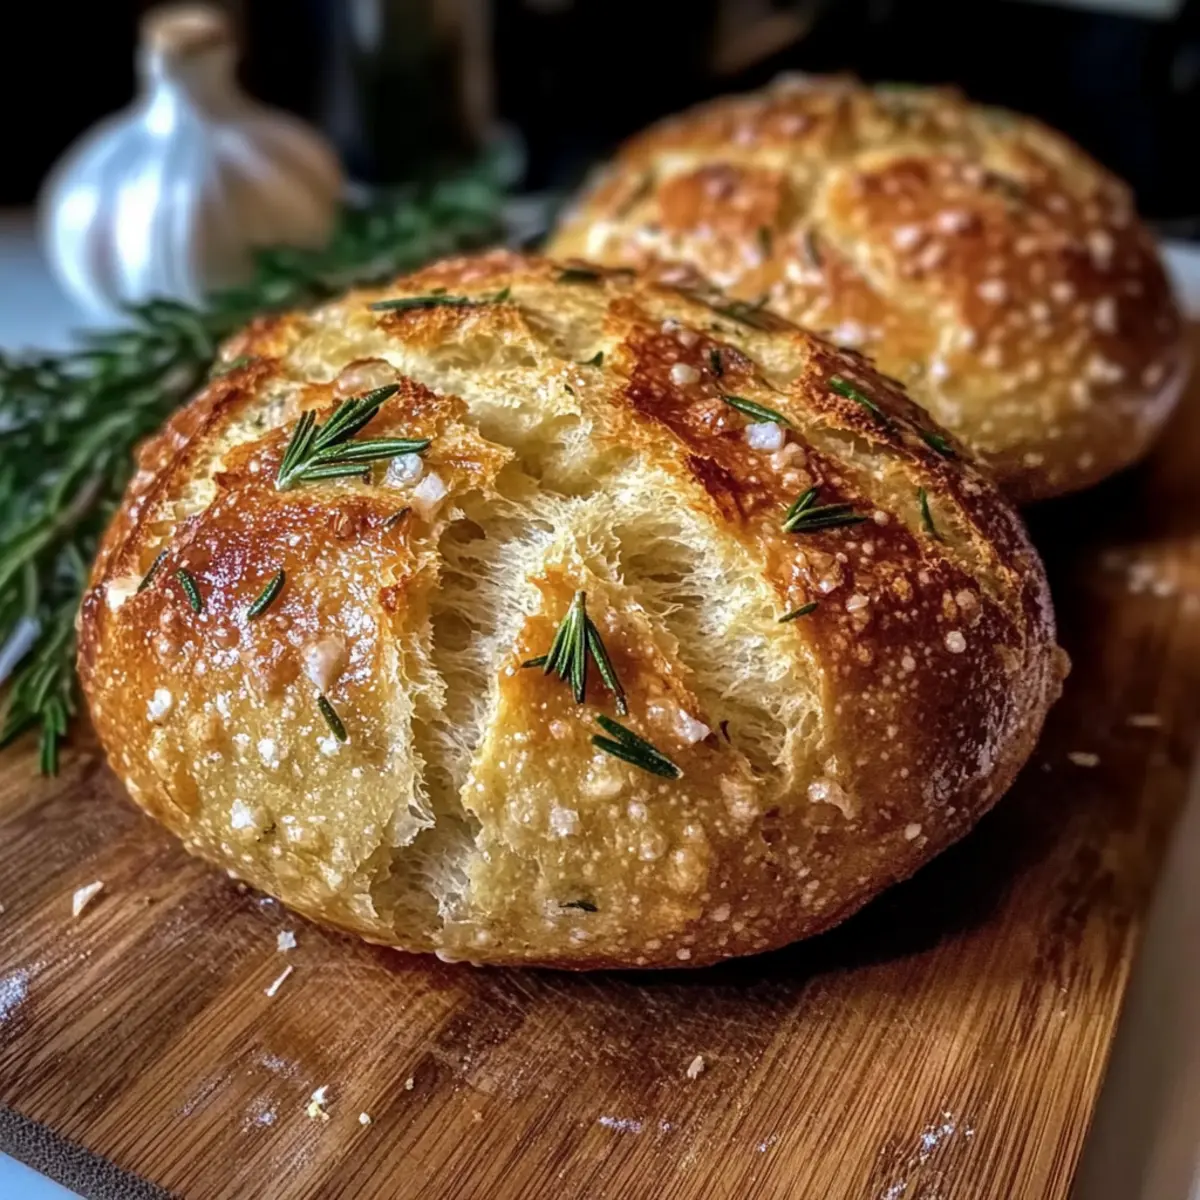
The moment the dough starts to rise, my kitchen transforms into a cozy haven, enveloped in the delightful aroma of fresh-baked bread dancing with the earthy notes of rosemary and the irresistible allure of garlic. This Homemade Garlic Rosemary Bread not only requires just a handful of pantry staples but also delivers a level of satisfaction that’s hard to match. It’s perfect for quick weekday dinners or as a showstopper on your brunch table, making it a quintessential addition to any home chef’s repertoire. As the crispy crust forms and the fluffy interior awaits, you’ll find yourself in a delightful culinary journey. What are you waiting for? Let’s roll up our sleeves and get baking!
Why is Homemade Garlic Rosemary Bread Special?
Aromatic Bliss: The moment you slice into this bread, the fragrant blend of garlic and rosemary envelops your senses, inviting everyone around the table.
Easy Peasy: With just a few simple steps, you can create bakery-quality bread at home, even if you’re a beginner!
Crowd-Pleaser: Whether it’s a family dinner or a gathering with friends, this bread is sure to impress and keep everyone coming back for more.
Versatile Delight: Pair it with soups, salads, or spread with butter for a comforting snack; it shines in any meal! Want something more adventurous? Check out our Homemade Pizza Pockets for another flavorful experience.
Texture Perfection: Achieve that wonderful crispy crust with a soft, fluffy center that perfectly balances to make every bite a delight, much like our Cheesy Garlic Chicken wraps!
Roll up your sleeves, grab your ingredients, and let’s make some magic in the kitchen!
Homemade Garlic Rosemary Bread Ingredients
For the Dough
• All-purpose flour – Provides structure and body to the bread; you can substitute with a gluten-free blend (1:1).
• Warm water – Activates the yeast for proper rising; use gently warmed (not hot) water for best results.
• Yeast (active dry) – A key leavening agent that helps the dough rise; ensure yeast is fresh for effective leavening.
• Salt – Enhances flavor while controlling yeast activity; essential for taste.
• Olive oil – Contributes moisture and flavor to the bread.
For Flavoring
• Garlic (fresh) – Adds aromatic flavor; fresh is recommended, but use a little less if using dried.
• Fresh rosemary – Imparts a delightful herbal note; in case of unavailability, dried rosemary can be used at half the amount.
Now that you have your homemade garlic rosemary bread ingredients ready, you’re well on your way to enjoying that incredible aroma and taste right in your own kitchen!
Step‑by‑Step Instructions for Homemade Garlic Rosemary Bread
Step 1: Mix Dough
In a large mixing bowl, combine 3 ½ cups of all-purpose flour, 1 teaspoon of salt, and 2 teaspoons of active dry yeast. Gradually pour in 1 ¼ cups of warm water and 2 tablespoons of olive oil, using a wooden spoon to stir until a shaggy dough forms. The mixture should be slightly sticky but cohesive, indicating you’re ready for the next step.
Step 2: Knead
Turn the dough onto a lightly floured surface and knead it by hand for about 10 minutes. You’ll know it’s ready when the dough becomes smooth and elastic. Alternatively, use a stand mixer fitted with a dough hook and knead for about 5 minutes. Ensure the dough remains slightly tacky but does not stick excessively to your hands or the surface.
Step 3: Add Flavors
During the last few minutes of kneading, incorporate 4 cloves of minced garlic and 2 tablespoons of finely chopped fresh rosemary into the dough. This will allow the flavors to distribute evenly, enhancing your Homemade Garlic Rosemary Bread. Continue kneading until the garlic and rosemary are fully integrated into the dough.
Step 4: First Rise
Place the dough in a greased bowl, turning it once to coat the surface with oil. Cover the bowl with a clean kitchen cloth and let it rise in a warm area for about 1 hour, or until it has doubled in size. Look for the dough to puff up and feel airy, signaling that the yeast is working its magic.
Step 5: Shape
Once risen, gently punch down the dough to release any trapped air. Turn it out onto a floured surface and shape into a loaf or divide it into rolls, depending on your preference for your Homemade Garlic Rosemary Bread. Make sure the surface is nice and smooth for a lovely appearance and texture.
Step 6: Second Rise
Transfer the shaped dough to a baking sheet lined with parchment paper. Cover it with a cloth and let it rise for another 30 minutes. You want the dough to puff up again slightly, indicating that it is ready to be baked. The dough should feel airy and lightly spring back when poked.
Step 7: Preheat Oven
While the dough is completing its second rise, preheat your oven to 375°F (190°C). This ensures your oven is hot enough to create that perfect crispy crust on your Homemade Garlic Rosemary Bread. Prepare a small oven-safe dish filled with water to create steam during baking, which helps achieve that beautiful texture.
Step 8: Bake
Once preheated, carefully place your dough in the oven, along with the pan of water on the bottom rack. Bake for 30-35 minutes, or until the top is a deep golden brown and the bread sounds hollow when tapped on the bottom. Keep an eye on it during the last few minutes to ensure a perfect bake.
Step 9: Cool
After baking, remove the Homemade Garlic Rosemary Bread from the oven and transfer it to a wire rack to cool. Let it rest for at least 15-20 minutes before slicing. This cooling time is crucial, as cutting too soon can result in a gummy texture. Enjoy the warm, inviting aroma as you anticipate that first delicious slice!
How to Store and Freeze Homemade Garlic Rosemary Bread
Room Temperature: Wrap the cooled bread in a clean kitchen towel to keep its crust crisp. It can be stored at room temperature for up to 2 days.
Fridge: If you need to keep the bread longer, place it in an airtight container in the fridge for up to a week, although this may soften the crust.
Freezer: For longer storage, slice the bread and wrap each piece tightly in plastic wrap, then place in a freezer bag. It can be frozen for up to 3 months.
Reheating: To enjoy the bread warm, thaw slices in the fridge overnight, then reheat in a toaster or oven at 350°F (175°C) for about 10 minutes, restoring that freshly-baked texture to your Homemade Garlic Rosemary Bread.
Expert Tips for Homemade Garlic Rosemary Bread
Fresh Ingredients Matter: Use fresh garlic and rosemary for the best flavor; they’ll make your Homemade Garlic Rosemary Bread truly aromatic.
Temperature Check: Ensure your warm water is just that—warm! Hot water can kill the yeast, preventing proper rising.
Kneading Pro Tip: Avoid over-kneading. You want a smooth, elastic dough, but a little tackiness is okay. This keeps your bread fluffy.
Steam for Crispy Crust: Create steam in the oven by placing a dish of water on the bottom rack. This will enhance the crust’s crispiness.
Cool Before Slicing: Patience is key! Let your bread cool completely on a wire rack before slicing to maintain its texture and avoid gumminess.
Homemade Garlic Rosemary Bread Variations
Feel free to make this Homemade Garlic Rosemary Bread your own with these delightful twists that will elevate your baking experience!
- Dairy-Free: Substitute olive oil with vegan butter for a rich flavor while keeping it dairy-free.
- Herb Medley: Mix in other herbs like thyme and parsley for a fragrant twist, adding depth to your bread.
- Cheesy Garlic Bread: Incorporate 1 cup of grated cheese, like Parmesan or mozzarella, into the dough for a cheesy delight that pairs wonderfully with soups.
- Whole Wheat Option: Swap half of the all-purpose flour with whole wheat flour for a denser, nutty flavor that’s equally satisfying.
- Spicy Kick: Add 1 teaspoon of red pepper flakes directly into the dough for a gentle heat that complements the garlic.
- Olive Infusion: Replace a portion of the olive oil with herbed olive oil to enhance the flavor profile with a gourmet touch.
- Roasted Garlic: Use roasted garlic instead of fresh for a sweeter, mellower garlic flavor that will tantalize your taste buds. Simply mash the roasted cloves into the dough!
- Nutty Texture: Throw in a handful of chopped walnuts or pine nuts for a delightful crunch that turns each bite into a flavorful adventure.
Baking is all about creativity and love, so feel free to combine these ideas and share your unique concoction! Looking for more inspiration? Don’t miss out on our scrumptious Garlic Butter Honey recipe to discover another way to enjoy those delightful flavors!
What to Serve with Homemade Garlic Rosemary Bread?
Warm, fragrant, and delightfully crispy, this bread beckons for the perfect pairing to form a memorable meal.
-
Creamy Tomato Soup: This classic pairing offers a soothing contrast to the crusty bread, perfect for dipping.
-
Mixed Green Salad: A crisp salad with a citrus vinaigrette adds brightness, balancing the hearty garlic and rosemary flavors.
-
Herb-Infused Olive Oil: Serve it alongside a small dish of herb-infused olive oil for dipping. The rich flavor elevates the experience!
-
Garlic Butter Shrimp: Juicy shrimp bathed in garlic butter echoes the bread’s flavors, making a savory match that’s hard to resist.
-
Sautéed Spinach: Lightly sautéed spinach with a hint of garlic provides refreshing greens, enhancing the meal’s texture and nutrients.
-
Beef Stew: Pour some rich, flavorful beef stew over your bread, and watch as it soaks up all the goodness, creating magic in every bite.
-
Sparkling Water with Lemon: For a refreshing drink, sparkling water with a twist of lemon cleanses the palate beautifully after each bite.
-
Chocolate Lava Cake: Include a sweet touch to your meal with a rich chocolate lava cake for dessert; the contrast of warm and cold is divine!
-
Fruit Platter: Lighten things up with a vibrant fruit platter; the natural sweetness complements the savory tones of the garlic rosemary bread.
Make Ahead Options
These Homemade Garlic Rosemary Bread loaves are perfect for meal prep enthusiasts! You can mix the dough and let it rise up to 24 hours in advance; simply cover the bowl tightly and refrigerate it. The key step is to allow the dough to come back to room temperature before shaping and letting it rise again. For even greater convenience, shape the loaves and freeze them at this stage. When you’re ready to bake, thaw the dough in the refrigerator overnight, let it rise for the second time, and then bake as directed. This way, you’ll enjoy warm, freshly baked bread with minimal effort, just as delicious as if you made it all in one day!
Homemade Garlic Rosemary Bread Recipe FAQs
What kind of flour is best for Homemade Garlic Rosemary Bread?
All-purpose flour is ideal for this recipe as it provides the right structure and body. If you’re gluten-sensitive, I recommend using a gluten-free flour blend measured 1:1 against the all-purpose flour.
How should I store Homemade Garlic Rosemary Bread?
To keep your bread fresh, wrap it in a clean kitchen towel at room temperature for up to 2 days. If you’re not going to eat it within that timeframe, consider placing it in an airtight container in the fridge for up to a week, though this may soften the crust.
Can I freeze Homemade Garlic Rosemary Bread?
Absolutely! For freezing, slice the bread, and then wrap each piece tightly in plastic wrap. Place them in a freezer bag, ensuring to squeeze out as much air as possible. You can freeze your bread for up to 3 months and it will still taste amazing!
What if my dough isn’t rising as expected?
Ah, a common kitchen conundrum! If your dough isn’t rising, it may be due to inactive yeast. Ensure your yeast is fresh; it should be within the expiration date and bubbly when activated with warm water. Try letting the dough rise in a warm, draft-free area, as cooler temperatures can slow down the process.
Can I use dried rosemary instead of fresh?
Yes, if you don’t have fresh rosemary, dried rosemary can be a great substitute. Just use about half the amount called for in the recipe. While the flavor may be slightly different, it will still add a lovely herbal note to your Homemade Garlic Rosemary Bread.
Are there any dietary considerations for this recipe?
This Homemade Garlic Rosemary Bread is inherently vegetarian. However, those with gluten allergies should substitute the flour to a gluten-free blend. It’s advisable to check ingredient labels for potential allergens if you are serving this bread to guests.
Homemade Garlic Rosemary Bread That'll Wow Your Taste Buds
Ingredients
Equipment
Method
- In a large mixing bowl, combine 3 ½ cups of all-purpose flour, 1 teaspoon of salt, and 2 teaspoons of active dry yeast. Gradually pour in 1 ¼ cups of warm water and 2 tablespoons of olive oil, using a wooden spoon to stir until a shaggy dough forms.
- Turn the dough onto a lightly floured surface and knead it by hand for about 10 minutes until it becomes smooth and elastic.
- Incorporate 4 cloves of minced garlic and 2 tablespoons of finely chopped fresh rosemary into the dough during the last few minutes of kneading.
- Place the dough in a greased bowl, cover with a cloth, and let it rise in a warm area for about 1 hour.
- Once risen, punch down the dough and shape it into a loaf or rolls.
- Transfer the shaped dough to a baking sheet lined with parchment paper and let it rise for another 30 minutes.
- Preheat your oven to 375°F (190°C).
- Bake for 30-35 minutes until the top is deep golden brown and sounds hollow when tapped.
- Remove from the oven and transfer to a wire rack to cool for at least 15-20 minutes before slicing.
Leave a Reply