
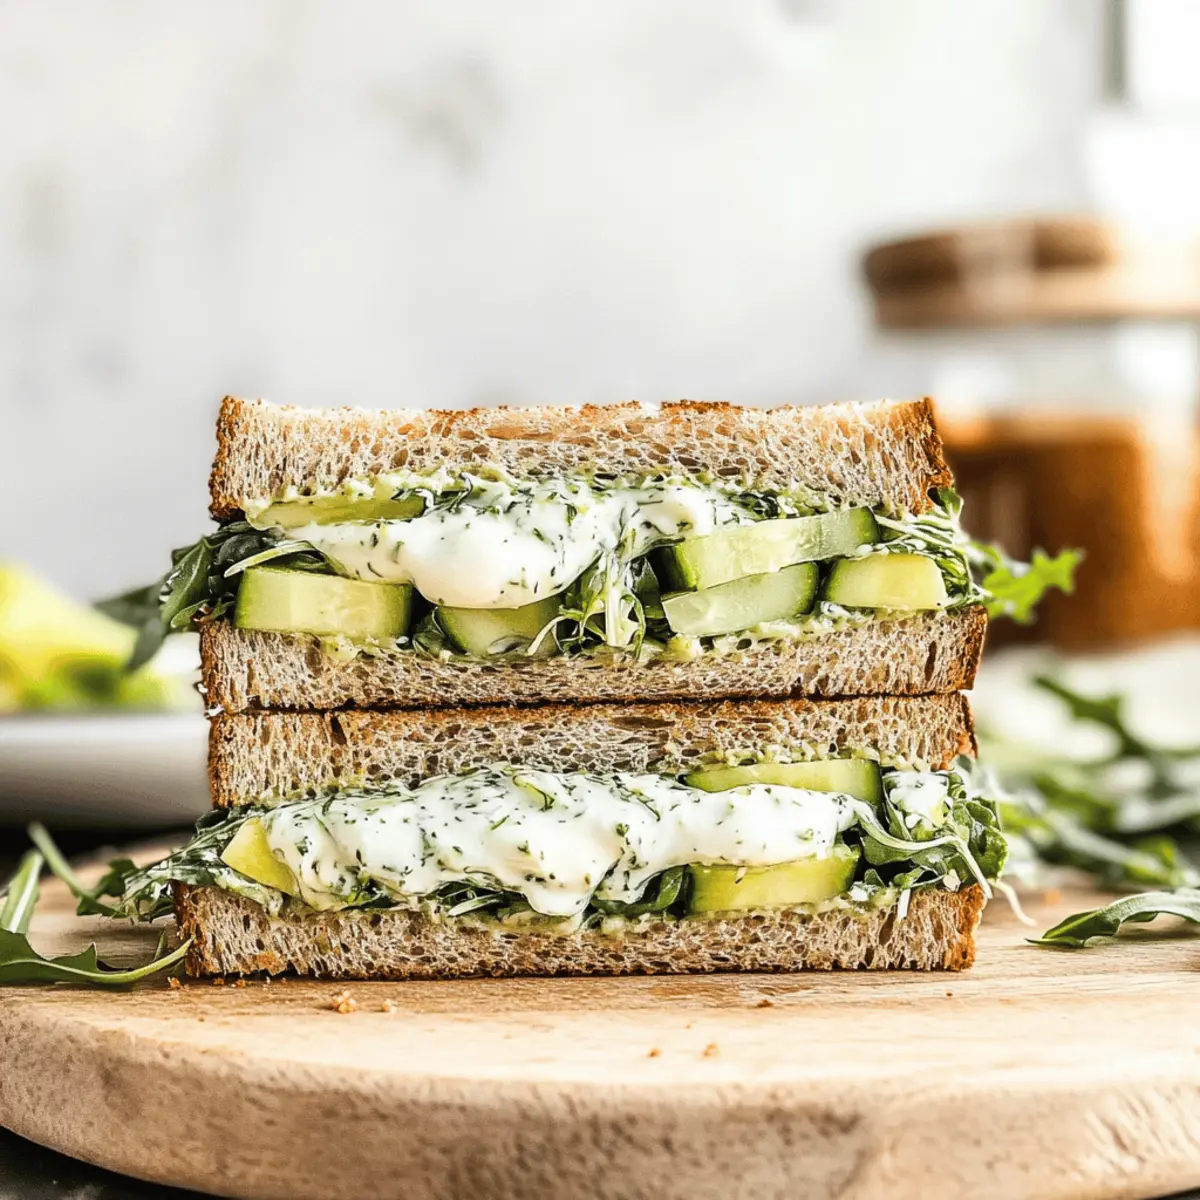
In the bustling moments of my kitchen, I stumbled upon the ultimate way to elevate a simple sandwich. The Green Goddess Sandwich has become my go-to remedy against boring lunches, blending creamy, herby goodness with crisp, fresh vegetables. This delightful creation isn’t just any sandwich; it boasts a vibrant, nutrient-packed filling that’s perfect for those seeking a quick, no-cook meal or a refreshing dish for your next picnic. With its layers of mozzarella, avocado, and peppery arugula, it’s a satisfying, wholesome choice that even the most devoted fast-food fans will appreciate. Tempted yet? Let’s dive into the delicious details and bring this bright lunch to your table!
Why is the Green Goddess Sandwich amazing?
Vibrant flavors: This sandwich offers a refreshing explosion of freshness with every bite. Creamy texture: The luscious green goddess sauce and creamy avocado create a delightful mouthfeel. Quick prep: In just minutes, you can whip up this no-cook meal, making it perfect for those busy days. Plus, it’s versatile! Swap veggies or cheeses to suit your cravings, just like in my Apple Cheddar Sandwich recipe. Perfect for gatherings: Serve it at picnics or lunch gatherings, and watch it disappear as friends rave about the deliciousness! Your lunch game just got a major upgrade!
Green Goddess Sandwich Ingredients
Unlock the secrets to making a delightful Green Goddess Sandwich with these essential ingredients!
For the Sauce
- ¼ cup Greek yogurt – Adds creaminess and protein; substitute with sour cream for a tangy twist.
- ¼ cup mayonnaise – Contributes richness; use vegan mayo for a plant-based version.
- 1 clove garlic – Provides aromatic flavor; grate or press for best results.
- 3 tablespoons fresh chives – Enhances freshness and adds color; substitutable with green onions.
- 3 tablespoons tarragon – Offers herbaceous flavor; can replace with basil or parsley if necessary.
- Zest and juice of ½ lemon – Brightens the sauce; use lime as a substitute for a different citrus flavor.
- 1 tablespoon olive oil – Adds richness and aids in blending; can replace with avocado oil.
- ¼ teaspoon salt – Enhances overall flavor; adjust to taste.
- ¼ teaspoon ground black pepper – Adds warmth; can use white pepper as an alternative.
For the Sandwich
- 4 thick slices whole-wheat bread (½ inch) – Forms the sandwich base; gluten-free bread can be used for a gluten-free version.
- 1 cup arugula – Provides peppery flavor and nutrition; spinach could be used as a milder alternative.
- 6 ounces fresh mozzarella cheese, sliced ¼ inch – Adds creaminess and flavor; use vegan cheese alternatives for a dairy-free option.
- ⅓ English cucumber, thinly sliced – Adds crunch and freshness; replace with another mild vegetable if desired.
- 1 medium avocado, sliced – Contributes creaminess and healthy fats; omit for a lighter version.
- ⅔ cup alfalfa sprouts – Adds texture and nutrition; substitute with another type of sprouts or microgreens.
Each ingredient plays a pivotal role in making your Green Goddess Sandwich not just a meal, but an experience bursting with nourishment and flavor ahead!
Step‑by‑Step Instructions for Green Goddess Sandwich
Step 1: Prepare the Sauce
In a medium-sized bowl, mix together ¼ cup Greek yogurt, ¼ cup mayonnaise, and 1 grated garlic clove. Add in 3 tablespoons of chopped fresh chives and 3 tablespoons of tarragon, followed by the zest and juice of ½ lemon. Drizzle in 1 tablespoon of olive oil, then blend everything until it’s a smooth and creamy green goddess sauce that looks vibrant and inviting.
Step 2: Assemble the Sandwich
Take one slice of thick whole-wheat bread and generously spread a layer of the green goddess sauce over the top, ensuring even coverage. The sauce should create a luscious base that glistens with fresh herbs, setting the stage for a flavorful Green Goddess Sandwich that’s brimming with potential.
Step 3: Layer Ingredients
On top of the green goddess sauce, add 1 cup of fresh arugula, followed by 6 ounces of sliced mozzarella cheese arranged neatly. Next, layer on thin slices of ⅓ English cucumber, then a few slices of 1 medium avocado, and finally sprinkle ⅔ cup of alfalfa sprouts. Each ingredient should harmonize visually and texturally, creating a colorful masterpiece.
Step 4: Top with Another Slice of Bread
Carefully place a second slice of bread on top of the layered ingredients, pressing down gently to secure everything in place. This will help the fresh ingredients meld together and enhance the overall flavor of your Green Goddess Sandwich, making each bite satisfying.
Step 5: Slice and Serve
Using a sharp knife, cut the sandwich diagonally in half to showcase the vibrant layers within. The fresh colors and textures should be visually appealing. Serve the sandwich immediately for the best taste experience, and enjoy the refreshing, creamy flavors that come with every delicious bite.
Green Goddess Sandwich Variations
Dive into the possibilities of customizing your Green Goddess Sandwich to suit your taste buds! Whether you’re looking to switch things up or cater to dietary needs, I’ve got some delightful ideas that will make your lunch even more delicious.
-
Vegan Cheese: Swap mozzarella for your favorite vegan cheese to create a dairy-free delight. It’s an easy way to enjoy the same creamy goodness without the dairy!
-
Leafy Greens: Replace arugula with fresh spinach or kale for a different flavor profile. Each leafy green brings its own vibrancy and will still provide that essential crunch.
-
Crunch Boost: Add thinly sliced radishes or bell peppers for an extra pop of color and texture. These veggies not only enhance the sandwich visually but also bring forth delightful crunch with each bite.
-
Gluten-Free Option: Use gluten-free bread to make this sandwich accessible for everyone. The vibrant flavors will shine through, proving that gluten-free can be just as delicious!
-
Spicy Kick: Incorporate sliced jalapeños or a few dashes of hot sauce to give your sandwich a spicy twist. This little heat will complement the creamy sauce beautifully!
-
Herb Swaps: Feel free to experiment with different herbs like basil or cilantro instead of tarragon. This small change can transform the whole flavor profile into something uniquely yours.
-
Citrus Swap: Use lime juice and zest instead of lemon for a zesty variation that adds a new layer of brightness to the sauce. Lime’s tangy flavor adds an unexpected twist!
-
Veggie Medley: Mix in thin slices of roasted red pepper or artichoke hearts for a gourmet touch. These ingredients bring a rich depth of flavor that transforms your sandwich into a fancy treat.
Ready to personalize your Green Goddess Sandwich? With these variations, you’ll never get bored with your lunch again. And if you love vibrant flavor combinations, be sure to check out my Apple Cheddar Sandwich, which offers a deliciously unique take on the classic sandwich!
Make Ahead Options
These Green Goddess Sandwiches are perfect for busy home cooks looking to save time! You can prepare the green goddess sauce up to 3 days in advance and store it in an airtight container in the refrigerator for optimal flavor development. The sauce will stay just as vibrant and creamy, making it a delightful addition to the sandwich. However, it’s best to assemble the sandwiches no more than 24 hours before serving to maintain the texture of the bread and freshness of the vegetables. When you’re ready to enjoy your Green Goddess Sandwich, simply spread the sauce on the bread, layer your fresh ingredients, and savor a delicious, hassle-free meal that brightens your lunch game!
What to Serve with Green Goddess Sandwich
This vibrant creation is the perfect base for a delightful meal, and pairing it with the right sides can elevate your experience!
-
Crispy Sweet Potato Fries: These add a sweet and crunchy contrast that perfectly complements the creamy textures of the sandwich. Serve them hot and crispy for the best flavor!
-
Mixed Green Salad: Tossed with a light vinaigrette, the fresh greens balance the richness of the sandwich while providing a healthy crunch to each bite.
-
Chilled Gazpacho: This refreshing, cold soup brings a vibrant burst of tomato and vegetable goodness, making it a wonderful light companion to your sandwich.
-
Fruit Skewers: Fresh fruit adds a sweet finish to your meal, with juicy berries and melons enhancing the freshness that the Green Goddess Sandwich embodies. They’re also fun and easy to prepare!
-
Potato Salad: Creamy potato salad offers a satisfying texture that holds its own against the lively flavors of the sandwich, making it a classic picnic pairing without overpowering it.
-
Iced Herbal Tea: A soothing herbal tea, served chilled, creates a refreshing and uplifting pairing, enhancing the herbaceous notes in your Green Goddess Sandwich.
With these delicious sides, your wonderful picnic or quick lunch can become a delightful feast, inviting everyone to join in the celebration of flavorful, homemade meals!
How to Store and Freeze Green Goddess Sandwich
Fridge: Store the assembled Green Goddess Sandwich in an airtight container and consume it within 24 hours for optimal freshness, preventing sogginess.
Green Goddess Sauce: You can prepare the sauce ahead of time and keep it in the fridge for up to 3 days, allowing the flavors to develop.
Freezer: Avoid freezing the assembled sandwich due to the fresh vegetables, but the green goddess sauce can be frozen in an airtight container for up to 1 month.
Reheating: If you want a warm variation, separate the sauce and ingredients, then lightly toast the bread and assemble when ready to enjoy!
Expert Tips for the Green Goddess Sandwich
-
Pre-Make the Sauce: Make the green goddess sauce ahead of time and refrigerate for up to 3 days. This enhances its herbaceous flavor and saves you time for busy meals.
-
Keep Bread Fresh: To avoid soggy bread, assemble sandwiches just before serving or store components separately and combine when ready to eat.
-
Layer Smartly: Place sturdier ingredients, like cucumber and cheese, closer to the bread. This creates a barrier that helps keep the green goddess sauce from soaking through.
-
Consider Texture: While alfalfa sprouts add texture, feel free to swap them with any sprouts or microgreens you enjoy to elevate the crunch factor of your Green Goddess Sandwich.
-
Personalize It: Experiment with veggies and add-ins! Radishes or bell peppers can add an extra crunch and color to your sandwich—don’t hesitate to get creative!
-
Freshness Matters: Enjoy your assembled sandwich within 24 hours for optimal freshness, but remember, the components can last longer on their own!
Green Goddess Sandwich Recipe FAQs
What kind of bread is best for the Green Goddess Sandwich?
You can use thick slices of whole-wheat bread, which provides a hearty base. If you’re gluten-free, I recommend using gluten-free bread options instead. The bread creates a nice texture that holds up well against the creamy sauce and fresh vegetables.
How should I store my Green Goddess Sandwich once made?
To keep it fresh, store the assembled sandwich in an airtight container and consume it within 24 hours. This prevents the bread from becoming soggy and maintains the flavor. I find it best to layer the ingredients just before enjoying to retain that delightful crunch.
Can I prepare the Green Goddess sauce in advance?
Absolutely! You can make the green goddess sauce ahead of time and store it in the fridge for up to 3 days. This not only saves you time but also allows the flavors to meld beautifully. Keep it in a sealed container, and give it a good stir before using.
Can I freeze the Green Goddess Sandwich?
It’s best to avoid freezing the assembled Green Goddess Sandwich due to the fresh vegetables, which can lose their crispness. However, the green goddess sauce can be frozen in an airtight container for up to 1 month. Simply thaw it in the fridge when you’re ready to use it!
What if someone has allergies to certain ingredients?
To accommodate allergies or dietary preferences, you can easily swap ingredients in the Green Goddess Sandwich. Use vegan mayo for a dairy-free option, substitute mozzarella with plant-based cheese, or simply leave out any ingredient that you or your guests may be allergic to. Just be sure to check labels and choose safe alternatives!
Are there any tips for keeping the fresh vegetables crisp in the sandwich?
Certainly! Layer sturdier vegetables like cucumber closer to the bread to create a barrier against the sauce, which helps maintain the crunchiness of the other ingredients. Assemble your sandwich just before serving to enjoy the freshest and most vibrant flavors.
Vibrant Green Goddess Sandwich That Brightens Your Lunch Game
Ingredients
Equipment
Method
- In a medium-sized bowl, mix together Greek yogurt, mayonnaise, and grated garlic clove. Add chopped fresh chives, tarragon, lemon zest, and juice. Drizzle in olive oil, then blend everything until smooth.
- Spread a layer of the green goddess sauce over one slice of thick whole-wheat bread.
- On the sauce, add fresh arugula, sliced mozzarella cheese, thin slices of cucumber, avocado, and sprinkle alfalfa sprouts.
- Place another slice of bread on top and press gently.
- Cut the sandwich diagonally in half and serve immediately.
Leave a Reply