
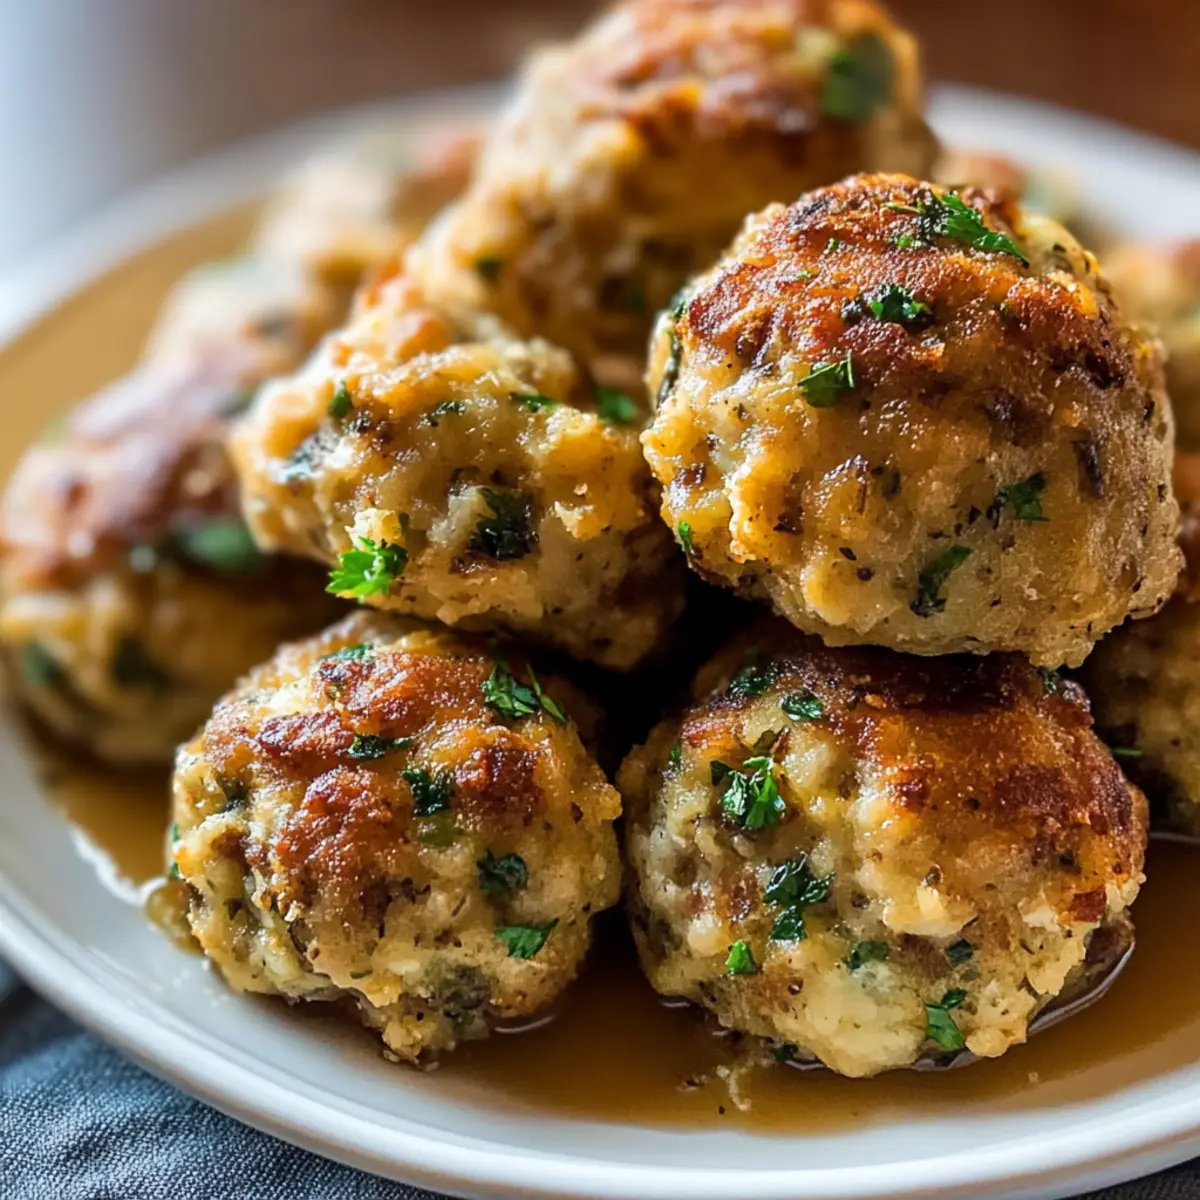
As I stood in the kitchen, the aroma of sizzling onions and celery filled the air, whisking me back to the family gatherings of my childhood. Grandma Dot’s Stuffing Balls were the star of every holiday feast, coveted by all for their crispy edges and fluffy centers. This recipe captures the essence of comfort food, offering a make-ahead option that effortlessly brings joy to your table. Perfect for Thanksgiving, Christmas, or any cherished occasion, these little bites are an easy crowd-pleaser, ready to be paired with gravy or enjoyed on their own. With endless variations to explore—think cheesy, fruity, or even gluten-free—there’s a delightful twist waiting for everyone. Are you ready to bring a little nostalgia into your kitchen? Let’s get cooking!
Why Will You Love Grandma Dot’s Recipe?
Comforting, Grandma Dot’s Stuffing Balls encapsulate the essence of home-cooked warmth, ensuring every bite is a nostalgic journey. Make-Ahead Friendly, you can prepare these delightful morsels in advance, making holiday meal planning a breeze. Endless Variations, from cheesy to cranberry twists, allow for personalized touches that cater to every palate. Crowd-Pleasing Appeal, these savory bites are loved by both kids and adults, making them a staple at any gathering. Don’t forget to explore additional options like the Vegetarian Casserole Savory for a delightful twist on your side dishes!
Grandma Dot’s Stuffing Balls Ingredients
• Everything you need for this comforting dish!
For the Base
- Bread Cubes – Day-old bread adds essential structure; mix white, wheat, or a combination for depth.
- Unsalted Butter – Provides richness and is perfect for sautéing your vegetables while allowing you to control the saltiness.
- Onion – Finely chopped for a foundational flavor that cooks down to a delicious sweetness.
- Celery – Finely chopped; it contributes a delightful crunch and enhances the stuffing’s depth.
- Fresh Parsley – Optional, but fresh parsley adds a burst of brightness to the dish.
For the Flavor
- Poultry Seasoning – A vital blend for classic stuffing flavor, combining sage, thyme, marjoram, and rosemary.
- Garlic Powder – Optional yet enhances the savory profile of Grandma Dot’s stuffing balls.
For Binding and Moisture
- Eggs – Lightly beaten to act as a binder for our mixture, ensuring each bite holds together perfectly.
- Chicken/Turkey Broth – Adds moisture and flavor depth; adjust the amount until you achieve your desired texture.
- Salt & Pepper – Season to taste; essential for balancing the flavors based on the broth used.
With these ingredients in hand, you’ll be well on your way to creating Grandma Dot’s Stuffing Balls that will warm your heart and gather your loved ones around the table. Happy cooking!
Step‑by‑Step Instructions for Grandma Dot’s Stuffing Balls
Step 1: Prepare Bread Cubes
Start by cutting your day-old bread into ½-inch cubes. Spread them evenly on a baking sheet and place in a preheated oven at 300°F for 10-15 minutes. Keep an eye on them; you want them to dry out and become crisp without browning. This ensures that Grandma Dot’s Stuffing Balls will have the perfect texture.
Step 2: Sauté Vegetables
In a large skillet, melt unsalted butter over medium heat. Add finely chopped onions and celery, cooking them for about 6-7 minutes until they soften and turn translucent. The aroma will fill your kitchen, providing the essential flavor base for your stuffing mixture. Remove from heat and let cool slightly.
Step 3: Mix Base Ingredients
In a large mixing bowl, combine your roasted bread cubes with the sautéed onions and celery. Gently add the poultry seasoning and optional fresh parsley, mixing well to distribute the flavor evenly. This satisfying combination is the foundation for Grandma Dot’s Stuffing Balls, ensuring every bite is full of comforting taste.
Step 4: Bind Mixture
In a separate bowl, whisk the eggs until lightly beaten. Gradually pour in the chicken or turkey broth, mixing as you go to prevent clumps. Slowly add this liquid mixture to the bread and vegetable concoction. You want it to hold together when squeezed without being too wet. This step is crucial for shaping your stuffing balls.
Step 5: Shape Balls
Using oiled hands, scoop out portions of the mixture and form them into golf ball-sized balls. Place these onto a greased baking sheet, making sure to leave a little space between each one. This will allow them to bake evenly, achieving that lovely golden-brown exterior that characterizes Grandma Dot’s Stuffing Balls.
Step 6: Bake
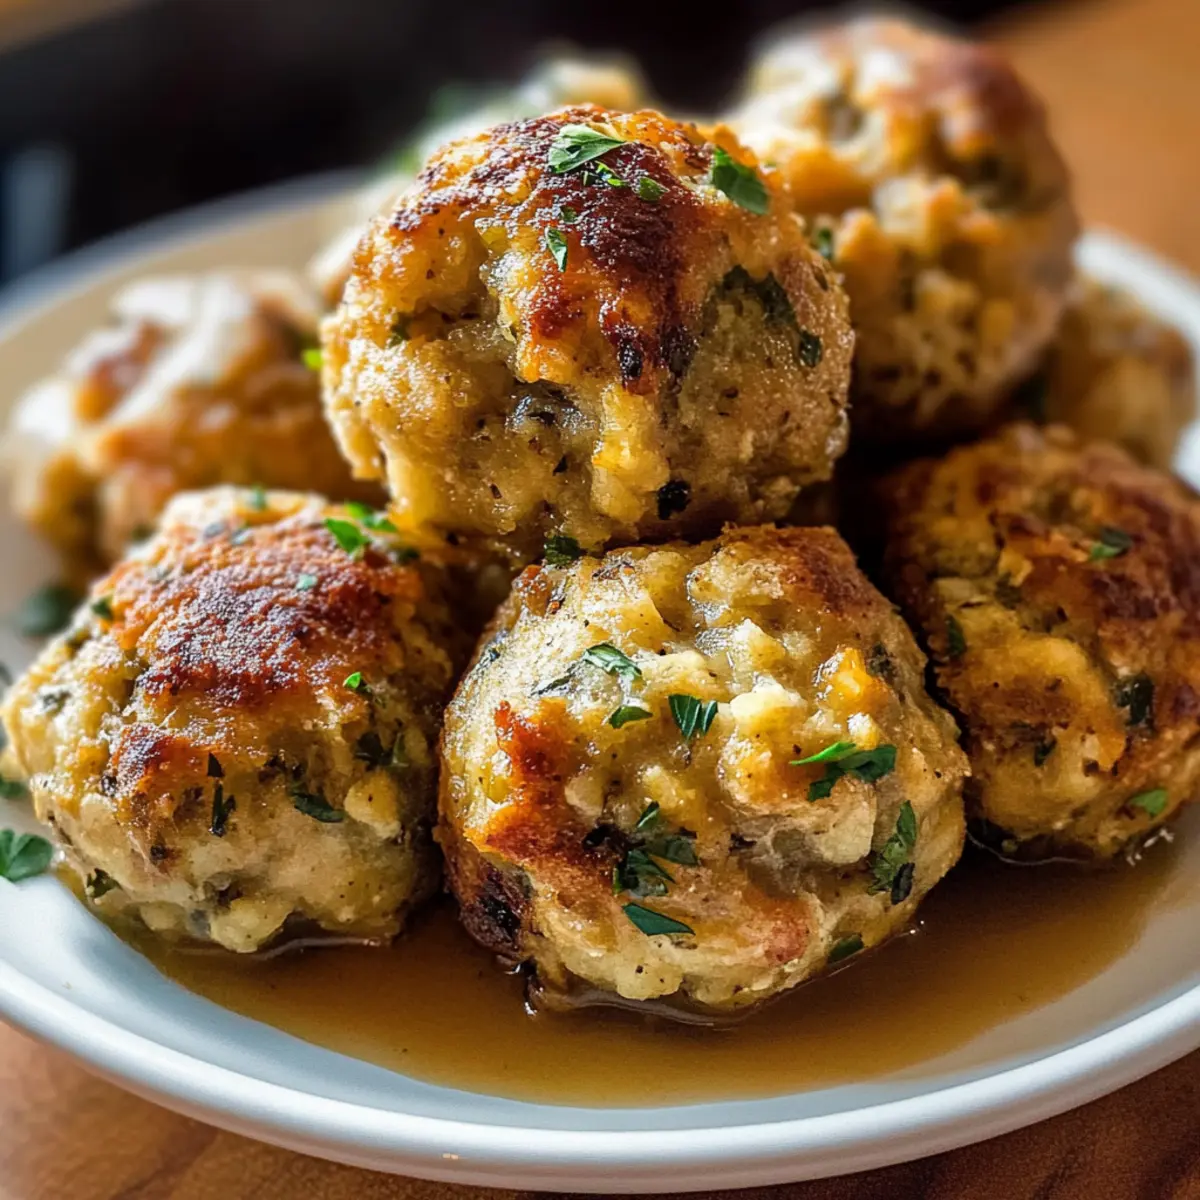
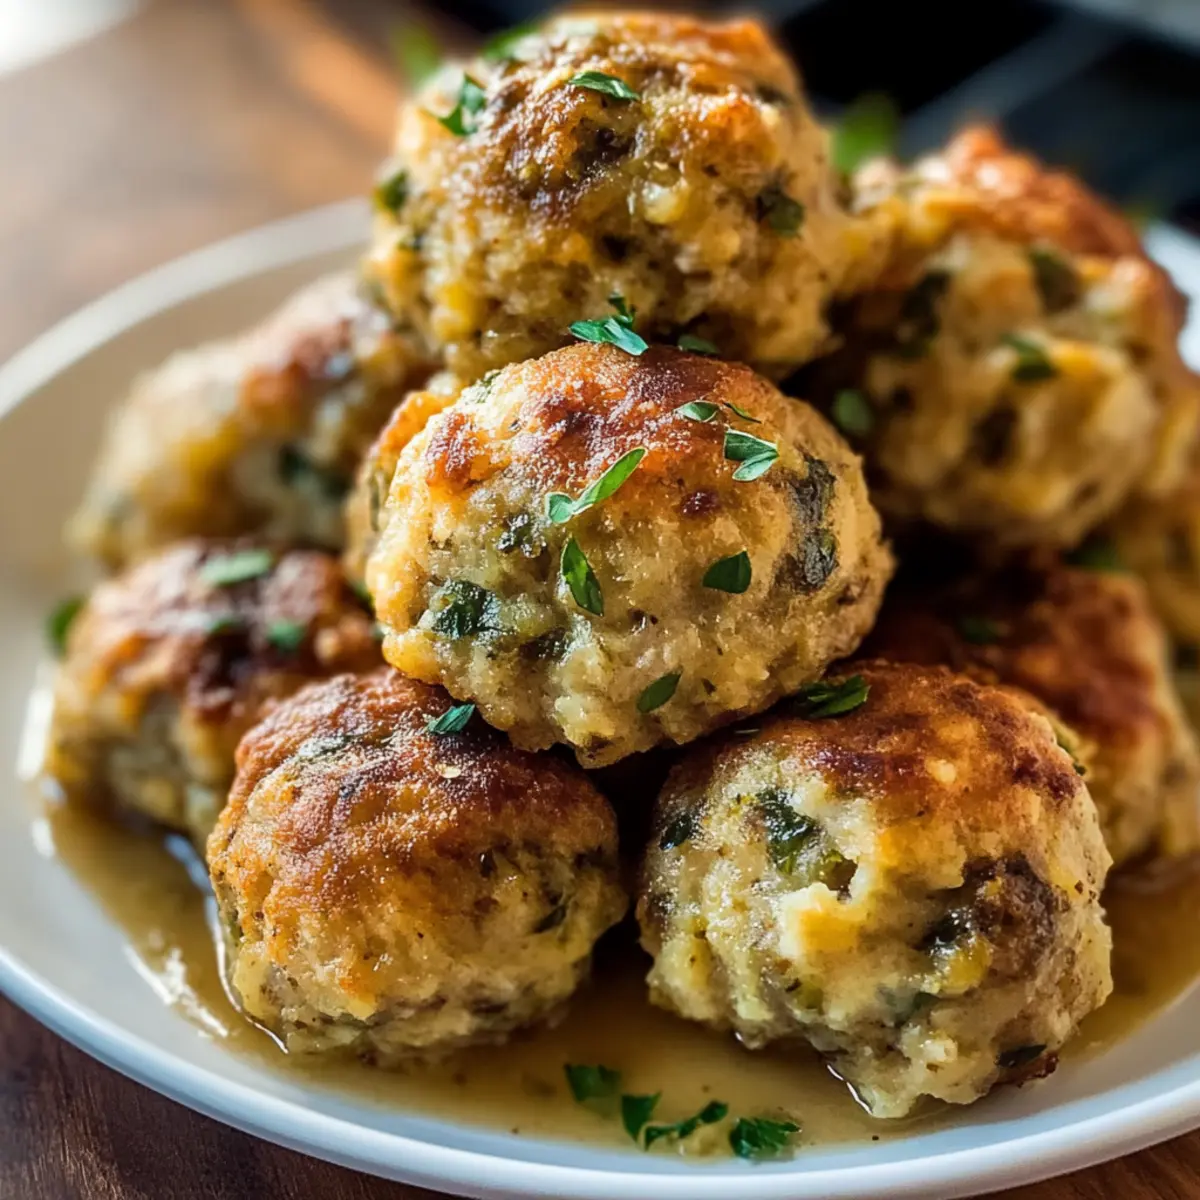
Preheat your oven to 375°F. Once at temperature, place your baking sheet in the oven and bake for 25-30 minutes. Halfway through, turn the stuffing balls gently to ensure even browning. You’ll know they are ready when they are golden brown and slightly crispy on the outside—simply irresistible!
Step 7: Serve
When the baking time is up, carefully transfer Grandma Dot’s Stuffing Balls to a serving platter. Enjoy them warm, either as a stand-alone treat or with a side of gravy. These stuffing balls are the perfect comfort food for family gatherings, embodying the warmth and nostalgia of home-cooked meals.
Expert Tips for Grandma Dot’s Stuffing Balls
-
Make-Ahead Magic: Prepare and shape the stuffing balls in advance, refrigerating for up to 24 hours or freezing unbaked to save time on busy days.
-
Avoid Sogginess: Ensure bread cubes are dry; stale or toasted bread holds better and prevents a soggy mixture that can ruin your Grandma Dot’s Stuffing Balls.
-
Perfect Binding: If the mixture feels crumbly, add an extra egg or more broth gradually until it holds together without being overly wet.
-
Flavor Enhancements: Experiment with add-ins like sausage, cheese, or cranberries to customize the flavors and elevate your Grandma Dot’s Stuffing Balls to new heights.
-
Reheating Right: For best results, reheat baked stuffing balls in a 350°F oven for about 10 minutes rather than using a microwave, which can make them chewy.
Make Ahead Options
These Grandma Dot’s Stuffing Balls are the perfect solution for busy weeknights or holiday meal prep! You can shape the stuffing balls up to 24 hours in advance and refrigerate them, keeping them fresh and ready to bake. Alternatively, for longer storage, freeze the unbaked balls for up to 2 months; just be sure to place them on a baking sheet to freeze individually before transferring to a freezer bag. To maintain their delicious texture, let them thaw overnight in the refrigerator before baking. When you’re ready to serve, simply bake from chilled or frozen, adding about 10 minutes to the baking time—ensuring you have delicious comfort food with minimal effort.
What to Serve with Grandma Dot’s Stuffing Balls
The perfect meal is all about harmony and balancing flavors. Let’s elevate your gathering with delightful pairings!
- Roasted Turkey: The classic companion, its juicy flavors perfectly complement the savory stuffing and create a comforting feast.
- Homemade Gravy: Drizzle over the stuffing balls for added richness, enhancing their already delicious taste and adding moisture.
- Green Bean Almondine: A crunchy, fresh side that contrasts beautifully while providing a bright pop of color and flavor to your table.
- Garlic Mashed Potatoes: Creamy, buttery potatoes add a heartwarming touch that pairs wonderfully with both turkey and stuffing.
- Cranberry Sauce: The sweet-tartness delivers a delightful zing, cutting through the richness of the stuffing and turkey.
- Honey Glazed Carrots: Their natural sweetness balances the savory elements of the meal, ensuring a well-rounded experience for your taste buds.
- Warm Bread Rolls: Fluffy and buttery, these rolls are perfect for sopping up gravy and elevating the comfort food experience.
- Apple Cider: This warming beverage brings the essence of the season to your table, harmonizing with the cozy flavors of the stuffing.
- Pumpkin Pie: A classic dessert that feels like a warm hug at the end of your meal, its spiced flavors continue the festive theme beautifully.
Grandma Dot’s Stuffing Balls Variations
Customize your experience with Grandma Dot’s Stuffing Balls, delighting in new flavors that will tantalize your taste buds!
-
Sausage Stuffing Balls: Add browned Italian sausage for a savory, hearty twist that takes these stuffing balls to the next level. The rich flavor of sausage pairs beautifully with the stuffing mixture, creating a crowd-pleasing option everyone will love.
-
Cheesy Variation: Incorporate shredded cheddar or parmesan cheese for an indulgent richness. The gooey melted cheese oozing from the center adds a delightful surprise to each bite. Cheese lovers will be delighted by this twist!
-
Cranberry Twist: Toss in some dried cranberries for a burst of sweetness that balances the savory flavors perfectly. This fruity addition offers a colorful contrast and an unexpected zing, perfect for festive gatherings.
-
Mushroom Edition: Sauté diced mushrooms along with the onions and celery for an earthy flavor boost. This twist adds a depth of umami that enhances the stuffing’s overall taste, making it irresistibly delicious.
-
Gluten-Free Version: Swap regular bread cubes for gluten-free options and use gluten-free broth to accommodate dietary preferences. You can still achieve that comforting flavor and texture without any compromise.
-
Herb Infusion: Experiment with different herbs like thyme, rosemary, or chives for a fresh and fragrant twist. Each herb brings its own unique flavor, enhancing the stuffing and making it even more aromatic.
-
Spicy Kick: Add a pinch of red pepper flakes or diced jalapeños for a warm, zesty flavor. This spicy variation adds a fun twist that wakes up your taste buds and brings excitement to your stuffing balls.
-
Vegetarian Casserole Savory: Consider a fully vegetarian adaptation by omitting the broth and using vegetable stock instead. This way, you can enjoy the comforting delight of stuffing balls while catering to vegetarian diners—check out my Vegetarian Casserole Savory for more inspiration!
Experiment with these variations to make Grandma Dot’s Stuffing Balls truly your own, ensuring a nostalgic dish tailored to your family’s taste. Happy cooking!
How to Store and Freeze Grandma Dot’s Stuffing Balls
Fridge: Store cooked Grandma Dot’s Stuffing Balls in an airtight container for up to 4 days. Make sure they’re completely cooled before sealing to prevent moisture buildup.
Freezer: For longer storage, freeze the stuffing balls wrapped individually in plastic wrap, then place in a freezer-safe bag or container for up to 2 months.
Reheating: When ready to enjoy, reheat from frozen in a preheated oven at 350°F for about 10-15 minutes, ensuring they regain that crispy exterior.
Make-Ahead: You can shape and refrigerate the stuffing balls before baking for up to 24 hours or freeze them unbaked, just adjust cooking time accordingly.
Grandma Dot’s Stuffing Balls Recipe FAQs
What type of bread is best for Grandma Dot’s Stuffing Balls?
Day-old bread is ideal for this recipe. You can mix white, wheat, or a combination of both to enhance flavor and texture. Ensure you dry the bread cubes in the oven to prevent them from becoming soggy while baking.
How do I store leftover Grandma Dot’s Stuffing Balls?
Store cooked stuffing balls in an airtight container in the fridge for up to 4 days. Make sure they are completely cooled before sealing to avoid moisture buildup, which could lead to sogginess.
Can I freeze Grandma Dot’s Stuffing Balls?
Absolutely! You can freeze the stuffing balls, either baked or unbaked. For freezing unbaked, wrap each ball in plastic wrap and place them in a freezer-safe bag or container. They can be stored up to 2 months. When you’re ready to bake them, add an extra 10 minutes to the cooking time if baking directly from frozen.
What should I do if my stuffing balls crumble?
If your mixture crumbles instead of holding together, don’t worry! Simply add an extra beaten egg or a little more broth, mixing it in gradually until the mixture binds together properly. This adjustment is a common fix to achieve that perfect ball shape.
Are there any dietary considerations for Grandma Dot’s Stuffing Balls?
If you’re catering to specific dietary needs, you can easily make this recipe gluten-free. Just swap out the regular bread for gluten-free bread cubes and ensure your broth is gluten-free as well. Additionally, if anyone has egg allergies, consider using flaxseed meal or a commercial egg replacer as a substitute for eggs.

Grandma Dot's Stuffing Balls: Comfort in Every Bite
Ingredients
Equipment
Method
- Cut day-old bread into ½-inch cubes and dry in a preheated oven at 300°F for 10-15 minutes.
- Sauté finely chopped onions and celery in melted butter over medium heat for 6-7 minutes until softened.
- Combine the roasted bread cubes with sautéed vegetables and mix in poultry seasoning and parsley.
- Whisk eggs and gradually add chicken broth, then mix with the bread and vegetable mixture until it holds together.
- Shape mixture into golf ball-sized balls and place on a greased baking sheet.
- Bake in a preheated oven at 375°F for 25-30 minutes, turning halfway through until golden brown.
- Transfer to a serving platter and enjoy warm, with or without gravy.
Leave a Reply