
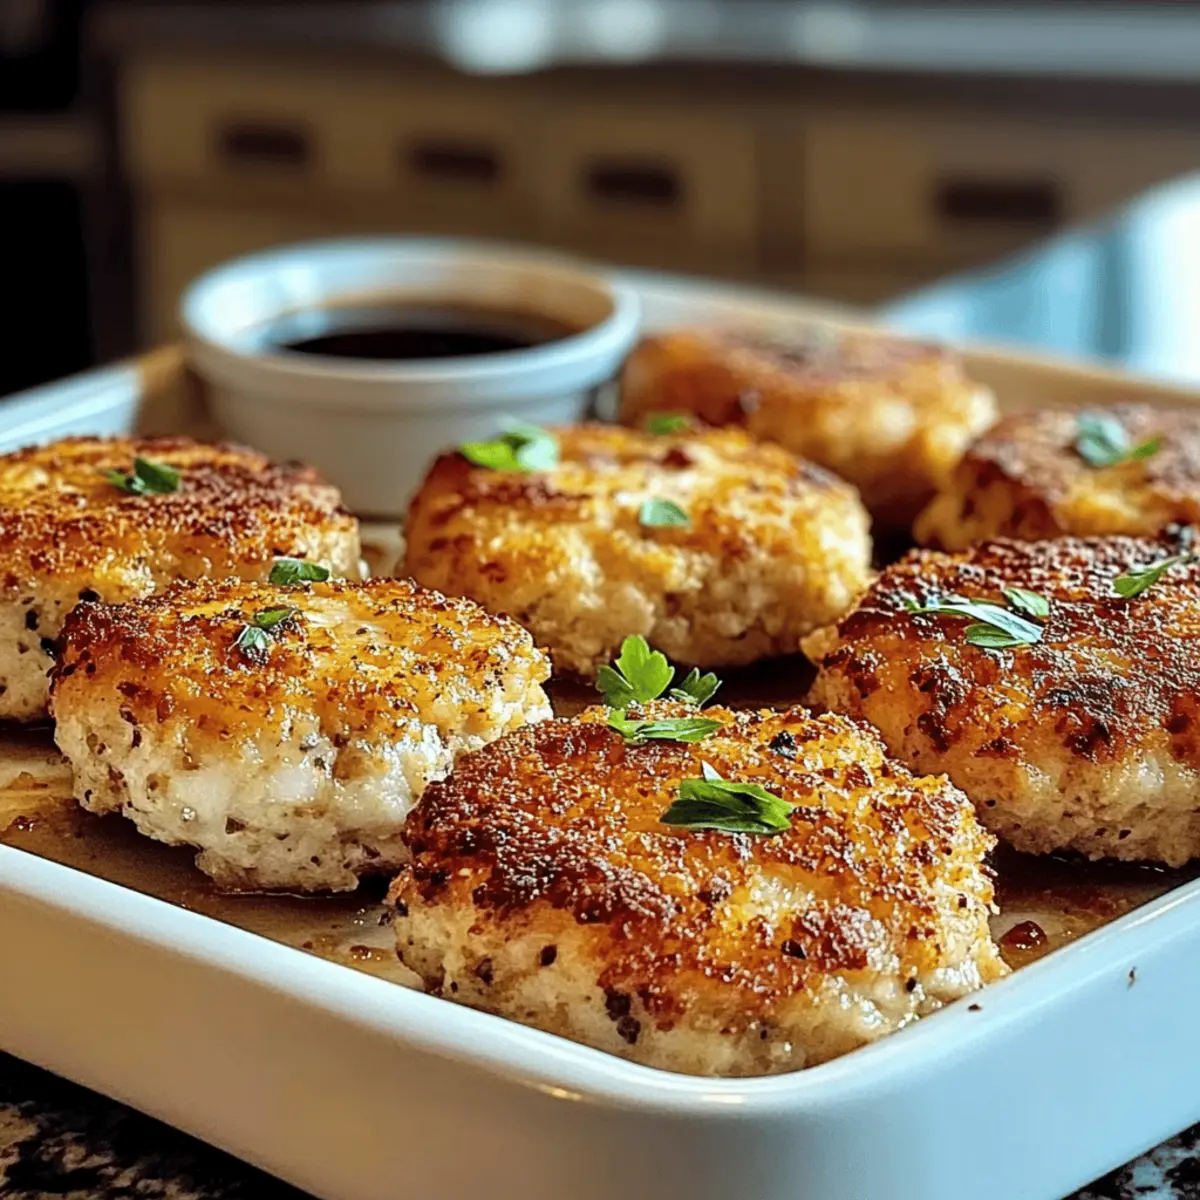
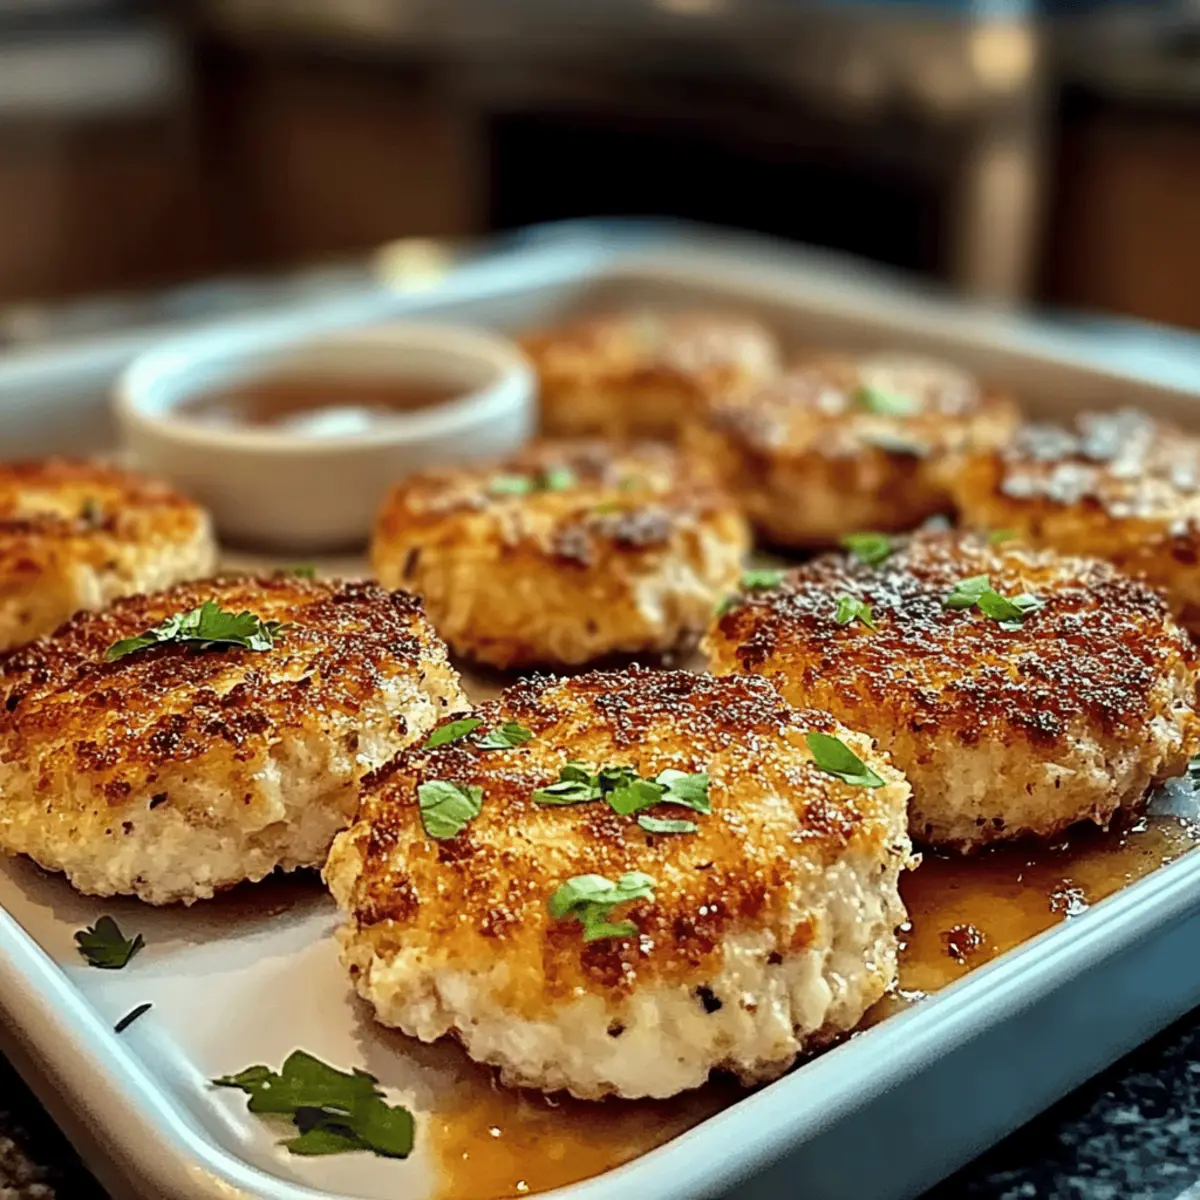
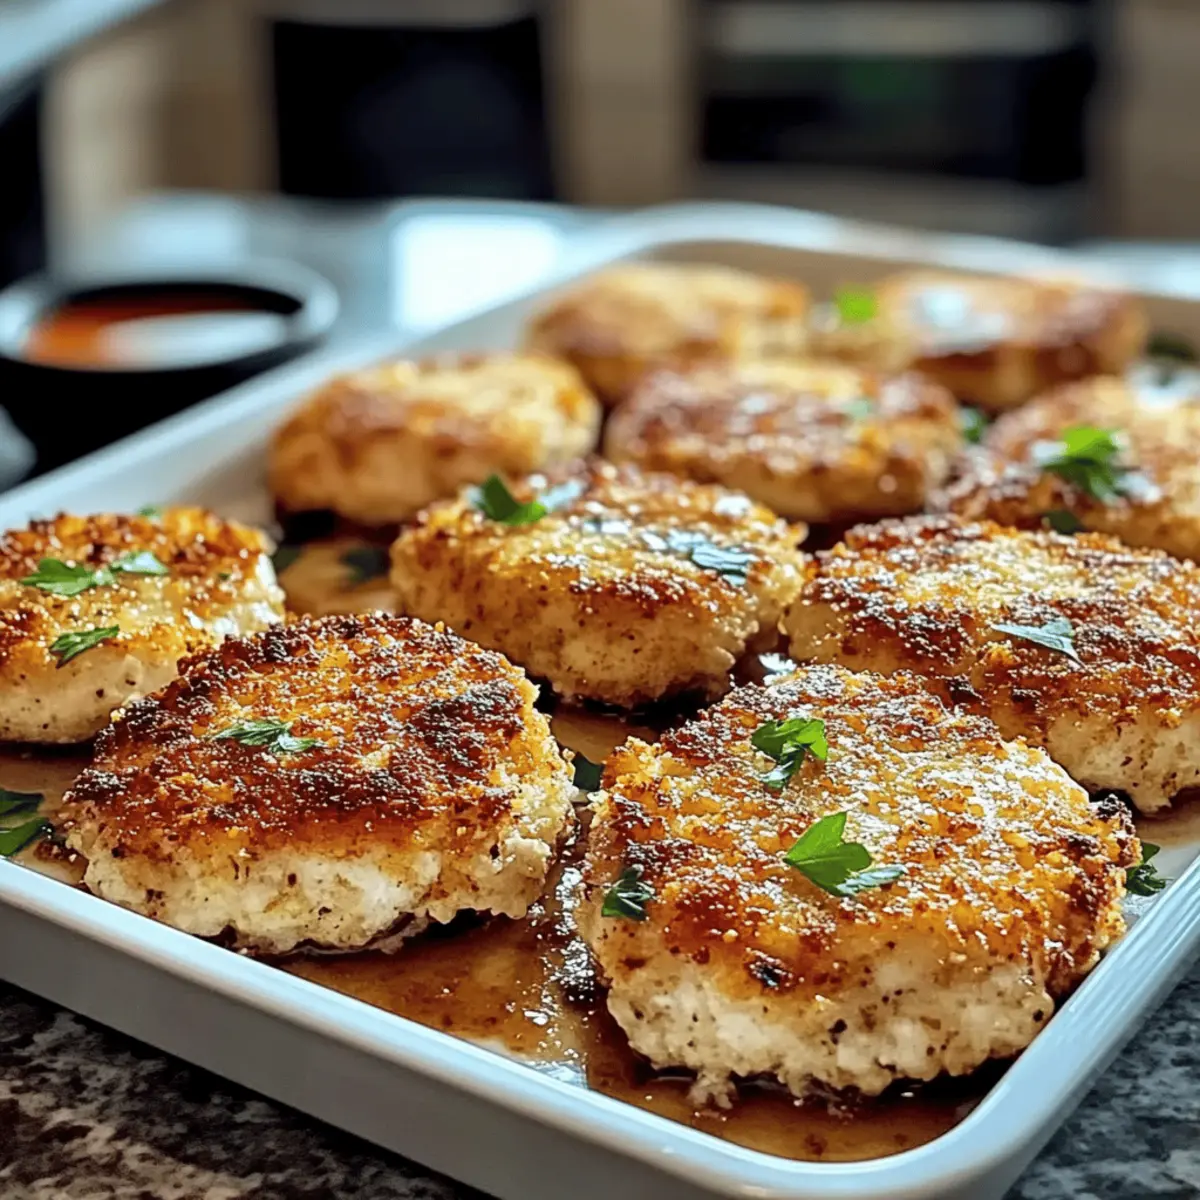
The sound of sizzling patties is like an unwritten promise of comfort, and boy, do these Golden Baked Chicken Rissoles deliver! As the aroma fills your kitchen and draws everyone in, you can’t help but feel a wave of nostalgia wash over you—this is the kind of dish that turns a simple weeknight dinner into a cherished family moment. A healthy twist on a classic, these rissoles are not only quick to whip up but also offer a scrumptious gluten-free option, making them a perfect crowd-pleaser. Whether you serve them with a fresh salad or alongside creamy mashed potatoes, these delightful, light patties are guaranteed to please even the pickiest eater. Ready to discover how easy they are to make? Let’s dive in!
Why Are These Rissoles a Must-Try?
Irresistible Flavor: The blend of ground chicken and vibrant veggies packs each rissole with mouthwatering goodness.
Quick & Easy: Perfect for busy weeknights, these rissoles come together in just a few simple steps, letting you enjoy homemade comfort food without the fuss.
Healthy Twist: Enjoy all the comforting flavors you love with a guilt-free, gluten-free option that doesn’t skimp on satisfaction.
Versatile: Customize with your choice of ground meat or veggies, making this a dish that can be uniquely yours—try our Baked Pesto Chicken as another easy weeknight option!
Universal Appeal: These rissoles are sure to win over the whole family, no matter their taste preference, making them a fantastic addition to your meal rotation.
Golden Baked Chicken Rissoles Ingredients
For the Rissoles
• Ground Chicken – This main protein keeps your rissoles light and juicy; you can also substitute with ground turkey or lean beef for a variation.
• Breadcrumbs – They provide structure and binding; opt for gluten-free breadcrumbs if you need a gluten-free option.
• Seasonings (e.g., salt, pepper, garlic powder) – Enhances flavor; feel free to customize with your favorite herbs or spices to make these Golden Baked Chicken Rissoles truly yours.
• Finely Chopped Vegetables (e.g., carrots, onions) – Add flavor and nutrition; substitutes like zucchini or bell peppers work wonderfully too.
• Egg – Acts as a binder to hold everything together; for a vegan option, replace it with a flaxseed meal mixture.
For Baking
• Olive Oil (optional) – A drizzle before baking helps achieve that desired crispy texture.
Step‑by‑Step Instructions for Golden Baked Chicken Rissoles
Step 1: Preheat the Oven
Begin by preheating your oven to 375°F (190°C), ensuring it’s hot enough for perfectly baked Golden Baked Chicken Rissoles. While the oven heats, get your baking sheet ready by lining it with parchment paper, which will help prevent sticking and make cleanup a breeze.
Step 2: Mix Ingredients
In a large mixing bowl, combine the ground chicken, breadcrumbs, seasonings, and finely chopped vegetables. Crack in an egg to act as a binder, and mix everything together using your hands or a spoon until well incorporated. Aim for a mixture that is neither too dry nor too wet, ensuring the rissoles will hold their shape when formed.
Step 3: Shape Rissoles
Once your mixture is ready, take a portion and shape it into small, round patties—about the size of your palm. Make sure to compact them well to avoid crumbling during baking. Continue this process until all of the mixture has been formed into rissoles, and arrange them on your prepared baking sheet, ensuring they’re spaced out for even cooking.
Step 4: Bake
Place the baking sheet in your preheated oven and bake the Golden Baked Chicken Rissoles for 20-25 minutes. Halfway through the baking time, carefully flip each rissole to ensure an evenly golden-brown crust forms on both sides. They are done when they appear crispy and golden and the internal temperature reaches at least 165°F (74°C).
Step 5: Serve
Once baked to perfection, remove the rissoles from the oven and let them cool slightly on the baking sheet. This brief resting period allows the juices to settle, making for a juicier rissole when served. Pair your Golden Baked Chicken Rissoles with fresh salads or your favorite dipping sauces for a delightful meal.
Golden Baked Chicken Rissoles Variations
Feel free to mix and match ingredients to make these rissoles truly your own—your kitchen is your playground!
- Ground Turkey: Swap ground chicken for ground turkey for a leaner option with similar flavors—perfect for a lighter meal.
- Plant-Based Alternative: For a vegan twist, substitute ground chicken with your favorite plant-based meat alternative for a deliciously guilt-free meal.
- Vegetable Medley: Add finely chopped spinach, mushrooms, or peas to elevate nutrition and flavor; they work brilliantly with the other ingredients.
- Cheesy Delight: Mix in a handful of shredded cheese for a cheesy melty surprise that’ll delight the taste buds—try sharp cheddar or mozzarella.
- Spicy Kick: Add red pepper flakes or diced jalapeños to provide a spicy kick, making the flavors dance on your palate.
- Flavored Breadcrumbs: Instead of plain breadcrumbs, experiment with seasoned or Italian-flavored options for a boost of flavor that perfectly complements the chicken.
- Herb Infusion: Fresh or dried herbs like parsley, thyme, or dill can be added for extra aromatic goodness; choose your favorites to personalize these rissoles.
- Serve with Dips: Serve your rissoles with different dipping sauces, such as tangy barbecue or zesty tzatziki, to keep each meal exciting—don’t forget the classic pair of mashed potatoes or a fresh side salad! For other delectable ideas, check out our Baked French Dip for a warm, comforting experience or our Healthy Blueberry Baked for a delightful breakfast option.
Make Ahead Options
These Golden Baked Chicken Rissoles are perfect for meal prep enthusiasts! You can mix the ingredients and form the patties up to 24 hours in advance, storing them in an airtight container in the refrigerator to maintain freshness. For even more convenience, you can freeze the uncooked rissoles for up to 3 months; just arrange them on a baking sheet until firm, then transfer to a freezer-safe container. When you’re ready to serve, simply bake from frozen, adding a few extra minutes to the cooking time. This approach ensures that your rissoles remain just as delicious and flavorful when it’s time to enjoy them!
Expert Tips for Golden Baked Chicken Rissoles
- Crispy Finish: For extra crunch, drizzle a bit of olive oil on top of the rissoles before baking. This helps create that golden-brown crust that everyone loves.
- Proper Mixing: Ensure all ingredients are well-combined. Avoid over-mixing, which can make the rissoles tough; just mix until everything is incorporated.
- Perfect Patties: Shape the rissoles firmly, as loose patties may crumble during baking. Aim for a compact texture that holds together beautifully.
- Customize Flavors: Feel free to adjust seasonings to suit your taste. Experiment with fresh herbs like parsley or basil to elevate the flavor profile of your Golden Baked Chicken Rissoles.
- Storage Savvy: If you have leftovers, store them in an airtight container. They can last up to three days in the fridge, or freeze for future quick meals.
What to Serve with Golden Baked Chicken Rissoles
Create a vibrant meal that satisfies both the taste buds and the heart with these delightful pairings!
- Fresh Garden Salad: Crisp greens and vegetables add a refreshing crunch, balancing the warmth of the rissoles perfectly.
- Creamy Mashed Potatoes: Silky and smooth, these are the ultimate comfort food side that’s sure to complement each juicy rissole.
- Roasted Vegetables: Roasting brings out natural sweetness, creating a delicious contrast with the savory flavors of the chicken rissoles.
- Zesty Coleslaw: This tangy, crunchy slaw adds brightness and a delightful texture that contrasts beautifully with the rissoles.
- Herbaceous Quinoa: Light and fluffy, this grain bowl provides a nutty flavor, making it a wholesome companion to the rissoles.
- Garlic Bread: A crisp, buttery slice adds an irresistible crunch, perfect for soaking up any flavorful sauces served alongside.
Pair with a glass of sparkling water with a lemon twist for a refreshing touch! For dessert, consider serving a light fruit salad or a scoop of sorbet to cleanse the palate after your comforting meal.
Storage Tips for Golden Baked Chicken Rissoles
Fridge: Store cooked rissoles in an airtight container for up to 3 days to maintain their flavor and texture. Allow to cool completely before sealing.
Freezer: For longer storage, freeze the rissoles—either raw or cooked—for up to 3 months. Freeze raw rissoles on a baking sheet until firm, then transfer to a freezer-safe container.
Reheating: To reheat, bake cooked rissoles at 375°F (190°C) for about 10-15 minutes, or microwave until heated through. Enjoy the same delightful taste as when they were freshly made!
Golden Baked Chicken Rissoles Recipe FAQs
What kind of ground meat can I use for these rissoles?
Absolutely! While ground chicken is the star of the show, feel free to mix it up with ground turkey, lean beef, or even plant-based alternatives. Each choice will bring its unique flavor and texture to your Golden Baked Chicken Rissoles, making them a versatile option for any taste preference.
How should I store leftover rissoles?
To keep your delicious rissoles fresh, store them in an airtight container in the fridge for up to 3 days. Make sure to let them cool completely before sealing to avoid condensation, which can make them soggy. For longer storage, freeze cooked rissoles for up to 3 months; just be sure to reheat them to a safe internal temperature of 165°F (74°C) before enjoying!
Can I freeze these rissoles before baking?
Yes, indeed! To freeze raw Golden Baked Chicken Rissoles, arrange them on a baking sheet in a single layer and place them in the freezer until they’re firm (about 1-2 hours). Then, transfer them to a freezer-safe container or bag, specifying the date you made them. This way, you have a ready-to-bake meal on hand for those busy nights!
What should I do if my rissoles crumble while cooking?
If your rissoles are crumbling, fear not! The key to a stable rissole lies in the mixing and shaping stages. Make sure the mixture is well-combined without being overworked, as overmixing can toughen them. During shaping, form the patties firmly and ensure they aren’t too loose. If they continue crumbling, consider adding a bit more egg or breadcrumbs to help bind them better.
Are these rissoles gluten-free?
Very much so! To ensure your Golden Baked Chicken Rissoles are gluten-free, simply substitute regular breadcrumbs with gluten-free breadcrumbs. This little switch ensures that everyone at the table can savor this comforting dish without any worries. Always check the labels of your ingredients for hidden gluten, just to be safe!
Can dogs eat these chicken rissoles?
While it’s tempting to share, it’s best to keep rissoles for human enjoyment. The seasoning used in these Golden Baked Chicken Rissoles, such as salt and garlic powder, can be harmful to pets. Instead, consider making a plain batch without seasoning for your furry friend, but always consult your vet before introducing new foods into their diet.

Golden Baked Chicken Rissoles: Crispy, Juicy, and Guilt-Free
Ingredients
Equipment
Method
- Preheat your oven to 375°F (190°C) and line a baking sheet with parchment paper.
- In a large mixing bowl, combine the ground chicken, breadcrumbs, seasonings, and finely chopped vegetables. Add the egg and mix until well incorporated.
- Shape the mixture into small, round patties, ensuring they are compact to avoid crumbling.
- Place the rissoles on the prepared baking sheet and bake for 20-25 minutes, flipping halfway through, until golden brown and the internal temperature reaches 165°F (74°C).
- Let the rissoles cool slightly before serving with fresh salads or dipping sauces.
Leave a Reply