
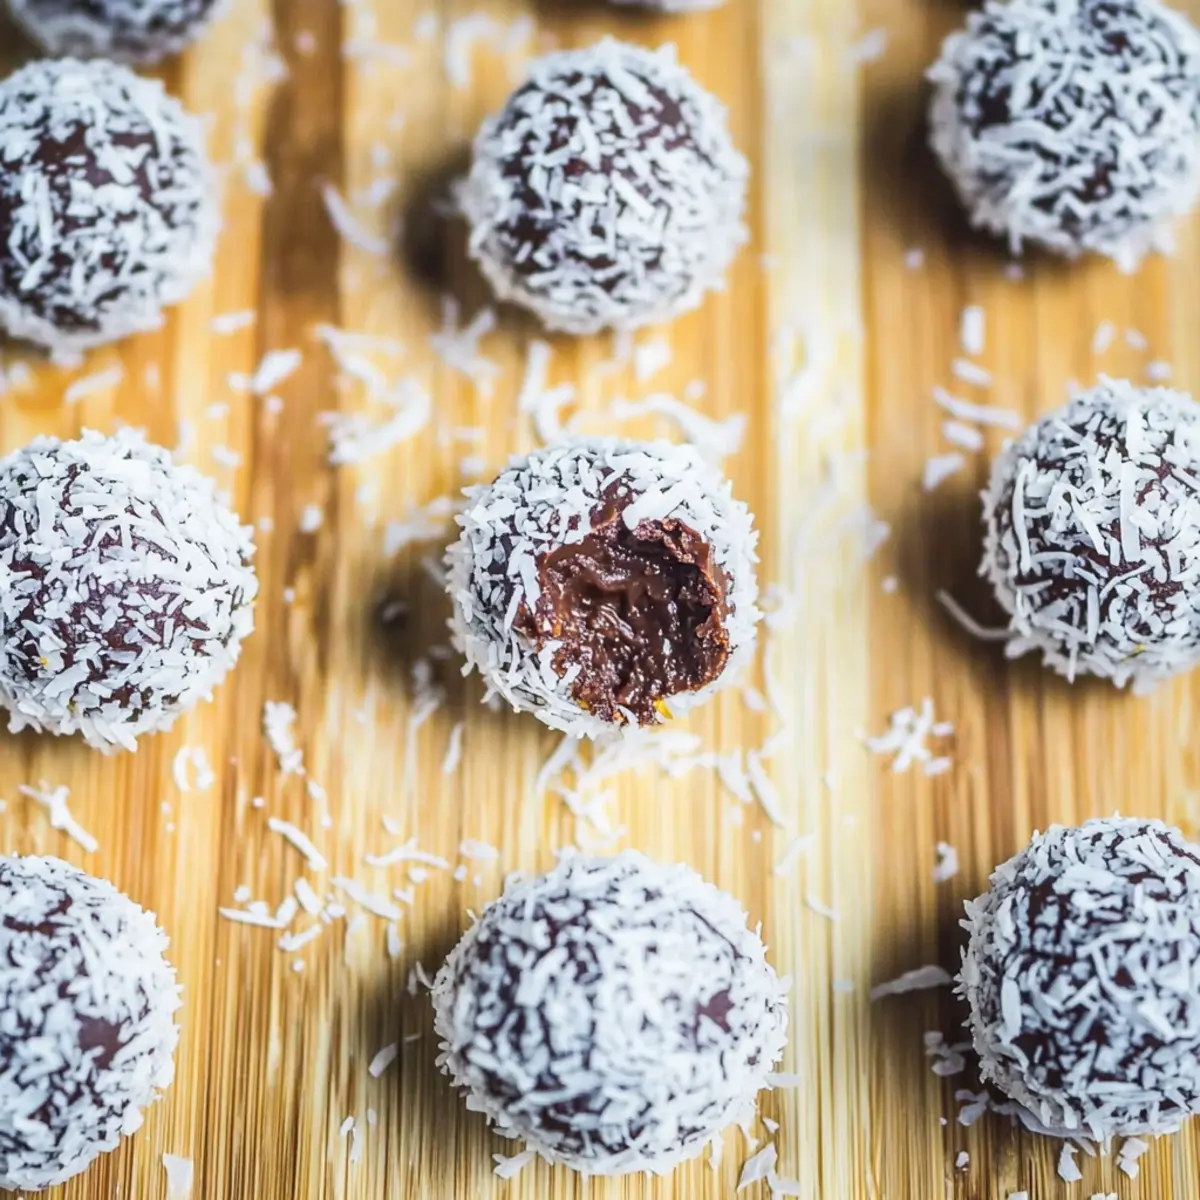
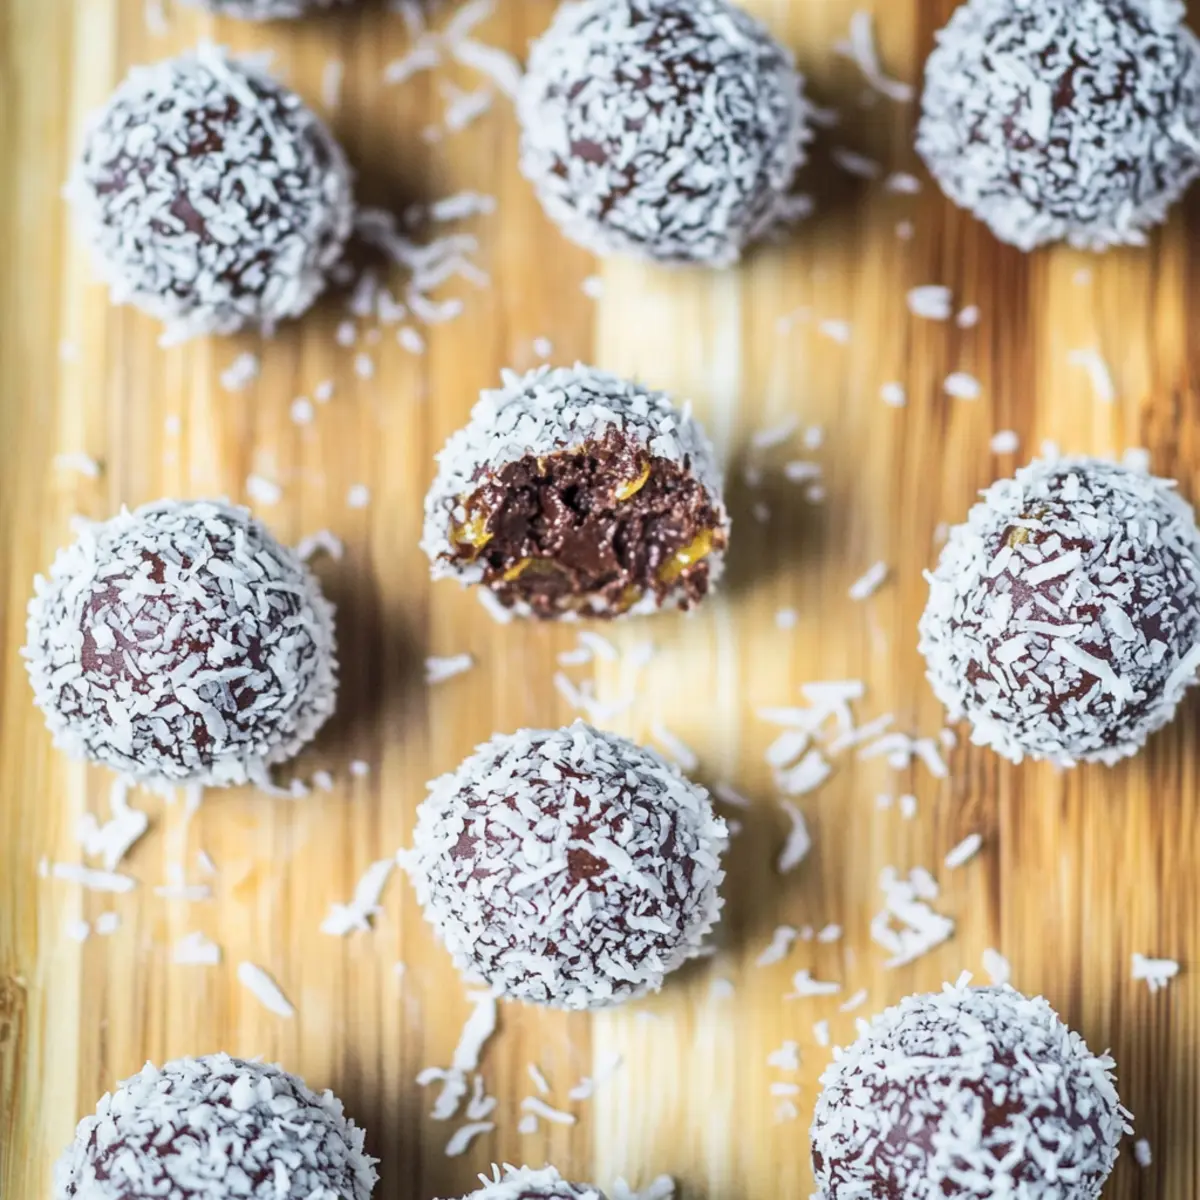
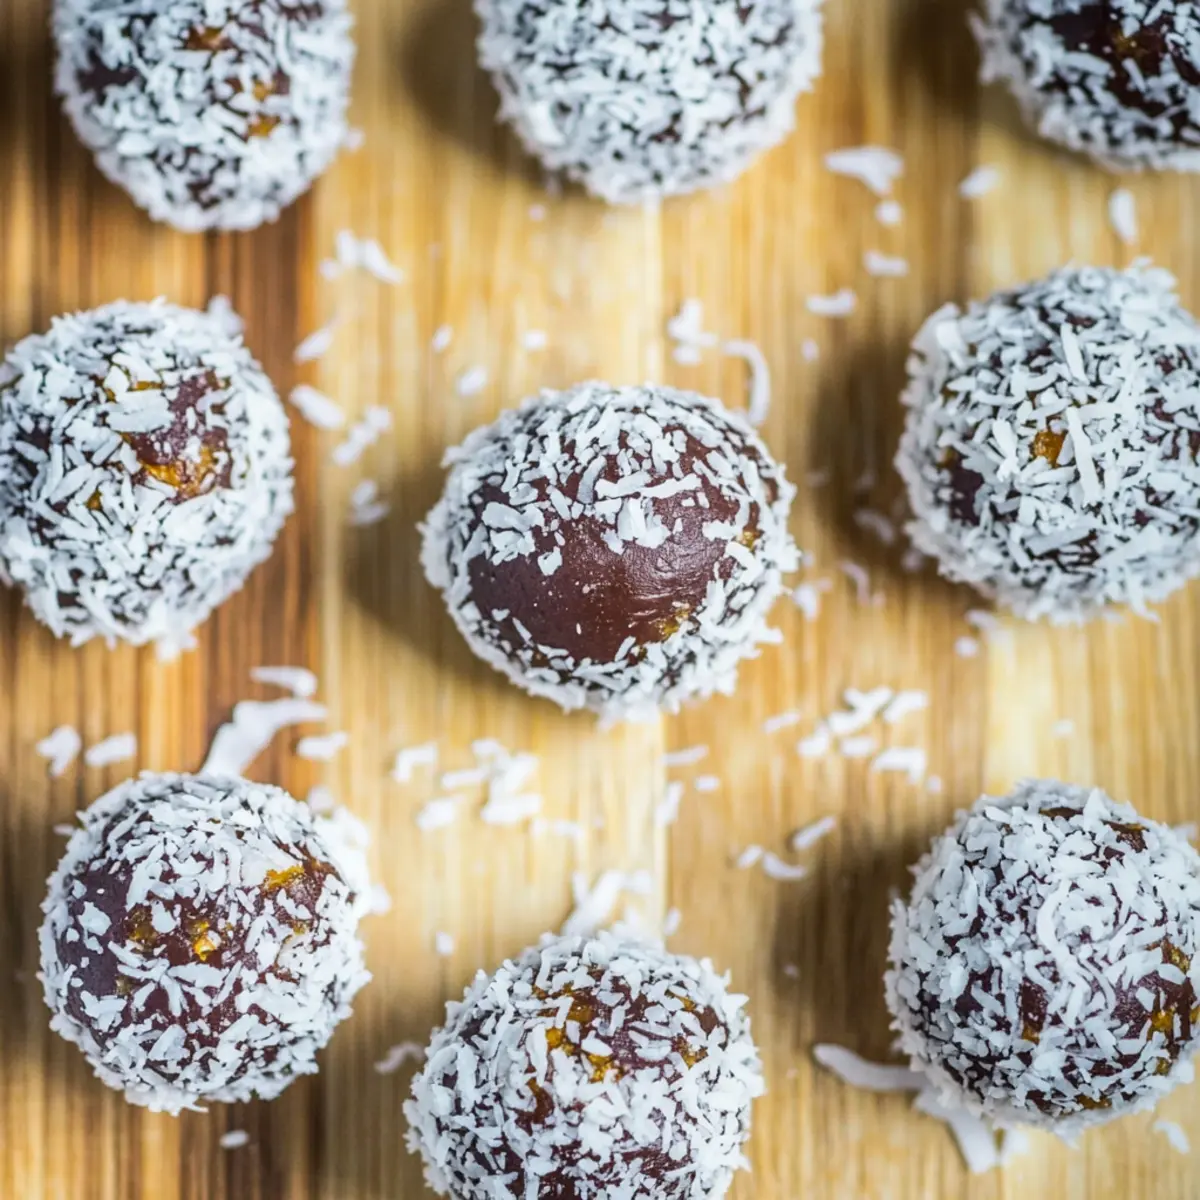
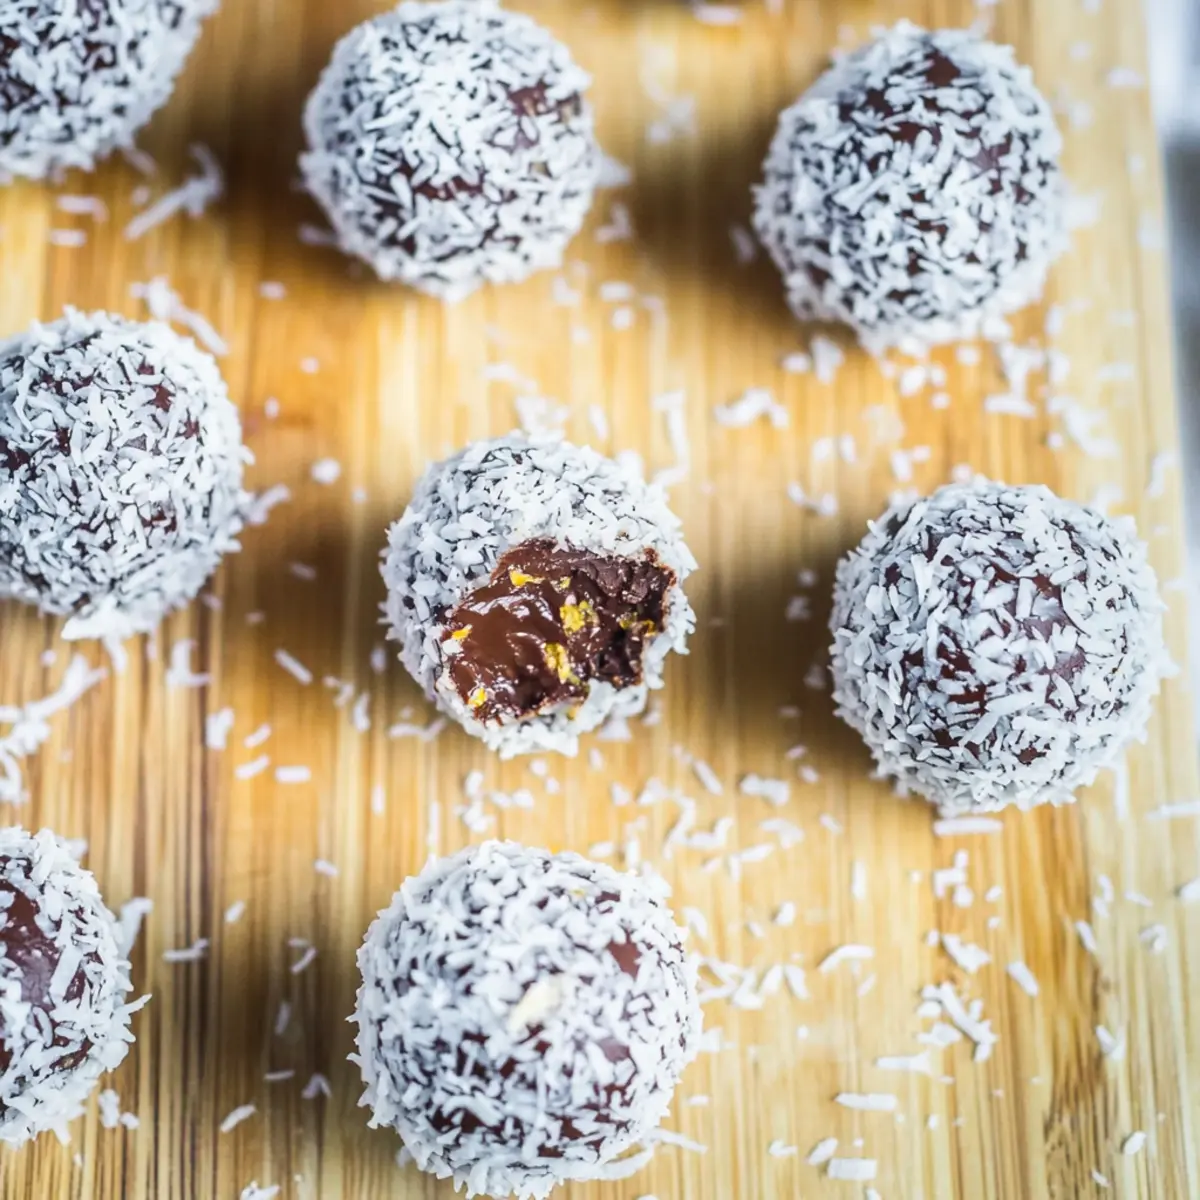
As I pulled my food processor out of the cupboard, a spark of excitement was in the air. Today, I was diving into the world of Chocolate Orange Bliss Balls—a treat that’s as simple to whip up as it is delightful to eat. With just 10 minutes of prep, these no-bake vegan goodies are not only a quick solution for busy afternoons but also cater to various dietary needs like gluten-free, dairy-free, and paleo. Each bite brings a harmonious blend of rich chocolate and zesty orange that feels indulgent yet wholesome. Perfect for a snack, dessert, or even as a thoughtful gift to friends, these bliss balls may just become your new go-to. Are you ready to create a little bliss in your kitchen?
Why Are Chocolate Orange Bliss Balls Irresistible?
Quick and Easy: In just 10 minutes, you can whip up these delightful treats—perfect for a busy lifestyle.
Dietary-Friendly: With gluten-free, dairy-free, vegan, and paleo options, these bliss balls cater to various dietary needs without compromising on taste.
Flavor Explosion: Each bite delivers a harmonious blend of sweet chocolate and zesty orange, creating a rich flavor experience.
Crowd-Pleaser: Whether it’s a casual gathering or a picnic, these treats are sure to impress friends and family—they’re just that good!
Make Ahead Convenience: These bliss balls can be made in advance and stored in the fridge, making them an excellent option for no-fuss snacks throughout the week.
For more quick and delicious recipes, check out our Cheesy Garlic Chicken or indulge your sweet tooth with Chocolate Chip Sourdough. Enjoy!
Chocolate Orange Bliss Balls Ingredients
For the Bliss Balls
- Medjool Dates – These add natural sweetness and moisture; substitute with other sticky soft dates for a similar effect.
- Orange Rind – Provides a fresh citrus flavor; use zest from any orange for a zesty undertone.
- Almonds – Adds structure and crunch; can use cashews or macadamia nuts for a different texture.
- Maple Syrup – Acts as a sweetener to enhance the flavor; honey can be used for non-vegan options.
- Cardamom – Introduces warm spice notes; feel free to omit or substitute with cinnamon for a different flavor profile.
- Cocoa – Infuses richness and chocolate flavor; ensure it’s unsweetened for best results in making these Chocolate Orange Bliss Balls.
- Desiccated Coconut – Envelops the bliss balls, adding delightful texture and flavor; flaked coconut can be used as an alternative.
Enjoy creating these irresistible treats that bring a touch of bliss to your day!
Step‑by‑Step Instructions for Chocolate Orange Bliss Balls
Step 1: Prepare the Ingredients
Begin by gathering all your ingredients for the Chocolate Orange Bliss Balls: Medjool dates, orange rind, almonds, maple syrup, cardamom, cocoa, and desiccated coconut. Make sure your dates are soft; if they are too firm, soak them in warm water for about 10 minutes. This ensures a smooth blending experience.
Step 2: Blend the Mixture
In a food processor, combine the Medjool dates, orange rind, almonds, maple syrup, cardamom, cocoa, and half of the desiccated coconut. Blend on high for about 2-3 minutes, scraping down the sides as necessary, until the mixture reaches a sticky, well-combined consistency. You want it to be moist enough to hold together when rolled into balls.
Step 3: Form the Bliss Balls
Once the mixture is ready, use your hands to portion it out. Take about a tablespoon of the mixture and roll it between your palms to form a ball, ensuring it holds together nicely. Continue this process until all of the mixture is used up, and place the rolled balls on a parchment-lined plate or tray.
Step 4: Coat with Coconut
Next, place the remaining desiccated coconut in a shallow bowl. Roll each bliss ball in the coconut to coat the outside evenly. This adds a delightful texture and enhances the appearance of your Chocolate Orange Bliss Balls. Make sure each ball is fully coated for a beautiful finish.
Step 5: Chill and Set
Finally, refrigerate the bliss balls for at least 30 minutes to allow them to firm up. This step is crucial for achieving the perfect texture, making them easier to eat. Once they are set, transfer them to an airtight container, and they’ll be ready to enjoy as a tasty snack or dessert!
Make Ahead Options
These Chocolate Orange Bliss Balls are a fantastic choice for meal prep enthusiasts! You can mix the ingredients and roll them into balls up to 24 hours in advance, storing them in an airtight container in the refrigerator. This ensures they stay fresh and ready for snacking, maintaining their delightful texture and flavor. If you’d like, you can prepare the mixture without rolling them into balls, placing the mixture in the fridge, and then rolling into balls just before serving. Simply coat them in desiccated coconut when ready to enjoy, ensuring they are chilled and firm for a deliciously easy treat anytime!
How to Store and Freeze Chocolate Orange Bliss Balls
Fridge: Store your Chocolate Orange Bliss Balls in an airtight container in the fridge for up to 1 week to maintain freshness and flavor.
Freezer: These bliss balls freeze wonderfully! Place them in a single layer on a baking sheet until firm, then transfer to an airtight container for up to 3 months.
Reheating: There’s no need to thaw; simply grab one straight from the freezer for a refreshing snack or let it sit at room temperature for a few minutes before enjoying!
Portion Control: Consider rolling them into smaller balls for easier snacking or meal prep, making it simpler to grab a quick treat on busy days.
Expert Tips for Chocolate Orange Bliss Balls
Soft Dates: Ensure your Medjool dates are soft and sticky for easy blending; soak them in warm water if they feel too firm.
Customize Sweetness: Adjust the maple syrup to your taste by adding more or less, ensuring your Chocolate Orange Bliss Balls suit your sweetness preference.
Storage Savvy: Keep your bliss balls in an airtight container in the fridge for maximum freshness—these treats can last up to a week!
Coating Choices: For added creativity, try using crushed nuts or cocoa powder instead of desiccated coconut when rolling the bliss balls for unique flavors.
Batch Preparation: Make a double batch for snacks throughout the week; they freeze beautifully for quick, on-the-go indulgence!
Chocolate Orange Bliss Balls Variations
Feel free to customize these delightful bites to match your taste and dietary preferences!
-
Nut-Free: Swap almonds for sunflower seeds for a nut-free version, ensuring everyone can join in on the treat.
Embrace the change! Sunflower seeds lend a delightful crunch while keeping these bliss balls accessible to those with nut allergies. -
Protein Boost: Add a tablespoon of protein powder to the mix for an energy-boosting treat perfect for post-workout recovery.
This simple addition elevates the nutritional value, making them a perfect companion for your fitness regime! -
Chocolate Lovers: Incorporate mini chocolate chips into the mixture for an extra chocolate kick—indulgence at its finest.
Not only do they amplify the chocolate flavor, but they also add a delightful surprise in every bite! -
Citrus Burst: Experiment with different citrus zests like lemon or grapefruit for a refreshing twist on the classic flavor.
Each zesty variation brings its unique flair, keeping your taste buds excited with every homemade batch. -
Creamy Coconut: Blend in shredded coconut for added texture and creaminess, making every bite even more enjoyable.
Using shredded coconut can enhance the mouthfeel, making these bliss balls irresistibly chewy and flavorful! -
Spice It Up: Substitute cardamom with cinnamon or ginger for a warm spice touch that adds depth to your bliss balls.
These aromatic spices not only awaken the senses but also create a cozy vibe, perfect for any occasion! -
Sweeten Your Way: Experiment with different natural sweeteners, like agave syrup or date syrup, to find your favorite balance.
This way, you control the sweetness level while enjoying the variations of flavors these syrups offer!
For more inspiration, try serving your bliss balls alongside a refreshing cup of herbal tea or pair them with the savory flavors of Cheesy Garlic Chicken for a delightful contrast. Enjoy whipping up your own delicious variations!
What to Serve with Chocolate Orange Bliss Balls
Indulging in these delightful treats opens up a world of delicious pairing possibilities that elevate your snack time.
-
Nutty Granola: A small bowl of nutty granola adds crunch and complements the soft texture of the bliss balls, enhancing the overall experience.
-
Fresh Berries: Juicy strawberries or raspberries provide a refreshing contrast to the rich flavors, balancing sweetness with their tartness.
-
Herbal Tea: A warm cup of chamomile or peppermint tea soothes and refreshes, creating a comforting environment for enjoying your bliss balls.
-
Coconut Yogurt: Creamy coconut yogurt offers a rich, dairy-free companion, adding a smooth element that enhances the blissfulness of each bite.
-
Dark Chocolate Drizzle: A simple drizzle of melted dark chocolate not only intensifies the chocolate flavor but also adds a touch of decadence to your snack.
-
Fruit Smoothie: Pairing these bliss balls with a bright fruit smoothie delivers a nutritional punch and a refreshing balance, perfect for a nourishing snack.
-
Cacao Nibs: Sprinkle some cacao nibs on top for a crunchy texture and an extra chocolate kick, elevating the chocolate experience to new heights.
-
Almond Milk: Serve with a tall glass of chilled almond milk for a satisfying drink option that ties the flavors together beautifully.
Explore these delightful pairings to create a varied and satisfying snacking experience!
Chocolate Orange Bliss Balls Recipe FAQs
How do I choose the right Medjool dates?
Absolutely! When selecting Medjool dates, look for those that are deep brown, plump, and slightly sticky to the touch. Avoid dates with dark spots all over, as this may indicate they’re past their prime. If your dates are hard, soak them in warm water for about 10 minutes to soften them up for blending.
How should I store Chocolate Orange Bliss Balls?
I recommend storing your Chocolate Orange Bliss Balls in an airtight container in the fridge where they can stay fresh for up to 1 week. This will keep their flavors intact and avoid any unwanted moisture. For ultimate freshness, consider placing a paper towel in the container to absorb excess moisture.
Can I freeze Chocolate Orange Bliss Balls?
Very much so! To freeze your bliss balls, place them in a single layer on a baking sheet and put them in the freezer until they are firm. Once frozen, transfer them to an airtight container or freezer bag for up to 3 months. No need to thaw; grab one straight from the freezer for a delicious treat.
What if my mixture is too crumbly?
If you find your mixture isn’t sticking together, it’s possible that the dates weren’t moist enough. Consider adding a small amount of maple syrup or a splash of water to the mixture and blend again. Alternatively, if you have a bit of nut butter on hand, adding a teaspoon can help bind the mixture nicely.
Are there any allergy considerations with this recipe?
Yes! While these Chocolate Orange Bliss Balls are naturally gluten-free and vegan, they do contain nuts. If you’re catering to nut allergies, feel free to swap the almonds for sunflower seeds or pumpkin seeds for a safe alternative. Always double-check labels for cross-contamination concerns as well.
How long do the flavors develop after making them?
The flavors of your Chocolate Orange Bliss Balls will actually deepen over time! I often find that after a couple of hours in the fridge, they taste even better. Allowing them to chill for at least 30 minutes is essential, but if you can wait a day, the rich chocolate and zesty orange flavors really shine through.
Irresistible Chocolate Orange Bliss Balls – Quick & Healthy Snack
Ingredients
Equipment
Method
- Gather all your ingredients: Medjool dates, orange rind, almonds, maple syrup, cardamom, cocoa, and desiccated coconut.
- In a food processor, combine the ingredients and blend on high for 2-3 minutes until the mixture is sticky and well-combined.
- Roll tablespoon-sized portions of the mixture into balls and place them on a parchment-lined plate.
- Roll each bliss ball in the remaining desiccated coconut to coat the outside.
- Refrigerate the bliss balls for at least 30 minutes to firm them up before enjoying.
Leave a Reply