
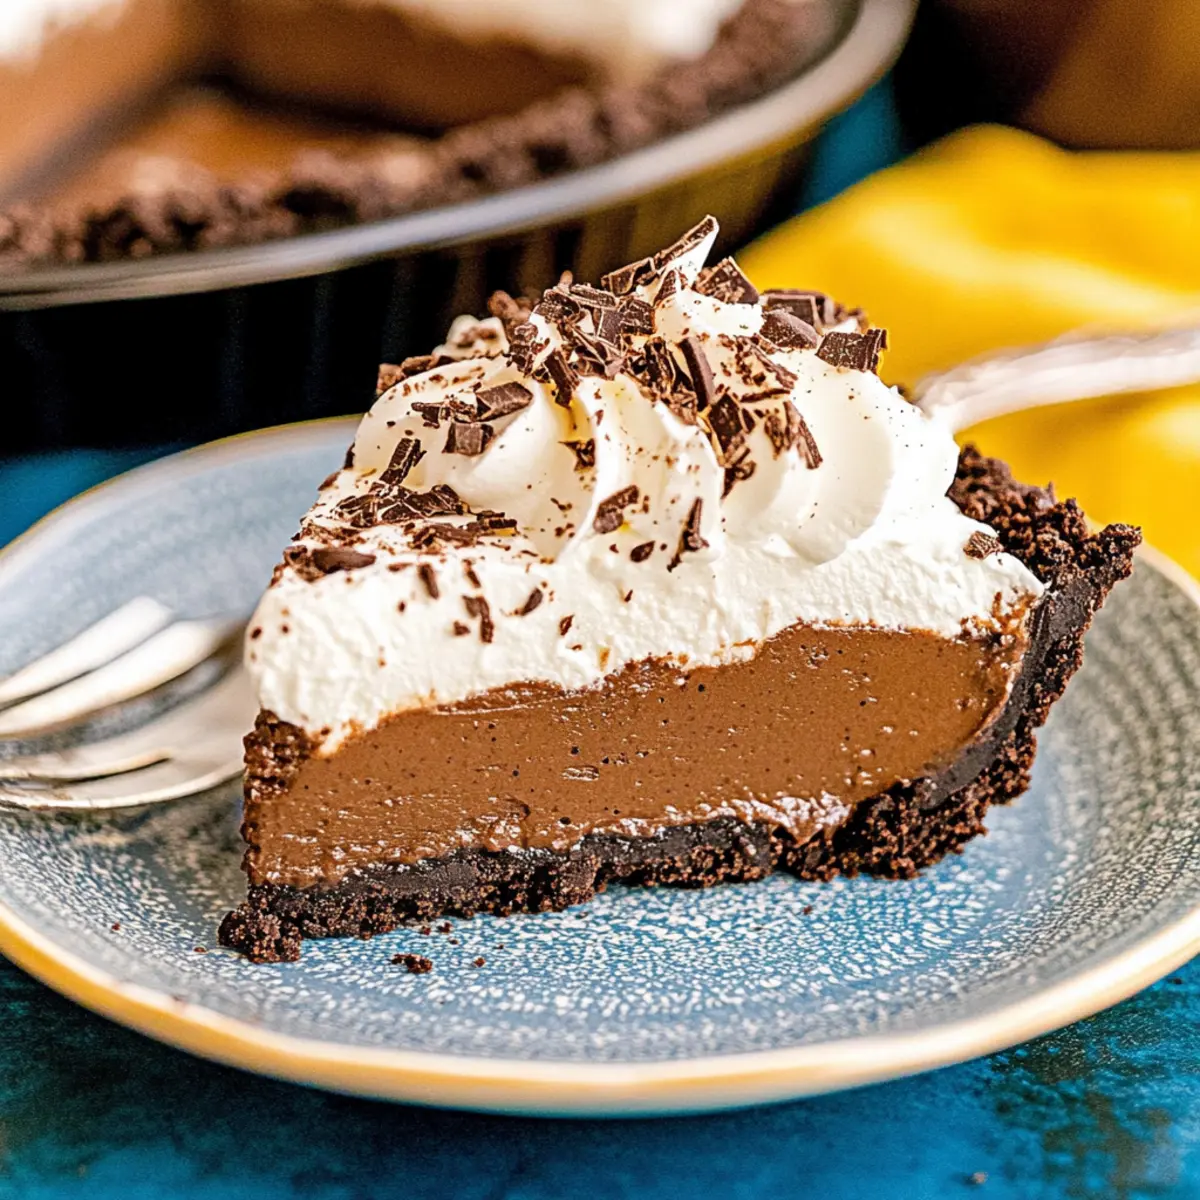
There’s something magical about a no-bake dessert on a warm day, and this Classic No-Bake Chocolate Cream Pie with Oreo Crust is my ultimate go-to. With just a quick 20 minutes of prep, I can whip up this delightful treat that effortlessly impresses friends and family alike. The Oreo crust brings a crunchy, sweet twist to the silky, rich chocolate filling, all beautifully topped with a cloud of homemade whipped cream. Not only is it a breeze to make, but it also makes for a crowd-pleaser at gatherings, turning any occasion into a celebration of flavors. I dare you to resist a second slice! Isn’t it time you treated yourself to this indulgent dessert that truly feels like a warm hug on a plate?
Why Choose This Chocolate Cream Pie?
Decadent Flavor: The rich chocolate filling paired with the crunchy Oreo crust creates an explosion of taste with every bite. No-Bake Convenience: Whip it up in just 20 minutes without turning on the oven—perfect for those warm days! Crowd-Pleasing Delight: This dessert is a favorite for gatherings, ensuring you leave everyone wanting more. Feeling adventurous? Try it with a graham cracker crust for a twist! Impressive Presentation: Serve it chilled, topped with fluffy whipped cream, and watch as it steals the show. Treat yourself to a slice of joy today!
Chocolate Cream Pie Ingredients
For the Oreo Crust
• Oreo Cookies – The crunchy base for this chocolate cream pie; use a family-sized package for ample crumbs.
• Salted Butter – Binds the crust together; you can substitute it with unsalted butter and add a pinch of salt for balance.
For the Chocolate Filling
• Granulated Sugar – Sweetens the custard filling; no direct substitutes recommended to maintain the consistency.
• Cornstarch – Acts as a thickener for the chocolate custard; arrowroot can be used as an alternative if needed.
• Cocoa Powder – Enhances the chocolate flavor; opt for Dutch-process cocoa for a richer taste.
• Half and Half – Provides the desired creaminess in the filling; full-fat milk or a mix of whole milk and heavy cream works well as substitutes.
• Egg Yolks – Add richness and structure to the custard; no recommended egg substitutes for this base.
• Semisweet Chocolate – The main flavoring component; dark chocolate can be used for a more intense taste.
• Vanilla Extract – Enhances the flavor profile; imitation vanilla can serve as a substitute in a pinch.
For the Whipped Topping
• Heavy Cream – Whipped into a light topping; feel free to use store-bought whipped topping for convenience.
• Powdered Sugar – Sweetens and stabilizes the whipped cream; granulated sugar can be used, though it may not dissolve entirely.
Optional Garnish
• Crushed Oreos or Chocolate Shavings – Elevate the presentation; use these to add a decorative finish to your chocolate cream pie.
Step‑by‑Step Instructions for Chocolate Cream Pie
Step 1: Prepare the Crust
Start by blending a family-sized package of Oreo cookies into fine crumbs using a food processor, which should take about 1-2 minutes. Melt 5 tablespoons of salted butter and mix it into the Oreo crumbs until fully combined. Firmly press the mixture into the bottom and sides of a springform pan. Chill the crust in the refrigerator for at least 30 minutes to help it set.
Step 2: Make the Filling
In a medium saucepan, whisk together ½ cup of granulated sugar, ¼ cup of cornstarch, and ½ cup of cocoa powder. In a separate bowl, combine 2 cups of half and half with 4 large egg yolks. Gradually whisk the egg mixture into the dry ingredients while stirring continuously. Cook over medium heat until the mixture bubbles and thickens, about 5-7 minutes. Remove from heat and incorporate 4 tablespoons of butter, 6 ounces of semisweet chocolate, and 1 teaspoon of vanilla extract until the filling is silky smooth.
Step 3: Assemble the Pie
Carefully pour the chocolate filling into the chilled Oreo crust, spreading it evenly using a spatula. Cover the pie with plastic wrap or a lid, ensuring it stays sealed. Refrigerate the assembled pie for a minimum of 6 hours, or overnight if possible, to allow the filling to fully set and deepen the flavors.
Step 4: Prepare Whipped Cream
In a large mixing bowl, combine 1 cup of cold heavy cream, ¼ cup of powdered sugar, and 1 teaspoon of vanilla extract. Using a hand mixer or stand mixer, beat on medium-high speed until stiff peaks form, which should take about 3-5 minutes. If desired, add 1 tablespoon of cornstarch while whipping to stabilize your topping.
Step 5: Finish
Once the pie has chilled properly, gently spread the whipped cream over the top of the chocolate filling. For a decorative touch, sprinkle crushed Oreos or chocolate shavings on top of the whipped cream. You’re now ready to slice and serve this delightful Chocolate Cream Pie, a guaranteed crowd-pleaser!
Expert Tips for Chocolate Cream Pie
• Whisk Continuously: Keep whisking the custard filling while cooking to avoid lumps for a silky smooth texture.
• Chill Time: Allow the pie to chill for at least 6 hours; this helps the filling set properly, enhancing the flavor.
• Store-Bought Shortcut: If you’re short on time, a pre-made graham cracker crust can save you a step without sacrificing flavor.
• Don’t Skip Toppings: The whipped cream topping not only adds flavor but also creates a beautiful contrast to the rich chocolate filling.
• Freeze for Later: For longer storage, freeze the pie without whipped cream for up to 3 months; just add fresh whipped cream before serving.
Storage Tips for Chocolate Cream Pie
- Fridge: Store the Chocolate Cream Pie in the refrigerator for up to 4 days. Make sure it’s tightly covered to maintain freshness and prevent any odors from other foods.
- Freezer: For longer storage, freeze the pie without the whipped cream for up to 3 months. Ensure it’s well-wrapped in plastic wrap and aluminum foil to avoid freezer burn.
- Thawing: To enjoy the pie after freezing, thaw it in the refrigerator overnight for the best texture and taste.
- Reheating: There’s no need to reheat this dessert; serve it chilled and enjoy the cool, rich flavors!
What to Serve with Classic No-Bake Chocolate Cream Pie?
Elevate your dessert experience by pairing this rich pie with complementary flavors and textures that dance on your palate.
-
Fresh Berries: Summer’s sweet bounty, like strawberries or raspberries, add a juicy brightness that cuts through the richness of the pie.
-
Vanilla Ice Cream: A scoop of creamy goodness that melts beautifully with each slice while enhancing the chocolate flavors.
-
Espresso or Coffee: The robust taste of a good brew brings a delightful balance to the sweet and creamy chocolaty notes, making each bite even more indulgent.
-
Salted Caramel Sauce: Drizzling this over the whipped cream adds a sweet and salty twist that pairs perfectly with the chocolate.
-
Chocolate Covered Pretzels: The crunchy, salty bites create a playful contrast and are fun to snack on while enjoying a slice.
-
Mint Leaves: Bright and herbaceous, mint can refresh your palate and adds a pop of color to your dessert presentation.
-
Chocolate Mousse: For true chocolate lovers, a light mousse on the side takes your dessert experience to another level of texture and depth.
-
Sparkling Water with Lime: A refreshing drink that cleanses the palate and enhances the pie’s flavors without overpowering them.
-
Almond Biscotti: These crunchy cookies provide a delightful crunch, perfect for dipping alongside your slice for an Italian twist.
-
Whipped Chocolate Ganache: For an extra touch of elegance, consider serving a dollop on the side; it embodies pure chocolate bliss and enhances the pie’s lusciousness.
Make Ahead Options
These Classic No-Bake Chocolate Cream Pies are perfect for busy home cooks looking to simplify their meal planning! You can prepare the Oreo crust and filling up to 3 days in advance. To do this, make the crust, chill it for at least 30 minutes, and then pour in the chocolate filling. Cover tightly with plastic wrap and refrigerate it until you’re ready to serve. Just keep in mind that the whipped cream topping should be made fresh; whip it up on the day you plan to enjoy the pie to maintain its light, fluffy texture. When you’re ready to serve, simply spread the whipped cream over the chilled pie and garnish with crushed Oreos or chocolate shavings for a delightful finish. Enjoy the gift of time and the joy of sharing this indulgent dessert!
Chocolate Cream Pie Variations & Substitutions
Feel free to get creative with this easy Chocolate Cream Pie recipe; there are endless ways to personalize it for your taste!
- Graham Cracker Crust: Swap the Oreo crust for a graham cracker crust for a slightly different flavor that still sings.
- Dairy-Free Delight: Use coconut cream instead of heavy cream for the topping and almond milk for the filling for a dairy-free version.
- Mocha Infusion: Add 1-2 tablespoons of instant coffee granules to the filling for a delicious mocha twist that coffee lovers will adore.
- Fruit Layer: Place fresh fruit, like raspberries or strawberries, beneath the whipped cream to add a splash of color and a refreshing contrast to the chocolate.
- Dark Chocolate: Substitute semisweet chocolate with dark chocolate for a richer and more intense chocolate experience.
- Mini Pies: Create individual-sized pies using a muffin tin for potlucks or gatherings. Just be mindful of the baking time!
- Spicy Kick: Add a pinch of cayenne pepper to the filling for a surprising hint of heat that perfectly complements the chocolate’s sweetness.
- S’mores Twist: Sprinkle mini marshmallows and crushed graham crackers atop the whipped cream for an indulgent s’mores-inspired treat.
Don’t forget to check out some of my other family-favorite recipes, like my delightful Pumpkin Cream Cheese Cinnamon Rolls or the heavenly Lemon Cream Cheese Dump Cake. Enjoy experimenting!
Chocolate Cream Pie Recipe FAQs
What type of Oreo cookies should I use for the crust?
Absolutely! For the best flavor and texture, it’s best to use a family-sized package of regular Oreo cookies. You can also opt for chocolate or double-stuffed Oreos for an extra kick, but the classic version holds up well in this pie recipe.
How long can I store the Chocolate Cream Pie in the refrigerator?
You can store the Chocolate Cream Pie in the refrigerator for up to 4 days. Just be sure to keep it tightly covered to maintain its freshness and wonderful chocolatey flavor. If you find yourself with leftovers, you might even enjoy a slice the next day!
Can I freeze the Chocolate Cream Pie, and if so, how?
Yes, you can freeze this Chocolate Cream Pie without the whipped cream for up to 3 months! To do so, wrap the pie tightly in plastic wrap and then in aluminum foil to prevent freezer burn. When you’re ready to enjoy it, simply thaw the pie in the refrigerator overnight before adding your fresh whipped cream topping.
What should I do if my chocolate filling is lumpy?
If your chocolate filling turns out lumpy, don’t fret! Simply pass it through a fine mesh sieve to strain out any lumps. If lumps persist while making the filling, make sure to whisk continuously over medium heat and ensure your heat isn’t too high—this keeps the mixture smooth.
Are there any dietary considerations I should keep in mind for this recipe?
Yes! This Chocolate Cream Pie contains gluten from the Oreo crust and dairy from the filling and whipped topping. If you have gluten sensitivities, you can swap the Oreo cookies for gluten-free cookies. For a dairy-free version, consider using dairy-free chocolate and a non-dairy alternative for the whipped topping.
How can I enhance the flavor profile of the pie?
Feeling adventurous? You can give your pie a delightful twist by mixing in some coffee granules into the chocolate filling for a mocha flavor or layering some fresh fruit like raspberries beneath the whipped cream for a fruity contrast. The more the merrier when it comes to flavors!
Easy Chocolate Cream Pie with a Crunchy Oreo Crust
Ingredients
Equipment
Method
- Blend Oreo cookies into fine crumbs using a food processor. Melt salted butter and mix with Oreo crumbs. Firmly press mixture into the bottom and sides of a springform pan. Chill the crust in the refrigerator for at least 30 minutes.
- In a medium saucepan, whisk together granulated sugar, cornstarch, and cocoa powder. In a separate bowl, combine half and half with egg yolks. Gradually whisk the egg mixture into the dry ingredients. Cook over medium heat until thickened, about 5-7 minutes. Remove from heat and incorporate butter, semisweet chocolate, and vanilla extract until smooth.
- Pour the chocolate filling into the chilled Oreo crust, spreading evenly. Cover and refrigerate for a minimum of 6 hours or overnight.
- Combine cold heavy cream, powdered sugar, and vanilla extract in a mixing bowl. Beat until stiff peaks form. Optionally, add cornstarch to stabilize your topping.
- Spread whipped cream over the chocolate filling and sprinkle with crushed Oreos or chocolate shavings. Slice and serve.
Leave a Reply