
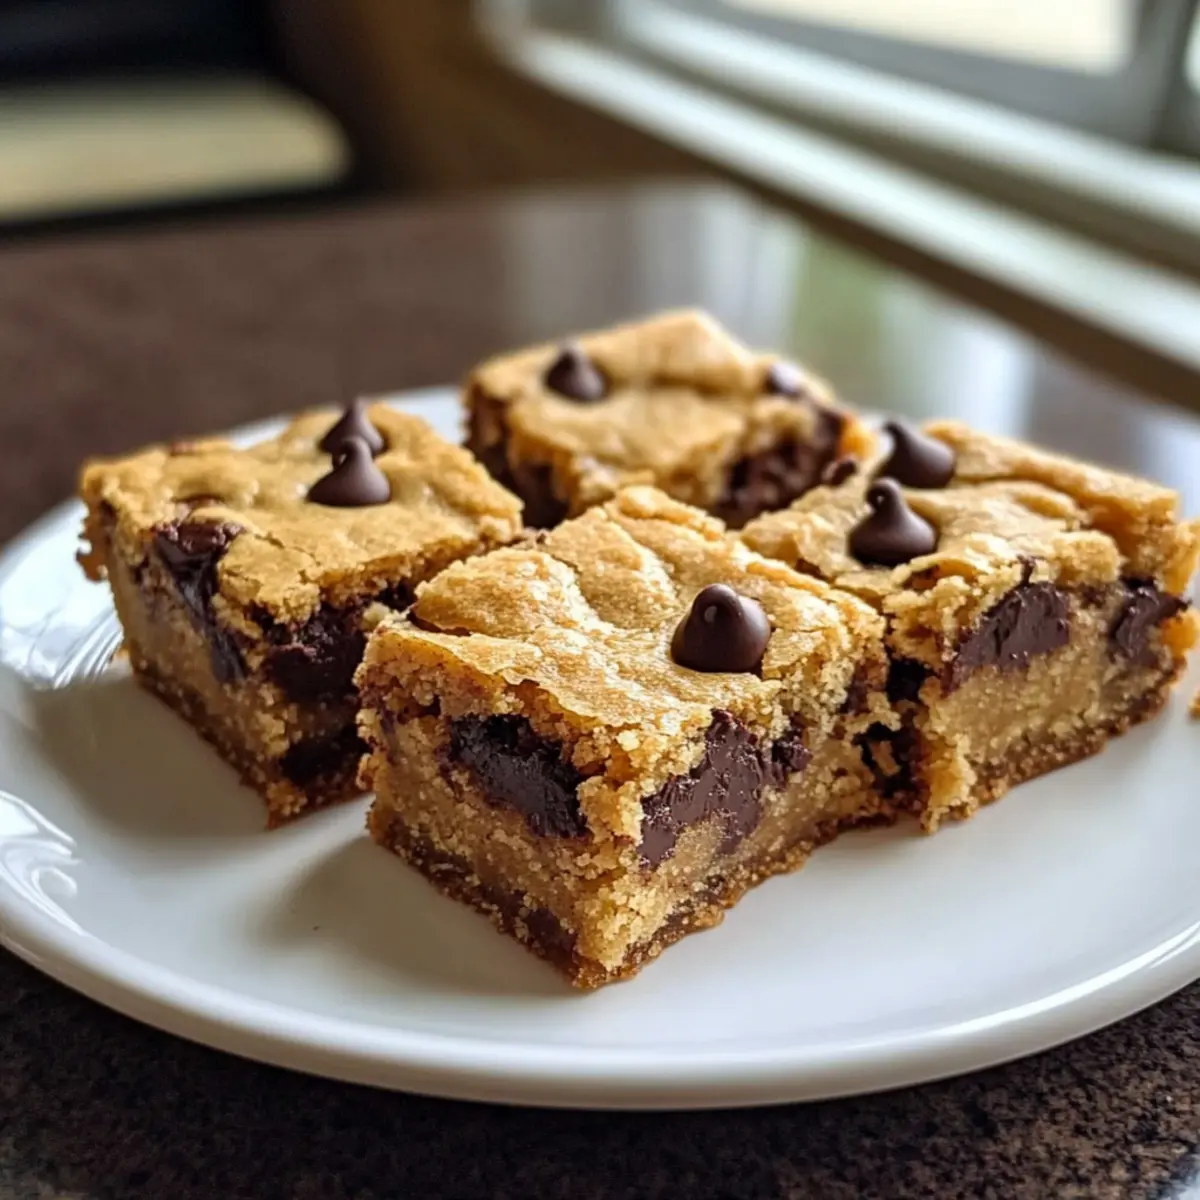
As I popped the last batch out of the oven, the warm, sweet aroma of my Chewy Chocolate Chip Cookie Bars enveloped the kitchen, instantly lifting my spirits. These bars strike the perfect harmony between a fudgy center and crisp edges, making them an absolute delight for anyone craving a comforting treat. What I love most about this easy, beginner-friendly recipe is how quickly I can whip it up with simple, everyday ingredients. Plus, the versatility means you can customize these bars to fit any mood—add nuts, swap chocolate chips, or even toss in some dried fruit for a fun twist! Ready to discover the joy of baking at home? Let’s dive into this mouthwatering adventure together!
Why You’ll Adore These Cookie Bars!
Simplicity at its finest: This recipe sings with an easy-to-follow method, perfect for both seasoned bakers and beginners alike.
Rich texture paired with rich flavors comes from that ideal blend of fudgy centers and crispy edges, leaving you craving more with each bite.
Versatile options abound! Customize your bars with mix-ins like nuts or dried fruit, making every batch a new delightful experience.
Crowd-pleaser guaranteed: Whether at a family gathering or a casual get-together, these bars will bring smiles all around!
Make-ahead convenience makes life easier; bake a batch today and delight in their gooey goodness all week.
Why not check out other variations like Malted Peanut Cookies for another flavor adventure? Trust me, your cookie cravings will thank you!
Chewy Chocolate Chip Cookie Bars Ingredients
For the Bars
- Unsalted Butter – Adds richness and moisture; use coconut oil for a dairy-free option.
- Light Brown Sugar – Provides sweetness and a lovely hint of caramel; dark brown sugar can deepen the flavor.
- Granulated Sugar – Enhances sweetness; consider coconut sugar for a healthier twist.
- Large Eggs – Binds everything together; for an egg-free version, substitute with flax eggs (1 tablespoon ground flaxseed mixed with 2.5 tablespoons water per egg).
- Vanilla Extract – Elevates the overall flavor; pure extract delivers the best taste, or omit for a vanilla-free treat.
- All-Purpose Flour – Gives structure to the bars; switch to a 1:1 gluten-free flour blend if desired.
- Salt – Balances sweetness; essential for enhancing flavor, but can be omitted for low-sodium diets.
- Baking Soda – Helps the bars rise; make sure it’s fresh for optimal results.
- Chocolate Chips – The star ingredient that brings bursts of chocolate; swap for nuts, butterscotch chips, or dried fruit, maintaining total mix-ins to about 2.5 cups.
Feel the love as you gather these ingredients for your Chewy Chocolate Chip Cookie Bars—your kitchen will be filled with warmth and homey scents!
Step‑by‑Step Instructions for Chewy Chocolate Chip Cookie Bars
Step 1: Preheat the Oven
Begin by preheating your oven to 350°F (175°C) while you prepare your ingredients. This ensures that your Chewy Chocolate Chip Cookie Bars will bake evenly. Grease a 9×13-inch baking pan with butter or line it with parchment paper for easy removal after baking. Set the pan aside as you move on to the next steps.
Step 2: Mix the Butter and Sugars
In a large mixing bowl, combine 1 cup of melted unsalted butter with ¾ cup of light brown sugar and ½ cup of granulated sugar. Use a whisk or a wooden spoon to mix thoroughly until the sugars are fully incorporated into the butter. This step should take about 2 minutes, creating a smooth and creamy mixture that brings out the sweet, comforting essence of your cookie bars.
Step 3: Incorporate the Wet Ingredients
Add 2 large eggs and 1 tablespoon of vanilla extract to the butter-sugar mixture. Stir until the ingredients are completely blended, taking care to mix well for about 1-2 minutes. You want to achieve a cohesive batter that shows a silky texture without any lumps. This blend of wet ingredients is key to achieving that deliciously chewy center in your bars.
Step 4: Combine the Dry Ingredients
In a separate bowl, whisk together 2 cups of all-purpose flour, ½ teaspoon of salt, and 1 teaspoon of baking soda. Gradually add this dry mixture to the wet ingredients, stirring gently until just combined. Be mindful not to overmix; your goal is to achieve a thick dough that will hold its shape while baking. This comprehensive blend creates the foundation of your Chewy Chocolate Chip Cookie Bars.
Step 5: Fold in the Chocolate Chips
Now, it’s time to fold in 2 cups of chocolate chips, ensuring they are evenly distributed throughout the dough. Use a spatula to gently add the chocolate chips, taking care not to overwork the batter. This step adds those delightful bursts of chocolate, which are the hallmark of these tasty bars, making them a real treat for chocolate lovers.
Step 6: Transfer to the Baking Pan
Spread the cookie dough evenly into the prepared 9×13-inch baking pan, using a spatula to smooth the top. Make sure the mixture is evenly distributed to ensure consistent baking throughout your Chewy Chocolate Chip Cookie Bars. The thickness of the dough will help achieve that perfect chewy texture you desire.
Step 7: Bake in the Oven
Place the pan in the preheated oven and bake for 20-25 minutes, keeping a close eye on the edges, which should turn a beautiful golden brown. The center of the bars should appear set but slightly soft. This timing is crucial for achieving that desirable chewy texture, so avoid overbaking!
Step 8: Cool and Slice
Once the timer goes off, take the baking pan out of the oven and allow the bars to cool in the pan for about 10-15 minutes. This cooling time allows the bars to firm up slightly, making them easier to slice. After they cool for a bit, cut them into squares and serve! Your Chewy Chocolate Chip Cookie Bars are now ready to be enjoyed.
Helpful Tricks for Chewy Chocolate Chip Cookie Bars
Timing is Key: Pull the bars from the oven when the edges are golden and the center looks slightly underbaked; they’ll firm up as they cool, ensuring that perfect chewy texture.
Mix with Care: Avoid overmixing the dough; this can lead to tough bars. Stir just until the ingredients are combined for a softer bite.
Storage Matters: Keep your Chewy Chocolate Chip Cookie Bars in an airtight container at room temperature for 5 days. For longer freshness, freeze individually wrapped bars.
Experiment Boldly: Don’t hesitate to switch out chocolate chips for butterscotch, nuts, or dried fruit; this keeps each batch exciting and uniquely delicious.
Make Ahead Magic: Consider baking your cookie bars in advance for parties or gatherings. They’ll stay delicious when stored properly and are always a crowd-pleaser!
What to Serve with Chewy Chocolate Chip Cookie Bars
Nothing completes a delightful treat like the perfect pairings to elevate your experience while enjoying these scrumptious bars!
- Creamy Vanilla Ice Cream: The cool creaminess creates a delightful contrast to the warm, fudgy bars, enhancing their chocolatey goodness.
- Fresh Berries Medley: A burst of tartness from strawberries, blueberries, or raspberries complements the sweetness, adding brightness to each bite.
- Rich Hot Chocolate: Cozy up with a cup of hot chocolate; the chocolate flavor intensifies the indulgence, making it even more comforting.
- Crunchy Nuts: Sprinkling a handful of toasted nuts, like pecans or walnuts, adds texture and a lovely crunch that contrasts with the softness of the bars.
- Decadent Caramel Sauce: Drizzling warm caramel over the bars takes them to an entirely new level of indulgence that’s simply irresistible.
- Milk or Almond Milk: A classic pairing, a glass of ice-cold milk, helps balance the sweetness and cleanses the palate, making every bite enjoyable.
- Baked Apples: Serve alongside warm cinnamon-spiced baked apples for a cozy, homestyle dessert experience that feels like a hug in a dish.
- Mocha Coffee: A cup of rich mocha coffee beautifully complements the chocolate flavors, making it a perfect afternoon treat or dessert pairing.
Chewy Chocolate Chip Cookie Bars Variations
Feel free to get creative with your Chewy Chocolate Chip Cookie Bars and explore delightful twists that cater to your taste buds!
-
Nutty Crunch: Add ½ cup of chopped nuts like walnuts or pecans for a satisfying crunch. The added texture beautifully complements the fudgy interior.
-
Mini Chip Surprise: Swap half the chocolate chips for mini chocolate chips for extra sweetness. This creates pops of flavor that will leave chocolate lovers delighted.
-
Fruit Fusion: Toss in dried cranberries or cherries for a fruity burst. The sweet-sour balance enhances the richness of the chocolate, creating a delightful blend.
-
Spice It Up: Add a teaspoon of cinnamon or a pinch of nutmeg for unexpected warmth. This subtle twist can elevate the flavor profile and make them feel like a cozy treat.
-
Nut Butter Swirl: Introduce a swirl of peanut or almond butter to the batter before baking for a nutty flavor explosion. This addition will make the bars even more decadent.
-
Salted Caramel Bliss: Drizzle a bit of caramel sauce on top before baking and sprinkle with sea salt. The combination of sweet and salty is truly irresistible.
-
Coconut Dream: Mix in shredded coconut for tropical flair. This variation transforms the bars into a chewy, chocolatey coconut delight, perfect for any coconut lover.
Why not pair these creations with other cookie recipes like Ferrero Rocher Cookies or Neiman Marcus Cookies? Each recipe offers a unique flavor journey, ensuring you never run out of delicious options!
How to Store and Freeze Chewy Chocolate Chip Cookie Bars
Room Temperature: Keep Chewy Chocolate Chip Cookie Bars in an airtight container at room temperature for up to 5 days to maintain their chewy texture and flavor.
Freezer: For longer storage, wrap individual bars tightly in plastic wrap and then place them in a freezer-safe bag. They can last for up to 3 months, ideal for a sweet treat anytime!
Reheating: To enjoy frozen bars, thaw them in the refrigerator overnight. Warm in the microwave for 10-15 seconds for that fresh-baked taste!
Reviving Texture: If the bars become a bit hard after freezing, simply sprinkle a few drops of water on them before reheating in the microwave to bring back some moisture.
Make Ahead Options
These Chewy Chocolate Chip Cookie Bars are perfect for meal prep, allowing you to enjoy homemade treats without the last-minute rush! You can prepare the dough up to 24 hours in advance by mixing together the butter, sugars, eggs, and vanilla, then incorporating the dry ingredients and chocolate chips. Store the prepared dough in an airtight container in the refrigerator to maintain quality and freshness. When you’re ready to bake, simply let the dough sit at room temperature for about 10-15 minutes to soften, then spread it into your pan and bake as directed. This way, you’ll have delicious, warm cookie bars ready to indulge in when your sweet tooth strikes!
Chewy Chocolate Chip Cookie Bars Recipe FAQs
How do I choose the best chocolate chips for my bars?
Absolutely! When selecting chocolate chips, I recommend going for high-quality semi-sweet chocolate for that classic taste. If you’re feeling adventurous, try using a mix of dark and milk chocolate for a richer flavor. Look for chips that are sturdy enough to hold their shape during baking—this way, you get those delightful, gooey pockets of chocolate in every bite.
How should I store my Chewy Chocolate Chip Cookie Bars?
For optimal freshness, keep your Chewy Chocolate Chip Cookie Bars in an airtight container at room temperature. They will stay delicious for up to 5 days. If you want to keep them longer, consider freezing them. Wrap individual bars tightly in plastic wrap and place them in a freezer-safe bag. These can be stored for up to 3 months, a great way to have a sweet treat on hand whenever the craving hits!
Can I freeze my cookie bars, and if so, what’s the process?
Yes, freezing is a fantastic way to preserve your treats! Start by cutting the cooled cookie bars into individual squares. Wrap each square tightly in plastic wrap and then place them in a freezer-safe bag, making sure to remove as much air as possible. Label the bag with the date and they’ll be good for up to 3 months. To enjoy, simply thaw in the fridge overnight or warm slightly in the microwave for that fresh-baked experience!
What do I do if my bars come out too dry?
Very good question! If you find your cookie bars turn out dry, it could be that they were overbaked or the ingredients were measured inaccurately. To fix dry bars next time, make sure to pull them from the oven just as the edges are golden while the center is still slightly soft. Always use the right measuring methods, and consider adding a bit more melted butter to the mixture for added moisture.
Are there any allergen considerations I should keep in mind?
Definitely! If you’re baking for those with allergies, you can easily modify this recipe. Use dairy-free butter (like coconut oil) for a lactose-free alternative. For eggs, consider flax eggs (1 tablespoon ground flaxseed mixed with 2.5 tablespoons water per egg) for a vegan version. If you need to avoid gluten, simply substitute all-purpose flour with a 1:1 gluten-free blend, ensuring everyone can enjoy the cookie fun!
Can I customize the mix-ins for my chewy bars?
The more the merrier! Feel free to experiment by adding in different mix-ins. You can swap out half of the chocolate chips for nuts, butterscotch chips, or even a handful of dried fruit for a unique twist. Just aim to keep the total amount of mix-ins around 2.5 cups to maintain that perfect balance in texture and flavor.
Chewy Chocolate Chip Cookie Bars That Melt in Your Mouth
Ingredients
Equipment
Method
- Preheat your oven to 350°F (175°C) and grease a 9×13-inch baking pan.
- In a large mixing bowl, combine melted butter with light brown sugar and granulated sugar.
- Add eggs and vanilla extract to the mixture and blend well.
- In a separate bowl, whisk together flour, salt, and baking soda, then combine with wet ingredients.
- Fold in chocolate chips until evenly distributed.
- Spread the dough in the prepared baking pan and smooth the top.
- Bake for 20-25 minutes until the edges are golden and the center appears set.
- Cool in the pan for 10-15 minutes, then slice into squares.
Leave a Reply