
The sizzle of garlic in the pan transports me to my favorite cozy corner of the kitchen, where the tantalizing aroma draws everyone in like a warm hug. Today, I’m excited to share my Cheesy Garlic Chicken Wraps—a recipe that’s not just about satisfying your hunger, but about creating a delightful experience for both you and your family. These wraps are a wonderful combination of juicy chicken, rich cheese, and aromatic garlic, all cradled in a soft tortilla that you can customize to suit your taste. With a quick prep time, they’re a fantastic solution for busy weeknight dinners or casual lunches that feel special. Plus, the beauty of these wraps lies in their adaptability; whether you prefer a little kick from pepper jack cheese or a fresh twist with added veggies, the options are endless! Are you ready to wrap up something delicious? Let’s dive in!
What Makes These Wraps So Irresistible?
Customization, at its finest: You can easily tweak these wraps to fit your cravings! Quick and easy: Prepare a delicious meal in no time, making it perfect for busy weeknights. Family favorite: Their cheesy goodness appeals to everyone—kids and adults alike. Comfort food: Indulge in a satisfying blend of flavors that feels like a warm hug. Flavors galore: From mozzarella to pepper jack, every bite is a surprise. For even more delicious ideas, check out our Garlic Chicken Wraps and enhance your meals!
Cheesy Garlic Chicken Wrap Ingredients
• Perfect for customizing your wraps!
For the Filling
• Chicken – Provides protein and substance; use rotisserie chicken for a quick option.
• Garlic – Adds aromatic and bold flavor; fresh minced garlic is preferred for the best results.
• Cheese – Essential for richness and meltiness; mozzarella for classic flavor or pepper jack for heat.
For the Wrap
• Tortillas – Serves as the wrap; substitute with gluten-free or whole wheat tortillas if needed.
• Butter – Used for toasting the wraps, yielding a crispy texture.
For the Garnish
• Parsley (optional) – Adds freshness and color for a beautiful presentation.
Step‑by‑Step Instructions for Cheesy Garlic Chicken Wraps
Step 1: Prepare the Chicken
Start by cooking the chicken, seasoned with salt and pepper, using your preferred method—bake, grill, or sauté—until it’s fully cooked and reaches an internal temperature of 165°F, about 15–20 minutes. Once done, let it cool slightly before dicing it into small, bite-sized pieces that will fit perfectly in your wraps.
Step 2: Sauté the Garlic
In a medium pan, heat 1 tablespoon of olive oil over medium heat. Add minced garlic and sauté for 30 seconds to 1 minute, stirring often until it turns golden and fragrant. This aromatic step will lay a flavorful foundation for your cheesy garlic chicken wraps, filling your kitchen with irresistible scents.
Step 3: Combine Chicken and Garlic
Toss the diced cooked chicken into the pan with the sautéed garlic, stirring well to coat the chicken in the garlicky oil. Cook for an additional 2 minutes, allowing the chicken to absorb all those delicious flavors. This mixture should be hot and fragrant, ready to embrace the gooey cheese.
Step 4: Melt the Cheese
Remove the pan from the heat and sprinkle in 1 to 1.5 cups of your chosen cheese—mozzarella for classic richness or pepper jack for a spicy kick. Stir until the cheese begins to melt and combines with the chicken, creating a gooey, irresistible filling for your wraps.
Step 5: Assemble the Wraps
Place a tortilla flat on a clean surface and spoon a generous portion of the cheesy chicken mixture into the center. Fold the sides inward, then tightly roll the tortilla from the bottom up like a burrito, ensuring the filling is securely wrapped. This step is crucial to keep your Cheesy Garlic Chicken Wraps intact during cooking.
Step 6: Toast the Wraps
In a skillet, melt 1 tablespoon of butter over medium heat. Once melted, place the wraps seam-side down in the skillet, pressing gently to seal them. Cook for 2-3 minutes on each side until golden brown and crispy, forming a delicious crust that enhances the overall texture of your Cheesy Garlic Chicken Wraps.
Step 7: Rest and Serve
After toasting, carefully remove the wraps from the skillet and let them rest for 1-2 minutes. This allows the cheese to regain its melty goodness. If desired, slice the wraps in half and garnish with fresh parsley for an inviting presentation. Your Cheesy Garlic Chicken Wraps are now ready to be enjoyed!
Make Ahead Options
These Cheesy Garlic Chicken Wraps are perfect for meal prep enthusiasts looking to save time during busy weeknights! You can prepare the cheesy chicken filling up to 3 days in advance. Simply cook and combine the chicken with garlic and cheese, then cool slightly before transferring it to an airtight container in the refrigerator. To keep the wraps fresh, assemble them right before cooking or store unwrapped tortillas separately. When you’re ready to enjoy your meal, simply fill the tortillas with the prepared mixture, toast them in a skillet, and savor the same delicious flavors without the rush. Enjoy restaurant-quality wraps in minimal time!
Tips for the Best Cheesy Garlic Chicken Wraps
- Cook Chicken Properly: Always ensure the chicken is fully cooked, seasoned well, and reaches an internal temperature of 165°F for the best flavor and safety.
- Don’t Overstuff: Avoid overloading the wraps; this prevents them from bursting while cooking and keeps each bite balanced and enjoyable.
- Garlic Lovers’ Trick: For a richer garlic flavor, brush the tortilla with garlic butter before filling and toasting, enhancing the taste of your cheesy garlic chicken wraps.
- Maintain Crispiness: When reheating leftovers, use a skillet or toaster oven instead of a microwave, as this preserves the wraps’ delightful crunch.
What to Serve with Cheesy Garlic Chicken Wraps
Delicious wraps deserve equally delightful side dishes that complement those savory flavors and textures.
-
Crispy Sweet Potato Fries: They offer a sweet contrast to the savory wraps, and their crunchy exterior pairs perfectly with the gooey filling. Serve with a tangy dip to balance the flavors.
-
Fresh Garden Salad: A mix of crisp greens, cherry tomatoes, and cucumbers adds a refreshing crunch, enhancing the meal’s overall appeal while balancing the richness of the wraps.
-
Creamy Coleslaw: With its tangy dressing and crunchy texture, coleslaw provides a delightful counterpoint to the warm, cheesy goodness of the wraps. Perfect for adding a bit of zest!
-
Roasted Veggies: Choose your favorite seasonal vegetables to roast with olive oil and herbs. Their caramelized sweetness brings depth to the meal and a colorful plate.
-
Tomato Soup: This classic pairing offers a comforting dunking option for your wraps, blending rich tomato flavors with a creamy texture that feels indulgent.
-
Garlic Breadsticks: For garlic lovers, these perfectly toasted, buttery sticks can further satisfy cravings. They are an ideal companion for every cheesy bite!
-
Sparkling Lemonade: This refreshing drink offers a zesty lift that complements the wraps beautifully and keeps the meal light and vibrant.
-
Fruit Salad: A bowl of mixed fruits adds a sweet, healthy element that contrasts nicely with the savory wraps, bringing a burst of color and freshness to the table.
Storage Tips for Cheesy Garlic Chicken Wraps
Fridge: Store leftover wraps in an airtight container for up to 3 days. This helps maintain their freshness and flavor.
Freezer: For longer storage, freeze the wraps wrapped in foil or parchment paper for up to 2 months. Thaw overnight in the fridge before reheating.
Reheating: To enjoy leftovers, reheat in a skillet over medium heat for about 3-4 minutes per side until crispy. Avoid the microwave to keep the texture of the cheesy garlic chicken wraps intact.
Cheesy Garlic Chicken Wrap Variations
Feel free to unleash your culinary creativity with these delicious twists that will make your wraps even more delightful!
-
Cheese Swap: Substitute mozzarella with gouda or sharp cheddar for a unique flavor profile that adds richness and depth.
-
Spicy Kick: Add sliced jalapeños or switch to pepper jack cheese to elevate the heat level, giving your wraps a fun, zesty twist.
-
Veggie Lover’s Delight: Incorporate fresh spinach, sautéed onions, or diced bell peppers to bring a colorful crunch and added nutrition.
-
Ground Chicken: Replace diced chicken with cooked ground chicken for a different texture that still absorbs all that delicious garlicky flavor.
-
Rotisserie Short-Cut: Use pre-cooked rotisserie chicken to shave off cooking time while still delivering that homemade feel everyone loves.
-
Extra Crunch: Add crushed tortilla chips into the filling for a delightful burst of texture that contrasts beautifully with the gooey cheese.
-
Herbed Twist: Mix in fresh herbs like basil or cilantro to brighten the flavors and add an aromatic touch that enhances every bite.
-
Gluten-Free Option: Swap traditional tortillas for gluten-free or whole grain tortillas, catering to dietary needs without sacrificing taste.
Discover more ways to enhance your meals with our delicious Garlic Chicken Wraps and make your kitchen adventures even more enjoyable!
Cheesy Garlic Chicken Wraps Recipe FAQs
How do I choose the right chicken for my wraps?
Absolutely! You can use any cooked chicken you prefer, such as grilled, baked, or even rotisserie chicken for convenience. When selecting fresh chicken, look for breasts or thighs that are firm and slightly glossy with no dark spots. Ensure the internal temperature reaches 165°F for safety when cooking.
What’s the best way to store leftovers?
Store any leftover wraps in an airtight container in the fridge for up to 3 days. This method helps maintain their flavor and freshness. If you’re looking to keep them longer, wrap them individually in foil or parchment paper and freeze for up to 2 months. Just remember to let them thaw in the fridge overnight before reheating.
Can I freeze these wraps? How?
Yes, you absolutely can! To freeze your Cheesy Garlic Chicken Wraps, allow them to cool completely first. Wrap each wrap tightly in foil or plastic wrap, then place them in a freezer-safe bag. They will keep well for up to 2 months. When you’re ready to enjoy, simply thaw overnight in the fridge, then reheat in a skillet over medium heat for about 3-4 minutes per side until crispy.
What if my cheese doesn’t melt properly?
If your cheese isn’t melting well, it’s likely due to the type you’re using or the cooking temperature. For the best results, stick with great melting options like mozzarella or gouda. Ensure you’re not overcooking the mixture during assembly; remove from heat just as the cheese begins to soften to retain that ooey-gooey goodness.
Are there any dietary considerations I should keep in mind?
Definitely! When making Cheesy Garlic Chicken Wraps, consider any allergies or dietary restrictions. For those with gluten sensitivities, simply swap regular tortillas for gluten-free options. Also, you can tailor the fillings to avoid any allergens, using different cheeses or avoiding certain ingredients altogether. Customizing wraps allows everyone to enjoy!
Any tips for making these wraps extra flavorful?
The more the merrier! To amp up the flavor, you can brush your tortillas with garlic-infused olive oil or melted garlic butter before filling. Feel free to toss in some sautéed vegetables for extra nutrition and flavor, such as spinach, onions, or bell peppers. Don’t be afraid to experiment with different cheeses and spices, as every tweak can create a delightful new version of your wraps!

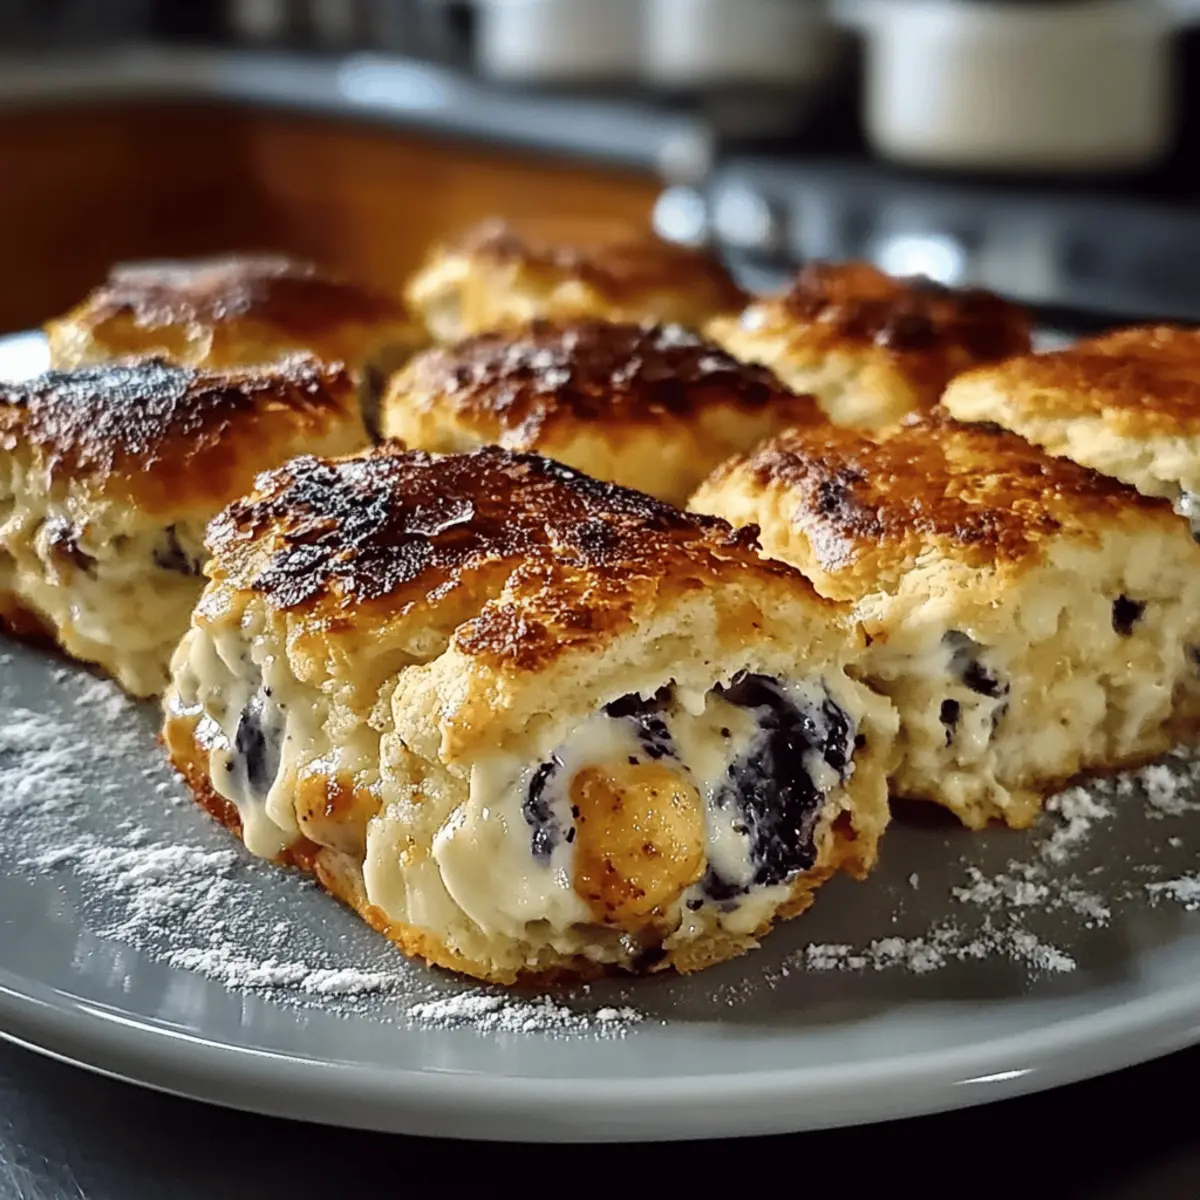
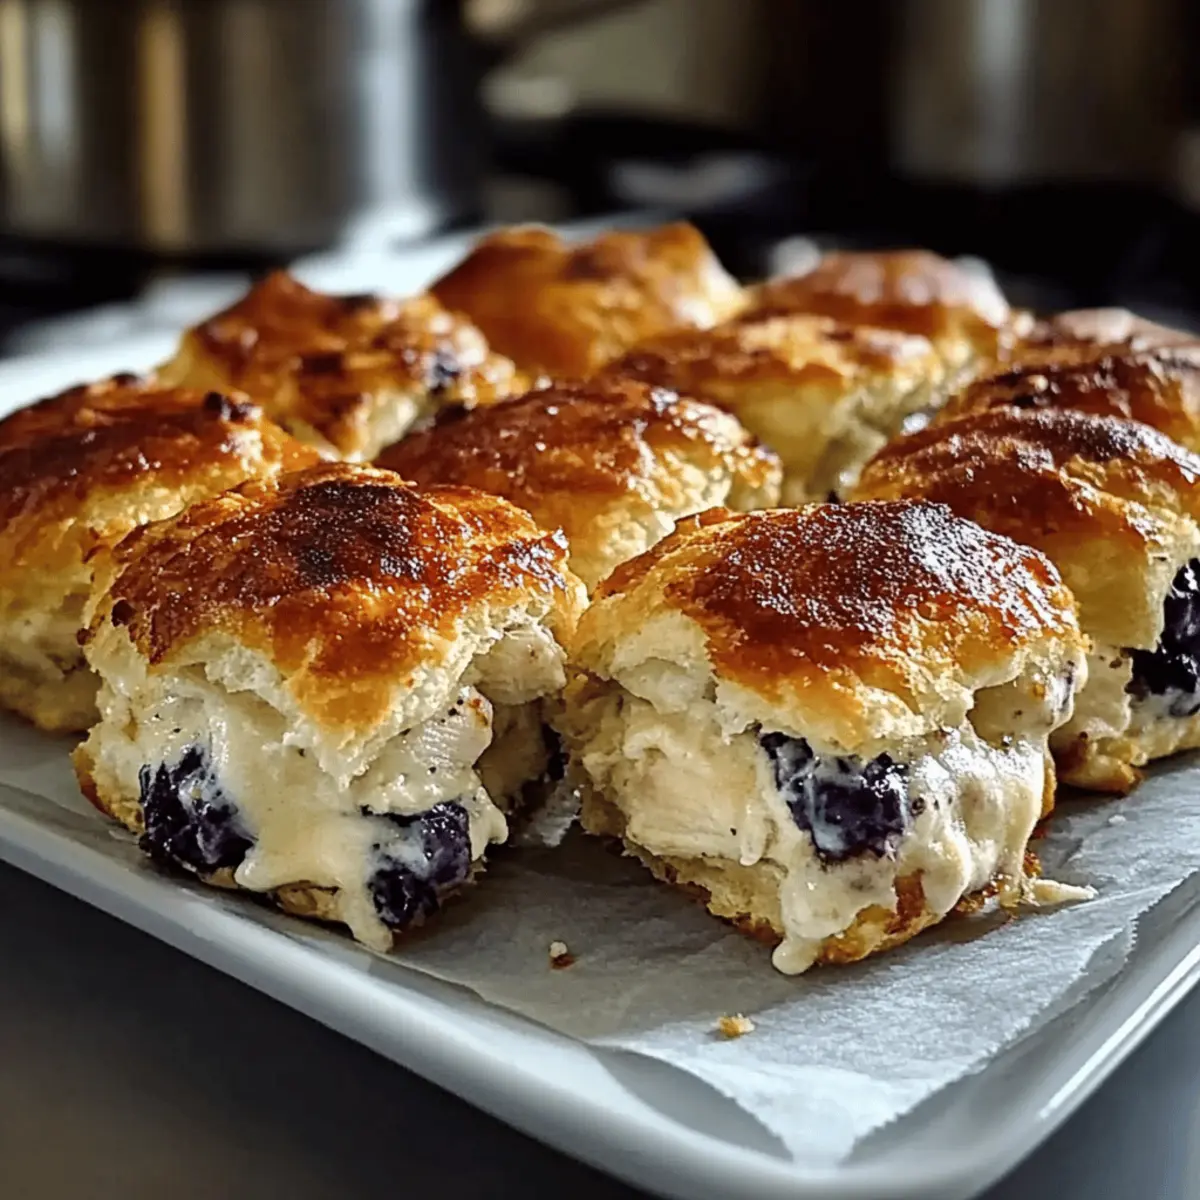
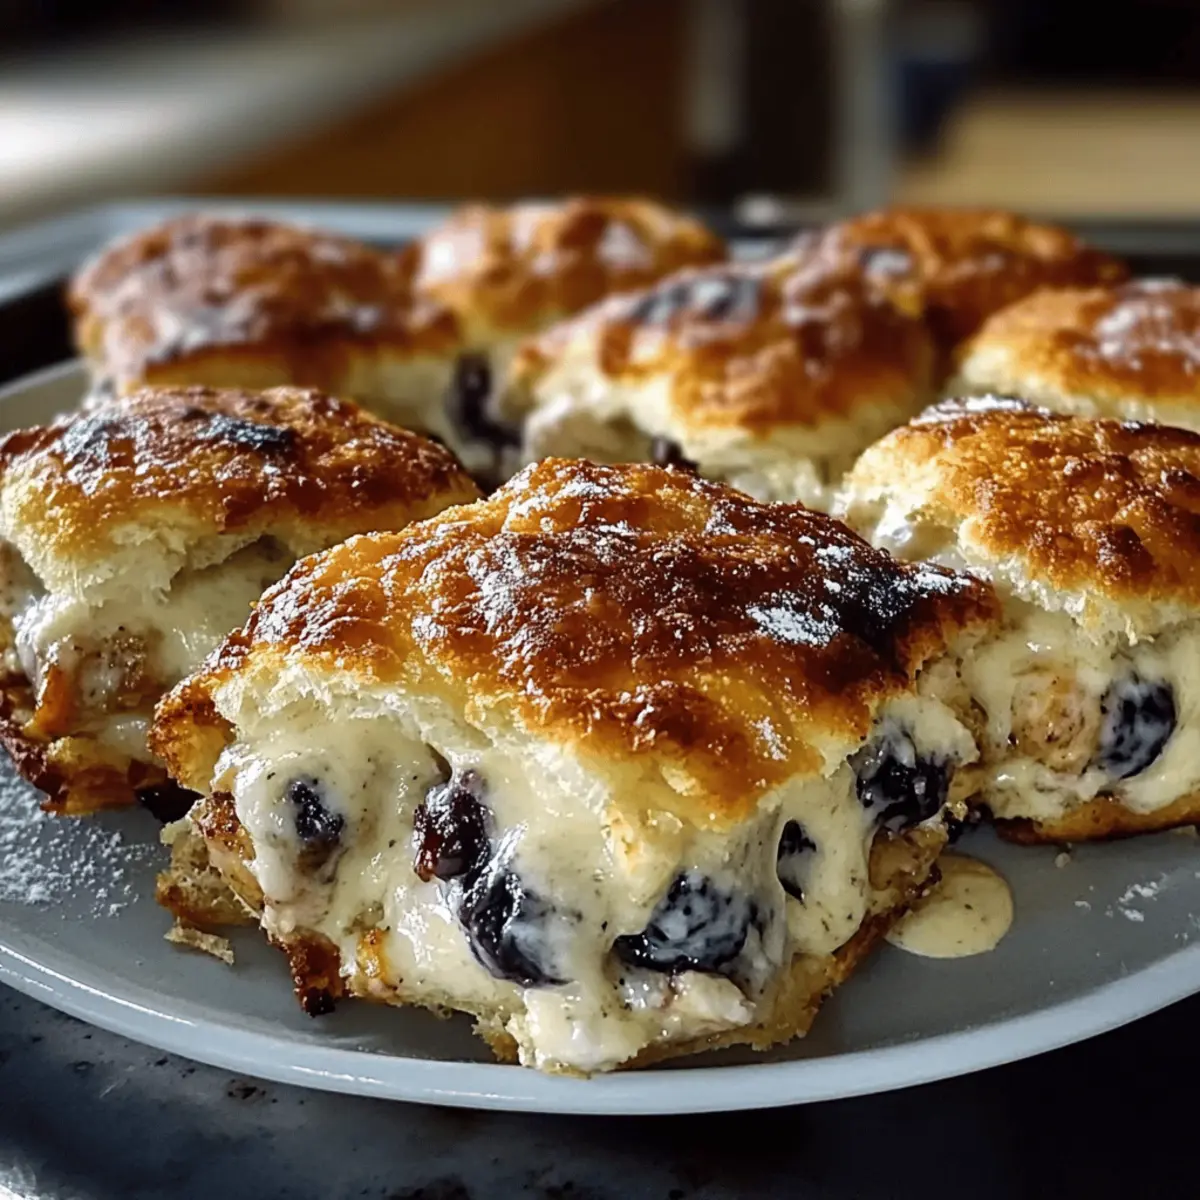
Irresistibly Fluffy Blueberry Biscuits You'll Crave
Ingredients
Equipment
Method
- Preheat the oven to 425°F (220°C).
- In a mixing bowl, combine flour, baking powder, salt, and sugar.
- Cut in cold butter until mixture resembles coarse crumbs.
- Stir in milk and fold in blueberries gently.
- Turn dough onto a floured surface and roll out to 1 inch thick.
- Cut into circles and place on a baking sheet.
- Bake in the preheated oven for 15-20 minutes until golden brown.
- Remove from oven and let cool for a few minutes before serving.
Leave a Reply