
“What’s for dinner?” It’s a question that can quickly spiral into a mini crisis, especially after a long day. But the answer doesn’t have to be fast food! Enter my Healthy Low-Carb Cheeseburger Bowls—your new go-to for a satisfying meal that’s both delicious and guilt-free. In just 20 minutes, you can whip up a bowl that satisfies all your cheeseburger cravings, while keeping your health goals in check. These bowls are packed with high protein and only have 11.3 grams of net carbs, making them perfect for meal prep or a quick weeknight dinner. Plus, the best part? Customizing your cheeseburger bowl is easy—swap out ingredients to match your taste! Ready to transform dinner time into a cheerful occasion full of flavor? Let’s dive into this delightful recipe and take back your evenings!
Why You’ll Love Cheeseburger Bowls
Satisfying, Nutritious Comfort: These bowls offer the indulgence of a cheeseburger without the guilt, perfect for meal prep or a quick dinner!
High Protein, Low Carb: Each serving packs a protein punch while keeping net carbs under control, catering to your health goals effortlessly.
Customizable Options: Whether you prefer ground turkey or plant-based protein, you can easily adapt ingredients to suit your taste.
Quick and Easy: Ready in just 20 minutes, these bowls save you time without sacrificing flavor, making them an ideal weeknight solution.
Crowd-Pleasing Appeal: Impress family and friends with this fun, flavorful dish that everyone can enjoy, especially with toppings tailored to their liking!
Feel free to explore more options like our Southern Style Low Carb or Vegetarian Low Carb casseroles for additional inspirations!
Cheeseburger Bowls Ingredients
For the Protein
- Lean Ground Beef (1 lb) – A classic choice for a hearty protein; ground turkey or chicken can be used for lighter options.
- Cooked Bacon (1/2 cup, crumbled) – Adds savory richness; swap with turkey bacon or plant-based bacon for a healthier twist.
For the Seasoning
- Garlic Powder (1 tsp) – Enhances flavor depth; feel free to substitute with fresh minced garlic.
- Onion Powder (1 tsp) – Provides aromatic seasoning; fresh onions can also give a delightful flavor boost.
- Italian Seasoning (1 tsp) – Elevates taste; use dried oregano or basil if needed.
- Salt and Black Pepper – Essential seasoning to taste, ensuring each bite is perfectly seasoned!
- Smoked Paprika (2 tsp) – Offers a delightful smoky flavor; regular paprika is a fine alternative.
For the Sauce
- Mayonnaise (1/4 cup) – Forms a creamy base for the sauce; Greek yogurt can offer a protein-packed substitute.
- Ketchup (2 tbsp) – Adds a hint of sweetness; opt for sugar-free to keep it low-carb!
- Yellow Mustard (1 tbsp) – Provides a zesty kick; professional chefs often switch to Dijon for a gourmet touch.
- Pickle Relish (1 tbsp) – For that classic cheeseburger sweetness; finely chopped dill pickles can be blended in instead.
For the Fresh Components
- Chopped Lettuce (4 cups) – The crunchy base of your bowl; mixed greens or spinach can mix things up.
- Cherry Tomatoes (2 cups, halved) – Brings a juicy freshness; swap with grape or Roma tomatoes if desired.
- Red Onion (1/2, sliced) – Adds brightness and crunch; sweet or pickled onions make great alternatives.
- Pickles (1/2 cup, sliced) – For a tangy burst of flavor; fresh cucumbers can also be substituted.
- Pickled Jalapeño Slices (1/4 cup) – Gives a spicy kick; omit if heat isn’t your thing.
- Cheddar Cheese (1 cup, shredded) – For creaminess; feel free to use Monterrey Jack or dairy-free options!
These Cheeseburger Bowls Ingredients are perfect for crafting a delicious meal that fits seamlessly into your healthy eating plan. Enjoy each scrumptious bite!
Step‑by‑Step Instructions for Cheeseburger Bowls
Step 1: Brown the Beef
In a large skillet, heat over medium-high heat. Add 1 pound of lean ground beef, followed by 1 teaspoon each of garlic powder, onion powder, and Italian seasoning. Season generously with salt and black pepper. Cook for 7-10 minutes, breaking up the beef with a spatula until it’s browned and no longer pink. Drain any excess fat, then set aside to allow the flavors to meld.
Step 2: Prepare the Sauce
In a small mixing bowl, combine 1/4 cup of mayonnaise, 2 tablespoons of ketchup, 1 tablespoon of yellow mustard, and 1 tablespoon of pickle relish. Whisk the ingredients together until the sauce is smooth and creamy, ensuring a consistent flavor throughout. This versatile sauce adds a delightful zing to your cheeseburger bowls, perfectly complementing the seasoned beef.
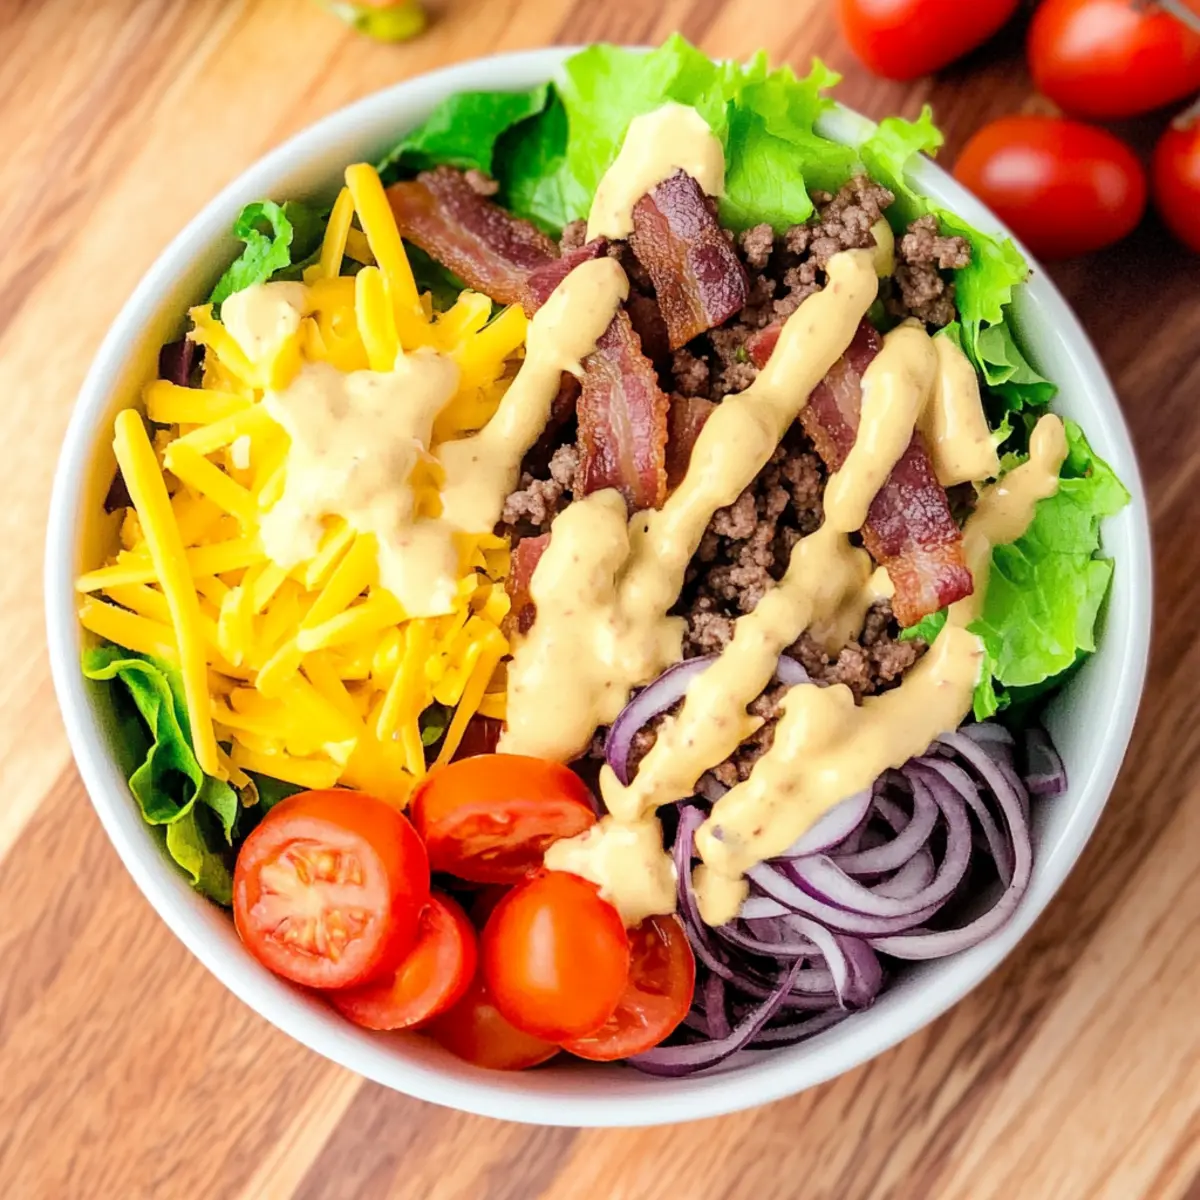
Step 3: Assemble the Bowls
Start building your cheeseburger bowls by placing 4 cups of chopped lettuce as the base in each bowl. Layer the cooked ground beef evenly over the lettuce, followed by 2 cups of halved cherry tomatoes for added freshness. Sprinkle 1 cup of shredded cheddar cheese on top, then add sliced red onion, pickles, and pickled jalapeños for extra crunch and flavor.
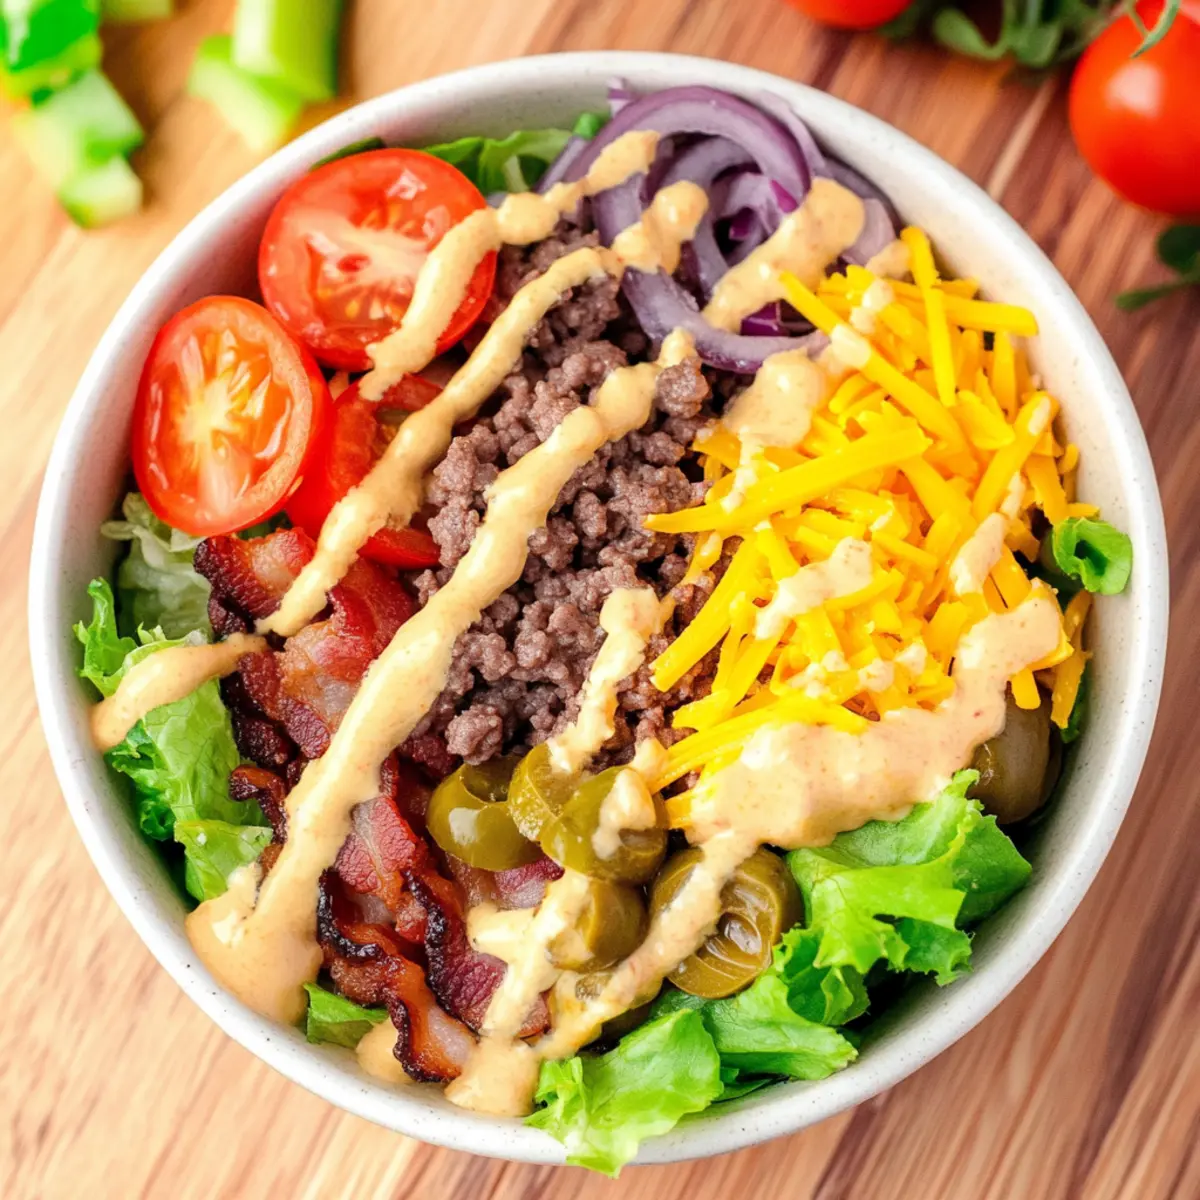
Step 4: Finish and Serve
Once the bowls are layered, evenly distribute the crumbled cooked bacon over each bowl. Drizzle the prepared sauce generously on top of all ingredients to enhance their flavors. Serve your delicious cheeseburger bowls immediately, allowing everyone to mix and enjoy the robust tastes of this healthy, low-carb meal tailored to satisfy your cravings.

Expert Tips for Cheeseburger Bowls
-
Ingredient Storage: Store ingredients separately in airtight containers for up to 3 days to keep veggies crisp and fresh, avoiding any sogginess.
-
Customization is Key: Feel free to swap proteins to suit your dietary preferences. Ground turkey or plant-based alternatives keep it delicious and healthy!
-
Sauce Perfection: Always mix the sauce just before serving to maintain its creamy texture and vibrant flavors; this way, the cheeseburger bowls stay fresh and delightful.
-
Heat Management: If you enjoy spice, adjust jalapeño quantities according to taste. Omit them altogether if you prefer a milder dish.
-
Meal Prep Friendly: Prepare components ahead of time for meal prep; cook the beef and make the sauce in advance, making weeknight dinners a breeze!
Cheeseburger Bowls Variations
Explore delightful twists on cheeseburger bowls that cater to your unique palate and dietary preferences!
- Turkey or Chicken: Swap lean ground beef for turkey or chicken for a lighter protein source, perfect for those watching their fat intake.
- Plant-Based Delight: Use crumbled tofu or tempeh in place of meat for a delicious vegan option that still satisfies those cheeseburger cravings.
- Cheese Options: Experiment with different cheeses like Monterrey Jack or go dairy-free with a cashew-based cheese for a creamy twist.
- Spice Level: Elevate the heat by adding fresh diced jalapeños or hot sauce, or scale it back for kids by omitting spicy elements entirely.
- Fresh Greens: Use a variety of greens like spinach, kale, or arugula instead of lettuce to add more nutrients and flavors to your bowl.
- Creamy Substitutes: Replace mayonnaise with creamy avocado for a healthier fat option that complements the cheeseburger theme beautifully.
- Sauce Variations: Create a zesty twist by mixing in sriracha or garlic aioli into your sauce for an extra flavor kick.
- Crunch Factor: Add roasted chickpeas or crispy onions as a toppings for an exciting texture contrast that delights with every bite.
Feel free to mix and match these ideas or combine them with some of our other healthy recipes like Southern Style Low Carb or Vegetarian Low Carb. Enjoy crafting your personalized cheeseburger bowl experience!
How to Store and Freeze Cheeseburger Bowls
Fridge: Store assembled bowls in an airtight container for up to 3 days. Keep the sauce separate until ready to serve to maintain freshness.
Freezer: For longer storage, freeze the cooked beef mixture in a freezer-safe container for up to 3 months. Thaw in the refrigerator overnight prior to reheating.
Reheating: Reheat the beef in a skillet or microwave until warmed through, then assemble the bowls with fresh veggies and sauce for the best texture.
Ingredient Storage: Keep prepped ingredients like chopped veggies and cheese in separate airtight containers to ensure they stay fresh for up to 3 days.
What to Serve with Healthy Low-Carb Cheeseburger Bowls
Create a delightful dining experience that is both satisfying and nutritious with these perfect pairings.
- Steamed Broccoli: A vibrant side that adds crunch and nutrients, balancing the rich flavors of the bowl beautifully.
- Garlicky Green Beans: The tender crunch and garlicky essence complement the savory beef, making every bite a little more exhilarating.
Feel free to toss in some toasted almonds for texture contrast—it’s a simple addition that elevates the entire dish.
-
Zucchini Noodles: Swap traditional pasta for these spiraled veggies, giving a fresh and low-carb twist alongside the hearty cheeseburger bowls.
-
Cauliflower Rice: This fluffy alternative absorbs flavors well, offering a light base that harmonizes effortlessly with the rich toppings in your bowl.
-
Crispy Sweet Potato Fries: Their natural sweetness is a fabulous contrast to the savory components, creating a balanced and satisfying meal with each bite.
-
Iced Tea or Lemonade: A refreshing drink that perfectly complements the rich flavors of the dish, offering a refreshing contrast and keeping the meal light and fun!
-
Chocolate Avocado Mousse: End on a sweet note with this creamy dessert. It’s indulgent yet healthy—a fitting finale after a satisfying cheeseburger bowl.
Let your meal shine by combining these delicious options, transforming a simple dinner into a memorable feast!
Make Ahead Options
These Healthy Low-Carb Cheeseburger Bowls are perfect for busy home cooks looking to save time during the week! You can prepare the seasoned ground beef up to 3 days in advance; simply cook and store it in an airtight container in the refrigerator. Additionally, chop the lettuce, tomatoes, and any other fresh veggies a day ahead to keep them crisp. When you’re ready to serve, reheat the beef, layer everything in bowls, and drizzle with your pre-mixed sauce for a quick and delicious meal. Keeping the components separate until serving helps maintain their quality—ensuring that your cheeseburger bowls remain just as delightful as when freshly made!
Cheeseburger Bowls Recipe FAQs
How do I choose the right ripeness of tomatoes for my cheeseburger bowls?
Absolutely! When selecting cherry tomatoes, look for ones that are firm and have a shiny skin with no dark spots. A little sweetness goes a long way, so smell the tomatoes too; there should be a slight fruity aroma. If they’re overly soft or have wrinkled skin, those are signs that they may be past their prime.
What is the best way to store leftover cheeseburger bowls?
Very! Store your assembled cheeseburger bowls in an airtight container in the refrigerator for up to 3 days. However, to keep everything crisp, I recommend keeping the sauce separate until you’re ready to enjoy your leftovers. This will help the veggies stay fresh and avoid becoming soggy.
Can I freeze cheeseburger bowls?
Certainly! To freeze your cheeseburger bowls, first freeze the cooked ground beef mixture in an airtight, freezer-safe container for up to 3 months. Thaw it overnight in the refrigerator before reheating. Once warmed, assemble the bowls with fresh veggies and sauce to maintain the best texture. This is a great way to keep that homemade taste while enjoying a quick dinner on busy nights.
What if my ground beef is too greasy when I cook it?
Certainly! If you notice excess fat after browning the beef, just drain it off carefully. If it’s very greasy, you could also use a paper towel to soak up some of the fat. The key is to cook over medium-high heat to ensure it gets browned without leaving too much oil. This way, you’ll still have that rich flavor without the extra grease in your dish.
Are cheeseburger bowls suitable for those with dietary restrictions?
Absolutely! To make them gluten-free, use certified gluten-free sauces and check that your mayonnaise is gluten-free as well. For those avoiding carbs, the recipe is already tailored, but if you have specific allergies, just replace any ingredients based on your needs—like using turkey bacon for a no-pork option or swapping out dairy cheese for a non-dairy alternative. Customizing to suit dietary preferences makes this dish even more delightful!
How long can I keep the prepped ingredients for cheeseburger bowls in the fridge?
Absolutely, you can store prepped ingredients like chopped veggies, shredded cheese, and cooked bacon in separate airtight containers in the refrigerator for up to 3 days. This way, you can whip up a fresh meal in no time, ensuring everything stays crisp and flavorful for when you’re ready to enjoy your cheeseburger bowls!
Delectable Cheeseburger Bowls That Satisfy Your Cravings
Ingredients
Equipment
Method
- In a large skillet, heat over medium-high heat. Add the ground beef, garlic powder, onion powder, Italian seasoning, and season with salt and black pepper. Cook for 7-10 minutes until browned.
- In a small mixing bowl, combine mayonnaise, ketchup, yellow mustard, and pickle relish. Whisk until the sauce is smooth and creamy.
- Assemble the bowls by placing chopped lettuce as the base. Layer the cooked beef, cherry tomatoes, shredded cheddar, red onion, pickles, and jalapeños on top.
- Distribute the crumbled bacon over the bowls and drizzle the sauce on top. Serve immediately.
Leave a Reply