
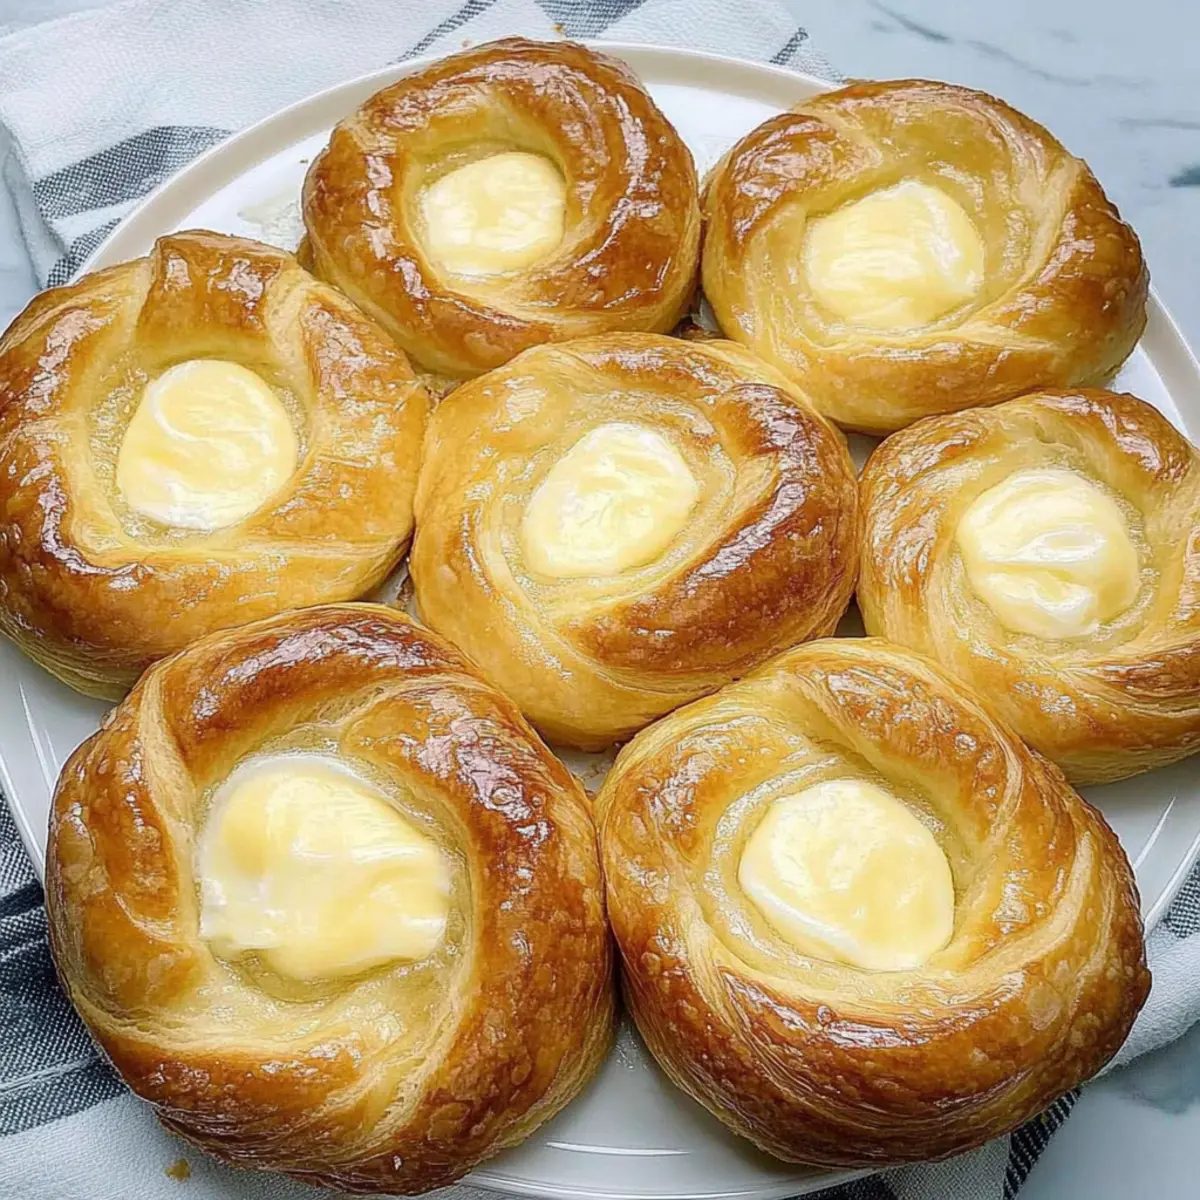
As I pulled the warm, fragrant cheese Danishes from the oven, a wave of nostalgia washed over me. Growing up, my weekends were spent in a kitchen filled with the sound of laughter and the enticing aroma of freshly baked pastries. This Heavenly Cheese Danish recipe brings that same joy to my home, combining an enriched dough with a creamy cream cheese filling that melts in your mouth. With quick prep time and the ability to impress family or friends at brunch, these flaky delights are sure to become a staple in your routine. Are you ready to elevate your breakfast game with these irresistible pastries?
Why You’ll Crave These Cheese Danishes
Irresistible Aroma: The moment you whip these up, your kitchen will be filled with a heavenly scent that’s hard to resist.
Flaky Perfection: Each bite offers a delightful texture, thanks to the enriched dough that’s both tender and crisp.
Decadent Filling: The creamy cream cheese filling makes these pastries rich and satisfying, a breakfast indulgence like no other.
Versatile Delight: Not just for breakfast—these Cheese Danishes make an incredible brunch centerpiece or a sweet treat any time of day!
Quick Prep Time: With a little advance planning, you can easily whip these up without spending hours in the kitchen. For more sweet inspirations, check out Pumpkin Cream Cheese or Lemon Cream Cheese recipes!
Family Favorite: They’re sure to impress your guests, creating happy moments at the table that you won’t forget.
Cheese Danish Ingredients
For the Dough
• Active Dry Yeast – This leavening agent ensures a delightful rise, so make sure it’s fresh!
• Warm Water – Activates the yeast; aim for a temperature between 110°F to 115°F for best results.
• All-Purpose Flour – Provides structure; feel free to substitute with bread flour for extra chewiness.
• Sugar – Slightly sweetens the dough and enhances browning; you can reduce it for a less sweet pastry.
• Salt – A vital flavor balancer that strengthens the dough.
• Cold Butter (cubed) – Adds richness and flakiness; unsalted butter is best for controlling salt content.
• 2% Milk – Hydrates the dough; whole milk can make it even richer and creamier.
• Egg Yolks (room temperature) – Contributes to richness and emulsifies the dough; for a vegan option, use flaxseed meal mixed with water.
• Ground Cinnamon – An optional spice that adds warm flavor notes for extra comfort.
For the Filling
• Cream Cheese (softened) – The star of the show, lending creaminess and a tangy flavor; full-fat gives the best texture.
• Additional Sugar (for filling) – Sweetens the cream cheese mixture; adjust to taste to suit your preference!
For the Topping
• Large Egg (for wash) – Creates a beautiful golden top; milk or plant-based options work well, too.
• Water (for wash) – Thins the egg for smooth application.
• Maple Syrup – Glazes the finished Danish, adding a lovely shine and hint of sweetness that elevates the whole pastry.
Delight in crafting Cheese Danishes that will not only comfort your taste buds but also create unforgettable moments around the table!
Step‑by‑Step Instructions for Heavenly Cheese Danishes
Step 1: Prepare the Dough
Start by dissolving the active dry yeast in warm water heated between 110°F and 115°F, and let it sit until bubbly. In a mixing bowl, combine all-purpose flour, sugar, and salt, then cut in cold cubed butter until the mixture is crumbly. Carefully add in the milk, egg yolks, and the yeast mixture, mixing until a sticky dough forms. Cover the dough and refrigerate for 8 to 24 hours.
Step 2: Shape the Danish
After the dough has chilled, punch it down gently and divide it into four equal pieces. On a floured surface, roll each piece into a rectangle about 9×4 inches. Sprinkle ground cinnamon over each rectangle, then cut them into strips. Begin twisting and coiling each strip to form the Danish shapes, making sure to leave space between them on a baking sheet lined with parchment paper.
Step 3: Add Filling
Using your fingers, create an indentation in the center of each coiled dough to hold the filling. In a separate bowl, mix softened cream cheese with additional sugar until smooth. Scoop a generous amount of this cream cheese mixture into each indentation. Once all Danishes are filled, cover them with a kitchen towel and let them rise in a warm area for about 45 minutes, until they look puffy and nearly doubled in size.
Step 4: Bake
Preheat your oven to 350°F while the Danishes are rising to save time. Once they’re puffy, apply an egg wash made from a beaten large egg mixed with a splash of water, brushing it over the rolls for a golden finish. Bake the Cheese Danishes for 15 to 20 minutes, keeping an eye on them until they turn a lovely golden brown.
Step 5: Finish
Once done, remove the Heavenly Cheese Danishes from the oven and let them cool slightly on a wire rack. To add a delightful touch, brush the warm Danishes with maple syrup for a sweet glaze that enhances their flavor. Serve these delicious pastries warm, savoring each flaky bite filled with creamy goodness.
Make Ahead Options
These Heavenly Cheese Danishes are perfect for busy home cooks looking to save time without sacrificing flavor! You can prepare the dough up to 24 hours in advance by refrigerating it after mixing and kneading. Alternatively, you can fill and shape the Danishes and store them covered in the fridge for up to 3 days before baking. To prevent the dough from browning prematurely, make sure to cover it tightly with plastic wrap. When you’re ready to bake, simply let the filled Danishes rise at room temperature for about 45 minutes, then brush with the egg wash and bake as directed. They’ll taste just as delicious as if you made them fresh every time!
Cheese Danishes Variations & Substitutions
Feel free to play with flavors and textures to make this recipe your own!
- Fruit-Infused: Add chopped fruits like blueberries or apricots to the cream cheese filling for a burst of natural sweetness. The fruity addition brings a delightful tang that pairs beautifully with the creaminess.
- Almond Substitution: Swap vanilla extract for almond extract in your filling for a nutty twist! This subtle flavor change can elevate the overall taste experience of your Danishes.
- Puff Pastry Shortcut: If you’re short on time, using store-bought puff pastry instead of homemade dough creates a flaky texture with less effort! Just roll it out and cut it into rectangles.
- Vegan Option: Replace cream cheese with a dairy-free alternative, and use flaxseed meal mixed with water instead of egg yolks. This way, everyone can enjoy these delicious pastries!
- Spicy Heat: For adventurous eaters, try adding a pinch of cinnamon or even a dash of cayenne pepper to the cream cheese filling! This kick adds a surprising element that contrasts perfectly with the sweetness.
- Cheese Varieties: Experiment with different cheeses like ricotta or mascarpone for a unique twist in the filling. Each cheese brings its own character and creaminess to the dish!
- Layer Flavors: Mix in some lemon or orange zest to your cream cheese filling for a refreshing citrus kick that brightens the overall flavor. It makes each bite feel like a sunny morning!
- Nutty Topping: Sprinkle chopped nuts like almonds or pistachios on top before baking for an added crunch. The nutty texture complements the softness of the Danish beautifully.
For more tasty ideas, why not check out my recipes for Sausage Cheese Potato or indulge in some delightful Pumpkin Cheesecake Cinnamon? The possibilities are endless, and they all bring joy to the table!
Expert Tips for Cheese Danishes
- Yeast Check: Always ensure your yeast is fresh and bubbly before mixing with warm water. This crucial step guarantees that your dough rises as expected.
- Softened Cream Cheese: Allow your cream cheese to come to room temperature for a smoother filling. If it’s too cold, it won’t blend well with the sugar.
- Watch the Bake: Keep an eye on the Danishes while baking to prevent over-browning. If they brown too quickly, cover them loosely with aluminum foil.
- Flour Dusting: Lightly flour your work surface when shaping the dough to prevent sticking. But don’t overdo it; too much flour can toughen the pastry.
- Warm Rising: For the best rise, let your shaped Danishes rest in a warm area while they proof. This helps achieve that fluffy texture we love in Cheese Danishes.
What to Serve with Heavenly Cheese Danish
Imagine a delightful spread that pairs beautifully with your freshly baked pastries, enhancing each bite’s flavor and experience.
- Fresh Fruit Salad: Bright, juicy fruits like strawberries and blueberries contrast nicely with the rich cheese filling, adding a refreshing touch.
- Savory Frittatas: The fluffy eggs in a frittata offer a savory balance to the sweetness of the Danish, creating a well-rounded brunch experience.
- Crispy Bacon: The salty crispness of bacon complements the sweetness of the Danishes, making each bite a perfect harmony of flavors.
- Coffee or Tea: A steaming cup of coffee or tea enhances the cozy experience, highlighting the indulgent textures of the cheese Danishes.
- Yogurt Parfait: Layered with granola and seasonal fruit, a yogurt parfait adds creaminess and crunch, perfect for a leisurely brunch.
- Chocolate Drizzle: Drizzling warm chocolate over the Danishes creates an extra indulgent treat that elevates them to dessert status.
- Maple Syrup Dipping Sauce: Go beyond the glaze; serve a small bowl of maple syrup for dipping to enhance those sweet, flaky bites.
- Flavored Mimosas: Light, bubbly drinks, infused with fresh fruit, add a festive flair perfect for celebrations or weekend brunches.
- Creamy Smoothies: Whip up a creamy smoothie packed with bananas and spinach for a deliciously nutritious addition that plays well with the Danishes.
- Cheese Board: Include a selection of soft cheeses that echoes the cream cheese filling, providing a delightful exploration of flavors alongside your Danishes.
Storage Tips for Cheese Danishes
- Fridge: Store cooled Cheese Danishes in an airtight container for up to 5 days. To enjoy them warm again, simply reheat in the oven for a few minutes or microwave for 15-20 seconds.
- Freezer: For longer storage, wrap each Danish individually in plastic wrap and place them in a freezer-safe bag. They can be frozen for up to 2 months.
- Thawing: When ready to enjoy, thaw the frozen Cheese Danishes in the fridge overnight. Reheat in the oven to recapture their flaky texture.
- Avoid Moisture: To preserve the quality, ensure they are completely cooled before wrapping. This prevents condensation that can make them soggy.
Heavenly Cheese Danish Recipe FAQs
How do I know if my yeast is fresh?
To ensure your yeast is fresh, dissolve it in warm water (between 110°F to 115°F) with a pinch of sugar. If you see bubbles and it starts to foam after about 5-10 minutes, your yeast is active and ready to use. If it doesn’t foam, it’s best to start again with new yeast.
How should I store leftover Cheese Danishes?
Once cooled, place leftover Cheese Danishes in an airtight container and store them in the refrigerator for up to 5 days. When you’re ready to enjoy them again, pop them in the oven for a few minutes to restore that fresh-baked warmth and flakiness.
Can I freeze Cheese Danishes?
Absolutely! For freezing, wrap each cooled Cheese Danish individually in plastic wrap and place them in a freezer-safe bag. They can be kept in the freezer for up to 2 months. To thaw, simply place them in the refrigerator overnight, then reheat them in the oven to enjoy that freshly baked texture again.
What should I do if my dough isn’t rising?
If your dough isn’t rising, first check the freshness of your yeast. If your yeast is fine and it’s still not rising, make sure your dough is in a warm area for rising, as drafts or cold temperatures can slow down the process. Consider moving it to a cozy spot in your kitchen or preheating the oven to a low setting and turning it off—place the dough inside to help it rise.
Are there any allergens in this recipe I should be aware of?
This recipe contains common allergens such as dairy (in the cream cheese), egg, and gluten (from the flour). If you need to make adjustments, look for lactose-free cream cheese and substitute eggs with a flaxseed meal alternative if going vegan. Always check your ingredients for any potential allergens as well!
Delicious Cheese Danishes You Can Make at Home Today
Ingredients
Equipment
Method
- Dissolve the active dry yeast in warm water and let sit until bubbly. Mix flour, sugar, and salt. Cut in cold butter until crumbly. Add milk, egg yolks, and yeast mixture to form a sticky dough. Refrigerate for 8 to 24 hours.
- After chilling, punch down the dough and divide into four pieces. Roll each into a 9x4 inch rectangle. Sprinkle ground cinnamon and cut into strips, twisting to form Danish shapes.
- Create an indentation in the center of each Danish and fill with cream cheese mixture. Let rise in a warm area for about 45 minutes.
- Preheat oven to 350°F. Brush with egg wash and bake for 15 to 20 minutes until golden brown.
- Remove from oven, cool slightly, and brush with maple syrup before serving.
Leave a Reply