
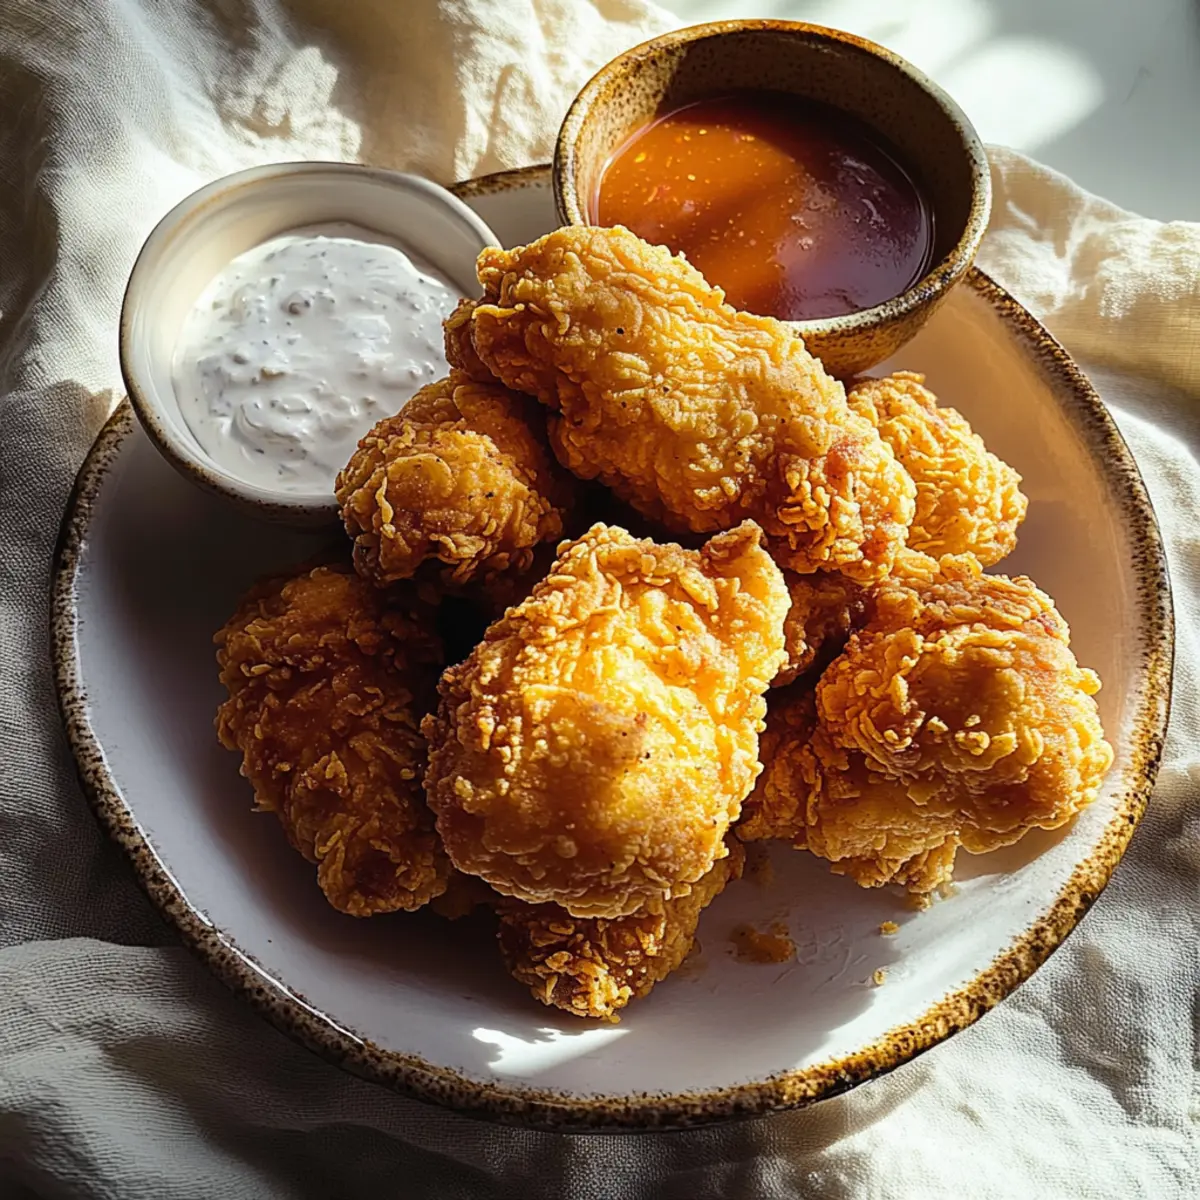
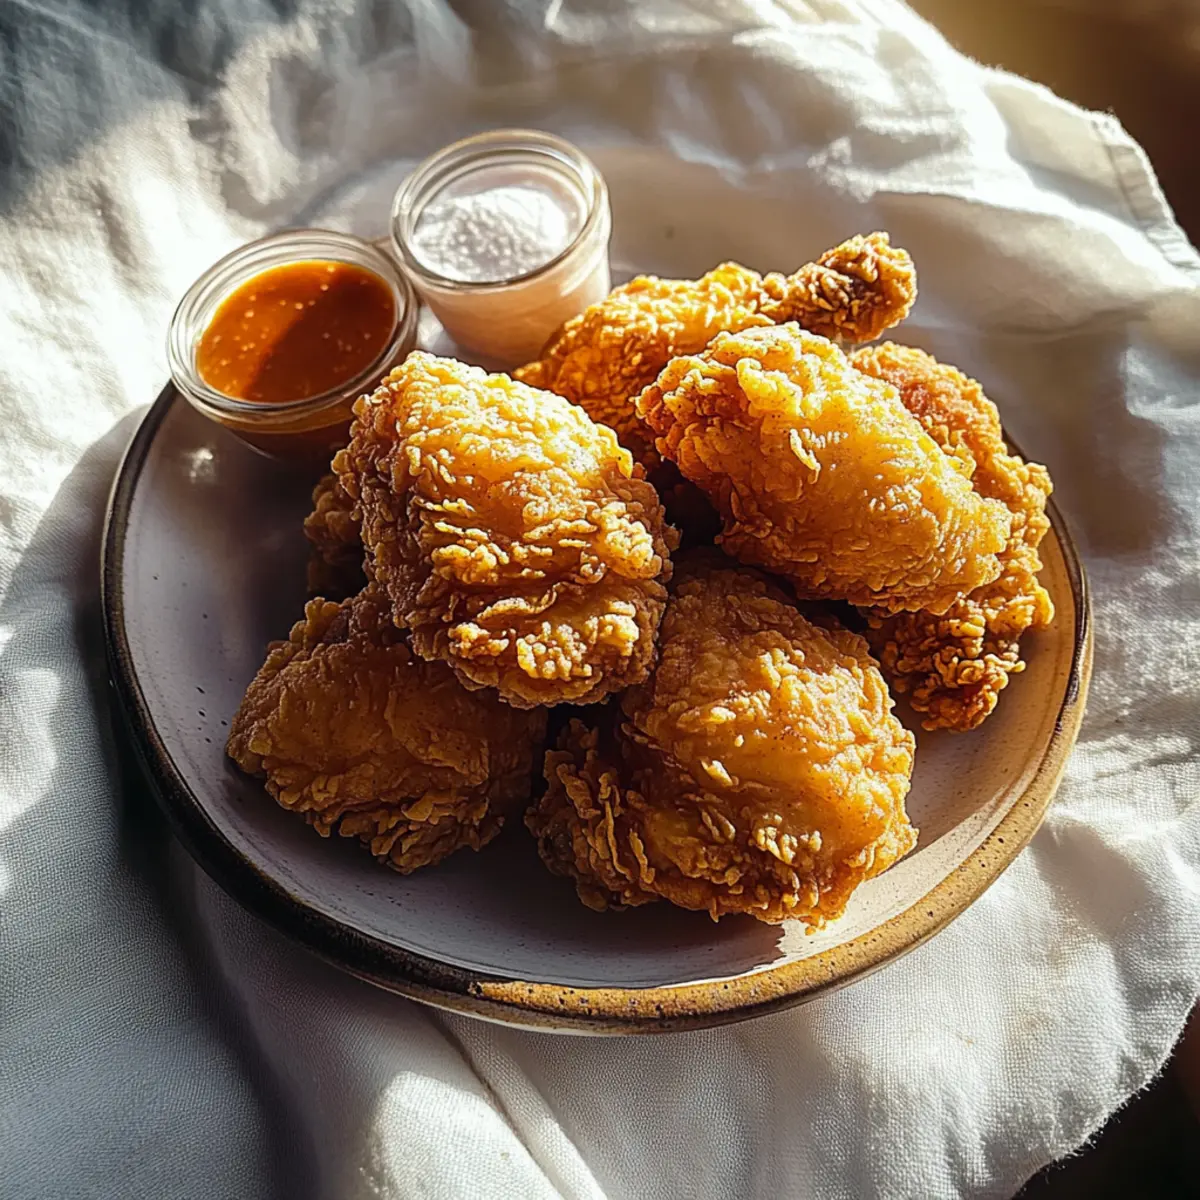
The satisfying sound of chicken sizzling in hot oil transports me straight to my Southern roots. This Buttermilk Fried Chicken recipe perfectly captures that nostalgia, with its golden crust giving way to tender, juicy meat. One of the best parts? It’s quick to prepare, making it an ideal choice for busy weeknights or casual gatherings with friends. Plus, I’ve included gluten-free options for those looking to enjoy this classic comfort food without compromise. Trust me, nothing beats the crispy exterior combined with the rich flavor of buttermilk. Are you ready to elevate your home cooking with a dish that’s sure to impress?
Why is Buttermilk Fried Chicken a Must-Try?
Irresistible Flavor: The buttermilk marinade infuses the chicken with a rich, tangy depth that will have your taste buds dancing.
Crispy Perfection: Achieving that perfect golden crust is simple, ensuring each bite delivers a satisfying crunch.
Customizable Options: Want a little heat? Add cayenne pepper or make it mild with chili powder—there’s a version for everyone!
Quick & Easy: This recipe is perfect for busy weekdays, allowing you to whip up comfort food in no time.
Versatile Dish: Serve it alongside traditional sides like coleslaw or biscuits, or turn it into a hearty sandwich with pickles and mayo. Why not try this with a delightful side of Coleslaw for that Southern flair?
Buttermilk Fried Chicken Ingredients
For the Marinade
- Buttermilk – Tenderizes the chicken and infuses rich flavor; if needed, substitute with 2 cups of milk + 2 tablespoons of lemon juice or vinegar.
For the Coating
- All-Purpose Flour – Forms that crispy coating; for a gluten-free option, use a gluten-free flour blend.
- Cayenne Pepper – Adds heat and flavor complexity; feel free to swap for chili powder if you prefer a milder taste.
- Paprika – Provides warmth, color, and smokiness to the crust.
- Seasoned Salt – Essential for flavoring the chicken, enhancing its rich taste.
- Black Pepper – Complements the seasoned salt and adds a hint of kick.
For Frying
- Vegetable Oil – Necessary for frying to achieve that golden-brown finish; can also substitute with canola or sunflower oil for frying alternatives.
Enjoy crafting this delicious Buttermilk Fried Chicken recipe that’s sure to become a family favorite!
Step‑by‑Step Instructions for Buttermilk Fried Chicken
Step 1: Marinate the Chicken
Begin by placing your chicken pieces into a large bowl and pouring enough buttermilk over them to ensure they’re fully submerged. Cover the bowl with plastic wrap and let it marinate in the refrigerator for a minimum of 4 hours, or ideally overnight. This tenderizing process enriches the chicken with flavor and ensures it stays juicy once cooked.
Step 2: Prepare the Coating
In a separate bowl, combine all-purpose flour with cayenne pepper, paprika, seasoned salt, and black pepper. Whisk the ingredients together until well mixed. This flavorful coating is what makes your Buttermilk Fried Chicken so irresistible. Set this mixture aside, ready for dredging your marinated chicken.
Step 3: Dredge Each Piece
Once your chicken has soaked in the buttermilk, remove each piece from the marinade, allowing any excess liquid to drip off. Carefully coat each chicken piece in your prepared flour mixture, ensuring they are thoroughly covered. This step is vital for that crunchy exterior, so press the flour onto the chicken for maximum adherence.
Step 4: Heat the Oil
Select a heavy-duty cast-iron skillet and fill it about 1.5 inches deep with vegetable oil. Heat the oil over medium heat until it reaches around 350°F (175°C). You can test the temperature by dropping a pinch of flour into the oil; it should sizzle immediately. Preheating is crucial for achieving that perfect golden-brown crust.
Step 5: Fry the Chicken
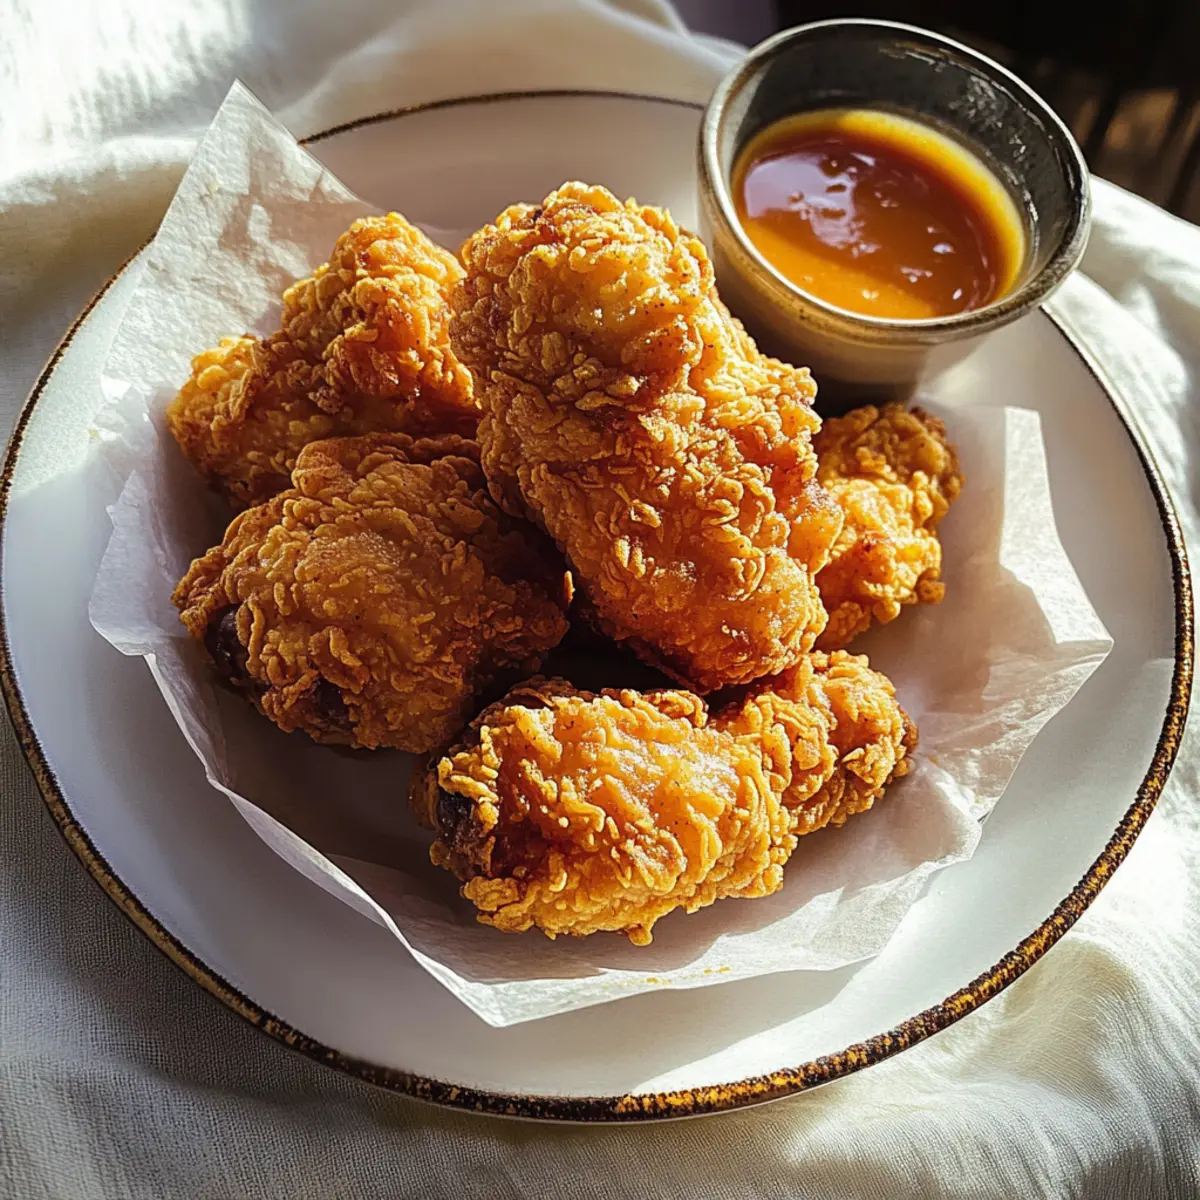
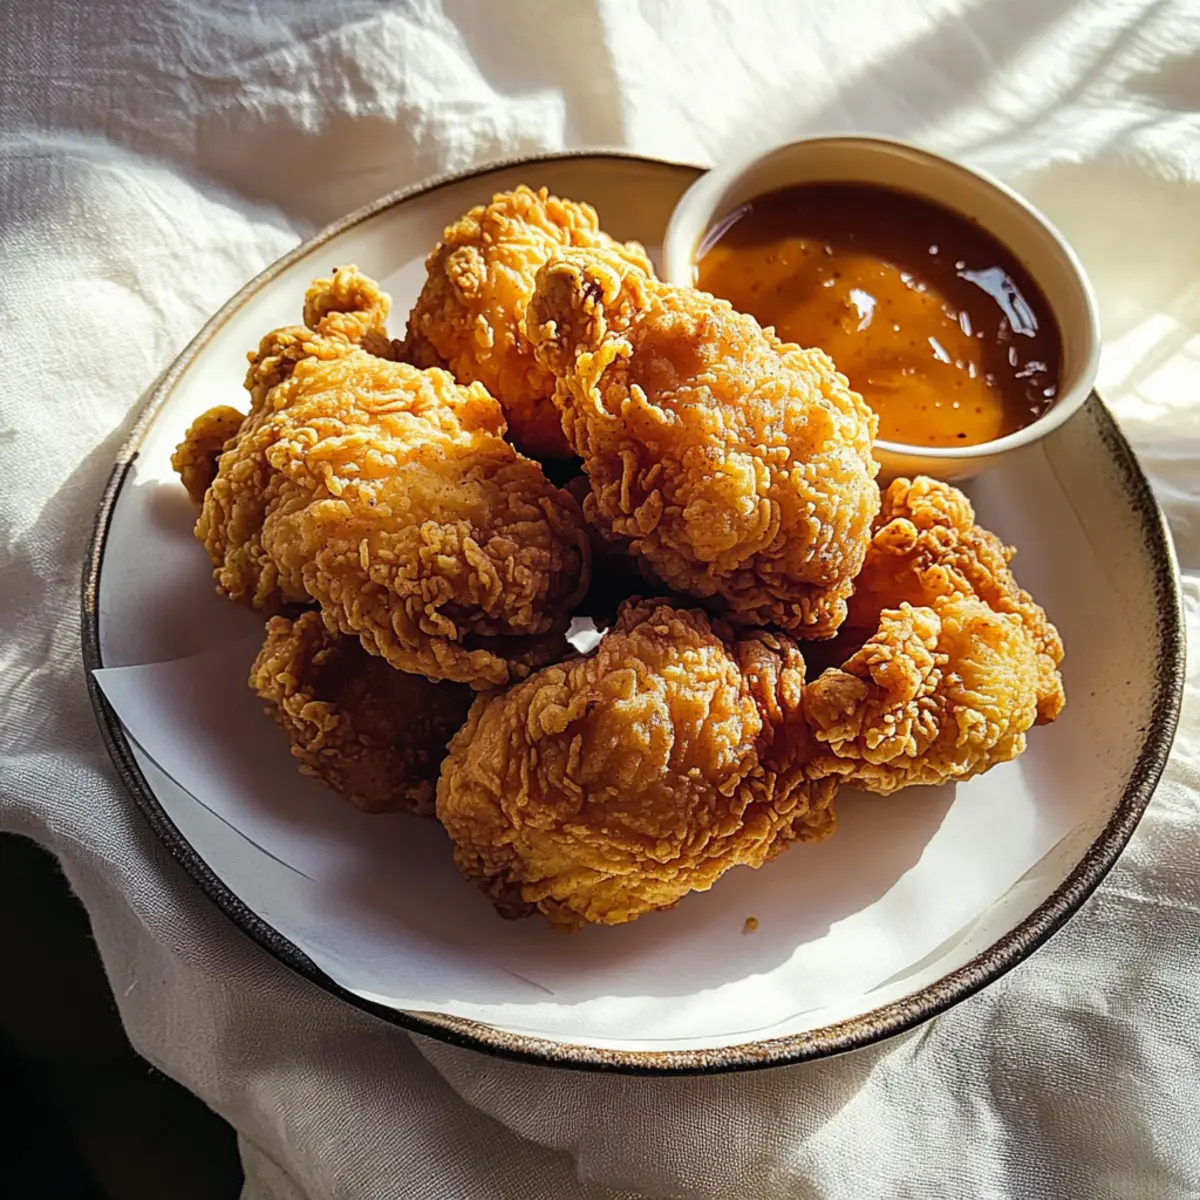
Gently place the coated chicken pieces into the hot oil, being careful not to overcrowd the skillet. Fry the chicken for about 12-15 minutes per side, turning occasionally until you achieve a lovely golden color and the internal temperature reaches 165°F (75°C). Keep an eye on the oil temperature to avoid burning for flawless Buttermilk Fried Chicken.
Step 6: Drain the Chicken
Once cooked, use tongs to carefully remove the chicken from the oil. Place the fried pieces on a cooling rack set over a baking sheet. This allows excess oil to drain away while keeping the chicken crispy. Avoid placing them directly on paper towels, as this can lead to a soggy bottom.
Step 7: Serve and Enjoy
Serve your Buttermilk Fried Chicken immediately for the best taste, with some classic Southern sides like coleslaw or biscuits. If you have leftovers, store them in an airtight container in the fridge for up to 3 days. Reheat in a 375°F oven to maintain that delicious crispiness.
Buttermilk Fried Chicken Variations
Feel free to personalize your buttermilk fried chicken experience with these delightful tweaks!
-
Gluten-Free: Swap all-purpose flour for a gluten-free flour blend to cater to gluten-sensitive diets. Taste doesn’t have to be compromised here.
-
Spicy Sriracha: Mix in sriracha with your buttermilk for an exciting twist. It adds a zesty kick that’ll have everyone coming back for more!
-
Herb-Infused: Add chopped fresh herbs like rosemary or thyme to the flour mixture. The aromatic touch elevates the flavor profile wonderfully.
-
Crispy Tenders: Cut chicken breasts into strips for chicken tenders. They fry faster and are perfect for dipping into sauces.
-
Buttermilk Brine: Try a buttermilk brine by adding salt and spices to your marinade. This technique enhances the depth of flavor wonderfully!
-
Sweet Heat: Drizzle your fried chicken with honey mixed with cayenne for a delightful sweet-spicy flavor. It’s a delicious contrast to the savory chicken.
-
Hot Honey Drizzle: Give it a Southern twist with hot honey for a unique sweet-heat balance. This adds a gourmet flair that is sure to impress.
-
Savory Sandwiches: For a quick meal, layer fried chicken in a sandwich with pickles and lettuce. It’s a simple way to savor comfort food on the go, similar to a beloved Cheesy Cajun Chicken dish.
Experiment with these variations to create your own signature version of buttermilk fried chicken, ensuring every bite reflects your unique taste!
Expert Tips for Buttermilk Fried Chicken
-
Marinate Well: Make sure to soak your chicken in buttermilk for at least 4 hours, or overnight to ensure maximum tenderness and flavor infusion.
-
Proper Coating: When dredging, press the flour mixture firmly onto the chicken to help the coating adhere better during frying for that signature crispy texture.
-
Oil Temperature Check: Keep an eye on the oil temperature; it should stay around 350°F. If too hot, the crust may burn before the chicken cooks through.
-
Avoid Overcrowding: Fry chicken in batches if necessary. Overcrowding the skillet can reduce oil temperature and lead to soggy, unevenly cooked pieces.
-
Use a Meat Thermometer: To ensure perfectly cooked chicken, check that the internal temperature reaches 165°F. This prevents undercooking while keeping the chicken juicy.
-
Drain Effectively: Use a cooling rack over a sheet pan for draining fried chicken. This keeps the coating crisp by preventing moisture buildup on the bottom.
What to Serve with Buttermilk Fried Chicken
The delightful sizzle of fried chicken is just the beginning; let’s create a hearty meal experience that tantalizes the senses.
-
Creamy Mashed Potatoes:
Their buttery texture and rich flavor provide a comforting contrast to the crispy chicken, making every bite a delight. Drizzle with gravy for an extra treat! -
Classic Coleslaw:
The cool, crunchy cabbage slaw adds a refreshing balance to the savory chicken. The creamy dressing pairs beautifully for that perfect Southern touch. -
Fluffy Biscuits:
Soft, flaky biscuits are a must-have for mopping up juicy chicken and gravy. Slather on some butter and enjoy their warm, pillowy goodness. -
Sweet Potato Fries:
These offer a sweet and crispy contrast, with a touch of natural sweetness that complements the savory flavors of the fried chicken. -
Cornbread:
Golden cornbread boasts a slightly sweet flavor that perfectly offsets the spiciness of the chicken. Tear it apart for a delightful combination of textures. -
Green Beans:
Seasoned with a bit of garlic and butter, fresh green beans add a vibrant crunch and a burst of color to your plate. -
Pickles:
Tangy, crunchy dill pickles provide a zesty contrast to the rich fried chicken. They cleanse the palate and enhance every bite. -
Iced Tea:
A glass of sweet iced tea refreshes and ties together this Southern feast, balancing the meal’s richness with a cool, sweet touch. -
Peach Cobbler:
End with a warm slice of peach cobbler, its sweet, tender fruit filling and crumbly topping providing a classic Southern dessert that perfectly rounds off the meal.
Make Ahead Options
These Buttermilk Fried Chicken pieces are perfect for busy weeknights when you need to save time while still enjoying home-cooked goodness! You can marinate the chicken in buttermilk for up to 24 hours in advance, allowing the flavors to deepen and the meat to tenderize beautifully. You can also prepare the seasoned flour mixture ahead of time and store it in an airtight container for up to 3 days. When ready to cook, simply dredge your marinated chicken in the flour, heat the oil, and fry until golden brown. This makes for an easy finish on those hectic evenings while ensuring your fried chicken is just as delicious as when made from scratch!
Storage Tips for Buttermilk Fried Chicken
Fridge: Store leftover buttermilk fried chicken in an airtight container for up to 3 days. This keeps it fresh while preventing moisture loss.
Freezer: For longer storage, freeze fried chicken pieces in an airtight container or freezer bag for up to 2 months. Ensure they are fully cooled before freezing to preserve texture.
Reheating: Reheat in an oven at 375°F until heated through, about 15-20 minutes. This will help maintain the crispy coating that makes buttermilk fried chicken irresistible.
Buttermilk Fried Chicken Recipe FAQs
How do I choose the right buttermilk for my marinade?
Absolutely! When selecting buttermilk, look for a product that is thick and has a slight tangy aroma. Fresh buttermilk will yield the best flavor. If you’re in a pinch, you can always make your own by mixing 2 cups of milk with 2 tablespoons of lemon juice or white vinegar, letting it sit for about 5-10 minutes to curdle.
How should I store leftovers from my Buttermilk Fried Chicken?
Very! Place leftover fried chicken in an airtight container and refrigerate it. It will stay fresh for up to 3 days. If you want to keep it longer, you can freeze it for up to 2 months. Just be sure the chicken is fully cooled before freezing to retain its crispy texture.
Can I freeze my fried chicken, and how do I do it?
Definitely! To freeze your buttermilk fried chicken, first allow it to cool completely at room temperature. Then, place the chicken pieces in a single layer on a baking sheet and freeze for about 1-2 hours until they’re solid. After that, transfer the chicken to an airtight freezer bag or container, ensuring to remove as much air as possible. It can be stored for up to 2 months. When ready to enjoy, reheat in the oven at 375°F for about 15-20 minutes to regain its crispy crust.
What can I do if my coating doesn’t stick to the chicken while frying?
Oh no! If you find the coating isn’t sticking, there are a couple of things you can try. First, ensure your chicken is well coated in buttermilk and allow it to drip off before dredging. You can even double dredge by dipping it back in buttermilk and the flour mixture again for extra stickiness. Also, pressing the flour onto the chicken firmly helps! Keeping the oil at consistent temperature is crucial—if it’s too hot, the coating can slip off, so be vigilant with your heat.
Are there any dietary considerations for pets or allergies with buttermilk fried chicken?
Absolutely! While the ingredients in buttermilk fried chicken are delicious for us, they can be harmful to pets. Chicken itself is fine for dogs, but avoid giving them seasoned or fried food. For allergies, always check that the flour blend you’re using is gluten-free if needed. You can substitute the seasoned salt with regular salt or a mix of your favorite herbs for a healthier option. Always consult with a healthcare provider for specific dietary needs.
Buttermilk Fried Chicken: The Ultimate Crispy Comfort Classic
Ingredients
Equipment
Method
- Begin by placing your chicken pieces into a large bowl and pouring enough buttermilk over them to ensure they're fully submerged. Cover the bowl with plastic wrap and let it marinate in the refrigerator for a minimum of 4 hours, or ideally overnight.
- In a separate bowl, combine all-purpose flour with cayenne pepper, paprika, seasoned salt, and black pepper. Whisk the ingredients together until well mixed. Set this mixture aside, ready for dredging your marinated chicken.
- Once your chicken has soaked in the buttermilk, remove each piece from the marinade, allowing any excess liquid to drip off. Coat each chicken piece in your prepared flour mixture, pressing the flour onto the chicken for better adherence.
- Select a heavy-duty cast-iron skillet and fill it about 1.5 inches deep with vegetable oil. Heat the oil over medium heat until it reaches around 350°F (175°C). Preheating is crucial for achieving that perfect golden-brown crust.
- Gently place the coated chicken pieces into the hot oil and fry for about 12-15 minutes per side, turning occasionally until golden and the internal temperature reaches 165°F (75°C).
- Once cooked, use tongs to carefully remove the chicken from the oil and place it on a cooling rack set over a baking sheet to drain excess oil.
- Serve your Buttermilk Fried Chicken immediately for the best taste, with classic Southern sides like coleslaw or biscuits. Store leftovers in an airtight container in the fridge for up to 3 days.
Leave a Reply