
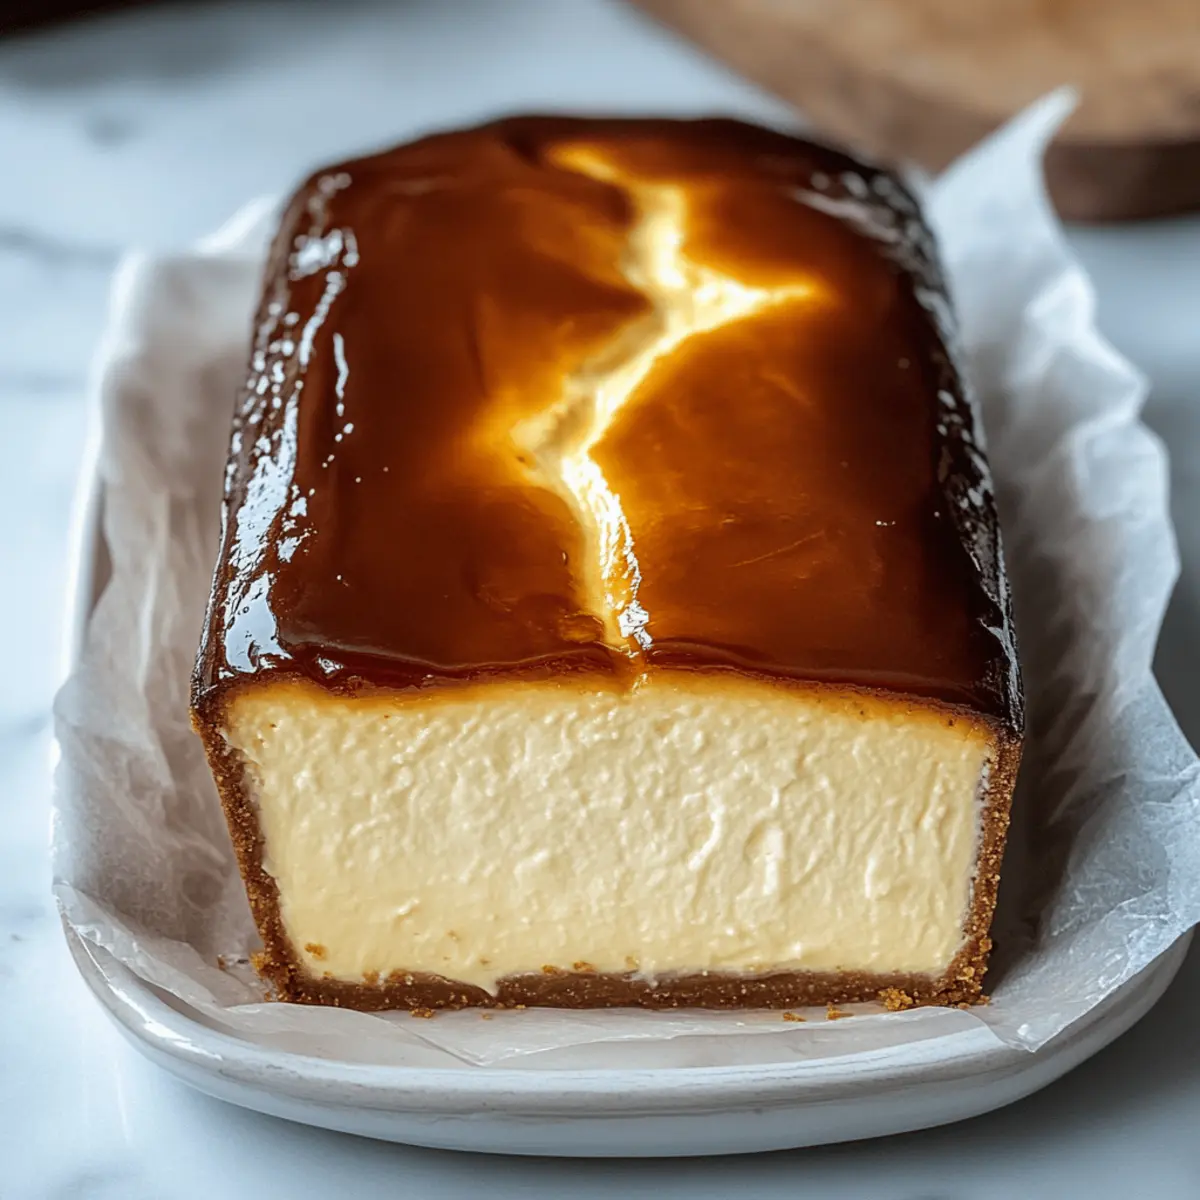
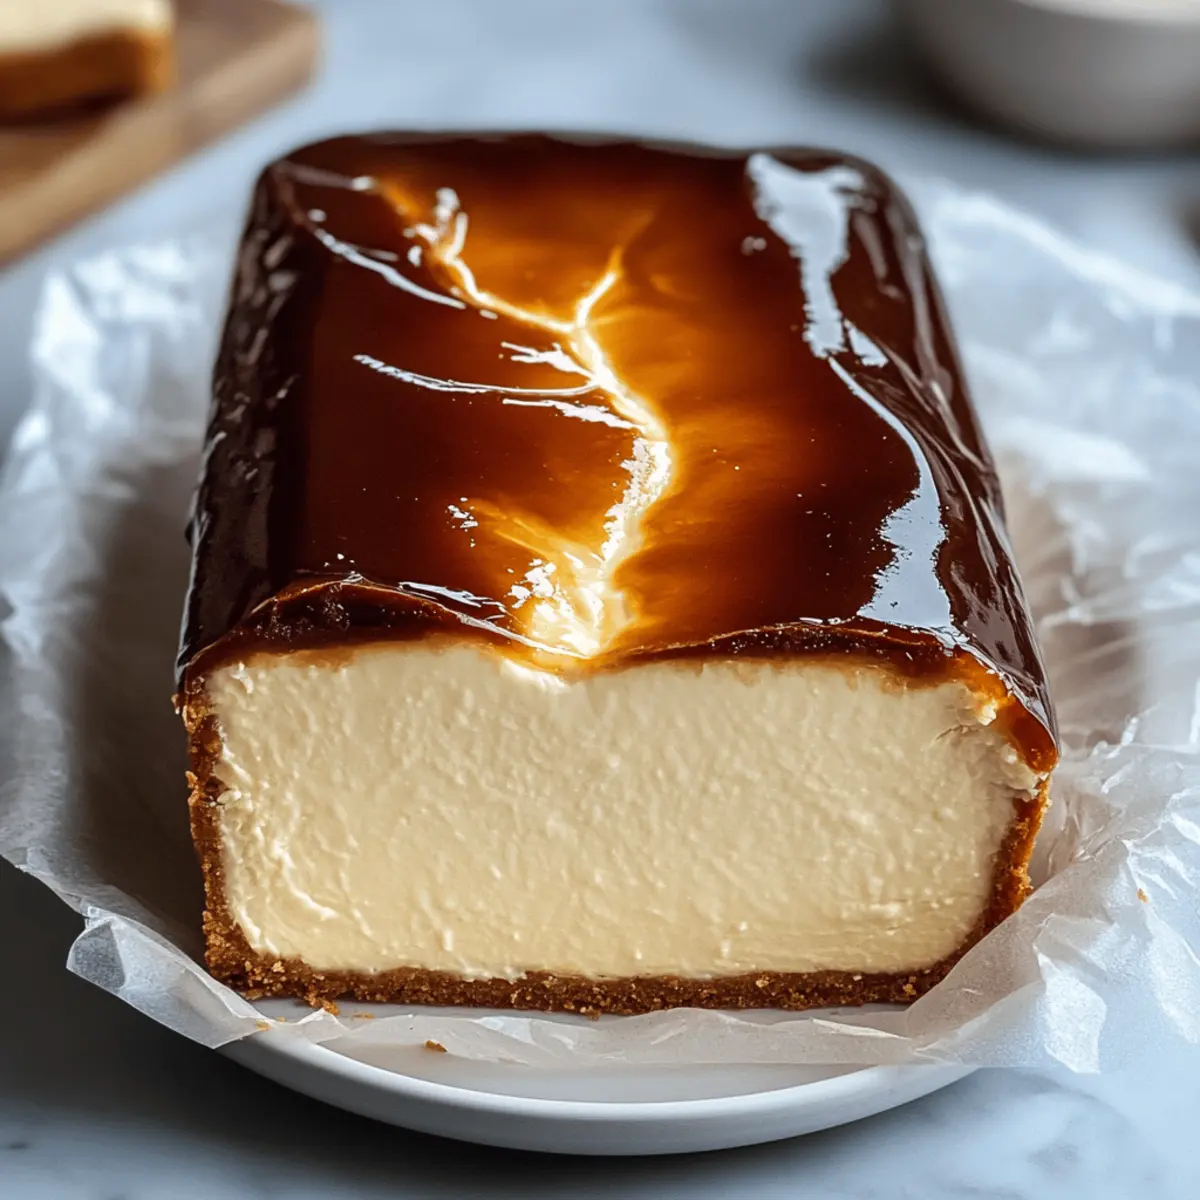
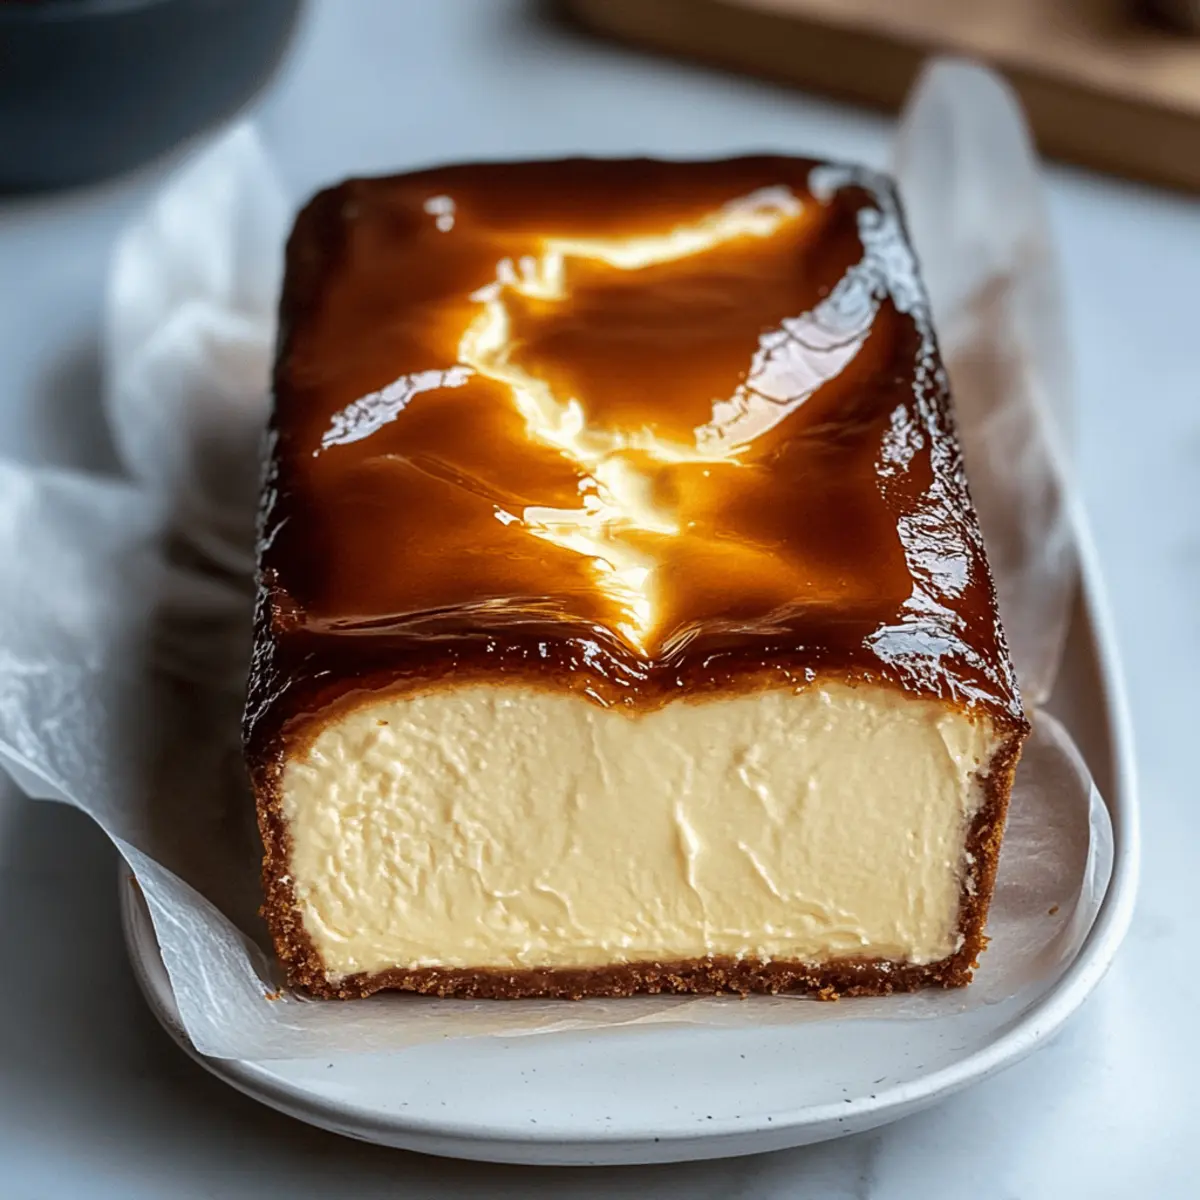
A rich, creamy slice of perfection is just a bake away! With the Burnt Basque Cheesecake in a Loaf Pan, you can indulge in a rustic dessert that’s both elegant and incredibly easy to make. Imagine the deep caramel hues and slightly bitter notes blending effortlessly with the luscious texture—this dessert is destined to become a favorite for both special occasions and casual gatherings. What makes it even better? It requires minimal prep and boasts no crust, allowing the creamy filling to take center stage. Plus, baking in a loaf pan makes serving a breeze! Are you ready to transform your dessert game with this delightful twist on a classic cheesecake?
Why is This Cheesecake So Irresistible?
Creamy Delight: The Burnt Basque Cheesecake in a Loaf Pan brings a luxurious, velvety texture that’s simply unforgettable.
Rich Flavor: Its beautifully caramelized top adds a gourmet touch, giving each bite a hint of richness that will have your taste buds dancing.
No-Fuss Baking: With no crust to worry about, this recipe cuts down prep time, making it perfect for busy evenings or when friends drop by unexpectedly.
Versatile Pairing: Serve it plain or jazz it up with fresh berries or a drizzle of salted caramel; its adaptable nature makes it suitable for any occasion!
Crowd-Pleaser: Whether it’s a family dinner or a potluck, this cheesecake is sure to be the star of the dessert table. And if you love easy-to-make desserts, don’t forget to check out my Pumpkin Cheesecake Cinnamon for more delicious inspiration!
Burnt Basque Cheesecake Ingredients
For the Cheesecake
• Cream Cheese – Ensure it’s softened to room temperature for a smooth, creamy base.
• Granulated Sugar – Adds the necessary sweetness and aids in caramelization for that perfect burnt top.
• Large Eggs – Acts as a binder; using room temperature eggs helps them incorporate better into the mixture.
• Heavy Cream – Richness is the key; sour cream can be a delightful substitute for a tangy twist.
• All-Purpose Flour – Provides stability; for a gluten-free option, almond or coconut flour works beautifully.
• Salt – Enhances overall flavor and balances the sweetness.
• Vanilla Extract – Use pure vanilla for depth of flavor and an inviting aroma.
For Greasing the Pan
• Butter/Parchment Paper – Prevents sticking and makes for easy removal after baking.
Step‑by‑Step Instructions for Burnt Basque Cheesecake in a Loaf Pan
Step 1: Preheat & Prep
Begin by preheating your oven to 400°F (205°C). While the oven warms up, generously grease a loaf pan with butter, then line it with parchment paper, ensuring there’s an overhang on the sides. This will make it easy to lift your Burnt Basque Cheesecake out later!
Step 2: Mix Cream Cheese
In a large mixing bowl, place softened cream cheese. With an electric mixer, beat on medium speed until the cream cheese is smooth and creamy, usually about 1-2 minutes. You want a velvety texture that will serve as the base for your cheesecake.
Step 3: Add Sugar
Gradually sprinkle in granulated sugar and continue mixing on medium speed. Beat until the mixture becomes light and fluffy, which should take around 2-3 minutes. This step is crucial for achieving that beautiful, airy texture in your Burnt Basque Cheesecake.
Step 4: Incorporate Eggs
Now, crack in the large eggs one at a time, mixing well after each addition. This allows for thorough incorporation and prevents any lumps. Beat for about 30 seconds after adding each egg until everything looks perfectly blended into the batter.
Step 5: Add Vanilla & Salt
Next, measure in the vanilla extract and sprinkle in the salt. Stir gently using a spatula or wooden spoon until these ingredients are fully combined. The vanilla will enhance the flavors of your cheesecake, making it even more delightful.
Step 6: Mix in Cream & Flour
Slowly pour in the heavy cream while mixing at a low speed. Once fully incorporated, sift in the all-purpose flour, and gently fold it into the mixture. Be careful not to overmix; you want the batter to blend just until combined and smooth for your Burnt Basque Cheesecake.
Step 7: Fill Pan & Bake
Pour the cheesecake batter into your prepared loaf pan. Lightly tap the pan on the countertop to release any air bubbles. Bake in your preheated oven for 45-50 minutes until the top is deeply caramelized and the center still has a slight jiggle.
Step 8: Cool & Refrigerate
Once baked, let the cheesecake cool in the pan for about 30 minutes. After cooling, transfer it to the refrigerator to chill for at least 4 hours, preferably overnight, before slicing. This cooling period allows the flavors to meld beautifully for your creamy Burnt Basque Cheesecake!

Burnt Basque Cheesecake in a Loaf Pan Variations
Feel free to make your Burnt Basque Cheesecake uniquely yours with these fun and delicious twists!
-
Berry Bliss: Top with fresh berries or sliced peaches for a burst of color and natural sweetness. The tartness of the fruit perfectly balances the creamy cheesecake.
-
Nutty Crunch: Add crushed nuts like almonds or walnuts to the top for a delightful texture contrast. Toasted nuts bring a wonderful aroma and crunch to each slice.
-
Chocolate Lovers: Swirl in some melted chocolate or cocoa powder into the batter for a chocolatey twist. This decadent addition will transform your cheesecake into a luxurious fudge-inspired treat.
-
Zesty Lemon: Incorporate lemon zest into the batter for a zesty kick. The citrus notes brighten up the rich flavors of the cheesecake beautifully.
-
Spicy Kick: Mix in a pinch of cinnamon or nutmeg for a warm, comforting spice. This small addition enhances depth and complements the caramelized top wonderfully.
-
Creamy Swirl: Serve with a dollop of whipped cream or sour cream on the side for added richness. This pairing elevates the creamy experience to new heights.
-
Espresso Infusion: For coffee lovers, add a shot of espresso to the batter. This adds a rich coffee flavor that perfectly complements the sweetness of the cheesecake.
-
Salted Caramel Drizzle: Drizzle salted caramel over the top just before serving for a deliciously sweet and salty contrast. It’ll create a show-stopping presentation that is sure to impress your guests.
And if you’re looking for more sweet inspirations, don’t forget to check out my Caramel Brownie Cheesecake—it’s another crowd-pleaser!
Expert Tips
-
Room Temperature Ingredients: Ensure all ingredients, particularly cream cheese and eggs, are at room temperature for seamless blending and a creamy texture in your Burnt Basque Cheesecake in a Loaf Pan.
-
Avoid Overmixing: Gently mix until just combined, especially when adding flour. Overmixing can lead to a dense cheesecake instead of the light and fluffy texture you desire.
-
Generous Greasing: Don’t skimp on butter and parchment; a well-greased loaf pan helps create rustic edges and ensures easy removal of your cheesecake after baking.
-
Watch the Jiggle: Keep an eye on your cheesecake towards the end of baking. The center should jiggle slightly—this indicates a perfectly custardy finish, achieving just the right consistency.
-
Chill Well: For the best slice, chill your cheesecake for at least 4 hours (or overnight). This waiting period enhances the flavors, resulting in a more delicious Burnt Basque Cheesecake!
How to Store and Freeze Burnt Basque Cheesecake
Fridge: Store your Burnt Basque Cheesecake in an airtight container in the refrigerator for up to 4 days. This keeps it fresh and ready to enjoy whenever you have that sweet craving!
Freezer: If you want to keep your cheesecake for longer, you can freeze it for up to 3 months. Wrap slices in plastic wrap and place them in a freezer-safe bag to prevent freezer burn.
Reheating: To enjoy your cheesecake again, simply remove it from the freezer and let it thaw in the refrigerator overnight. Enjoy it cold or let it sit at room temperature for about 30 minutes before serving for that perfect creamy texture.
Serving Tips: For the best experience, serve your cheesecake chilled. Consider adding a touch of fresh fruit or a drizzle of sauce right before indulging!
Make Ahead Options
These easy Burnt Basque Cheesecakes in a Loaf Pan are the perfect solution for busy home cooks looking to save time without sacrificing flavor! You can prepare the cheesecake batter up to 24 hours in advance; simply mix all the ingredients and refrigerate it in an airtight container. When you’re ready to bake, pour the chilled batter into the prepared loaf pan and follow the baking instructions as usual. This not only enhances the flavor but ensures a smooth texture. Just remember to cool the cheesecake for about 30 minutes before refrigerating for at least 4 hours, allowing the rich flavors to develop beautifully—and your friends and family will be none the wiser that you prepped ahead!
What to Serve with Easy Burnt Basque Cheesecake in a Loaf Pan
Elevate your dessert experience with delightful accompaniments that perfectly complement the rich and creamy flavors of your cheesecake.
-
Fresh Berries: Juicy raspberries or strawberries add a refreshing contrast, their tartness balancing the sweetness of the cheesecake beautifully.
-
Whipped Cream: Light and airy, whipped cream adds a velvety touch. Consider flavoring it with vanilla or a hint of citrus for an exciting twist.
-
Salted Caramel Drizzle: A warm drizzle enhances richness, while the touch of salt amplifies the dessert’s flavors and takes it to the next level of indulgence.
-
Espresso or Coffee: A rich shot of espresso contrasts beautifully with the cheesecake’s sweetness, creating a wonderful harmony of flavors.
-
Flavored Tea: A soothing herbal or chai tea can soothe the palate, providing a warming and comforting touch alongside your creamy dessert.
-
Chocolate Shavings: Dark chocolate shavings add an elegant touch and hint of bitterness, creating a deliciously decadent finish to each sweet, creamy bite.
Indulging in your Easy Burnt Basque Cheesecake in a Loaf Pan never felt so luxurious!
Burnt Basque Cheesecake in a Loaf Pan Recipe FAQs
How do I choose ripe cream cheese for this recipe?
Absolutely! For the best flavor and texture, ensure that your cream cheese is fresh and at room temperature before mixing. Look for blocks that are smooth without any dark spots or discoloration. I often suggest checking the expiration date and opting for full-fat cream cheese for a richer result!
How can I store leftovers of the cheesecake properly?
Very! You can store your Burnt Basque Cheesecake in an airtight container in the refrigerator for up to 4 days. This keeps it moist and delicious. I recommend covering the surface with plastic wrap before sealing the container to maintain its creaminess!
Can I freeze the cheesecake, and how should I do it?
Of course! Freezing is a great way to preserve your cheesecake for longer enjoyment. To freeze, first, slice the cheesecake into individual servings. Wrap each piece securely in plastic wrap, then place them in a freezer-safe bag or container. This should keep it fresh for up to 3 months! When you’re ready to enjoy, just transfer a slice to the fridge to thaw overnight.
What should I do if my cheesecake cracks during baking?
Don’t worry; it happens to the best of us! A little crack does not affect the taste. To prevent cracking in the future, ensure that your ingredients are at room temperature and avoid overmixing the batter. If you notice cracks, you can easily cover them up with a topping of whipped cream or berries when serving.
Is the recipe gluten-free?
Yes, you can easily make it gluten-free by substituting the all-purpose flour with almond or coconut flour. These alternatives will provide a delightful texture while accommodating gluten sensitivities. Just be sure to keep the measurements appropriate since they can behave differently in mixtures.
Can my pets eat any ingredients from this cheesecake?
While some ingredients like cream cheese are safe in small amounts, it’s best to keep this cheesecake away from pets, especially due to the sugar and eggs involved. If you’re looking for a pet-friendly treat, consider making a simple plain yogurt treat instead!
Indulge in Creamy Burnt Basque Cheesecake in a Loaf Pan
Ingredients
Equipment
Method
- Preheat your oven to 400°F (205°C) and grease a loaf pan with butter, lining it with parchment paper.
- In a mixing bowl, beat softened cream cheese until smooth and creamy, about 1-2 minutes.
- Gradually add the granulated sugar and mix until the mixture is light and fluffy, about 2-3 minutes.
- Add the eggs one at a time, mixing well after each addition to ensure smooth incorporation.
- Stir in the vanilla extract and salt until fully combined.
- Slowly pour in the heavy cream and gently fold in the flour until just combined.
- Pour the batter into the prepared loaf pan and bake for 45-50 minutes until caramelized on top.
- Cool in the pan for about 30 minutes, then refrigerate for at least 4 hours before slicing.
Leave a Reply