
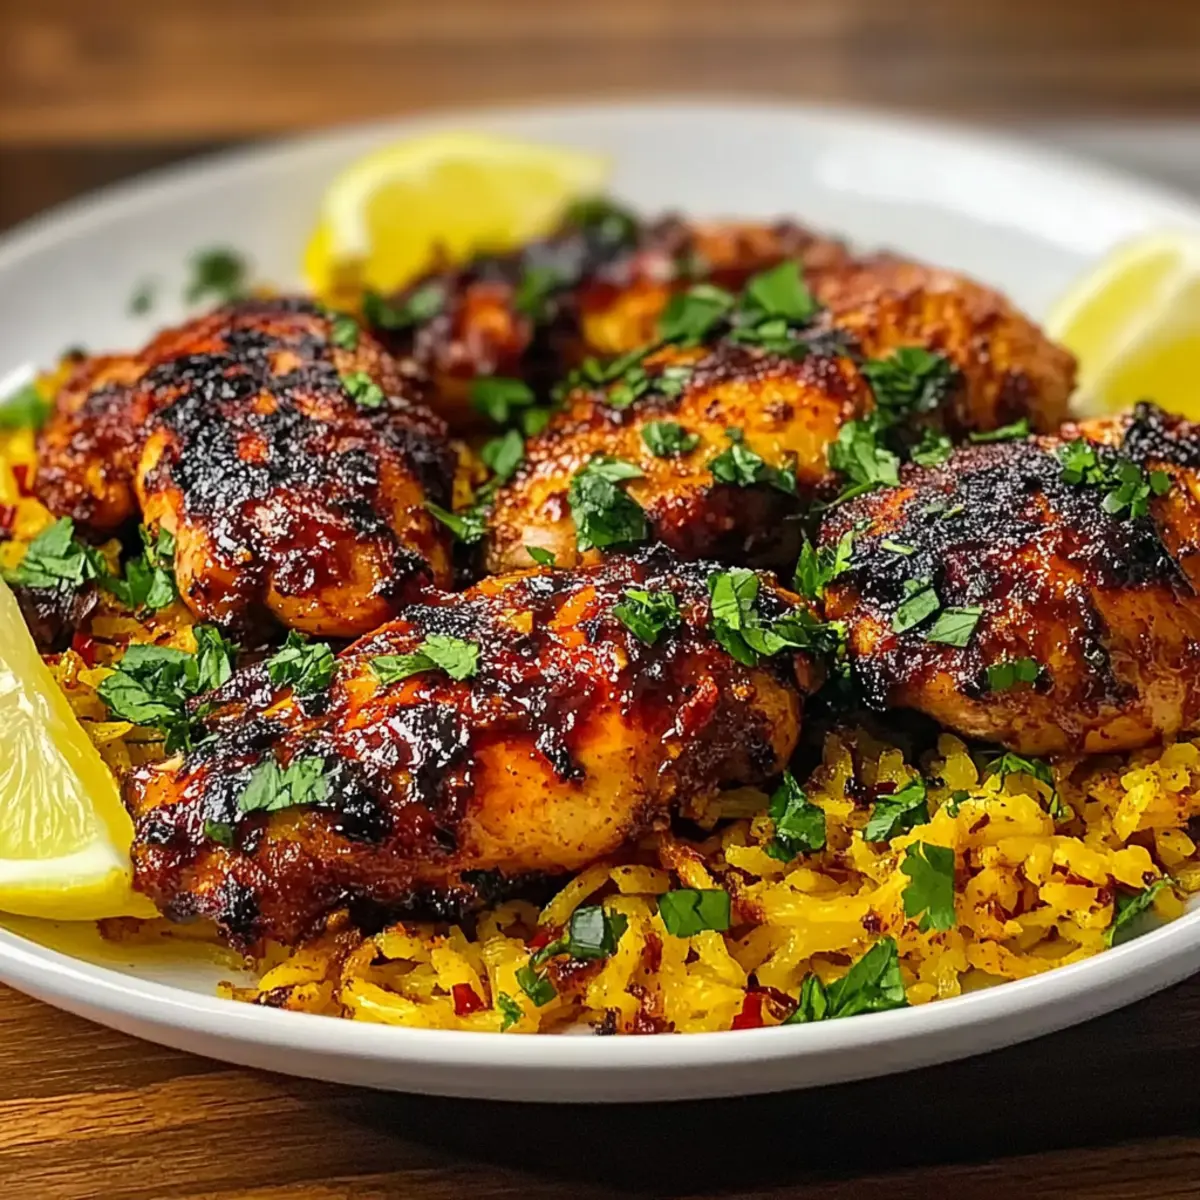
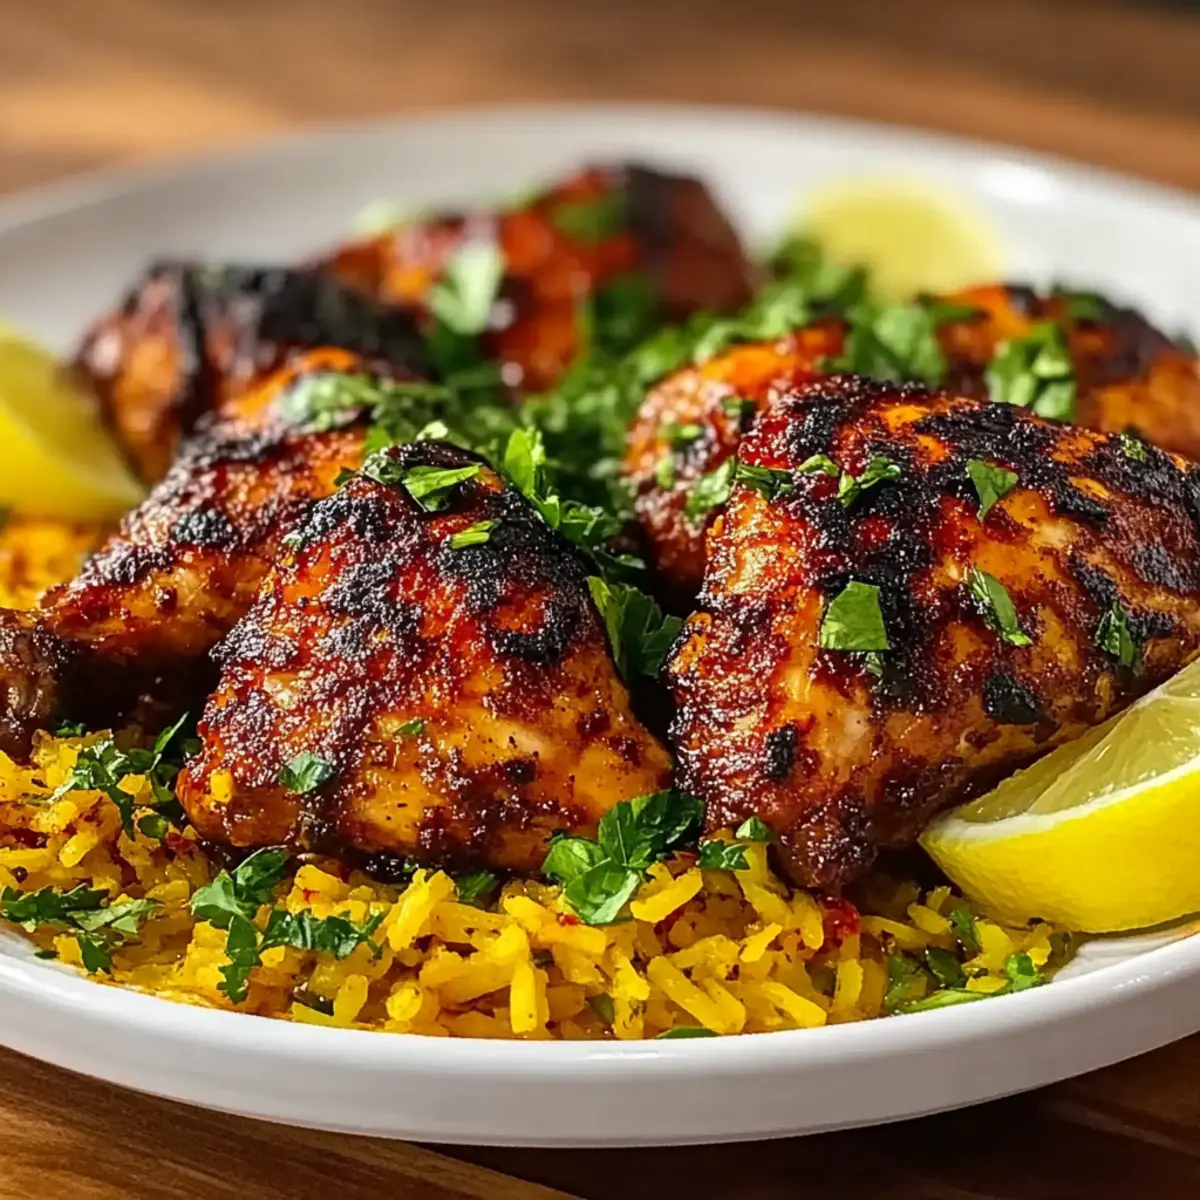
The aroma of grilled chicken fills the air, bringing back memories of sun-soaked summer evenings where each bite was a burst of flavor and heat. My Spicy Peri Peri Chicken (Portuguese Style) encapsulates that vibe perfectly, marrying the zest of citrus with a kick of chili that will have your taste buds dancing with joy. This recipe shines not only for its bold, spirited flavors but also for its quick prep, making it an ideal choice for busy weeknights or laid-back weekend gatherings with friends. With minimal effort, you’ll have juicy, tender chicken that’s perfectly charred and packed with personality. Ready to elevate your dinner game and tantalize your palate? Let’s dive into this delicious adventure together!

Why Is Peri Peri Chicken Irresistible?
Bold Flavors envelop your senses with every bite, as a zesty marinade infuses the chicken with a perfect balance of heat and tang. Quick Preparation means you can easily whip this dish up on busy nights or serve it at leisurely weekend barbecues. Crowd-Pleasing Comfort — everyone will rave about the vibrant taste and juicy texture! Versatile Options let you customize the spice level or accompany it with delicious sides, like fluffy rice or zesty salsa. Explore other favorites like Rolled Chicken Feta or Low Carb Chicken for a complete meal experience!
Peri Peri Chicken Ingredients
• Dive into the essentials for an explosive flavor experience!
For the Marinade
- Whole Chicken – Main protein source; cut into pieces for even cooking.
- Olive Oil – Adds moisture and richness; substitute with avocado oil for a milder taste.
- Garlic (4 cloves, minced) – Provides a strong aroma; use garlic powder if fresh is unavailable.
- Lemons (2, juiced) – Adds acidity and brightness; lime juice can also work as an alternative.
- Paprika (2 tablespoons) – Contributes beautiful color and mild pepper flavor; smoked paprika enhances it.
- Dried Oregano (1 tablespoon) – Infuses earthy notes; Italian seasoning can serve as a substitute.
- Chili Flakes (1 tablespoon) – Delivers heat; adjust to keep it mildly spicy or fiery based on your preference.
- Salt and Pepper – Essential seasoning; try kosher salt for a cleaner taste.
Remember, this Peri Peri Chicken (Portuguese Style) is all about those vibrant flavors and aromatic spices!
Step‑by‑Step Instructions for Peri Peri Chicken (Portuguese Style)
Step 1: Prepare the Marinade
In a medium mixing bowl, whisk together ½ cup of olive oil, minced garlic, juice from 2 lemons, paprika, dried oregano, chili flakes, salt, and pepper until well combined. Look for a vibrant, smooth consistency. This flavorful marinade is crucial for infusing your Peri Peri Chicken with that zesty kick.
Step 2: Marinate the Chicken
Place your whole chicken pieces into a large resealable plastic bag. Pour the marinade over the chicken, ensuring every piece is generously coated. Seal the bag tightly, then massage the marinade into the chicken for even coverage. Refrigerate for at least 2 hours, or let it marinate overnight for a deeper flavor experience.
Step 3: Preheat Your Cooking Equipment
When you’re ready to cook, preheat your grill or oven to medium-high heat, around 400°F (200°C). This temperature is ideal for achieving that irresistible char and juicy interior when grilling or roasting the Peri Peri Chicken. Allow the cooking surface to heat thoroughly for at least 10-15 minutes.
Step 4: Cook the Chicken
Remove the chicken pieces from the marinade, allowing any excess marinade to drip off. Place the chicken on the grill or a roasting pan. Grill or roast for about 25-30 minutes, turning occasionally. Look for a nicely charred exterior, and ensure the internal temperature reaches at least 165°F (75°C) for perfectly cooked Peri Peri Chicken.
Step 5: Let the Chicken Rest
Once cooked through, transfer the chicken to a serving platter and let it rest for 5-10 minutes. This brief resting period helps the juices redistribute, ensuring each bite remains succulent and flavorful. Garnish with fresh herbs and lemon wedges to enhance the dish’s visual appeal and brightness before serving.
Storage Tips for Peri Peri Chicken
- Fridge: Store leftovers in an airtight container for up to 3 days. Make sure to cool the Peri Peri Chicken to room temperature before refrigerating it to maintain freshness.
- Freezer: For longer storage, freeze in a resealable freezer bag for up to 3 months. Remove excess air before sealing to prevent freezer burn and maintain flavor.
- Reheating: To enjoy leftover Peri Peri Chicken, reheat in the oven at 350°F (175°C) for about 15-20 minutes or until heated through. This helps retain juiciness while avoiding a dried-out texture.
- Defrosting: Always thaw frozen chicken in the fridge overnight before reheating, ensuring safety and quality in your meals.
Peri Peri Chicken Variations
Feel free to get creative with your Peri Peri Chicken by trying these exciting twists and substitutions!
-
Boneless Option: Use boneless chicken thighs or breasts for quicker cooking and richer flavor. This change makes for a quicker meal, perfect for busy evenings.
-
Vegetarian Twist: Swap chicken for marinated tofu or cauliflower florets to create a delicious veggie alternative. These options soak up the marinade beautifully, ensuring each bite bursts with flavor.
-
Extra Heat: Add more chili flakes or a dash of your favorite hot sauce to the marinade for an extra fiery kick. A sprinkle of fresh diced jalapeños can heat things up even further!
-
Smoky Flavor: Substitute regular paprika with smoked paprika for an enticing depth of flavor and a hint of smokiness. This will add a lovely complexity that elevates your dish to new heights!
-
Herb Varieties: Experiment with different herbs such as thyme or rosemary in place of oregano to create a unique flavor profile. Each herb brings its own distinct aroma, transforming the overall taste.
-
Citrus Variety: If you’re feeling adventurous, try lime juice or even orange juice instead of lemon juice for an exciting twist on acidity. The different citrus notes will elevate your Peri Peri experience!
-
Sriracha Marinade: For a robust twist, replace some or all of the chili flakes with Sriracha sauce. This not only increases the spice but also adds just a touch of sweetness to the marinade.
-
Creamy Dip: Serve the chicken with a homemade yogurt-based sauce or tzatziki for a cooling counterpart. This works wonderfully to balance the spicy notes while enhancing the meal’s overall appeal.
For more flavor inspirations, consider pairing your meal with a refreshing Couscous Salad or a delightful Dump Bake Chicken. Let your culinary creativity shine!
Expert Tips for Peri Peri Chicken
- Deep Flavor: Pierce chicken pieces with a fork before marinating to allow the spices to penetrate better, enhancing the overall flavor of the Peri Peri Chicken.
- Baste While Cooking: For extra moisture and flavor, baste the chicken with leftover marinade during grilling or roasting—just remember to do this before discarding the marinade.
- Check Internal Temp: Always use a meat thermometer to ensure your chicken reaches an internal temperature of 165°F (75°C), avoiding any risk of undercooking.
- Resting Time: Let the chicken rest for 5-10 minutes after cooking. This crucial step helps to retain the juices, making each bite tender and succulent.
- Spice Adjustment: Adjust the amount of chili flakes based on your spice preference. A little more can make a big difference in the final dish!
Make Ahead Options
These Spicy Peri Peri Chicken (Portuguese Style) are perfect for meal prep enthusiasts looking to save time during busy weeks! You can marinate the chicken up to 24 hours in advance, allowing those robust flavors to fully develop—just be sure to store it in the refrigerator in a sealed container. The marinade can also be prepared ahead of time; whisk together the ingredients and refrigerate for up to 3 days. When ready to cook, simply remove the chicken from the marinade, letting excess drip off, and grill or roast until that coveted char forms. Following these prep tips will ensure that your Peri Peri Chicken is just as delicious as if you had made it fresh on the spot!
What to Serve with Peri Peri Chicken (Portuguese Style)
The perfect meal is just a few enticing side dishes away from complementing your fiery Peri Peri Chicken!
- Fluffy Rice: The subtle flavors of fluffy rice balance the spicy chicken, making each bite delightful and soothing.
- Zesty Tzatziki: A cool tzatziki sauce made with yogurt and cucumbers adds a refreshing contrast, enhancing the overall taste experience.
- Grilled Vegetable Medley: Colorful grilled veggies, such as bell peppers, zucchini, and asparagus, provide a satisfying crunch while soaking up any leftover marinade.
- Couscous Salad: A light and fluffy couscous salad, fresh herbs, and lemon elevate the meal, adding brightness and texture to each bite.
- Fresh Slaw: A crunchy slaw with cabbage, carrots, and a tangy dressing perfectly counterbalances the heat from the chicken, making it a must-try side.
- Garlic Bread: Serve warm garlic bread alongside the chicken to soak up any extra marinade, adding an irresistible buttery flavor.
- Mint Tea: A refreshing glass of mint tea can cleanse the palate and help calm the spice, creating an enjoyable meal experience.

Peri Peri Chicken (Portuguese Style) Recipe FAQs
How do I choose the right chicken for Peri Peri Chicken?
Absolutely! When selecting your chicken, look for whole chickens that are fresh, with a firm texture and no dark spots or blemishes on the skin. You can also use bone-in pieces for a more convenient cooking experience. Don’t shy away from organic options, as they often provide a richer flavor!
What is the best way to store leftover Peri Peri Chicken?
Very practical! Store any leftovers in an airtight container, allowing them to cool to room temperature first. This way, they’ll stay fresh for up to 3 days in the fridge. Remember to reheat thoroughly before enjoying again!
Can I freeze Peri Peri Chicken?
Absolutely! To freeze, place the cooked chicken pieces in a resealable freezer bag, removing excess air to prevent freezer burn. It can be stored for up to 3 months. When you’re ready to enjoy, simply thaw it overnight in the fridge and then reheat.
What can I do if my Peri Peri Chicken turns out dry?
Don’t worry! If you find your chicken is a bit dry, it’s essential to check the internal cooking temperature next time—aim for 165°F (75°C) for juicy results. Also, marinating the chicken overnight allows flavors to meld while ensuring moisture retention. Basting while cooking can also give you that extra juicy texture!
Are there any dietary considerations when making Peri Peri Chicken?
Absolutely! For those with allergies, ensure no cross-contamination occurs with your spices or chicken. If you have family members with spice sensitivities, consider adjusting the amount of chili flakes or even adding a touch of honey for sweetness without the heat. Also, always check for any specific dietary needs regarding chicken provenance, like choosing organic or free-range options if preferred.
What’s the ideal way to serve Peri Peri Chicken?
Great question! This Peri Peri Chicken shines when served with sides like fluffy rice or crispy roasted vegetables. You could also wrap it in pita with fresh lettuce and tzatziki, creating a delightful sandwich. Pair it with a cool beverage to balance the spice!
Delicious Peri Peri Chicken (Portuguese Style) for Spice Lovers
Ingredients
Equipment
Method
- Whisk together the olive oil, minced garlic, lemon juice, paprika, dried oregano, chili flakes, salt, and pepper in a medium mixing bowl until well combined.
- Place the chicken pieces in a large resealable plastic bag and pour the marinade over, ensuring each piece is coated.
- Seal the bag and massage the marinade into the chicken. Refrigerate for at least 2 hours, or overnight for deeper flavor.
- Preheat your grill or oven to medium-high heat, around 400°F (200°C) for optimal cooking.
- Remove the chicken from the marinade, allowing excess to drip off and place on the grill or in a roasting pan.
- Grill or roast for 25-30 minutes, turning occasionally, until charred and the internal temperature reaches at least 165°F (75°C).
- Transfer the cooked chicken to a serving platter and let it rest for 5-10 minutes before serving.
Leave a Reply