
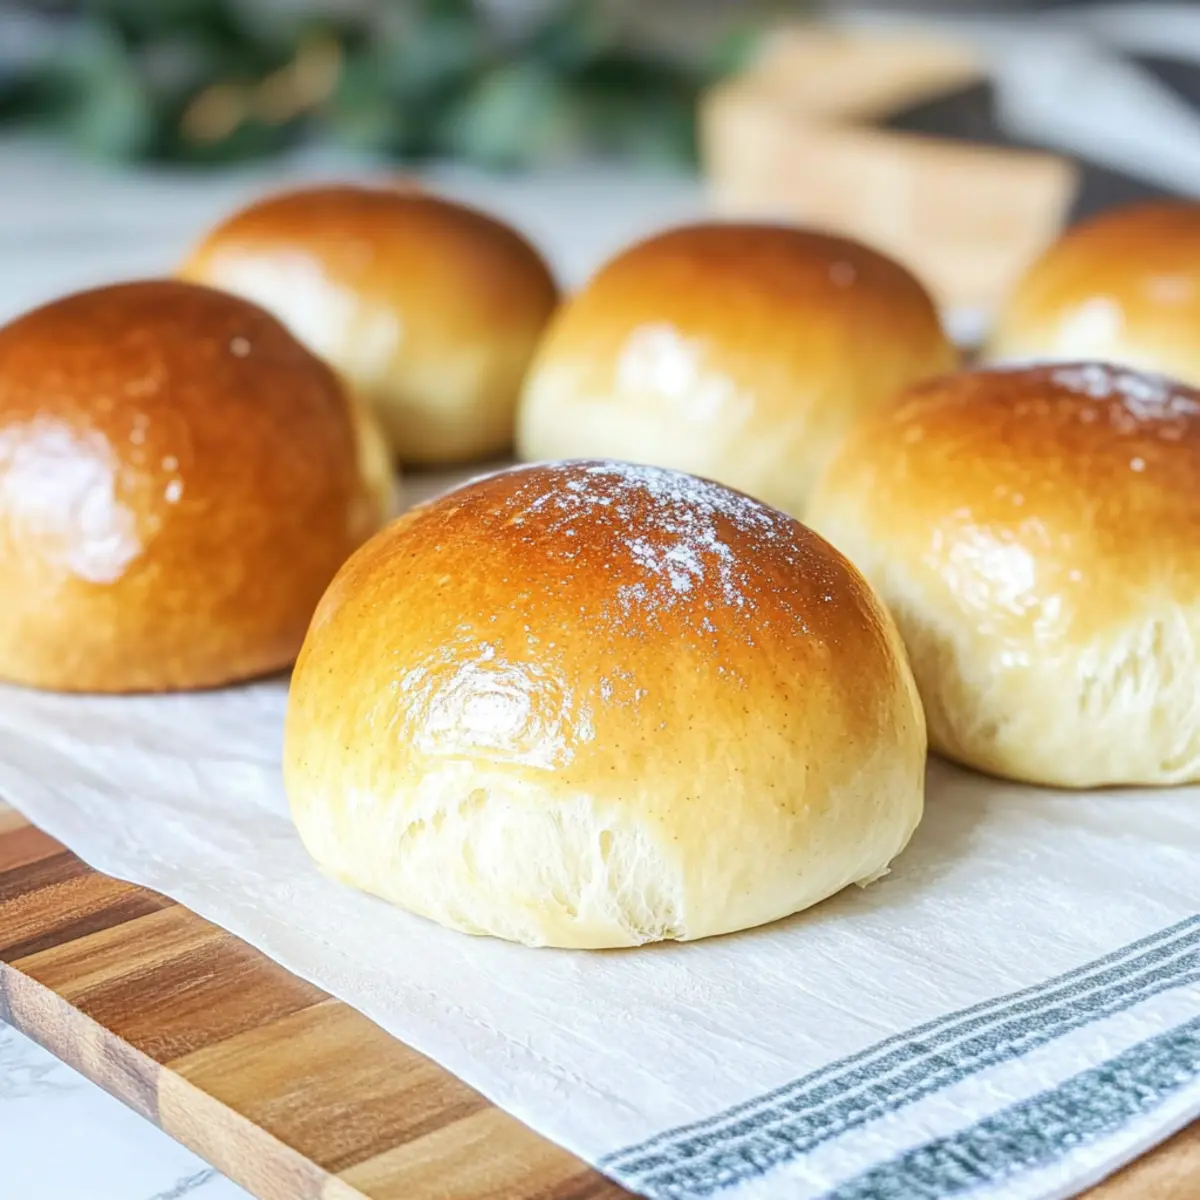
As I walked through the local bakery, the irresistible scent of fresh cardamom filled the air, transporting me straight to a cozy Norwegian café. Today, I want to share my favorite recipe for Hveteboller, or Norwegian Cardamom Buns, that captures that very essence. These soft, fluffy rolls are not only a delightful treat for breakfast or an afternoon snack, but they’re also surprisingly easy to whip up at home. Imagine pulling warm, fragrant buns from your oven, perfect for spreading with butter or serving alongside gooey geitost. Plus, they are versatile—add raisins for a twist, or chocolate chunks for a sweeter delight! Ready to bake these aromatic wonders? Let’s dive into the deliciousness!
Why are Norwegian Cardamom Buns special?
Comforting Aroma: The moment you take a bite, the warm scent of cardamom envelops your senses, creating a cozy atmosphere in your kitchen.
Easy to Make: With simple ingredients and straightforward steps, you’ll have these delicious buns ready to impress in no time.
Versatile Options: Feel free to explore variations like adding raisins for Rosinboller or chocolate for Sjokoladeboller, adapting the recipe to your taste.
Perfect for Sharing: These buns are a fantastic treat to share with family and friends, perfect for any gathering or cozy coffee break.
A Taste of Tradition: Enjoy a classic Norwegian delight that embodies the warmth of Scandinavian baking, making every bite a heartwarming experience.
Pair them with your favorite jam or a slice of geitost for an unforgettable snack!
Norwegian Cardamom Buns Ingredients
• Discover the essentials for baking these delicious treats!
For the Dough
• Active Dry Yeast – Ensures the dough rises beautifully; check for freshness to avoid dense buns.
• Lukewarm Milk (105-115˚F / 40-46˚C) – Activates the yeast; it should feel warm enough but not hot to the touch.
• All-Purpose Flour – Offers the right structure; for a chewier result, feel free to swap with bread flour.
• Granulated Sugar – Adds sweetness and aids in yeast activation; honey can be used as a natural alternative, just adjust the liquid slightly.
• Ground Cardamom – Infuses a warm, aromatic flavor that is essential to these Norwegian Cardamom Buns; cinnamon is a wonderful substitute if desired.
• Salt – Balances the sweetness and enhances flavor; don’t skip this ingredient for the best taste!
• Large Egg – Binds the dough and adds moisture; if you prefer a vegan option, consider a flax egg.
• Unsalted Butter (melted) – Introduces richness and flavor to the dough; margarine serves as a suitable replacement.
For the Topping
• Large Egg – Provides a lovely golden-brown finish when brushed on the buns before baking.
• Milk – Helps thin the egg wash to ensure even application for that perfect glaze.
Step‑by‑Step Instructions for Norwegian Cardamom Buns
Step 1: Activate the Yeast
Start by sprinkling the active dry yeast over lukewarm milk in a small bowl. Allow it to froth for about 5-10 minutes until it becomes bubbly and fragrant, indicating that your yeast is active. This step is crucial for your Norwegian Cardamom Buns to achieve that delightful rise.
Step 2: Combine Dry Ingredients
In a large mixing bowl, whisk together the all-purpose flour, granulated sugar, ground cardamom, and salt until evenly combined. Ensure to use a spatula or a whisk to break any clumps and to create a well in the center, where you’ll eventually add the wet ingredients. This mixture will lay the foundation for the soft, fluffy texture of your buns.
Step 3: Mix the Dough
Pour the frothy yeast mixture into the well of the dry ingredients, then add the large egg and melted unsalted butter. Using a wooden spoon or spatula, mix until a loose dough forms. It should be slightly sticky but cohesive. Take care not to overmix, as this could affect the texture of your Norwegian Cardamom Buns.
Step 4: Knead the Dough
Transfer the dough onto a lightly floured surface and knead for about 5-10 minutes until it becomes smooth and elastic. If the dough feels too dry, add a splash of milk; if it’s too wet, sprinkle in a touch more flour. This step is essential for developing the perfect texture in your cardamom buns.
Step 5: First Rise
Grease a clean bowl with a bit of melted butter and place the kneaded dough inside. Cover it with a damp cloth or plastic wrap and let it rise in a warm place for about 1 hour or until it has doubled in size. You’ll know it’s ready when it looks puffy and has a soft, airy feel.
Step 6: Preheat and Prepare
While the dough is rising, preheat your oven to 375˚F (190˚C). Line two baking sheets with parchment paper to ensure the buns don’t stick during baking. This is the perfect time to get your kitchen ready for the delightful smell of freshly baked Norwegian Cardamom Buns soon to fill the air.
Step 7: Shape the Buns
Once the dough has risen, punch it down gently to release the air. Divide it into 12 equal portions, rolling each piece into a smooth ball. Place the balls on the prepared baking sheets, leaving space between each to allow for further expansion. Let them rise for another 30 minutes; they should become slightly puffed during this time.
Step 8: Prepare the Topping
In a small bowl, whisk together the large egg and a splash of milk to create an egg wash. Using a pastry brush, gently apply this mixture over the tops of the risen buns, ensuring an even coating for that beautiful golden finish. This step adds a lovely sheen to your Norwegian Cardamom Buns when baked.
Step 9: Bake the Buns
Now, it’s time to bake! Place the baking sheets in the preheated oven and bake for about 15 minutes, or until the buns are golden brown and fragrant. Keep an eye on them towards the end to prevent over-baking. The perfect hue will invite you to savor their warm aroma right from the oven.
Step 10: Cool and Serve
Once baked, remove the buns from the oven and let them cool on a wire rack for a few minutes. They will be enticingly soft and ready to enjoy. Serve your Norwegian Cardamom Buns warm, ideally the same day, with butter and thin slices of geitost for an unforgettable treat.
Expert Tips for Norwegian Cardamom Buns
-
Fresh Yeast Matters: Ensure your active dry yeast is fresh for a perfect rise. Old yeast can lead to dense buns that don’t puff up nicely.
-
Temperature Check: Keep the milk lukewarm, not hot, before adding yeast. Too much heat can kill the yeast, affecting the dough’s rise and flavor.
-
Kneading Care: Be gentle when kneading your dough. Over-kneading can make the buns tough, while under-kneading may leave them dense. Aim for a smooth but soft texture!
-
Flour Adjustments: If your dough feels too sticky, gradually add flour. Avoid adding too much; it can make the Norwegian Cardamom Buns dry rather than fluffy.
-
Chill for Convenience: After the first rise, you can refrigerate your dough for later baking. Just ensure it warms back to room temperature before shaping and baking.
-
Tasty Variations: Experiment with adding raisins for Rosinboller or chocolate pieces for Sjokoladeboller, giving a sweet twist to your buns while keeping them delicious!
What to Serve with Soft and Fragrant Hveteboller?
Imagine the comforting warmth surrounding you as you relish the soft cardamom-scented rolls, melting away your cares.
-
Creamy Butter: Spread a generous slab of rich butter on a warm bun for a simple yet luxurious experience. The creamy flavor enhances the aromatic cardamom, making each bite a cozy treat.
-
Gooey Geitost: This traditional Norwegian cheese offers a sweet, caramel-like flavor that beautifully contrasts the buns’ warmth. Pairing it with Hveteboller elevates your breakfast into a Scandinavian delight.
-
Fresh Jam: A dollop of raspberry or strawberry jam adds a fruity brightness that balances the rich, buttery rolls. Spread it generously for a refreshing twist on your snack.
-
Hot Coffee: Pairing these soft buns with a steaming cup of coffee creates a classic morning ritual. The bitterness of coffee complements the sweetness of the cardamom, making your breakfast complete.
-
Cinnamon Tea: For a soothing beverage, try cinnamon tea; its warm spices echo the cardamom flavor while providing a gentle, relaxing ambience.
-
Chocolate Spread: For a more indulgent treat, spread your favorite chocolate spread on the buns. The combination of chocolate and cardamom makes for a sweet, comforting afternoon snack.
-
Fruit Salad: A light and refreshing side of fruit salad will enhance the experience, adding a bright and zesty contrast to the rich flavors of the buns.
-
Vanilla Ice Cream: Serve your warm Hveteboller with a scoop of vanilla ice cream for a delightful dessert. The contrasting temperatures and flavors create a deliciously indulgent treat after dinner.
Each of these pairings invites you to savor the joy of homemade Norwegian Cardamom Buns, allowing you to share warmth and happiness at your table.
How to Store and Freeze Norwegian Cardamom Buns
Room Temperature: Store your freshly baked Norwegian Cardamom Buns in an airtight container at room temperature for up to 2 days to keep them soft and fragrant.
Fridge: If you need to store them longer, you can refrigerate the buns for up to a week; however, this may slightly change their texture. Wrap them well to prevent drying out.
Freezer: For longer storage, freeze the buns tightly wrapped in plastic wrap or in a freezer bag for up to 3 months. They will maintain their delightful flavor and texture.
Reheating: To enjoy, simply thaw in the fridge overnight, then reheat in the oven at 350°F (175°C) for about 5–10 minutes until warm. Perfectly soft and aromatic once again!
Norwegian Cardamom Buns Variations
Feel free to get creative and customize your Norwegian Cardamom Buns to suit your flavor preferences and dietary needs!
-
Rosinboller: Add 1/3-1/2 cup of raisins into the dough before the first rise for a delightful, fruity twist.
-
Sjokoladeboller: Mix in chocolate chunks or chips instead of cardamom for a rich, sweet experience that chocolate lovers will adore.
-
Dairy-Free: Substitute unsalted butter with coconut oil or dairy-free margarine to create a vegan-friendly version of these beloved buns.
-
Nutmeg Boost: Replace cardamom with ground nutmeg to introduce a spicier flavor profile that adds a unique twist to each bite.
-
Cinnamon Swirl: If you’re in the mood for a different aroma, swap the cardamom for ground cinnamon; it might feel like a warm embrace from your childhood.
-
Gluten-Free: Use a gluten-free all-purpose flour blend to adapt the recipe, ensuring you also add a binding agent like xanthan gum for structure.
-
Honey Sweetening: Instead of granulated sugar, sweeten your dough with honey, adjusting the liquid in the recipe to maintain the right consistency.
-
Spicy & Sweet: If you love heat, mix in a pinch of ground cloves with the cardamom for a tantalizing spiciness that dances on your palate.
Remember, exploring flavors can lead to delightful discoveries! Why not pair these buns with some luscious jam or a slice of geitost? Enjoy the journey!
Make Ahead Options
These delightful Norwegian Cardamom Buns are perfect for meal prep lovers! You can prepare the dough up to 24 hours in advance by following the first rise (Step 5), then cover it tightly with plastic wrap and refrigerate. This method allows the flavors to deepen while maintaining their fluffy texture. To bake them, simply let the dough come to room temperature (about 30-60 minutes) before shaping and allowing for the second rise (Step 7). For longer storage, you can freeze the shaped rolls after the second rise for up to 3 months. When ready to enjoy, bake them straight from the freezer, adding an extra minute or two to the baking time for just as delicious results!
Norwegian Cardamom Buns Recipe FAQs
What type of yeast should I use for Norwegian Cardamom Buns?
I recommend using fresh active dry yeast for the best rise and flavor. If your yeast doesn’t bubble when activated in lukewarm milk, it may be expired, and you’ll want to get a new packet.
How long can I store Norwegian Cardamom Buns at room temperature?
You can store your freshly baked buns in an airtight container at room temperature for up to 2 days. This helps maintain their soft, fluffy texture and delightful aroma!
Can I freeze Norwegian Cardamom Buns?
Absolutely! For freezing, wrap the cooled buns tightly in plastic wrap or place them in a freezer bag. They can be kept in the freezer for up to 3 months. When ready to enjoy, simply thaw overnight in the fridge and reheat in the oven.
What can I do if my dough is too sticky?
If your dough is too sticky while kneading, gradually sprinkle in a little more flour—just be careful not to overdo it. Aim for a soft and slightly tacky dough. If it feels too dry, add a splash of milk to bring it back to the right consistency.
Are there any dietary considerations for Norwegian Cardamom Buns?
For those with egg allergies, you can use a flax egg (1 tablespoon ground flaxseed mixed with 3 tablespoons water) as a substitute to bind the dough. Additionally, if you have dairy sensitivities, plant-based butter works wonderfully in this recipe.
How can I tell when the buns are done baking?
You’ll know your Norwegian Cardamom Buns are perfectly baked when they are golden brown and emit a fragrant aroma. The internal temperature should reach about 190°F (88°C), and they should sound hollow when tapped on the bottom.
Melt-in-Your-Mouth Norwegian Cardamom Buns for Cozy Mornings
Ingredients
Equipment
Method
- Sprinkle the active dry yeast over lukewarm milk in a small bowl. Allow it to froth for about 5-10 minutes.
- In a large mixing bowl, whisk together the all-purpose flour, granulated sugar, ground cardamom, and salt until evenly combined.
- Pour the frothy yeast mixture into the well of the dry ingredients, then add the large egg and melted unsalted butter. Mix until a loose dough forms.
- Transfer the dough onto a lightly floured surface and knead for about 5-10 minutes until it becomes smooth and elastic.
- Grease a clean bowl with melted butter and place the kneaded dough inside. Cover it and let it rise for about 1 hour.
- Preheat your oven to 375˚F (190˚C) and line two baking sheets with parchment paper.
- Once the dough has risen, punch it down and divide it into 12 equal portions. Shape each into a ball and place on prepared sheets.
- Whisk together the large egg and a splash of milk to create an egg wash. Brush the mixture over the tops of the risen buns.
- Place the baking sheets in the oven and bake for about 15 minutes, or until the buns are golden brown.
- Let the buns cool on a wire rack for a few minutes before serving warm.
Leave a Reply