
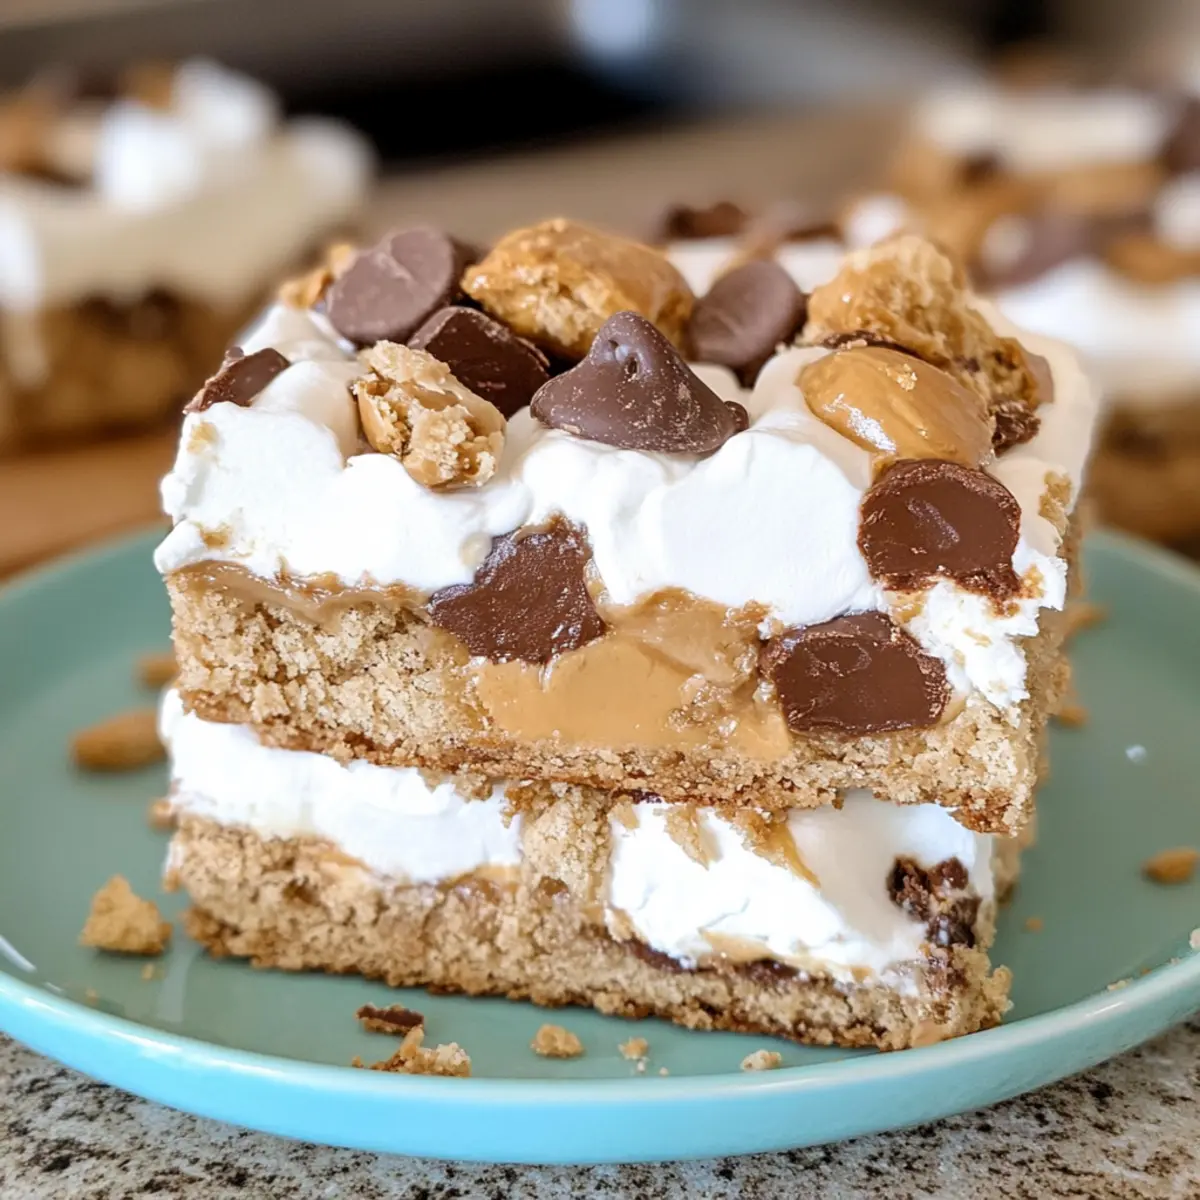
Walking into my kitchen, I was met with the sweet aroma of melting marshmallows and rich chocolate—the unmistakable scent of my latest creation: Fluffernutter Bars. These delightful treats bring together the heartwarming coziness of a classic peanut butter and marshmallow sandwich with a fun cookie twist that’s sure to brighten anyone’s day. Perfect for sharing at potlucks or simply enjoying as a sweet afternoon snack, the quick and easy prep makes them a go-to dessert for busy cooks. Each bite features a luscious combination of creamy marshmallow fluff, chocolate chips, and decadent peanut butter cups, creating a sticky symphony of flavors that will have both kids and adults reaching for seconds. So, who’s ready to indulge in these irresistible Fluffernutter Bars? Let’s dive into the recipe!
Why Are Fluffernutter Bars So Irresistible?
Decadent layers: These bars combine smooth marshmallow fluff with rich peanut butter cups and gooey chocolate, resulting in a sweet treat that’s hard to resist.
Quick and easy: With simple ingredients and minimal prep time, you can whip up these Fluffernutter Bars in no time—perfect for busy days.
Crowd-pleasing: From school parties to holiday gatherings, these bars are a guaranteed hit that will have everyone asking for the recipe!
Versatile flavors: Swap out peanut butter cups for your favorite candies or add crushed Oreos for an exciting twist—there are endless possibilities!
Comforting nostalgia: They evoke the delightful taste of a childhood classic, offering a sense of warmth and happiness with each delicious bite.
Fluffernutter Bars Ingredients
Here’s everything you’ll need to make these delightful Fluffernutter Bars that combine the best flavors of chocolate and peanut butter.
For the Cookie Dough
• 1/2 cup butter – Adds a rich, creamy depth; you can substitute with margarine for a dairy-free option.
• 1/3 cup peanut butter – Provides a delightful flavor and creaminess; choose creamy or crunchy based on your preference.
• 1 cup packed brown sugar – Sweetens the bars and retains moisture; light or dark brown sugar works well here.
• 1 large egg – Binds the ingredients together; consider a flax egg for a vegan alternative.
• 1 teaspoon vanilla extract – Enhances the overall flavor; for a richer touch, opt for pure vanilla.
• 1 1/4 cups all-purpose flour – Gives structure to the bars; gluten-free flour can be used for a gluten-free option.
• 2/3 cup chocolate chips – Introduces a melty chocolate flavor; use dark or semi-sweet chocolate for a more intense taste.
For the Fillings
• 9-12 regular-size peanut butter cups – The star ingredient that brings delicious flavor; chopped chocolate or your favorite candy works as a substitute.
• 7 ounces marshmallow creme (or fluff) – Provides that classic marshmallow texture that defines these Fluffernutter Bars and adds a delightful gooeyness.
With this selection of ingredients, you’re on your way to creating the ultimate Fluffernutter Bars that are perfect for satisfying your sweet cravings!
Step‑by‑Step Instructions for Fluffernutter Bars
Step 1: Preheat and Prepare
Begin by preheating your oven to 350°F (175°C). While it warms up, grab an 8 x 11 inch baking pan and line it with parchment paper, allowing some paper to overhang the edges. This will make it easy to lift the Fluffernutter Bars out later. Set the prepared pan aside and prepare for the rich layers ahead.
Step 2: Cream the Butter and Sugar
In a mixing bowl, combine 1/2 cup of softened butter and 1 cup of packed brown sugar. Using an electric mixer, beat the mixture on medium speed for about 3 minutes, or until it becomes light and fluffy. This step is crucial for achieving a airy texture in your Fluffernutter Bars, so make sure to mix well.
Step 3: Add Wet Ingredients
To the butter and sugar mixture, add 1 large egg, 1/3 cup of peanut butter, and 1 teaspoon of vanilla extract. Mix on low speed until the ingredients are just combined—this should take about 1 minute. The mixture will become creamy and well-blended, signaling that you’re ready for the next step.
Step 4: Mix in the Dry Ingredients
Gradually add 1 1/4 cups of all-purpose flour to the wet mixture, mixing on low speed until the flour is fully incorporated. This should take about 1-2 minutes. Once mixed, gently fold in 2/3 cup of chocolate chips. The goal is to have a thick, cookie dough-like consistency that will form your base and topping for the Fluffernutter Bars.
Step 5: Form the Base Layer
Take about 2/3 of the cookie dough and evenly press it into the bottom of your prepared baking pan. Using your hands or a spatula, smooth it out until you have a uniform layer covering the entire base. This step is essential for establishing a sturdy foundation for your bars.
Step 6: Layer the Peanut Butter Cups
Next, evenly distribute 9 to 12 peanut butter cups over the cookie layer. Make sure they are well-spaced and placed face-up for the best flavor integration. You want to create a delightful surprise of chocolate and peanut butter in every bite of your Fluffernutter Bars.
Step 7: Spread the Marshmallow Fluff
Take 7 ounces of marshmallow creme and carefully spread it over the layer of peanut butter cups. Use a spatula to ensure an even coating, covering as much of the candy underneath as possible. This fluffy layer is what makes these bars irresistible, adding both texture and sweetness.
Step 8: Add the Final Dough Layer
With the remaining cookie dough, gently flatten and place it over the marshmallow fluff. Lightly press the dough down to form an even layer, ensuring that the fluff is completely covered. This sealing step helps to meld the flavors of the Fluffernutter Bars together as they bake.
Step 9: Bake to Perfection
Place the baking pan in the preheated oven and bake for about 25 minutes, or until the top is golden brown. You’ll know your Fluffernutter Bars are ready when they start to bubble slightly at the edges, indicating that gooey center you want is getting nice and set.
Step 10: Cooling Time
Once baked, remove the pan from the oven and let it cool in the pan for one hour. This cooling period is crucial for the structure of the bars, allowing them to firm up before slicing. After one hour, carefully lift the Fluffernutter Bars out using the parchment overhang and transfer them to a cooling rack.
Step 11: Slice and Serve
Once completely cool, slice the Fluffernutter Bars into squares. Feel free to create larger or smaller portions based on your preference. These treats are now ready to be enjoyed, perfect for sharing, or indulging in all by yourself!
How to Store and Freeze Fluffernutter Bars
Room Temperature: Store your Fluffernutter Bars in an airtight container at room temperature for up to 3 days to maintain their delightful texture.
Fridge: For longer storage, keep the bars in the refrigerator for up to a week. This helps them stay fresh and firm, plus they taste great chilled!
Freezer: To extend their life further, freeze your Fluffernutter Bars for up to 3 months. Wrap them tightly in plastic wrap and then place them in an airtight container to prevent freezer burn.
Reheating: When ready to indulge, simply thaw them at room temperature or heat them in the microwave for 10-15 seconds for that warm, gooey experience again!
Fluffernutter Bars Variations & Substitutions
Feel free to get creative and tailor your Fluffernutter Bars to your taste with these delightful variations!
- Dairy-Free: Substitute the butter with margarine or coconut oil to keep it dairy-free without sacrificing flavor.
- Vegan: Use a flax egg instead of a regular egg for a vegan-friendly version that everyone can enjoy.
- Gluten-Free: Swap the all-purpose flour for a 1-to-1 gluten-free flour blend to cater to gluten-sensitive friends.
- Nut-Free: Try sun butter or a seed butter as a peanut butter alternative for a nut-free treat that’s just as delicious.
- Flavor Boost: Add a teaspoon of sea salt to the dough for a sweet and salty flavor explosion.
- Textural Twist: Fold in some chopped pretzels or crushed graham crackers into the cookie dough for an extra crunch.
- Heated Up: Drizzle melted chocolate on top before serving for an elegant finish that adds an extra layer of sweetness.
- Candy Swap: Use chopped Snickers or Twix bars instead of peanut butter cups to create a fun twist that will surprise your taste buds.
These variations can help you create a personalized dessert that reflects your tastes or the preferences of your loved ones. For even more inspiration, consider trying these chocolate chip cookie variations that can add another element to your treats! Enjoy exploring the endless possibilities!
What to Serve with Fluffernutter Bars
As you savor the creamy, chocolatey bliss of these Fluffernutter Bars, consider some delightful accompaniments to elevate your dessert experience.
- Vanilla Ice Cream: A scoop of creamy vanilla ice cream perfectly contrasts the rich flavors of the bars, creating a delightful temperature and texture play.
- Chocolate Drizzle: A warm, smooth chocolate drizzle can enhance the dessert’s indulgence, adding an extra layer of sweetness and visual appeal.
Pairing just right, these two options can turn a simple treat into a memorable experience that feels special.
-
Fresh Fruit: Slices of strawberries or bananas add freshness and a burst of color, balancing the sweetness with a touch of natural acidity.
-
Milk or Almond Milk: A tall glass of cold milk complements the gooeyness and richness of the Fluffernutter Bars, making every bite even more satisfying.
-
Nutty Granola: A sprinkle of crunchy nutty granola over the bars creates a delightful texture contrast, making each bite a little surprise.
-
Decaf Coffee: Enjoying a cup of warm, decaffeinated coffee on the side offers a comforting pairing that beautifully enhances the dessert’s sweetness.
-
Marshmallow Fluff Dip: Serve a side of extra marshmallow fluff for dipping! This playful twist offers a nostalgic experience reminiscent of cupcake frosting.
With these pairings, every bite of your Fluffernutter Bars can take on a new, delicious character, making your dessert time feel more special!
Expert Tips for Fluffernutter Bars
-
Chill Dough: Chilling your dough for about 30 minutes before pressing it into the pan helps prevent spreading and results in thicker bars.
-
Butter Consistency: Ensure your butter is softened but not melted. Over-melting can lead to greasy bars, affecting the texture of your Fluffernutter Bars.
-
Layering Technique: When layering, be gentle to avoid disrupting the layers. Even distribution of ingredients is crucial for that perfect bite every time.
-
Check for Doneness: Keep an eye on the baking time; every oven is different. The tops should be golden brown, but the center will remain slightly soft—this is what makes them gooey!
-
Storage Tip: For longer-lasting freshness, store uneaten Fluffernutter Bars in an airtight container in the refrigerator. They taste even better after chilling!
Make Ahead Options
These Fluffernutter Bars are perfect for busy home cooks looking to simplify their meal prep! You can prepare the cookie dough up to 24 hours ahead by mixing together the butter, sugar, egg, peanut butter, and vanilla, then refrigerating the mixture in an airtight container. Additionally, you can layer the peanut butter cups and marshmallow fluff in the baking pan, cover it with plastic wrap, and refrigerate it for up to 3 days. When you’re ready to bake, just remove the mixture from the fridge, press the remaining dough on top, and bake as instructed. This way, you’ll achieve delicious results with minimal effort, ensuring your Fluffernutter Bars are just as gooey and charming as when made fresh!
Fluffernutter Bars Recipe FAQs
What type of peanut butter is best for Fluffernutter Bars?
Absolutely! I recommend using regular creamy peanut butter for the best texture and flavor in your Fluffernutter Bars. Natural peanut butter can sometimes be overly oily or dry, which might affect the consistency of your bars. If you prefer a crunchier texture, feel free to use crunchy peanut butter instead!
How should I store Fluffernutter Bars?
You can keep your Fluffernutter Bars in an airtight container at room temperature for about 2-3 days. If you want them to last longer, store them in the refrigerator, where they will stay fresh for up to a week. Just remember to allow them to come to room temperature before serving for the perfect gooey bite!
Can I freeze Fluffernutter Bars?
Absolutely! To freeze your Fluffernutter Bars, wrap them tightly in plastic wrap and place them in an airtight container. They can be stored in the freezer for up to 3 months. When you’re ready to enjoy them, simply let them thaw at room temperature or pop them in the microwave for 10-15 seconds to bring back that warm, gooey goodness.
What do I do if my Fluffernutter Bars are too sticky?
If your bars turn out too sticky, it often means that they might not be fully set. After baking, allow them to cool for at least an hour in the pan—this is essential for firming up their structure. If they’re still very sticky, refrigerate them for a couple of hours before slicing. Chilling can help them set and make cutting easier!
Are Fluffernutter Bars safe for pets?
No, Fluffernutter Bars are not safe for pets! Ingredients like chocolate and peanut butter can be harmful to dogs, so it’s always best to keep these treats away from your furry friends. If you want to share a special treat with them, consider dog-friendly recipes instead!
Irresistible Fluffernutter Bars to Satisfy Your Sweet Cravings
Ingredients
Equipment
Method
- Preheat your oven to 350°F (175°C) and prepare an 8 x 11 inch baking pan lined with parchment paper.
- In a mixing bowl, cream together butter and brown sugar until light and fluffy.
- Add egg, peanut butter, and vanilla extract to the mixture and combine.
- Gradually mix in all-purpose flour and then fold in chocolate chips.
- Press 2/3 of the dough into the bottom of the prepared pan.
- Layer peanut butter cups evenly over the cookie base.
- Spread marshmallow creme over the layer of peanut butter cups.
- Flatten the remaining cookie dough over the marshmallow fluff.
- Bake for about 25 minutes until the top is golden brown.
- Cool the bars in the pan for one hour before lifting them out to cool completely.
- Once cool, slice the bars into squares and serve.
Leave a Reply