
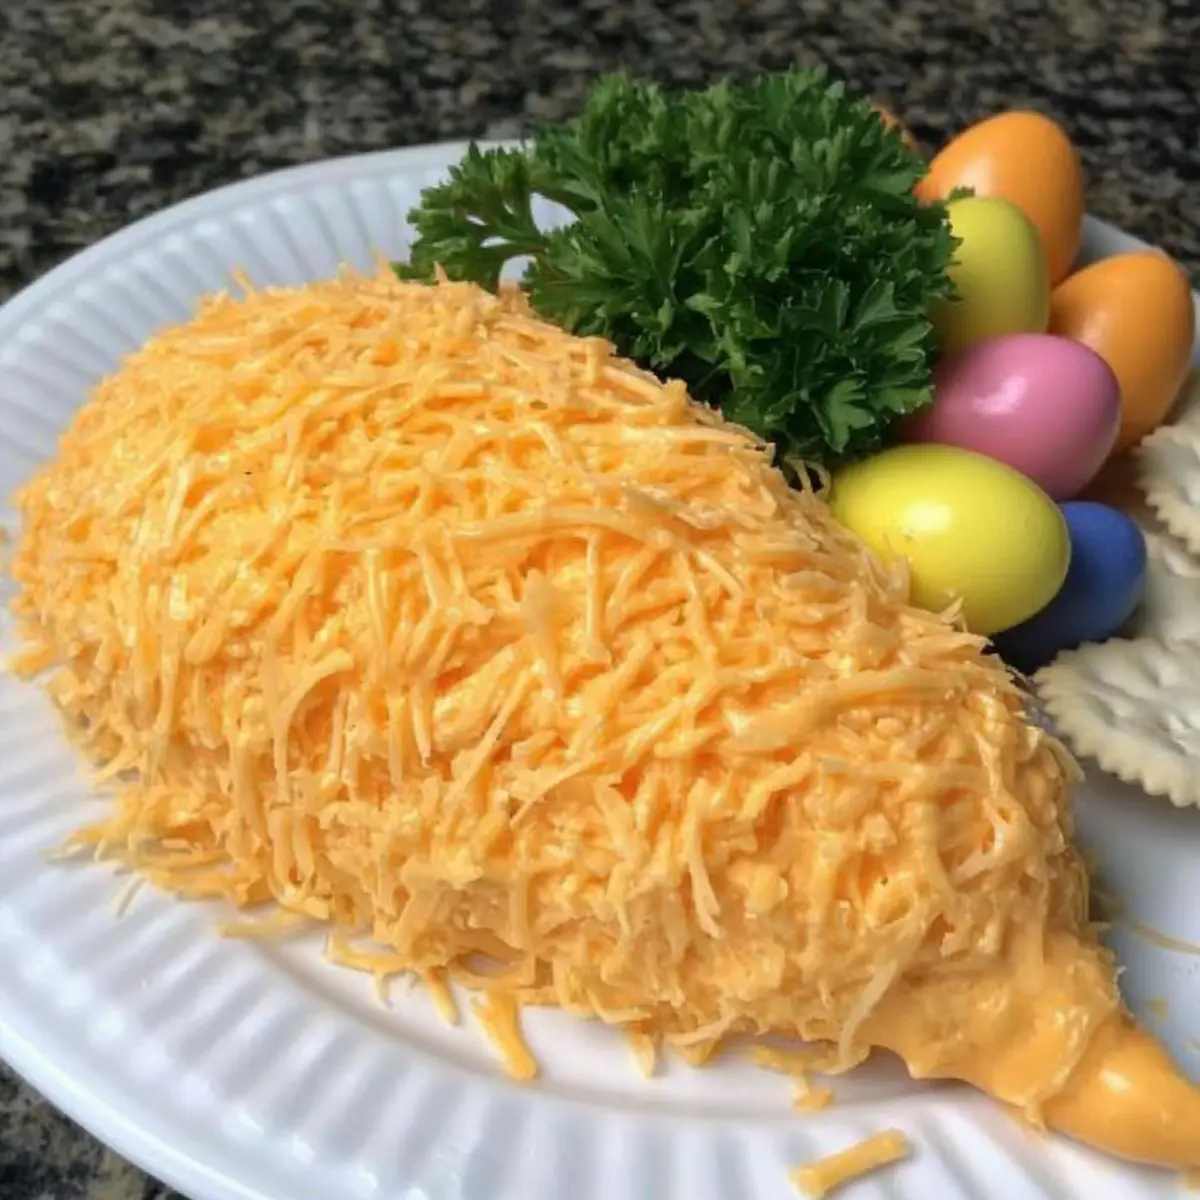
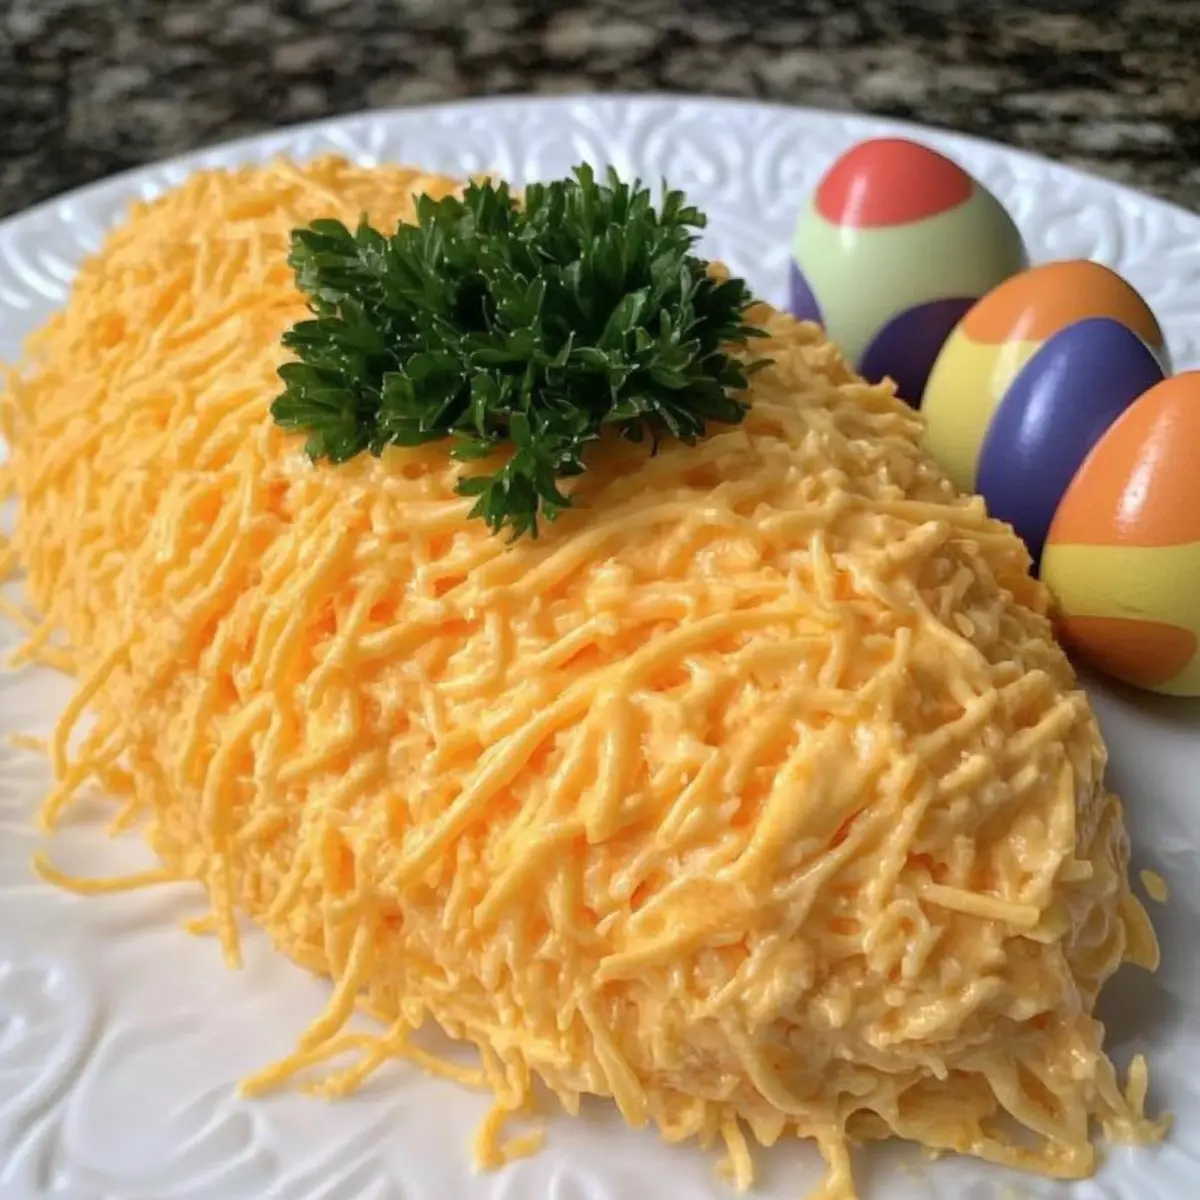
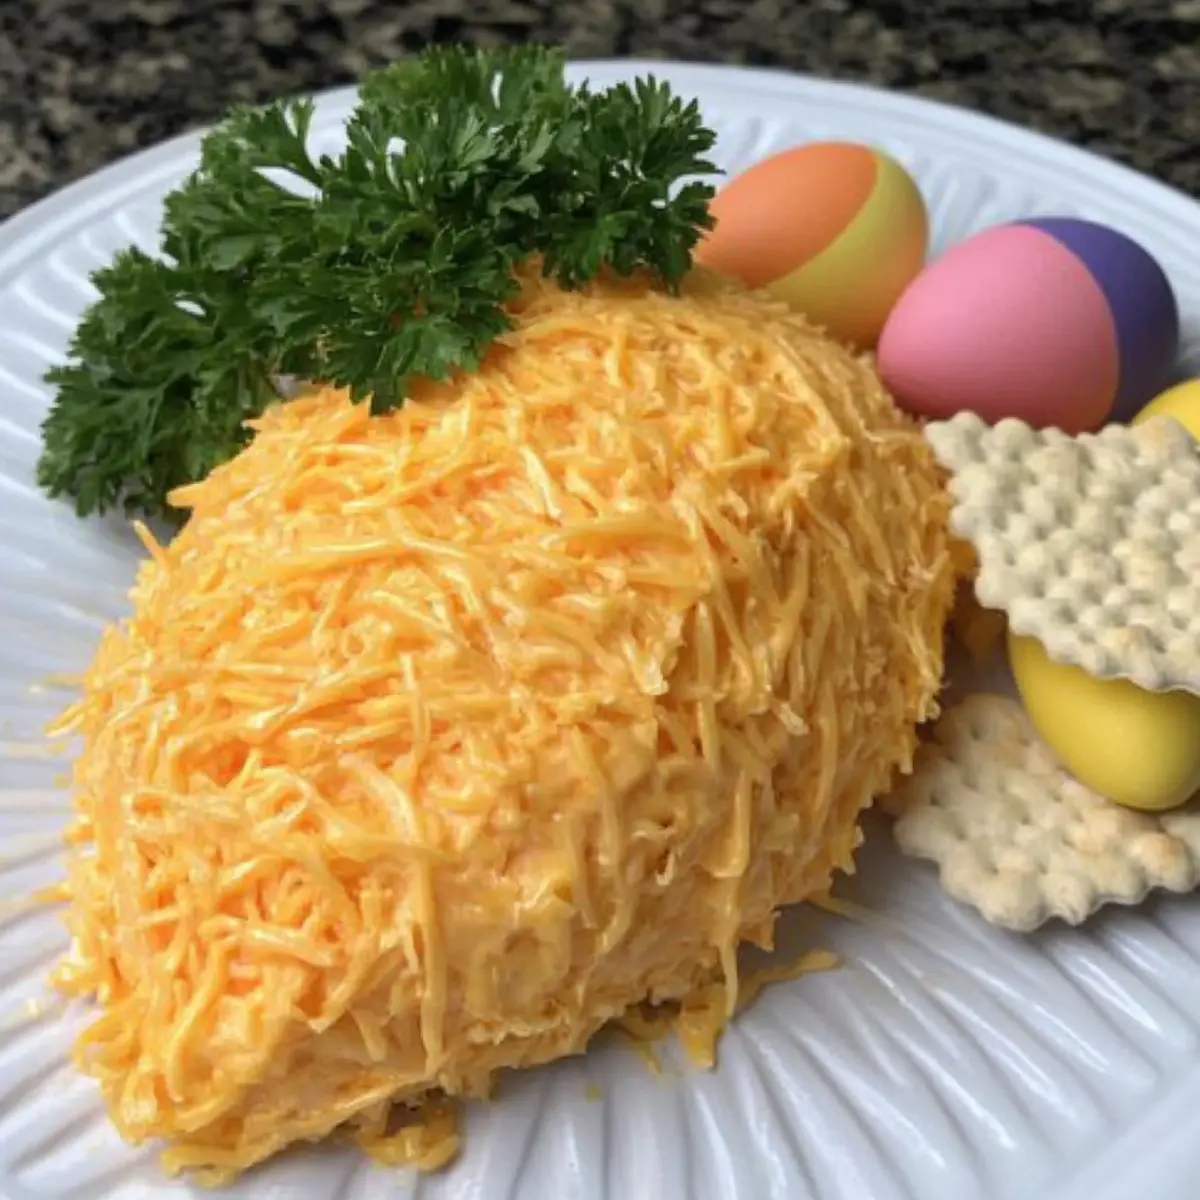
As I was preparing for this year’s Easter gathering, a vibrant idea struck me: why not create an eye-catching appetizer that screams spring? Enter the Easter Carrot Cheese Ball! This playful dish isn’t just a feast for the eyes with its lively orange hue; it’s a creamy, savory delight that will have your guests coming back for more. Combining cream cheese, crispy bacon, and cheddar, it’s not only easy to make but also an excellent make-ahead option. Friends and family will adore its fun shape, and you’ll appreciate how quickly it comes together. Ready to impress the crowd with this showstopper? Let’s dive into the delicious details of making your very own Easter Cheese Ball!
Why Is This Cheese Ball So Irresistible?
Creamy Texture: The blend of cream cheese and cheddar creates a smooth, rich base that melts in your mouth.
Easter Vibes: Its vibrant carrot shape and color make it a standout centerpiece for your Spring celebration!
Quick and Easy: With just a few simple steps, you can whip up this crowd-pleaser in no time, allowing you to enjoy your gathering stress-free.
Make-Ahead Marvel: Preparing it a day in advance ensures flavors meld perfectly, letting you focus on memorable moments with loved ones.
Versatile Flair: Not only will this Pumpkin Cream Cheese dish impress, but you can also customize it with different herbs or spices to suit any palate!
Easter Cheese Ball Ingredients
For the Base
- Cream Cheese – This creamy staple gives the cheese ball its delightful texture; opt for low-fat cream cheese for a lighter twist.
- Cooked Bacon – Adds a savory depth; substitute with turkey bacon for a healthier alternative.
- Garlic Salt – Provides essential seasoning; garlic powder works too if you want to reduce sodium.
- Worcestershire Sauce – Elevates flavor richness; feel free to omit for a vegetarian version.
For the Carrot Appearance
- Mild Cheddar Cheese (divided) – A key player in creating the “carrot” look while enhancing flavor; sharp cheddar can be swapped for a bolder taste.
- Parsley – Perfect for creating the carrot top’s charm; green onions can also take its place for added zest.
Optional Serving
- Assorted Crackers – Pair them with your cheese ball for delicious munching; choose Easter-egg-shaped ones for themed fun!
Step‑by‑Step Instructions for Easter Cheese Ball
Step 1: Prepare the Mixture
In a large mixing bowl, combine 8 ounces of softened cream cheese, ½ cup of crumbled cooked bacon, 1 teaspoon of garlic salt, and 1 tablespoon of Worcestershire sauce. Use a hand mixer or spatula to blend these ingredients until smooth and creamy, roughly 2-3 minutes. Ensure there are no lumps for a delightful texture in your Easter Cheese Ball.
Step 2: Incorporate the Cheddar
Gradually add 1 ½ cups of shredded mild cheddar cheese to the mixture, folding it in gently with a spatula. You want to ensure that the cheese is fully integrated and no streaks remain. This step brings in a rich flavor while contributing to the “carrot” appearance of your festive cheese ball.
Step 3: Shape the Cheese Ball
Lay a piece of parchment paper on your countertop, then scoop the cheese mixture onto it. Shape the mixture into a carrot form using your hands; aim for a rounded top and a tapering bottom. This will take about 5 minutes. Using parchment makes handling much easier and keeps things tidy.
Step 4: Coat for Color and Texture
Sprinkle the remaining ½ cup of shredded cheddar cheese over the shaped cheese ball, pressing it gently into the surface until fully coated. This colorful cheddar layer not only adds flavor and texture but also enhances the visual appeal of your Easter Cheese Ball. Set it aside.
Step 5: Add the Finishing Touches
Take a handful of fresh parsley and arrange it at the top of your cheese ball to represent the carrot’s leafy greens. Feel free to use kitchen scissors to trim the parsley for a neater look. These vibrant greens will make your Easter Cheese Ball even more inviting for your guests.
Step 6: Chill the Cheese Ball
Cover your decorated cheese ball with plastic wrap or keep it on the parchment paper and place it in the refrigerator. Allow it to chill for at least 1 hour to firm up and for the flavors to meld beautifully. This step is key for achieving the perfect texture in your Easter Cheese Ball.
Step 7: Serve with Style
Once chilled, transfer your lovely Easter Cheese Ball onto a serving platter. Pair it with an assortment of Easter-egg-shaped crackers for a playful touch. The crackers will complement the creamy inside while adding a delightful crunch, making it the perfect appetizer for your spring celebration.
What to Serve with Easter Carrot Cheese Ball
As you prepare to dazzle your guests with this festive cheese ball, consider these delightful pairings that create a well-rounded and memorable spring gathering.
-
Assorted Crackers: Pair with a variety of textures like crispy, buttery, or whole grain for an irresistible crunch alongside creamy cheese.
-
Fresh Vegetable Platter: Crisp carrots, celery, and bell peppers provide a refreshing contrast, adding a vibrant pop of color and healthful crunch to your spread.
-
Fruity Salsa: A sweet and tangy salsa made with pineapple or mango complements the savory notes of the cheese ball, offering a burst of tropical flavor.
-
Spinach Salad: Tossed with light vinaigrette, this salad adds a fresh and earthy element to balance the richness of the cheese ball.
-
White Wine Spritzer: Light and refreshing, this drink enhances your cheese ball’s flavors while uplifting the festive atmosphere of your gathering.
-
Chocolate-Covered Strawberries: For a sweet finish, these treats provide a delightful contrast to the savory cheese ball. A perfect dessert for springtime celebrations!
-
Garlic Breadsticks: Soft and warm, these breadsticks are perfect for scooping up your cheese ball, making them a hit with both kids and adults alike.
-
Homemade Lemonade: A zesty drink that cuts through the richness, refreshing and summery, it’s the ultimate companion to your festive spread.
Expert Tips for the Best Easter Cheese Ball
-
Softened Cheese: Ensure your cream cheese is at room temperature before mixing; this prevents lumps and creates a smooth, creamy texture for your Easter Cheese Ball.
-
Parchment Paper: Use parchment paper when shaping the cheese ball; it prevents sticking and makes transferring to a platter a breeze.
-
Presentation Matters: Choose a bright, festive serving dish to make your cheese ball pop. A vibrant presentation will excite your guests before they even take a bite!
-
Chill Time: Don’t skip the chilling step! Allowing the cheese ball to set in the fridge for at least an hour enhances flavors and improves the overall texture.
-
Don’t Overmix: When adding cheddar cheese, mix gently. Overmixing can lead to a rubbery consistency, so aim for a delicate fold to maintain that dreamy creaminess.
Make Ahead Options
This Easter Cheese Ball is perfect for busy home cooks looking to save time during holiday preparations! You can easily make the cheese ball up to 24 hours in advance, allowing the flavors to meld beautifully. Simply follow the steps to prepare the mixture and shape it, then wrap it tightly in plastic wrap and refrigerate. If you prefer, you can also coat the cheese ball in cheddar cheese up to 3 days ahead of time; just ensure it’s well-covered to maintain freshness. When you’re ready to serve, simply add the parsley garnish, chill for about 30 minutes if needed, and let your stunning appetizer shine on the table, just as delicious and inviting as if made fresh!
Easter Cheese Ball Variations & Substitutions
Feel free to let your creativity shine and personalize your cheese ball with these delightful twists!
-
Vegetarian Delight: Swap crispy bacon for chopped walnuts or pecans for a crunch that everyone can enjoy. This variation adds a lovely nutty flavor, elevating the dish to new heights.
-
Spicy Kick: Use pepper jack cheese instead of mild cheddar for a zesty surprise. This small change creates a burst of flavor that packs a punch without overwhelming the dish.
-
Herb-Infused: Combine in flavored cream cheeses like garlic & herb for a depth of taste. Not just good for this cheese ball, experimenting with different cream cheeses can transform many recipes into something special!
-
Lower Fat Option: Switch out regular cream cheese for low-fat or Greek yogurt for a lighter twist. This modification maintains creaminess but cuts down on calories without sacrificing flavor.
-
Savory Seasoning: Try adding fresh chives or dill to the mixture for a fresh, garden-inspired taste. These herbs bring an aromatic punch that will transport you to springtime bliss!
-
Cheese Diversity: Experiment with different types of cheese like gouda or mozzarella for varied textures and flavors. Mixing cheeses can lead to unexpected delights—you may find a new favorite!
-
Nuts for Crunch: Incorporate crushed pistachios or almonds on the outside for added texture. This colorful addition not only provides a crunchy element but also improves presentation with vibrant greens.
-
Sweet Twist: Add a touch of honey or a handful of dried cranberries to the cheese mixture for a hint of sweetness. This surprising element can balance the savory flavors beautifully and appeal even to the sweet tooth!
These variations are sure to keep your Easter Cheese Ball exciting and fresh! Don’t forget to pair it with your favorite Easter egg-shaped crackers or even some fresh veggies, like cucumber slices. If you’re inspired to explore more delicious recipes, consider trying a Pumpkin Cream Cheese dish as well!
How to Store and Freeze Easter Cheese Ball
Fridge: Store any leftovers in an airtight container in the refrigerator for up to 4 days. This helps maintain the Easter Cheese Ball’s creamy texture and flavor.
Freezer: If you want to keep it longer, wrap the cheese ball tightly in plastic wrap and freeze for up to 2 months. Thaw it in the fridge overnight before serving.
Avoid Room Temperature: Keep the cheese ball out of the danger zone! Do not leave it at room temperature for more than 2 hours to ensure food safety.
Reheating: No reheating is necessary since this cheese ball is best served cold. Enjoy it straight from the fridge with your festive crackers!

Easter Cheese Ball Recipe FAQs
What type of cream cheese should I use for the Easter Cheese Ball?
Use full-fat cream cheese for the best texture and flavor, as it provides the creaminess needed in this recipe. However, if you’re looking for a lighter option, low-fat cream cheese works well too and still delivers a delicious result!
How should I store leftover Easter Cheese Ball?
Store any leftovers in an airtight container in the refrigerator for up to 4 days. This will keep your cheese ball fresh and maintain its creamy texture. Just make sure to cover it well—nobody wants a cheese ball that has taken on fridge odors!
Can I freeze the Easter Cheese Ball?
Absolutely! Wrap the cheese ball tightly in plastic wrap and then place it in a freezer-safe container to prevent freezer burn. It can be frozen for up to 2 months. When you’re ready to enjoy it, simply thaw it in the refrigerator overnight before serving.
What if my cheese ball doesn’t hold its shape?
If your cheese ball is too soft and doesn’t hold its shape, it may need more chilling time. Make sure to chill it for at least an hour, as this helps firm up the mixture. Another tip is to add more cheese or a bit of breadcrumbs to help it bind together better.
Can I make the Easter Cheese Ball vegetarian?
Yes, you can easily adapt this recipe for a vegetarian audience! Just omit the cooked bacon and consider adding chopped nuts for a crunchy texture or more finely chopped vegetables for added flavor. Ensure the Worcestershire sauce you use is vegetarian or substitute it with a bit of extra seasoning to taste.
How do I know if my cheeses are fresh enough?
Always check for freshness by looking at the expiration dates on your cream cheese and cheddar. Fresh cheese should be free of any dark spots or a sour smell. For cream cheese, ensure it’s creamy and smooth without any lumps before mixing.
Create a Festive Easter Cheese Ball Everyone Will Love
Ingredients
Equipment
Method
- In a large mixing bowl, combine softened cream cheese, crumbled cooked bacon, garlic salt, and Worcestershire sauce. Blend until smooth, about 2-3 minutes.
- Gradually add shredded mild cheddar cheese to the mixture, folding it gently with a spatula until fully integrated.
- Scoop the cheese mixture onto parchment paper and shape it into a carrot form.
- Sprinkle the remaining shredded cheddar cheese over the shaped cheese ball, pressing it gently onto the surface.
- Arrange fresh parsley at the top of the cheese ball to represent the carrot's leafy greens.
- Cover with plastic wrap and refrigerate for at least 1 hour to firm up and meld flavors.
- Serve the Easter Cheese Ball on a platter with assorted crackers.
Leave a Reply