
As I flipped the last pancake, a vision danced in my mind—my kids’ faces lighting up like sunshine on Easter morning. If you’re looking to sprinkle some magic into your breakfast table this holiday, these adorable Easter Bunny Pancakes are the perfect choice. They’re not only a feast for the eyes, but they’re also incredibly easy to make, even for the most novice cooks among us. With fluffy pancakes that transform into playful critters topped with vibrant fruits, you’ll create a delightful scene that’s sure to have your little ones squealing with joy. Plus, this fun breakfast tradition doubles as a wholesome treat, keeping everyone satisfied and happy! So, are you ready to hop into the kitchen and whip up some smiles?
Why Are These Pancakes So Special?
Whimsical Fun: These Easter Bunny Pancakes transform a simple breakfast into a magical experience. Your kids will love the playful bunny designs that invite creativity at the breakfast table.
Effortless Preparation: With only a few ingredients, these pancakes are super easy to make, requiring no prior cooking expertise.
Customizable Delight: Feel free to experiment with your favorite fruits or even go savory! Create bunny faces or fun bunny butts that suit your family’s taste.
Nutritional Balance: Each serving is packed with wholesome ingredients, providing a great start to the day—who knew fun could be this nutritious?
Memorable Celebration: Make this breakfast a new family tradition that brings everyone together, creating cherished moments and joyful memories.
Easter Bunny Pancakes Ingredients
• Get ready to create magic in the kitchen!
For the Pancake Batter
- Bisquick (2 cups) – Forms the fluffy foundation of your pancakes; you can substitute with any favorite pancake mix.
- Milk (1 cup) – Adds moisture and richness; for a creamy twist, try almond or oat milk instead.
- Eggs (2) – Ensure fluffiness and binding; a chia egg can work as a vegan replacement for this part in your Easter Bunny Pancakes.
For the Bunny Decor
- Banana (1) – Perfect for cute bunny ears! Swap for apple slices for a different flavor.
- Blueberries (2) – Use these for the eyes, providing a delightful burst of freshness; chocolate chips can be a fun alternative.
- Strawberry (1/2) – This adds a colorful nose; other berries like raspberries can work nicely too.
- Cheese single (1 piece) – Cut into strips to create whiskers; for a savory option, thinly sliced turkey or ham will do wonders!
Step‑by‑Step Instructions for Easter Bunny Pancakes
Step 1: Prepare Batter
In a medium mixing bowl, combine 2 cups of Bisquick, 1 cup of milk, and 2 eggs. Whisk thoroughly until the batter is smooth and free of lumps—this will form the delightful foundation for your Easter Bunny Pancakes! Allow the mixture to sit for a few minutes while you preheat the skillet to medium heat, ensuring a fluffy texture.
Step 2: Heat Skillet
Once your batter is ready, place a non-stick skillet over medium heat. Lightly grease the skillet with cooking spray or a touch of butter to prevent sticking. Wait for the skillet to reach the optimal temperature; you can test it by splashing a drop of water on the surface—if it dances, you’re good to go!
Step 3: Cook Pancakes
Pour a ladleful of the batter onto the skillet to create one large pancake (about 5 inches in diameter) for the bunny head. Add two smaller pancakes (approximately 1.5 inches each) for the ears beside it. Cook until the edges appear set and bubbles form on the surface, usually 2-3 minutes, then carefully flip them over and cook for another 1-2 minutes until golden brown.
Step 4: Assemble Bunny Face
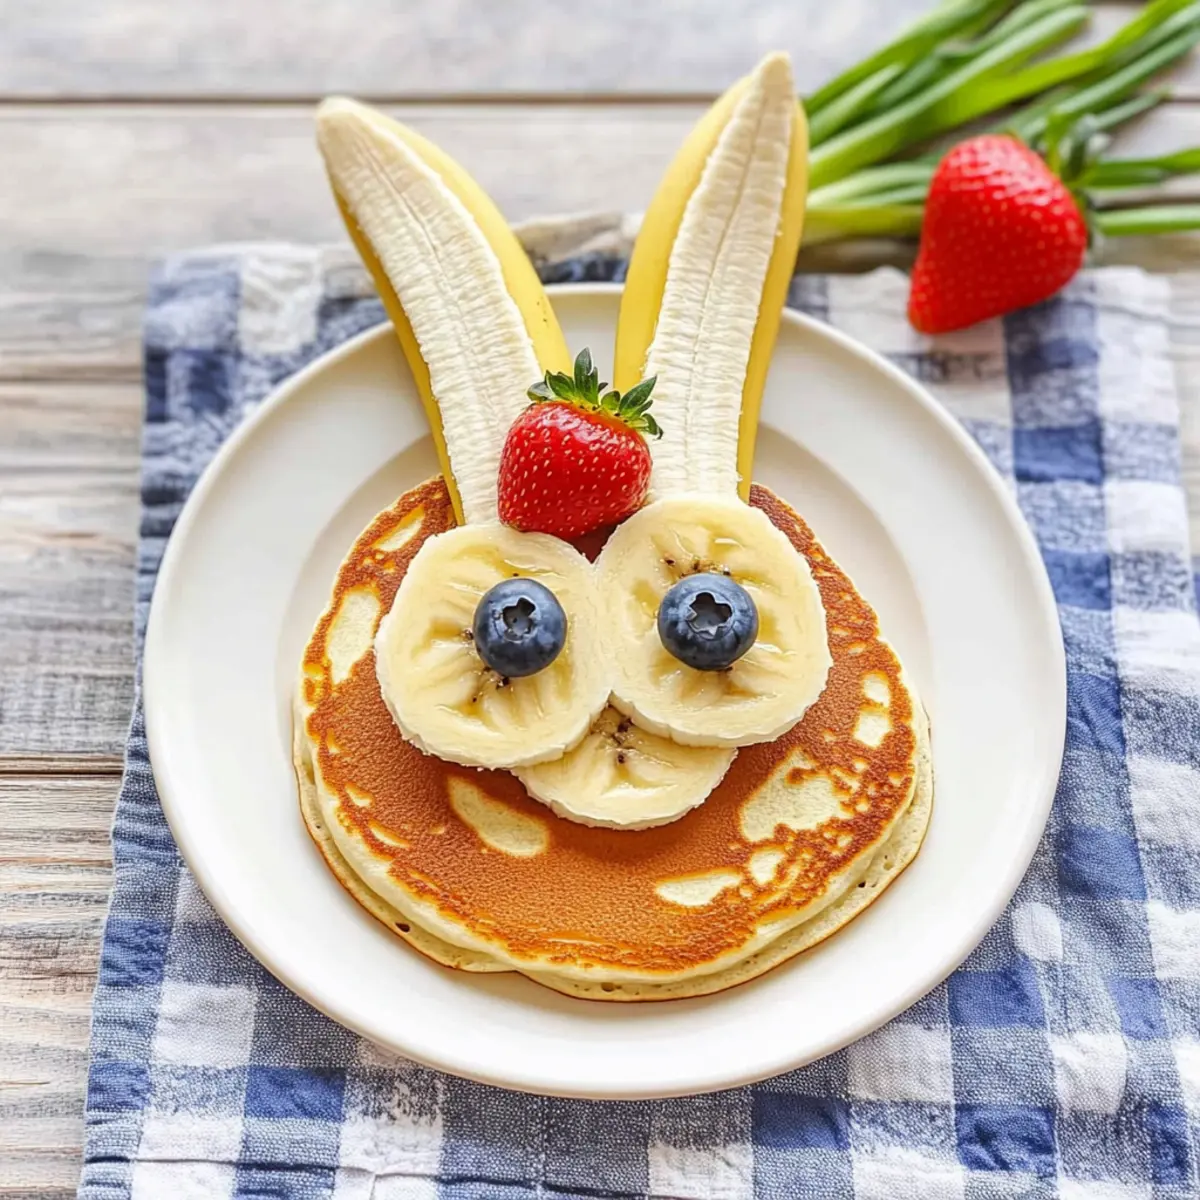
Once the pancakes are cooked, place the large pancake at the bottom as the bunny’s face on a plate. Position the two smaller pancakes on top for the ears, tilting them slightly for an adorable look. This creates the perfect base for decorating your whimsical Easter Bunny Pancakes!
Step 5: Decorate
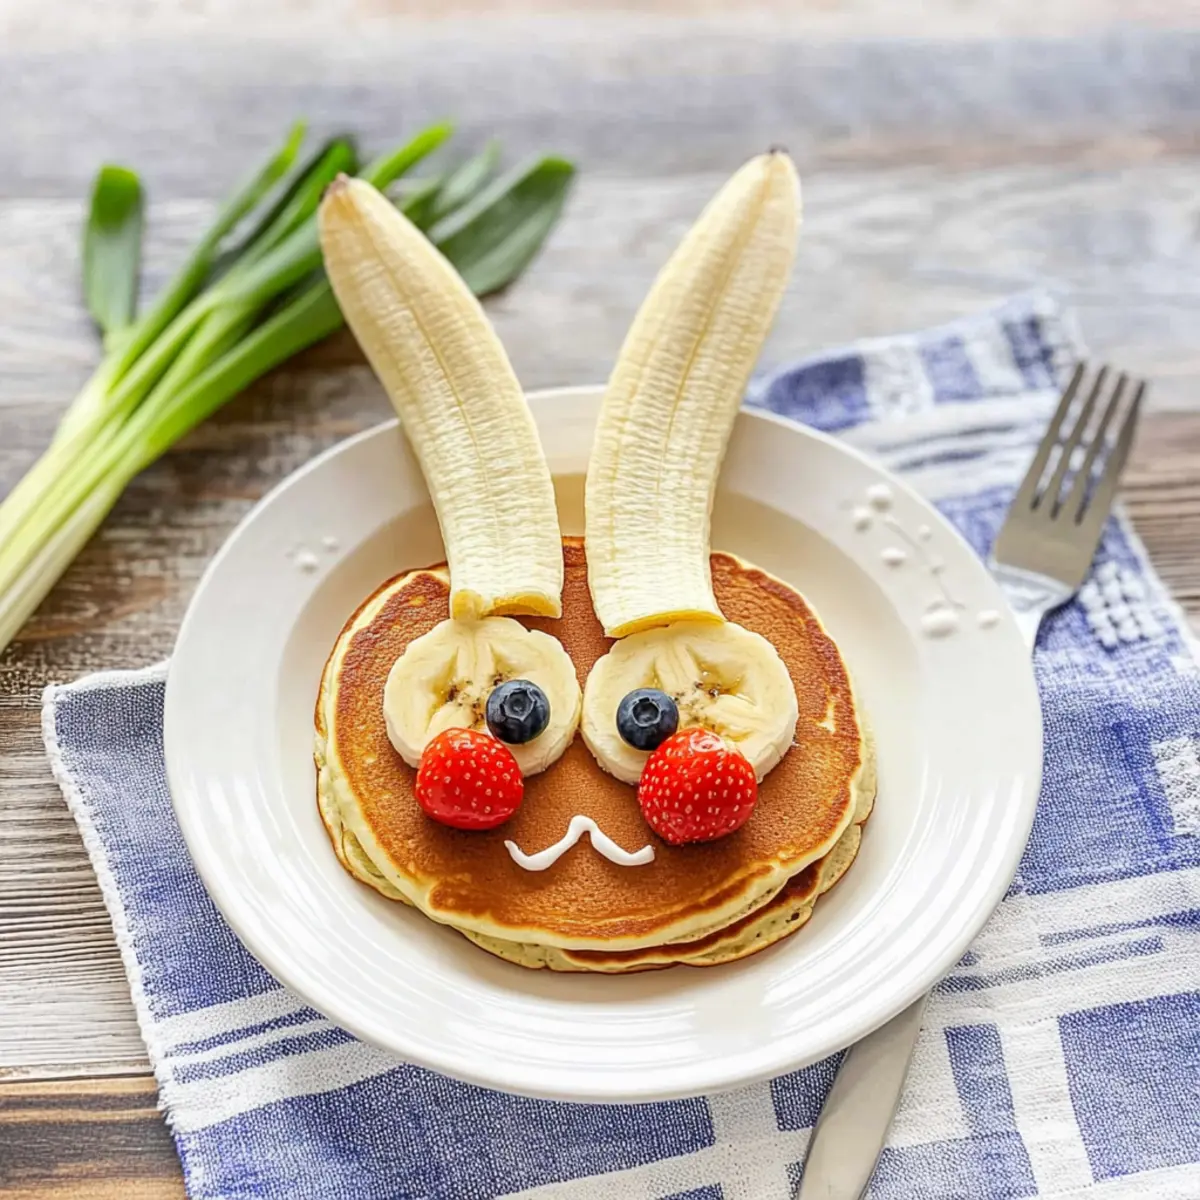
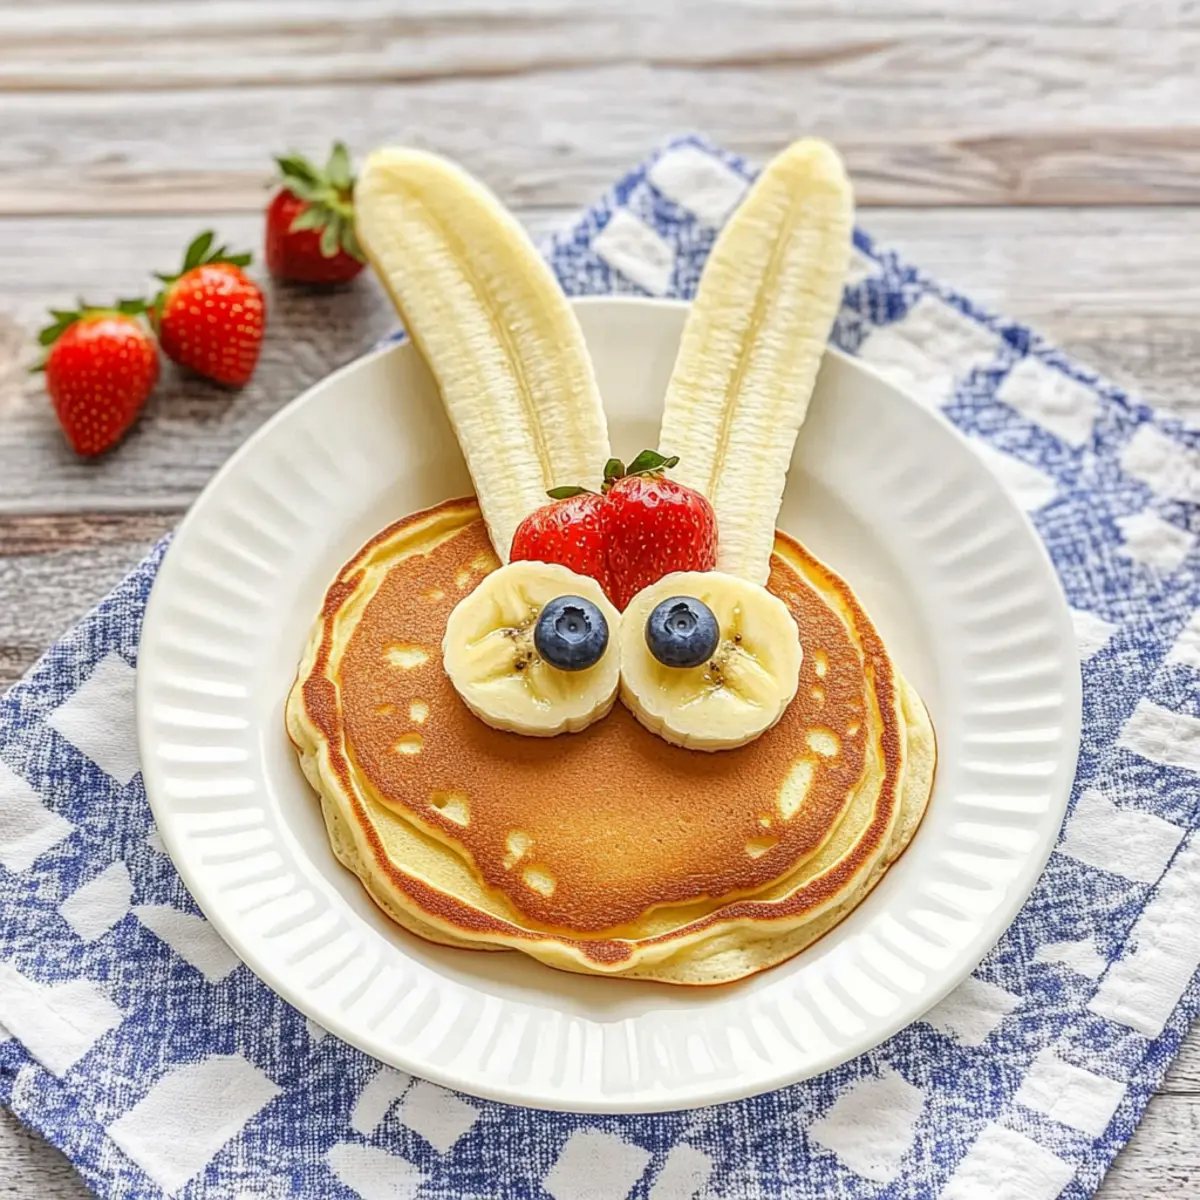
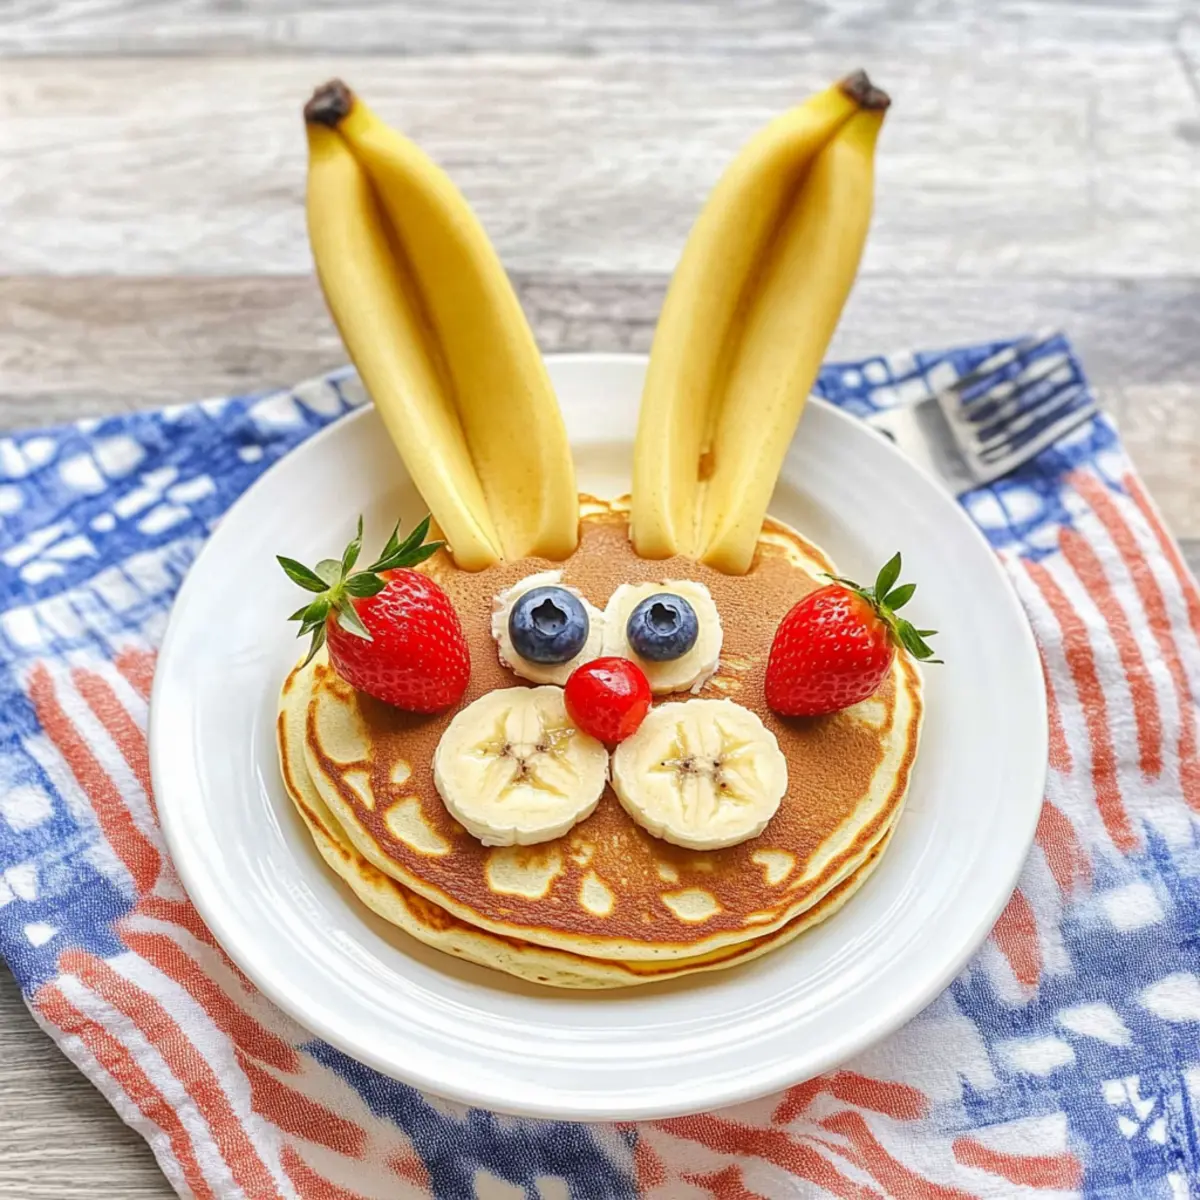
Now comes the fun part! Slice a banana to form the bunny ears, and arrange it on top of the pancake ears. Use a strawberry piece for the nose, and set two blueberries on the larger pancake to create bright, adorable eyes. Add strips of cheese on each side for the whiskers, completing the charming bunny face!
Step 6: Serve and Enjoy
Your enchanting Easter Bunny Pancakes are now ready to serve! Gather your family around the breakfast table, and watch their faces light up with joy. To elevate the festive experience, consider pairing these fluffy creations with a side of pink hot chocolate or fresh fruit. Enjoy the smiles and excitement they bring!
Easter Bunny Pancakes Variations & Substitutions
Feel free to play around with these ideas to make your pancakes uniquely yours—let your creativity shine in the kitchen!
-
Dairy-Free: Swap cow’s milk with almond or oat milk for a creamy, dairy-free option that everyone can enjoy.
-
Vegan Option: Replace the eggs with a chia egg (1 tbsp chia seeds mixed with 2.5 tbsp water) for a plant-based twist.
-
Savory Switch: Instead of fruits, use thinly sliced cucumbers or bell peppers for a veggie-themed bunny that’s sure to surprise!
-
Fruity Fun: Mix and match fruits based on what’s in season or your family’s favorites. Think mandarin oranges for a sunny nose!
-
Chocolate Treats: Use melted chocolate for the bunny’s eyes or even as a drizzle—because who can resist a sweet addition?
-
Oatmeal Magic: For a healthier option, use oatmeal instead of Bisquick to create oat-based pancakes that are hearty and wholesome.
-
Flavored Flair: Add a splash of vanilla or a sprinkle of cinnamon to your batter for an alluring scent and taste that will elevate your pancake game!
-
Bunny Butts: For more fun, construct bunny butt pancakes, using melted chocolate chips for toes and whipped cream for a fluffy tail—how cute is that?
If you’d like even more inspiration, consider exploring our ideas for creative pancake styles or check out how to use different fruits as pancake toppings. Let your imagination run wild, and enjoy family breakfast time together!
Make Ahead Options
These Easter Bunny Pancakes are a fantastic choice for meal prep, making your holiday breakfast not only enjoyable but also hassle-free! You can prepare the pancake batter up to 24 hours in advance; just mix the Bisquick, milk, and eggs, then store it in an airtight container in the refrigerator. For optimal texture, give it a gentle stir before cooking. Additionally, slice the banana, strawberries, and cheese ahead of time, and store them in separate containers for easy decoration. When you’re ready to serve, simply cook the pancakes and assemble them with the prepped fruits and cheese. This way, you can create those whimsical bunny faces with minimal effort, ensuring a delightful breakfast without the morning stress!
Expert Tips for Easter Bunny Pancakes
-
Skillet Temperature: Ensure your skillet is adequately heated to prevent soggy pancakes. A hot surface allows for the perfect golden brown finish on your Easter Bunny Pancakes.
-
Consistent Pancakes: Use a pancake dispenser if available. This ensures uniformity in size and shape, making your bunny designs more appealing and easier to assemble.
-
Fun Variations: Don’t hesitate to swap ingredients based on what you have on hand or your kids’ preferences. Try different fruits or savories, and watch how your Easter Bunny Pancakes transform!
-
Decor Genius: Get creative! Use whipped cream or yogurt to add even more personality to your bunny faces, making each serving a unique masterpiece.
-
Make Ahead: Prepare the batter the night before and store it in the fridge. This way, you can quickly whip up breakfast the next morning for a stress-free family celebration.
How to Store and Freeze Easter Bunny Pancakes
Fridge: After cooking, store your Easter Bunny Pancakes in an airtight container in the refrigerator for up to 2 days. Make sure to layer them with parchment paper to prevent sticking.
Freezer: For longer storage, freeze pancakes in a single layer on a baking sheet until solid, then transfer to a freezer-safe bag. They can last up to 2 months, perfect for quick breakfasts!
Reheating: To reheat, place pancakes in a toaster or skillet over medium heat for a few minutes until warmed through. This keeps their fluffy texture intact and ready to delight your family again!
Make-Ahead Option: Prep the batter in advance and store it in the refrigerator overnight. This way, you can whip up these fun Easter Bunny Pancakes in no time on your special morning!
What to Serve with Easter Bunny Pancakes
Brighten your festive breakfast table with delightful pairings that complement your whimsical pancake creation.
-
Pink Hot Chocolate: A fun, sweet drink to match the festive spirit, this charming beverage adds warmth and whimsy to every sip.
-
Fresh Fruit Salad: Bursting with color and flavor, a fruit salad offers a refreshing balance to pancakes, making every bite a delightful surprise.
-
Yogurt Parfaits: Layers of creamy yogurt with granola and berries enhance the breakfast experience, providing a satisfying crunch alongside the fluffy pancakes.
-
Maple Syrup Drizzle: A classic pairing, the rich sweetness of maple syrup perfectly complements the fluffy texture of the pancakes. Use a light hand to avoid overwhelming the playful flavors.
-
Bacon or Sausage Links: For a savory twist, crispy bacon or sausage links offer a hearty contrast to the sweetness of the pancakes, balancing your breakfast plate beautifully.
-
Scrambled Eggs: Soft, fluffy scrambled eggs add protein to the meal and serve as a wonderful sidekick to your whimsical pancakes.
-
Homemade Whipped Cream: A dollop of light, airy whipped cream can elevate your pancake presentation, adding an extra layer of fun and indulgence.
-
Mini Chocolate Chips: For a touch of sweetness, sprinkle mini chocolate chips on top or serve on the side, enticing kids and adults alike!
-
Sparkling Water with Fruit: Refreshing and bubbly, this drink provides a light, fruity note that cleanses the palate, perfectly balancing the sweetness of your Easter Bunny Pancakes.
Easter Bunny Pancakes Recipe FAQs
What type of Bisquick should I use?
You can use any version of Bisquick, including Original, Gluten-Free, or any pancake mix you prefer. Each one will work beautifully, providing that fluffy texture we love in Easter Bunny Pancakes!
How long do these pancakes last in the fridge?
These adorable pancakes can be stored in an airtight container in the refrigerator for up to 2 days. To keep them fresh and prevent sticking, layer them with parchment paper between each pancake.
Can I freeze Easter Bunny Pancakes?
Absolutely! To freeze your pancakes, lay them out in a single layer on a baking sheet until they are solid, about 1-2 hours. Then, transfer them to a freezer-safe bag or container. They can last up to 2 months, making for quick and convenient breakfasts whenever you need them!
What if my batter is too thick or too thin?
If you find your batter too thick, you can add a tablespoon or two of milk until it reaches a pourable consistency. Conversely, if it’s too thin, sprinkle in a little bit more Bisquick to thicken it up. This way, you’ll achieve the perfect fluffiness for your Easter Bunny Pancakes.
Are there any dietary considerations for the ingredients?
Yes, definitely! For a dairy-free option, use almond or oat milk instead of regular milk. If you’re making them vegan, you can substitute the eggs with a chia egg (1 tablespoon of chia seeds mixed with 2.5 tablespoons of water). Always ensure that any substitutes you make align with the dietary needs or allergies of those who will be enjoying these pancakes!
How can I make these pancakes more colorful?
Great question! You can easily add food coloring to the batter for rainbow pancakes or use a mix of vibrant fruits for decoration. Seasonal fruits like kiwi or mandarin oranges can also add a burst of color and flavor, making your Easter Bunny Pancakes even more inviting!
Easter Bunny Pancakes: A Whimsical Breakfast for Kids
Ingredients
Equipment
Method
- In a medium mixing bowl, combine 2 cups of Bisquick, 1 cup of milk, and 2 eggs. Whisk thoroughly until the batter is smooth and free of lumps. Allow to sit while preheating the skillet to medium heat.
- Place a non-stick skillet over medium heat and lightly grease it. Test the temperature by splashing a drop of water on the surface.
- Pour a ladleful of the batter onto the skillet to create one large pancake for the bunny head and two smaller pancakes for the ears. Cook until bubbles form on the surface, then flip.
- Assemble the pancakes by placing the large pancake at the bottom for the bunny's face and the two smaller ones on top for ears.
- Slice the banana for the ears, use a strawberry piece for the nose, and set blueberries for eyes. Add cheese strips for whiskers.
- Serve and enjoy with your family around the breakfast table!
Leave a Reply