
As I flipped through recipe cards from my childhood, I stumbled upon a memory—the taste of Disney’s Grilled Three-Cheese Sandwich. This delight isn’t just a meal; it’s a nostalgic embrace of comfort food that transports you straight to the happiest places on earth. Combining the creaminess of cream cheese, savory garlic spread, and a symphony of rich cheeses, this easy recipe is perfect for cozy family movie nights or a delightful afternoon pick-me-up. Plus, it’s a breeze to whip up, making it an ideal option for those busy days when you crave something special. Are you ready to melt into a delicious experience that captures the magic of Disneyland? Let’s dive into this whimsical journey of flavors together!
What Makes This Grilled Cheese Special?
Nostalgic Comfort: This sandwich brings back memories of blissful days spent at Disney, making it perfect for both kids and adults.
Flavor Explosion: A harmonious blend of cream cheese and garlic spread creates a taste sensation that elevates a classic favorite.
Easy to Make: Simple steps mean anyone can master it—making this an excellent choice for a quick weeknight meal.
Customizable Options: Feel free to play with cheeses or add ingredients like cooked bacon for your personalized touch.
Perfect Pairing: Serve it alongside a steaming bowl of homemade tomato soup to create a heartwarming meal that everyone will adore.
Embrace the magic and treat your tastebuds with this delightful recipe—just like indulging in a Disney park treat!
Disney’s Grilled Cheese Ingredients
For the Cream Cheese Spread
• Cream Cheese – ensures a rich and creamy base for the spread, reminiscent of Disney’s deliciousness.
• Shredded Double Gloucester or Cheddar – adds sharpness; use any creamy cheese if Double Gloucester isn’t on hand.
• Heavy Cream – provides silkiness; adds a dreamy texture to your spread.
• Coarse Salt – enhances flavors and balances the creaminess.
For the Garlic Spread
• Mayonnaise – creates a luscious texture; swap for Greek yogurt for a lighter alternative.
• Minced Garlic – infuses aromatic goodness that complements the cheese perfectly.
• Coarse Salt – brightens the flavor and ties the ingredients together.
For the Sandwich
• Artisan Bread – 8 thick slices are ideal for holding all the cheesy goodness; choose a crusty loaf for best results.
• Cheddar Cheese – 8 slices bring sharpness to the mix; consider a milder version if desired.
• Provolone Cheese – 8 slices offer a smooth and buttery flavor; Fontina makes a great alternative with similar melting qualities.
Embrace the delightful taste of this Disney’s Grilled Cheese and let your kitchen be filled with the comforting aroma of nostalgia!
Step‑by‑Step Instructions for Disney’s Grilled Cheese
Step 1: Prepare Cream Cheese Spread
Start by gathering a food processor to blend your cream cheese, shredded Double Gloucester or cheddar, heavy cream, and coarse salt. Pulse the mixture until smooth and creamy for about 1-2 minutes. You should have a rich, velvety spread that evokes the flavors of Disney. Once done, transfer it to a bowl and set it aside while you prepare the garlic spread.
Step 2: Make Garlic Spread
In a small mixing bowl, combine mayonnaise, minced garlic, and a pinch of coarse salt. Use a whisk or a fork to mix the ingredients thoroughly until well-blended. The result should be a smooth, aromatic garlic spread that will elevate your Disney’s Grilled Cheese. Once combined, set this aside to let the flavors meld while you assemble the sandwiches.
Step 3: Assemble Sandwich
Now it’s time to build your sandwich! Take 4 slices of artisan bread and spread the creamy cheese mixture generously over one side of each slice. On the opposite side, apply an even layer of the garlic spread. Layer each of the cream cheese-covered slices with cheddar and provolone cheese, before topping them off with the remaining slices, garlic-side down for that delightful crunch.
Step 4: Grill Sandwiches
Preheat a skillet over medium heat, adjusting to ensure even cooking. Once hot, place your assembled Disney’s Grilled Cheese sandwiches in the skillet. Grill each side for about 4-5 minutes, pressing gently with a spatula until the bread turns golden brown and the cheese begins to ooze. Keep an eye on them to prevent burning and ensure that they achieve that perfect crispiness.
Step 5: Serve
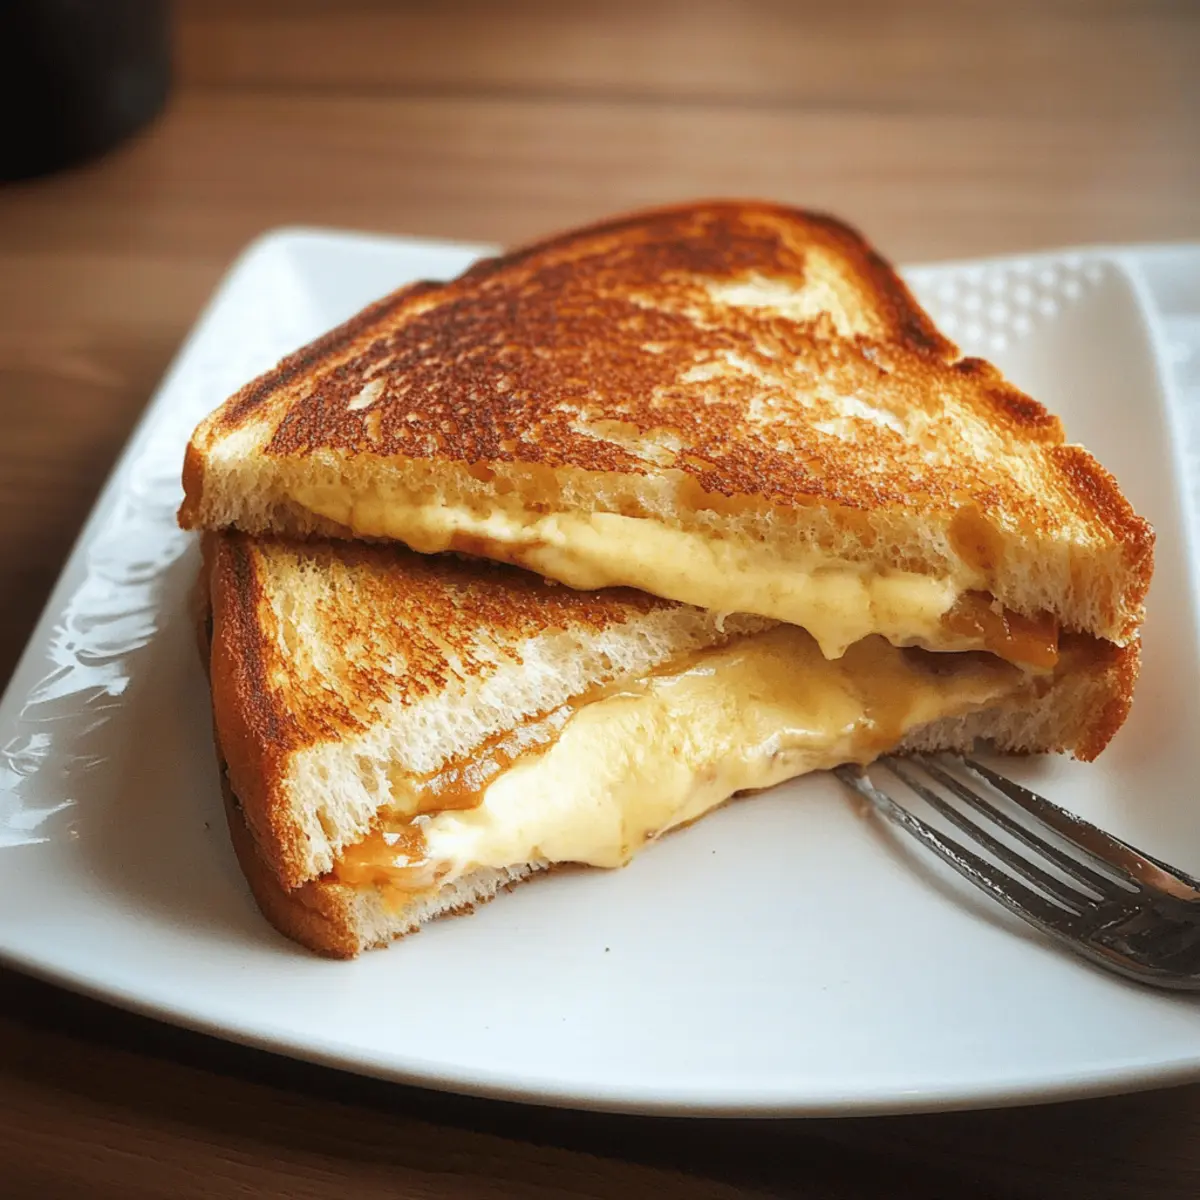
After grilling, remove the sandwiches from the skillet and let them cool for just a moment. Slice each sandwich diagonally to reveal the gooey cheese inside. Serve your Disney’s Grilled Cheese hot, and pair it with a side of homemade tomato soup for a classic, comforting meal that takes you right back to your favorite Disney moments.

How to Store and Freeze Disney’s Grilled Cheese
Fridge: Store any leftover Disney’s Grilled Cheese in an airtight container in the fridge for up to 2 days. This keeps the sandwich fresh while maintaining its cheesy deliciousness.
Freezer: For longer storage, wrap the grilled cheese tightly in plastic wrap and then place it in a freezer-safe bag. It can be frozen for up to 1 month.
Reheating: To reheat, thaw the sandwich in the fridge overnight, then grill it on medium heat for about 4-5 minutes on each side until warmed through and crispy.
Room Temperature: Avoid leaving the sandwich out at room temperature for more than 2 hours to ensure food safety. Enjoying it fresh is always best!
Expert Tips for Disney’s Grilled Cheese
• Heat Matters: Ensure your skillet is preheated so the bread toasts evenly and achieves that golden-brown perfection without burning.
• Press for Crispiness: Use a spatula to gently press down on the sandwich while grilling; this helps the cheese melt thoroughly and ensures a crunchy crust.
• Cheese Upgrade: For an extra cheesy experience, consider adding additional slices of cheese inside the sandwich before grilling; it enhances the flavor of Disney’s Grilled Cheese.
• Mind the Spread: Apply the spreads evenly to avoid sogginess, ensuring each bite delivers the delightful flavor without excess moisture.
• Bread Choice: Opt for thick-cut artisan bread to hold the substantial fillings securely, making every bite delightful and preventing collapse.
What to Serve with Disney’s Grilled Cheese
Looking to create a memorable meal that enhances the cozy flavors of your grilled cheese sensation?
- Tomato Soup: A classic companion, its acidity balanced with creaminess perfectly complements the cheese’s richness. The two create a delightful harmony of flavors.
- Crispy Pickles: Their tangy crunch cuts through the creaminess of the sandwich, adding a refreshing contrast that elevates every bite.
- French Fries: Golden and crispy, they add a satisfying crunch alongside the melty sandwich. Consider sprinkling with a hint of parmesan or a side of garlic aioli!
- Garden Salad: A fresh mix of greens with a light vinaigrette offers a bright, zesty counterbalance and helps lighten up the meal without sacrificing flavor.
- Coleslaw: Its creamy, crunchy texture provides a cooling contrast and textural variety, bringing out the savory notes of Disney’s Grilled Cheese.
- Apple Slices: Sweet, crisp apple slices provide a refreshing palate cleanser, making each bite of grilled cheese feel even more indulgent.
- Sparking Lemonade: A fizzy drink can invigorate your palate, while a touch of citrus balances the richness of the cheese beautifully.
- Brownies: For a sweet finish, fudgy brownies are always a hit, offering a rich dessert to round off your comforting meal.
Variations & Substitutions for Disney’s Grilled Cheese
Feel free to get creative with this delightful grilled cheese, as it welcomes personalization and flavor exploration!
- Dairy-Free: Substitute the cheese with your favorite plant-based alternatives for a delicious, creamy option that caters to dairy-free diets.
- Extra Crunch: Add a layer of crispy bacon or panko breadcrumbs on the outside before grilling for added texture and flavor. It adds a delightful crunch, making each bite irresistibly satisfying.
- Spicy Kick: Toss in some sliced jalapeños or a sprinkle of crushed red pepper for a zesty twist that amplifies the flavor profile beautifully. Spice it up to your liking for an unexpected surprise amidst the creamy goodness.
- Herb Infusion: Mix fresh herbs like basil or rosemary into both spreads to elevate the flavor. The aromatic notes will transport your taste buds straight to a sunlit garden.
- Nutty Flavor: Use a layer of nut-based cheese which offers a unique, creamy texture and a hint of nuttiness. Try swapping out only half for added richness without losing that cheesy essence.
- Flavorful Bread: Experiment with different types of bread such as sourdough or even a flavorful focaccia for a twist on the classic sandwich. Each option brings its distinct character to your grilled cheese experience.
- Roasted Veggies: Add roasted red peppers or sautéed mushrooms inside for a heartier sandwich. These add depth of flavor and a satisfying bite that makes it even more filling.
- Sweet Surprise: For a sweet contrast, layer in some apple slices or fig jam before grilling. It’s a surprising yet delightful combination that enhances the savory elements beautifully.
With these variations, you can easily make each grilled cheese unique while enjoying the magic of Disney right in your kitchen! Looking for a quick idea for a home-cooked meal? Consider pairing it with a bowl of homemade tomato soup or a fresh salad for added nourishment!
Make Ahead Options
These magical Disney’s Grilled Three-Cheese Sandwiches are perfect for meal prep enthusiasts! You can prepare the cream cheese and garlic spreads up to 3 days in advance, storing them in airtight containers in the refrigerator. Additionally, you can assemble the sandwiches, wrapping them tightly in plastic wrap, for a convenient grab-and-go meal that can sit in the fridge for up to 24 hours. To maintain quality, grill them just before serving to achieve that golden-brown crispiness and melty cheese surprise. When ready to enjoy, simply heat a skillet, grill each sandwich for about 4-5 minutes on each side, and savor the delicious nostalgia!

Disney’s Grilled Three-Cheese Sandwich Recipe FAQs
How do I choose the right bread for the sandwich?
For the best results, opt for thick-cut artisan bread with a sturdy crust. This ensures that it can hold the rich, cheesy fillings without collapsing during grilling. Brands like sourdough or ciabatta work great, providing the right balance of texture and flavor.
How should I store leftover Disney’s Grilled Cheese?
Absolutely! Store any leftovers in an airtight container in the fridge where they will stay fresh for up to 2 days. To maintain the best flavor and texture, heat them on a skillet rather than a microwave when you’re ready to enjoy them again.
Can I freeze Disney’s Grilled Cheese sandwiches?
Of course! To freeze your grilled cheese, first let the sandwiches cool completely. Then, wrap each sandwich tightly in plastic wrap, followed by aluminum foil, to prevent freezer burn. They can be frozen for up to 1 month. When it’s time to eat, thaw them in the fridge overnight, then grill them on medium heat for around 4-5 minutes on each side until they are crispy and heated through.
What if my sandwich turns soggy?
Very! If you find your sandwich is soggy, check the spreads used. Using too much mayonnaise or not allowing the spread to set can lead to moisture. Apply the spreads evenly but sparingly. Additionally, grilling the sandwich longer while applying gentle pressure can help achieve that crispy exterior.
Can I add extra ingredients to the grilled cheese?
Absolutely! Feel free to customize your sandwich with additional ingredients like crispy bacon, sautéed mushrooms, or fresh herbs like basil. These additions not only enhance flavor but also make your Disney’s Grilled Cheese uniquely yours!
Are there any dietary considerations I should keep in mind?
Yes! If cooking for others, be sure to check for allergens such as dairy in cheese and spreads. For gluten-free options, use gluten-free bread. If someone prefers a lighter version, swapping mayonnaise for Greek yogurt in the garlic spread is a great alternative too.

Ultimate Disney’s Grilled Cheese with Special Garlic Spread
Ingredients
Equipment
Method
- Prepare Cream Cheese Spread: Blend cream cheese, shredded Double Gloucester or cheddar, heavy cream, and coarse salt in a food processor until smooth.
- Make Garlic Spread: Combine mayonnaise, minced garlic, and coarse salt in a small bowl. Mix until well-blended.
- Assemble Sandwich: Spread creamy cheese mixture on one side of 4 slices of bread. Apply garlic spread on the opposite side and layer with cheddar and provolone.
- Grill Sandwiches: Preheat a skillet over medium heat. Grill each assembled sandwich for about 4-5 minutes on each side until golden brown.
- Serve: Slice sandwiches diagonally and serve hot, ideally with homemade tomato soup.
Leave a Reply