
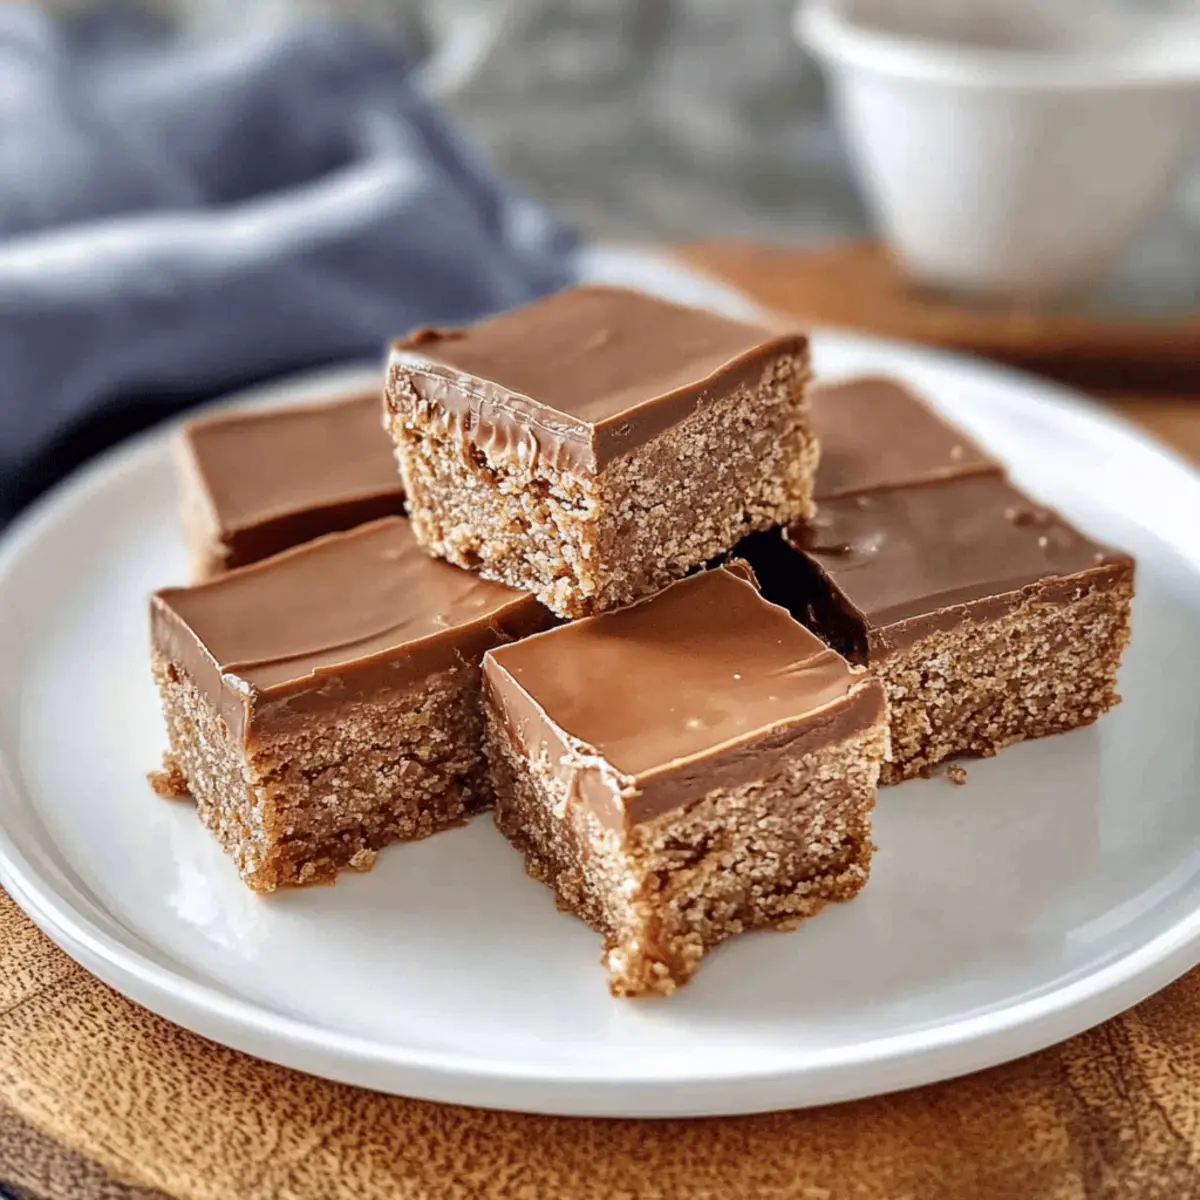
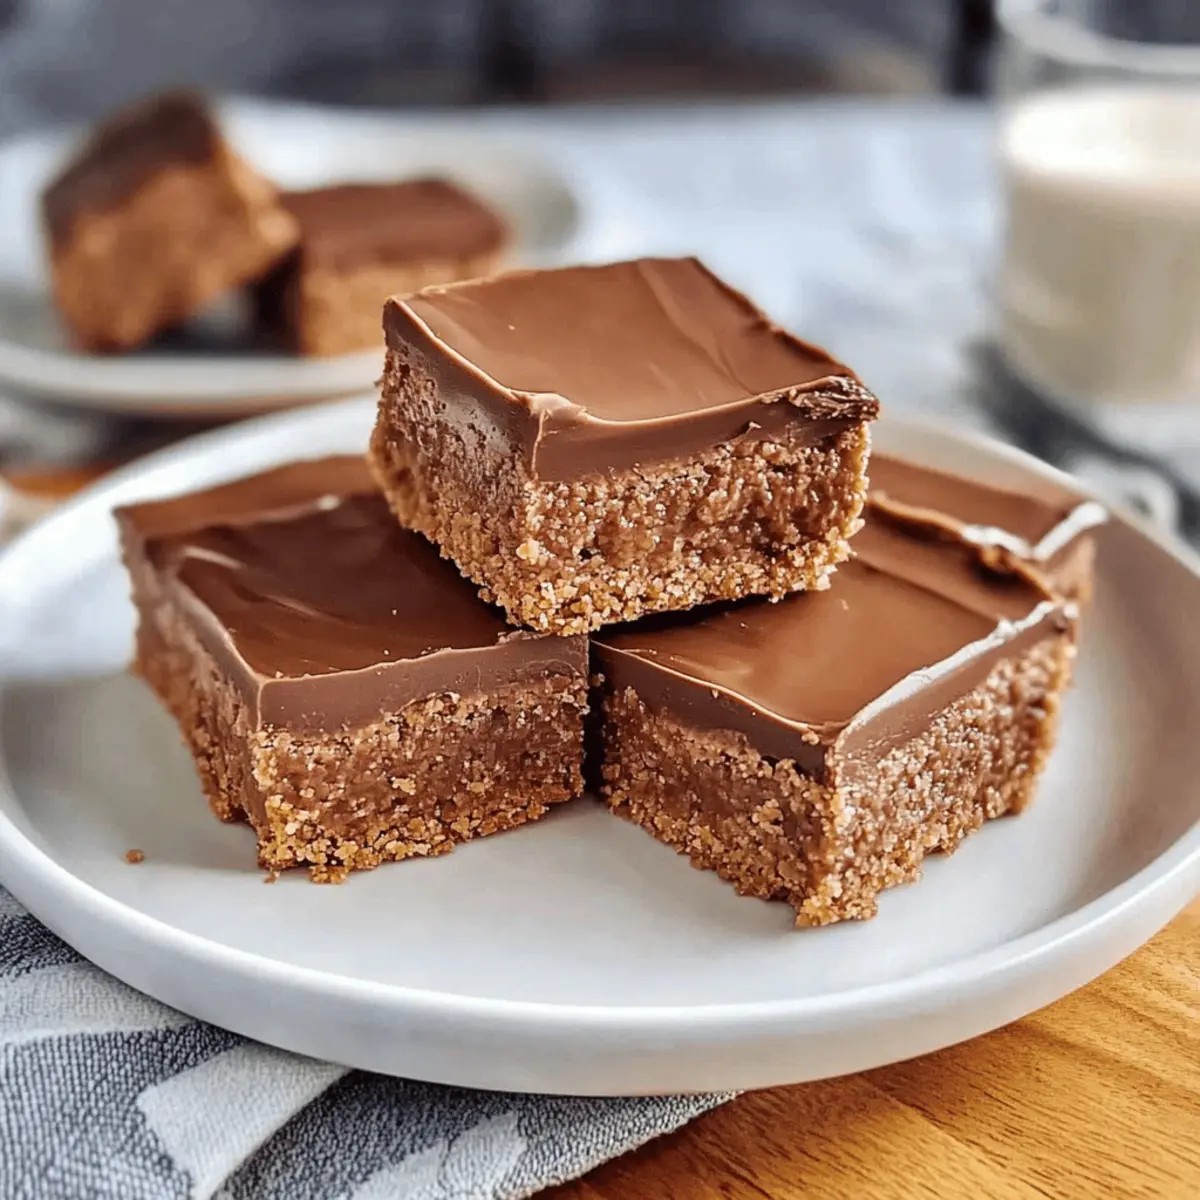
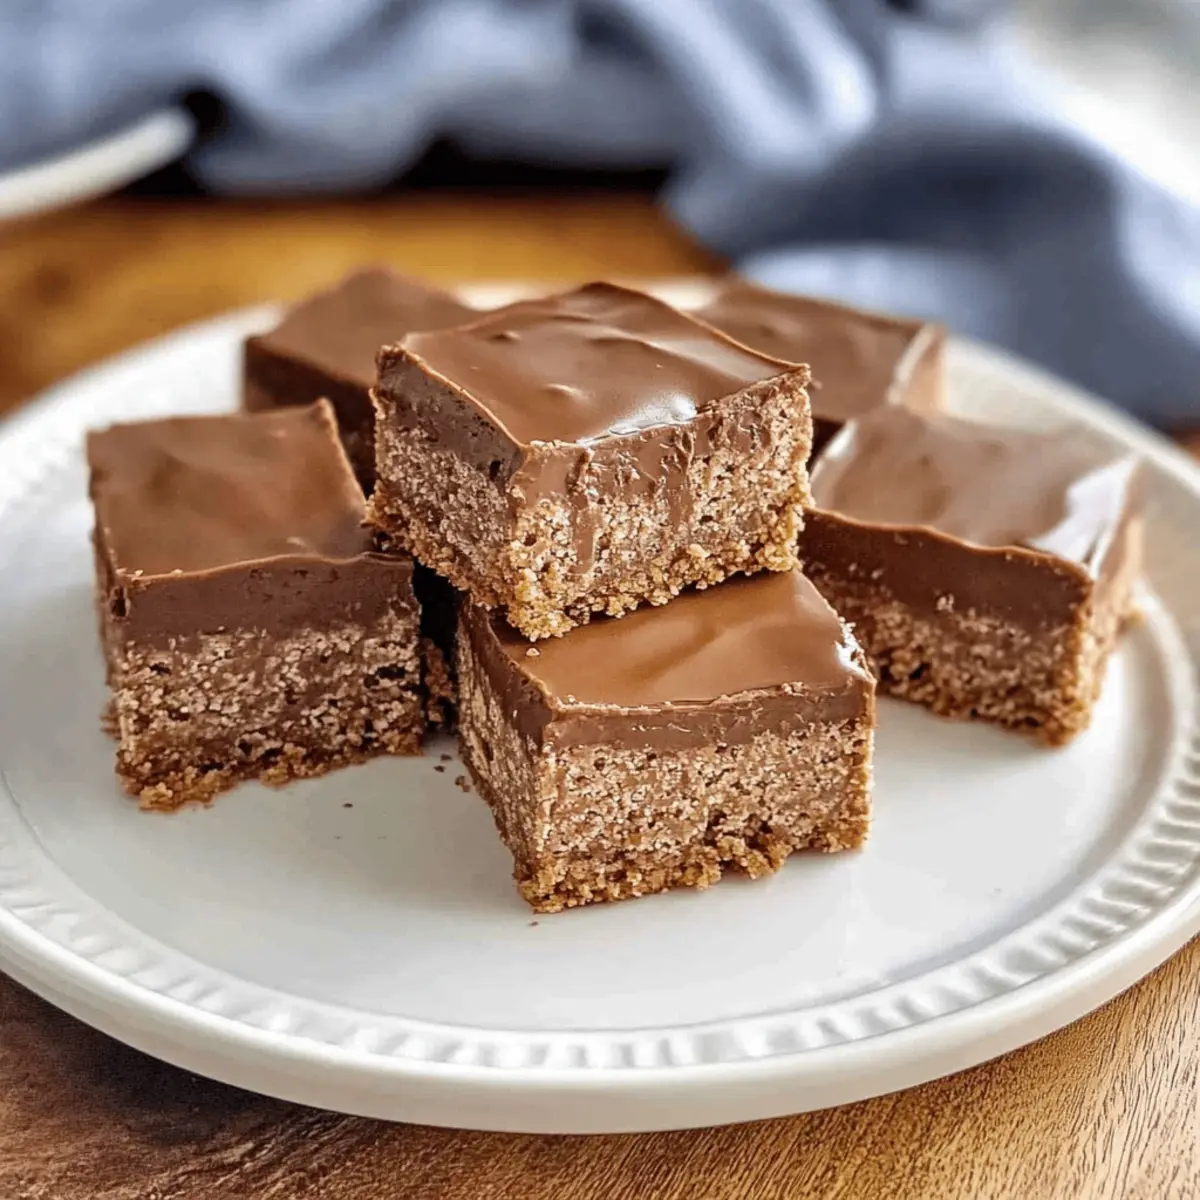
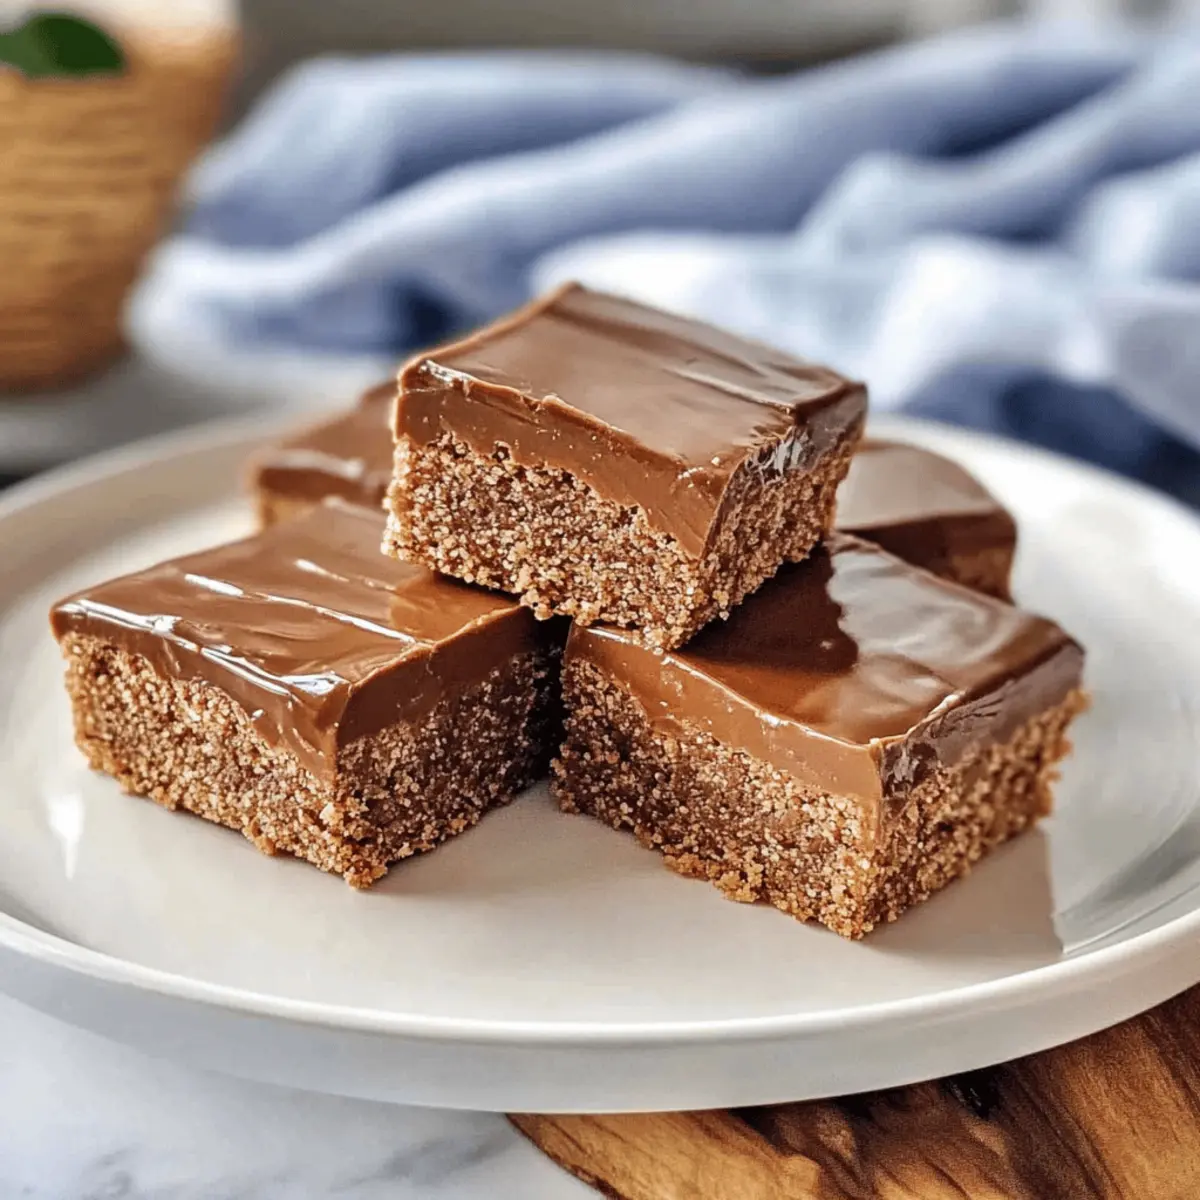
As the aroma of freshly brewed coffee wafts through my kitchen, I’m reminded of the joy that simple, homemade desserts can bring. This No-Bake Coffee Slice is the ultimate indulgence for coffee lovers like me, seamlessly blending a rich biscuit base with the irresistible allure of chocolate icing. What makes this sweet treat even more delightful is its quick preparation time—just 25 minutes is all you need to whip up a satisfying dessert that’ll keep you away from fast food! Not only is it easy to make, but it’s also a crowd-pleaser, perfect for sharing at gatherings or enjoying during those quiet moments with your favorite brew. So, are you ready to dive into this deliciously sweet adventure?
Why Will You Love This Coffee Slice?
Simplicity at Its Finest: You only need a handful of ingredients and no baking skills.
Irresistible Flavor Combination: The meld of rich coffee and chocolate creates a dessert that truly satisfies.
Quick Preparation: With just 25 minutes of hands-on time, you’ll have this delicious treat ready to chill.
Perfect for Sharing: It’s an excellent addition to any gathering, ensuring everyone goes home happy.
Customizable Goodness: Feel free to tweak it by adding toppings or swapping ingredients based on your preferences. Prepare to impress your guests or simply treat yourself with this delightful No-Bake Coffee Slice!
Coffee Slice Ingredients
• Get ready to create this easy and delicious treat!
For the Base
- Arnott’s Marie biscuits – The perfect foundation; can be swapped with digestive or rich tea biscuits if needed.
- Instant coffee granules – Brings aromatic coffee flavor; use granulated coffee in a pinch.
- Cocoa powder – Deepens the chocolate notes and flavor.
- Light brown sugar – Adds sweetness; substitute with granulated sugar for a milder taste.
- Sweetened condensed milk – Binds everything together with creaminess; avoid substitutes for best results.
- Desiccated coconut – Introduces texture and moisture; can be omitted or replaced with almond meal if desired.
- Salted butter (melted) – Provides richness and helps bind the mixture; unsalted butter works with a pinch of salt.
- Vanilla extract – Elevates the overall flavor with its warmth.
- Boiling water – Helps dissolve the coffee and sugar, enhancing the mixture.
For the Icing
- Milk chocolate – Adds rich creaminess as a topping; substitute dark chocolate for a deeper flavor.
- Additional salted butter – Ties the chocolate icing together for a smooth consistency.
Now you can bring the delightful Coffee Slice to life with these ingredients and enjoy every scrumptious bite!
Step‑by‑Step Instructions for Coffee Slice
Step 1: Prepare the Baking Tin
Begin by greasing and lining a 20 x 20 cm baking tin with parchment paper, allowing some overhang for easy removal later. This crucial step will ensure that your delicious Coffee Slice releases smoothly once set, giving you a beautiful presentation for serving.
Step 2: Crush the Biscuits
Using a food processor or a sturdy rolling pin, crush the Arnott’s Marie biscuits into fine crumbs. Aim for a texture similar to sand, which will create a solid base for your Coffee Slice. This should take about 3-5 minutes, ensuring all pieces are uniformly crushed for even mixing.
Step 3: Mix Coffee Mixture
In a small bowl, combine the instant coffee granules, cocoa powder, light brown sugar, and boiling water. Stir until all the ingredients are fully dissolved, forming a smooth coffee mixture. This step brings forth the rich flavor profile that will permeate your Coffee Slice, so take a moment to ensure everything is well blended.
Step 4: Combine Base Ingredients
In a large mixing bowl, combine the crushed biscuits, sweetened condensed milk, desiccated coconut, melted butter, vanilla extract, and the previously prepared coffee mixture. Stir with a wooden spoon or spatula for about 2-3 minutes until everything is thoroughly mixed and forms a sticky, cohesive mixture that will serve as the base of your slice.
Step 5: Press into Tin
Transfer the mixture into the prepared baking tin, spreading it evenly across the bottom. Use the back of a spoon or your hands to press down firmly, ensuring the base is compact and smooth. This step is essential for achieving a well-structured Coffee Slice that holds together beautifully when served.
Step 6: Make Icing
In a microwave-safe bowl, melt the milk chocolate and additional salted butter together at 30-second intervals, stirring in between until the mixture is smooth and shiny. Once melted, stir in instant coffee until well combined. This creamy chocolate icing will add the perfect finishing touch to your Coffee Slice.
Step 7: Ice the Slice
Once the base has cooled slightly, carefully spread the chocolate icing evenly over the top, ensuring every edge is covered. Use a spatula to create a smooth layer that will set to a glossy finish. This irresistible topping will enhance the flavor and appearance of your delightful Coffee Slice.
Step 8: Chill
Finally, place the entire tin into the refrigerator for at least 2 hours to allow the Coffee Slice to set completely. This patience pays off as chilling solidifies the base and icing, creating a decadent treat that’s easy to slice and serve when you’re ready to enjoy!
Coffee Slice Variations & Substitutions
Feel free to personalize this Coffee Slice to suit your taste buds, making it even more delightful!
-
Dairy-Free: Substitute sweetened condensed milk with coconut or almond milk cream for a creamy texture without dairy.
-
Nutty Texture: Add finely chopped nuts like walnuts or macadamias to the base for a crunchy element that enhances flavor.
-
Sweetener Swap: Substitute light brown sugar with maple syrup or agave for a unique sweetness and a slightly different flavor profile.
-
Gluten-Free: Use gluten-free biscuits instead of Arnott’s Marie biscuits to cater to gluten-sensitive friends while enjoying this treat.
-
Extra Chocolate: Stir in chocolate chips into the base mix for an indulgent surprise with every bite; it’s a great way to shine more chocolatey goodness!
-
Coffee Kick: For a more robust coffee taste, increase instant coffee granules; you might also consider turning this into a mocha slice by adding a touch of melted chocolate into the base.
-
Zesty Twist: Add a sprinkle of orange or lemon zest to the mixture for a refreshing citrus undertone that brightens the overall flavor.
-
High Fiber: Replace half of the desiccated coconut with oat flakes for a chewy texture and added fiber; this adjustment also contributes to a hearty feel.
The beauty of this Coffee Slice lies in its versatility, allowing you to adjust it according to your cravings. Enjoy exploring your flavors, and don’t forget to serve it alongside your favorite coffee blend for that perfect afternoon treat!
How to Store and Freeze Coffee Slice
Fridge: Store the Coffee Slice in an airtight container to keep it fresh for up to 5-7 days. This will maintain its delightful texture and flavor.
Freezer: For long-term storage, slice the Coffee Slice into portions and wrap each piece in plastic wrap, then place in a freezer-safe container. It can be frozen for up to 2 months.
Thawing: When ready to enjoy, simply remove the desired amount from the freezer and thaw in the fridge for a few hours or at room temperature for about 30 minutes.
Reheating: The Coffee Slice is best enjoyed chilled, but if you prefer it slightly warm, microwave for a few seconds to soften the chocolate icing.
What to Serve with No-Bake Coffee Slice
Savoring the rich flavors of a no-bake treat is a delight best shared with the perfect accompaniments!
- Freshly Brewed Coffee: The ultimate pairing that enhances the coffee flavor while providing a warm comfort with each bite.
- Vanilla Ice Cream: This creamy delight beautifully contrasts the rich texture of the Coffee Slice, making each spoonful a heavenly experience.
- Chocolate-Covered Almonds: Crunchy and sweet, these add a gourmet touch that complements the chocolate icing perfectly, making for an indulgent snack.
- Whipped Cream Topping: A dollop of fluffy whipped cream adds a lightness that balances the richness of the slice beautifully.
- Nutty Granola: The crunchy texture and nutty flavor add an unexpected twist that pairs delightfully with the dense, sweet slice.
- Fruity Dessert Wine: A chilled glass will enhance the coffee and chocolate flavor while providing a refreshing contrast to the dessert.
- Coconut Macaroons: For a tropical touch, these chewy delights echo the desiccated coconut in your Coffee Slice and make for a wonderful snack.
- Café Latte: Embrace the coffee theme completely with a frothy latte; its creaminess harmonizes beautifully with the slice’s dense texture.
- Earl Grey Tea: With its subtle bergamot notes, this tea offers a unique pairing, refreshing the palate between bites of the delicious Coffee Slice.
Make Ahead Options
These No-Bake Coffee Slices are perfect for busy home cooks looking to save time and enjoy homemade desserts! You can prepare the base up to 24 hours in advance by following the recipe steps up to pressing it into the tin, then refrigerate it covered to maintain its freshness. The chocolate icing can also be made ahead and stored in an airtight container for up to 3 days in the fridge; just give it a quick stir before spreading it over the set base. When ready to serve, simply assemble the iced slice after chilling and enjoy a delicious treat that looks and tastes just as fresh as if you made it that day!
Expert Tips for Coffee Slice
-
Uniform Crumbs: Ensure biscuits are finely crushed to avoid large chunks; this helps create a cohesive base for your Coffee Slice.
-
Chill Time Matters: Allow a minimum of 2 hours in the fridge for proper setting; don’t rush this step, or the slice may fall apart when served.
-
Chocolate Consistency: Melt chocolate in short bursts to prevent burning; a smooth consistency ensures a beautiful finish on your Coffee Slice.
-
Grease & Line: Properly greasing and lining your tin is crucial for an easy release; if it sticks, run warm water on the outside briefly to loosen it.
-
Taste Preferences: Feel free to adjust the amount of instant coffee based on your preference for strength; more coffee enhances the flavor even further!
Coffee Slice Recipe FAQs
How do I select the right biscuits for the Coffee Slice?
For the best texture and flavor, use Arnott’s Marie biscuits, as they provide the right structure. If you can’t find them, don’t worry! Digestive or rich tea biscuits are excellent substitutes that will still hold up beautifully in the recipe.
What is the best way to store leftover Coffee Slice?
Store the Coffee Slice in an airtight container in the refrigerator for up to 5-7 days. This will help maintain its delicious texture and flavor. Make sure to keep it well-covered to prevent it from drying out.
Can I freeze the Coffee Slice, and how?
Absolutely! For longer storage, slice the Coffee Slice into portions and wrap each piece in plastic wrap. Place them in a freezer-safe container or bag and store for up to 2 months. When you’re ready to enjoy, simply thaw in the refrigerator for several hours or at room temperature for about 30 minutes.
What should I do if my Coffee Slice is too crumbly or falls apart?
This can happen if the base mixture isn’t packed down tightly enough or if there is too much dry ingredient. To troubleshoot, after mixing your base, press it down firmly into the tin. If it’s still crumbly after chilling, I recommend adding a bit more melted butter or sweetened condensed milk next time to help bind it better.
Are there any dietary considerations for this recipe?
Yes! The Coffee Slice contains gluten from the biscuits and dairy from the butter and condensed milk. For gluten-free options, look for gluten-free biscuits. If you’re lactose intolerant, consider using dairy-free alternatives for butter and condensed milk, although it may affect the texture slightly.
Can I use different types of chocolate for the icing?
Certainly! While milk chocolate gives a lovely creamy finish, you can experiment with dark chocolate for a richer taste. Just keep in mind that dark chocolate is usually less sweet, which can change the overall flavor profile of your Coffee Slice.
Easy Coffee Slice: No Bake Bliss for Coffee Lovers
Ingredients
Equipment
Method
- Prepare the Baking Tin: Grease and line a 20 x 20 cm baking tin with parchment paper.
- Crush the Biscuits: Crush the Arnott’s Marie biscuits into fine crumbs using a food processor or sturdy rolling pin.
- Mix Coffee Mixture: In a small bowl, combine instant coffee, cocoa powder, light brown sugar, and boiling water until smooth.
- Combine Base Ingredients: Mix crushed biscuits, sweetened condensed milk, desiccated coconut, melted butter, vanilla extract, and coffee mixture in a large bowl.
- Press into Tin: Transfer the mixture into the prepared baking tin and press down evenly to create a compact base.
- Make Icing: Melt milk chocolate and additional salted butter in a microwave-safe bowl, stirring until smooth.
- Ice the Slice: Spread the chocolate icing evenly over the cooled base.
- Chill: Refrigerate for at least 2 hours to allow the Coffee Slice to set completely.
Leave a Reply