
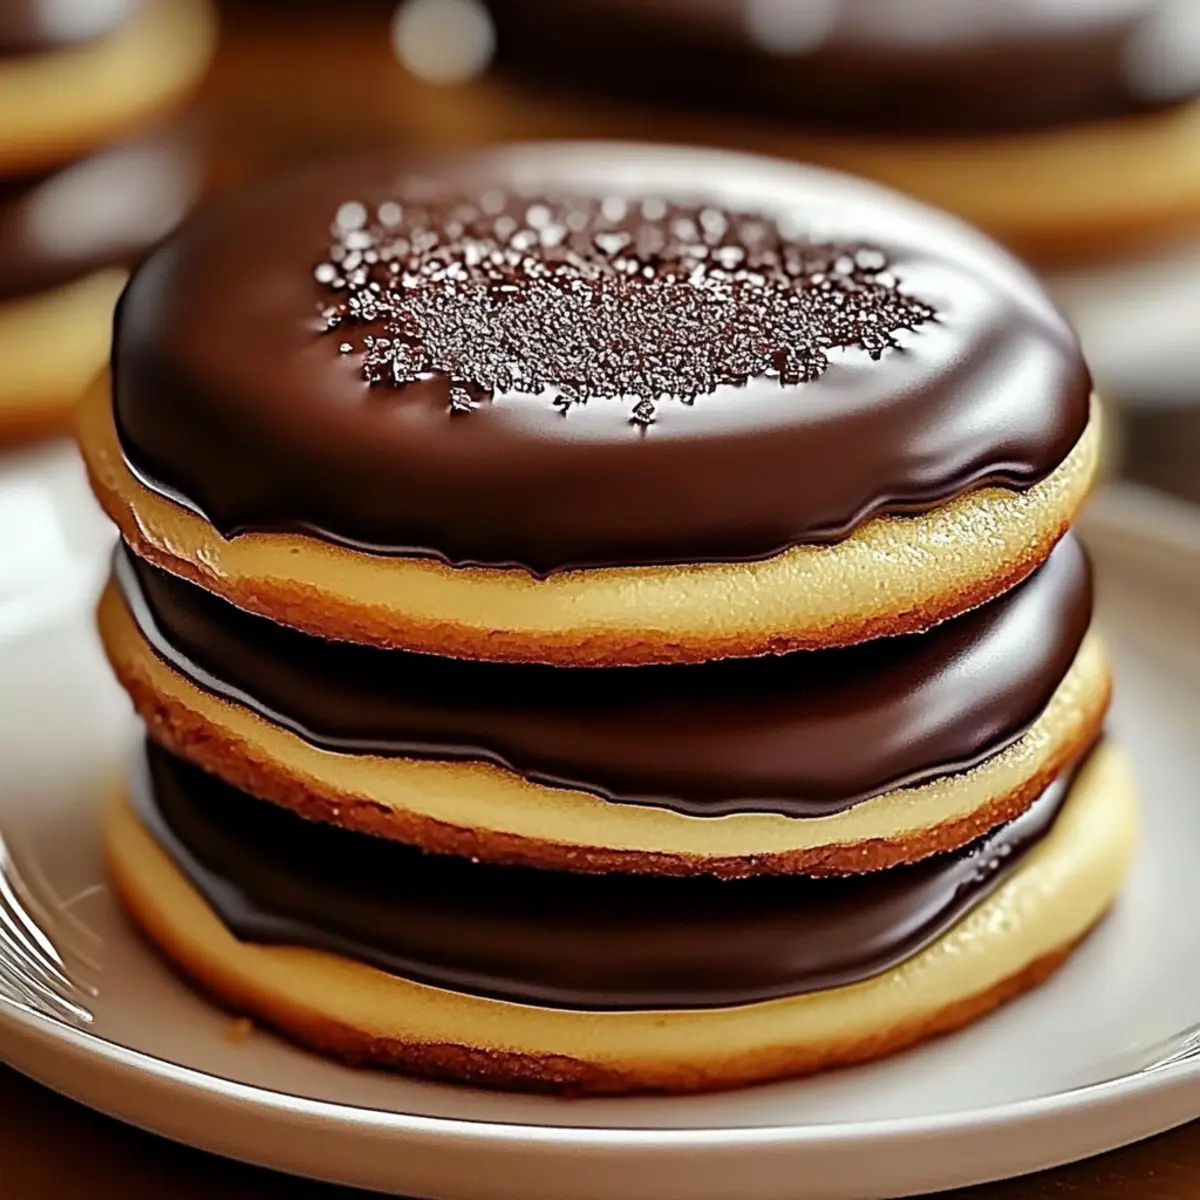
As I stood in my kitchen, the smell of chocolate wafting through the air, memories of family gatherings flooded my mind. It’s amazing how certain flavors can transport us back in time. Boston Cream Pie Cookies bring a charming twist to the classic dessert with their soft, cake-like texture filled with rich pastry cream and topped with a glossy chocolate glaze. These delightful treats are not only a fond homage to the beloved Boston Cream Pie but also incredibly easy to make, making them perfect for both casual snacking and special occasions. Whether you’re hosting a gathering or simply treating yourself, Boston Cream Pie Cookies deliver joy in every bite. Curious how to whip up this delightful dessert? Let’s dive in!
Why are Boston Cream Pie Cookies a Must-Try?
Irresistible Flavor: The luscious pastry cream filling paired with a decadent chocolate glaze makes these cookies a flavor explosion.
Easy to Make: Don’t worry about complicated steps—these cookies come together simply, even if you’re cooking in a hurry.
Perfect for All Occasions: Whether it’s a holiday dessert or a weeknight treat, these cookies are sure to impress friends and family alike.
Unique Twist: Enjoy the nostalgia of a classic dessert in cookie form, offering both the comfort of cookies and the indulgence of pie.
Delightful Texture: Each bite offers a soft, cake-like cookie that contrasts beautifully with the creamy interior and shiny chocolate topping.
With their crowd-pleasing vibe, these Boston Cream Pie Cookies will be a hit—much like Lemon Cream Cheese treats or Pumpkin Cream Cheese delights!
Boston Cream Pie Cookies Ingredients
• For the Cookies
- Unsalted Butter – Adds richness and moisture; substitute with vegan butter for a dairy-free version.
- Granulated Sugar – Provides sweetness and a tender texture; brown sugar can be used for a deeper flavor.
- Large Eggs – Binds the ingredients and adds richness; omit for egg-free options (use flaxseed mixture).
- Vanilla Extract – Enhances flavor; almond extract can be an interesting substitute for a different aroma.
- All-Purpose Flour – Forms the structure of the cookies; for gluten-free, use a 1:1 flour substitute.
- Baking Powder – Leavens the cookies for a lighter texture; ensure it’s fresh for best results.
- Baking Soda – Further helps the cookies rise.
- Salt – Balances sweetness and enhances flavor.
• For the Cream Filling
- Heavy Cream – Adds richness to the filling; coconut cream can be used as a non-dairy alternative.
- Powdered Sugar – Sweetens and thickens the cream filling; granulated sugar can be used in a pinch.
• For the Chocolate Glaze
- Chocolate Chips (Semi-Sweet) – Adds rich chocolate flavor to the topping; dark or milk chocolate chips can be alternates.
- Vegetable Oil – Thinly coats the chocolate glaze; can be replaced with melted coconut oil.
Indulge in the delightful creation of Boston Cream Pie Cookies, a treat that combines the best of cookies and classic dessert flavors!
Step‑by‑Step Instructions for Boston Cream Pie Cookies
Step 1: Prepare Cookie Dough
In a large mixing bowl, cream together ½ cup of softened unsalted butter and 1 cup of granulated sugar until light and fluffy, about 3-4 minutes. Add 2 large eggs one at a time, followed by 1 teaspoon of vanilla extract, blending until smooth. Gradually mix in 2 cups of all-purpose flour, 1 teaspoon of baking powder, ½ teaspoon of baking soda, and a pinch of salt until a soft dough forms.
Step 2: Chill Dough
Once your cookie dough is ready, cover the bowl with plastic wrap and refrigerate it for about 30 minutes. This will firm up the dough, making it easier to handle and preventing the cookies from spreading too much while baking. During this time, you can prepare your baking sheets by lining them with parchment paper.
Step 3: Bake Cookies
Preheat your oven to 350°F (175°C). Once the dough has chilled, use a cookie scoop or your hands to roll the dough into balls, placing them about 2 inches apart on the prepared baking sheets. Bake in the preheated oven for 12 minutes, or until the edges are lightly golden. Allow the cookies to cool on the baking sheets for a few minutes before transferring them to a wire rack to cool completely.
Step 4: Make Cream Filling
While the cookies are cooling, prepare the creamy filling. In a medium bowl, whip together 1 cup of heavy cream and ¼ cup of powdered sugar until soft peaks form. Add another teaspoon of vanilla extract, and continue to whip until the mixture is light and fluffy. This luscious cream will bring the Boston Cream Pie Cookies to life!
Step 5: Prepare Chocolate Glaze
Next, melt 1 cup of semi-sweet chocolate chips in a microwave-safe bowl, adding 1 tablespoon of vegetable oil to smooth out the glaze. Heat in 20-second intervals, stirring in between until completely melted and glossy. This rich glaze will add a decadent finish to your cookies, reminiscent of the traditional Boston Cream Pie.
Step 6: Assemble Cookies
To assemble your Boston Cream Pie Cookies, take one cooled cookie and dollop a generous amount of the cream filling on the flat side. Place a second cookie on top to create a sandwich. Carefully dip the tops of each cookie in the melted chocolate glaze, letting any excess drip off. Set the cookies on a wire rack to allow the glaze to set.
Step 7: Let Glaze Set
Allow the chocolate glaze to set for at least 15 minutes before serving your Boston Cream Pie Cookies. This waiting period will ensure that the glaze hardens slightly, allowing for easier handling and a beautiful presentation. Once set, your cookies are ready to be served and enjoyed!
Boston Cream Pie Cookies Variations
Feel free to customize your Boston Cream Pie Cookies to match your taste preferences or dietary needs!
-
Nutty Delight: Add finely chopped nuts, like walnuts or pecans, to the dough for a satisfying crunch.
-
Vegan Option: Replace unsalted butter with vegan butter and use coconut cream for the filling to create a plant-based treat. They’ll taste just as divine!
-
Chocolate Lovers: Swap semi-sweet chocolate chips with dark chocolate for a richer, more intense flavor. Each bite will be a luscious experience.
-
Extract Twists: Experiment with flavored extracts like hazelnut or coconut in the cream filling. It adds a fun twist that transforms the classic into a new favorite!
-
Crunchy Texture: Fold in crushed graham crackers into the cookie batter for an extra layer of flavor and a fun crunch, keeping that nostalgic pie experience alive.
-
Maple Sweetness: Substitute granulated sugar for pure maple sugar to infuse your cookies with a warm, comforting sweetness.
-
Spicy Kick: For a surprising twist, add a pinch of cayenne pepper or cinnamon to the cream filling for just a hint of warmth and spice!
-
Fruit Fusion: Toss in mini chocolate chips or dried fruit, like cranberries or cherries, for a burst of flavor in each bite, reminiscent of classic desserts!
These variations will surely keep your taste buds dancing! If you’re curious about other delightful treats, you might want to check out Ferrero Rocher Cookies or try making Pumpkin Pie Stuffed for something cozy and seasonal.
How to Store and Freeze Boston Cream Pie Cookies
Fridge: Store the cookies in an airtight container for up to 5 days to maintain freshness and flavor. They taste best when chilled!
Freezer: For longer storage, freeze assembled cookies by wrapping each individually in plastic wrap and placing them in a freezer-safe bag. They can be stored for up to 3 months.
Thawing: To enjoy frozen Boston Cream Pie Cookies, simply remove them from the freezer and let them thaw in the fridge for a few hours. This prevents the glaze from becoming too soft.
Reheating: If you prefer them warm, gently reheat in the microwave for about 10-15 seconds. This will slightly soften the chocolate glaze, reviving that delightful experience!
Expert Tips for Boston Cream Pie Cookies
-
Softened Butter: Always ensure your butter is softened to room temperature for optimal creaminess when mixing the dough. Cold butter can lead to a dense cookie texture.
-
Chilling is Key: Don’t skip the chilling step! Refrigerating the dough for 30 minutes helps prevent spreading during baking, resulting in perfectly shaped cookies.
-
Cool Before Filling: Allow the cookies to cool completely before adding the cream filling. Otherwise, the chocolate glaze might melt, creating a messy situation.
-
Whip Wisely: When making the cream filling, whip until just before stiff peaks form. This keeps the filling airy and light, ensuring a delightful contrast with the dense cookie.
-
Glaze Technique: Dip the tops in the chocolate glaze with a steady hand for a clean finish. Letting excess drip off prevents a puddle around your cookies while they set.
-
Enjoy in Moderation: Remember, these Boston Cream Pie Cookies are rich and indulgent. Share with friends or store some away for later to avoid overindulging!
Make Ahead Options
These Boston Cream Pie Cookies are ideal for meal prep and can save you precious time during busy weeknights! You can prepare the cookie dough up to 24 hours in advance. Simply follow the instructions to mix the dough, then wrap it tightly in plastic wrap and refrigerate it. Additionally, you can whip up the cream filling and refrigerate it for up to 3 days; just remember to re-whip it lightly before assembling to restore its fluffy texture. When you’re ready to enjoy your cookies, bake the chilled dough, let them cool completely, and assemble with the cream filling and chocolate glaze for deliciously indulgent results!
What to Serve with Boston Cream Pie Cookies
These delicious cookies create the perfect centerpiece for a delightful dessert spread, inviting friends and family to indulge together.
-
Rich Vanilla Ice Cream: A scoop of creamy vanilla ice cream beautifully balances the rich flavors of the cookies, adding a delightful coolness to each bite.
-
Fresh Berries Medley: Strawberries, blueberries, and raspberries add a refreshing burst of tartness that complements the sweetness of the cookies. Their vibrant colors also make for a cheerful presentation.
-
Whipped Cream: Soft, fluffy whipped cream adds an airy layer to your experience, enhancing the creamy filling of the cookies while maintaining a light texture.
-
Coffee or Espresso: A warm cup of coffee or a shot of espresso brings out the chocolate flavors in the glaze, making for a cozy pairing that elevates the treat to a café-style indulgence.
-
Chocolate Fondue: For a fun twist, serve with a chocolate fondue pot where guests can dip the cookies into melted chocolate, creating an interactive dessert experience.
-
Chocolate Milkshake: Another decadent pairing, a chocolate milkshake echoes the dessert’s flavors with a thick and creamy texture that will make everyone swoon.
-
Toasted Almonds: Chopped toasted almonds sprinkled on the top brings in a nutty crunch that contrasts delightfully with the soft cookies and enriched cream filling.
-
Caramel Sauce: Drizzling a bit of warm caramel sauce over the cookies creates a sweet, gooey experience that will tantalize your taste buds and take dessert to the next level.
-
Nutty Granola: For a textural contrast, serve with a side of crunchy nutty granola which you can sprinkle on top of the cookies for added flavor.
Boston Cream Pie Cookies Recipe FAQs
What types of butter should I use for Boston Cream Pie Cookies?
For the best flavor and texture, use unsalted butter that has been softened to room temperature. If you’re looking for a dairy-free option, vegan butter works beautifully as a substitute.
How long can I store Boston Cream Pie Cookies?
Absolutely! You can keep your delicious cookies in an airtight container in the fridge for up to 5 days. Ensure you store them carefully to maintain freshness, and they actually taste delightful when chilled!
Can I freeze Boston Cream Pie Cookies?
Yes, you can! To freeze, wrap each assembled cookie individually in plastic wrap and place them into a freezer-safe bag. They can be stored for up to 3 months. When you’re ready to enjoy, just remove the cookies from the freezer and let them thaw in the fridge for a few hours.
What if my cookies spread too much during baking?
Very! If your cookies spread excessively, it could be due to the dough being too warm. Make sure to chill the dough for at least 30 minutes before baking. Additionally, ensure your baking powder is fresh and consider using a slightly cooler baking temperature.
Are there any dietary concerns with Boston Cream Pie Cookies?
Definitely! If you’re making these cookies for guests, keep in mind that they contain gluten and dairy. For a gluten-free version, substitute all-purpose flour with a 1:1 gluten-free flour blend. If someone has a dairy allergy, ensure you use coconut cream in the filling and vegan butter in the dough. Always double-check for personal allergens!
Boston Cream Pie Cookies That Will Make You Swoon
Ingredients
Equipment
Method
- In a large mixing bowl, cream together softened unsalted butter and granulated sugar until light and fluffy, about 3-4 minutes. Add eggs one at a time, followed by vanilla extract, blending until smooth.
- Gradually mix in all-purpose flour, baking powder, baking soda, and salt until a soft dough forms.
- Cover the bowl with plastic wrap and refrigerate for about 30 minutes.
- Preheat your oven to 350°F (175°C). Use a cookie scoop or your hands to roll the dough into balls, placing them about 2 inches apart on the prepared baking sheets.
- Bake in the preheated oven for 12 minutes, or until the edges are lightly golden. Allow the cookies to cool on the baking sheets before transferring to a wire rack.
- In a medium bowl, whip together heavy cream and powdered sugar until soft peaks form. Add another teaspoon of vanilla extract, and continue to whip until light and fluffy.
- Melt chocolate chips in a microwave-safe bowl, adding vegetable oil to smooth out the glaze, stirring until completely melted.
- To assemble, take one cooled cookie, dollop a generous amount of cream filling on the flat side, and place a second cookie on top. Dip the tops in melted chocolate glaze.
- Allow the chocolate glaze to set for at least 15 minutes before serving.
Leave a Reply